Category: Low Maintenance Plants

  • Fall whiskey barrel planter ideas

    Every product is independently reviewed and selected by our editors. If you buy something through our links, we may earn an affiliate commission at no extra cost to you.

    There’s something deeply satisfying about a whiskey barrel planter overflowing with rich burgundy mums, cascading ivy, and ornamental grasses glowing in the golden light of fall. When designed correctly, a single half-barrel can anchor your porch, frame your entryway, or transform a small patio into a seasonal focal point that feels intentional and professionally styled.

    If your fall containers tend to look sparse, wilt early, or feel like an afterthought, the issue isn’t creativity it’s plant selection, soil structure, and seasonal strategy. Let’s fix that.

    Introduction

    Many gardeners struggle with fall containers that decline quickly once temperatures drop or rainfall increases. Summer soil becomes compacted. Drainage slows. Plants outgrow their space. Frost arrives earlier than expected.

    Whiskey barrel planters are large enough to create dramatic autumn displays but only if you understand root depth, drainage requirements, plant layering, and cold-season maintenance.

    In this guide, you’ll learn:

    • Exactly how to design a fall whiskey barrel planter that lasts until frost (and sometimes beyond)
    • The best soil mix for autumn container stability
    • Plant combinations that thrive in cooler temperatures
    • Container depth and drainage guidelines
    • Budget vs premium setup considerations
    • Common beginner mistakes that ruin fall displays

    This is practical, field-tested advice not generic container inspiration.

    Quick Summary

    • Use well-draining potting mix amended with compost and pine fines
    • Ensure at least 3–5 drainage holes in the barrel
    • Fill to within 2 inches of rim
    • Choose plants rated for USDA zones 4–9 depending on your region
    • Combine thrillers, fillers, spillers
    • Water deeply but less frequently (cool weather slows evaporation)
    • Protect roots from freeze-thaw cycles
    • Refresh every 6–8 weeks for peak appearance

    Why Whiskey Barrel Planters Are Ideal for Fall Displays

    Whiskey barrels (typically 20–26 inches wide and 16–18 inches deep when cut in half) offer three major advantages in autumn:

    1. Root Insulation

    The thick wood walls buffer temperature fluctuations better than thin plastic pots. This protects root systems during early frosts.

    2. Moisture Retention

    Cooler temperatures reduce evaporation. The large soil mass in a barrel maintains steady moisture — ideal for chrysanthemums, ornamental cabbage, and pansies.

    3. Visual Impact

    Their scale supports dramatic combinations tall grasses, branching kale, pumpkins, and trailing ivy without looking crowded.

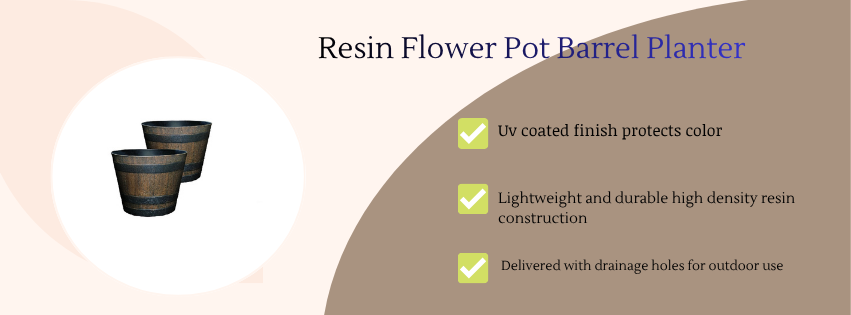
    Cost note: Real oak barrels range from $70–$150. Resin composite alternatives cost $40–$90 and last longer but lack authentic aging character.

    Maintenance note: Real wood requires sealing every 1–2 years to prevent cracking.

    Step 1: Build the Right Soil Foundation

    The Ideal Soil Mix for Fall Barrel Planters

    Never use garden soil. It compacts and suffocates roots in containers.

    Instead, use:

    • 60% high-quality potting mix
    • 20% compost (improves nutrient availability)
    • 10% pine bark fines (improves drainage)
    • 10% perlite or pumice

    Why this works: Fall brings heavier rain and cooler soil. Without proper aeration, roots rot quickly. Pine fines and perlite maintain air pockets even when saturated.

    Container depth consideration: Most whiskey barrels are 16–18 inches deep. After adding drainage material and soil settling, expect 14–16 inches of usable root depth enough for:

    • Ornamental cabbage
    • Chrysanthemums
    • Small shrubs
    • Ornamental grasses

    Not ideal for:

    • Deep-rooted shrubs
    • Dwarf trees
    • Large root vegetables

    Drainage rule: Drill at least 3–5 half-inch holes in the base. Elevate the barrel on pot feet to prevent waterlogging.

    Common mistake: Adding gravel at the bottom. This creates a perched water table and worsens drainage.

    Step 2: Choose Plants That Actually Thrive in Fall

    Fall containers fail when gardeners reuse summer annuals. Instead, choose cold-tolerant plants.

    Thriller Plants (Height & Structure)

    These create vertical drama.

    Ornamental Grasses

    • Purple fountain grass (Zones 8–11)
    • Switchgrass (Zones 4–9)
    • Blue fescue (Zones 4–8)

    Why they work: Grasses tolerate temperature swings and add movement.

    Light requirement: Full sun (6+ hours), preferably south- or west-facing exposure.

    Cost: $12–$25 per plant.

    Maintenance: Cut back after frost.

    Dwarf Conifers

    • Dwarf Alberta spruce
    • Hinoki cypress

    Zones: 3–8 depending on variety.

    Why they work: Evergreen structure remains attractive through winter.

    Container depth: Minimum 16 inches.

    Premium setup: Adds year-round appeal but higher upfront cost ($30–$60 per plant).

    Filler Plants (Bulk & Color)

    Chrysanthemums

    Zones: 5–9 (hardy varieties)

    Light: Full sun minimum 6 hours.

    Watering: Every 3–5 days depending on rainfall.

    Why they fail: Poor drainage and insufficient sunlight.

    Cost: $8–$20 each.

    Ornamental Cabbage & Kale

    Zones: 2–11 (cold hardy)

    Light: Full sun to partial sun.

    Maintenance: Virtually none.

    Why they work: Color intensifies after light frost.

    Pansies & Violas

    Zones: 4–9

    Best for: Long-lasting low color through frost.

    Watering: Weekly unless rainfall is heavy.

    Spiller Plants (Soft Edges)

    English Ivy

    • Tolerates cold
    • Trails beautifully
    • Zones 4–9

    Creeping Jenny

    • Lime-green contrast
    • Zones 3–9

    Sweet Potato Vine (early fall only)

    • Not frost tolerant
    • Zones 9–11

    Spillers soften the heavy barrel edge and make the arrangement look finished.

    7 High-Impact Fall Whiskey Barrel Planter Ideas

    1. Classic Harvest Barrel

    • Purple fountain grass (center)
    • Orange mums
    • Ornamental cabbage
    • Ivy trailing
    • Mini pumpkins tucked in

    Best for: Front porch focal point.

    Maintenance: Remove pumpkins as they soften.

    2. Rustic Farmhouse Neutral

    • Dwarf spruce
    • White mums
    • Dusty miller
    • Trailing ivy
    • Pinecones & birch logs

    Why it works: Texture over color creates sophistication.

    3. Moody Autumn Burgundy

    • Red switchgrass
    • Burgundy kale
    • Heuchera
    • Black pansies

    Perfect for: Modern homes with dark trim.

    4. Edible Fall Barrel

    • Kale
    • Swiss chard
    • Parsley
    • Ornamental peppers

    Why: Functional and decorative.

    Maintenance: Harvest regularly to prevent legginess.

    5. Shade-Friendly Fall Planter

    For north-facing entries.

    • Heuchera
    • Ivy
    • Ferns
    • White violas

    Avoid mums here  they need sun.

    6. All-Evergreen Transitional Barrel

    Designed to last into winter.

    • Dwarf conifer
    • Blue fescue
    • Ivy
    • Winterberry stems inserted

    Higher cost but multi-season impact.

    7. Minimalist Modern

    • One ornamental grass
    • One cabbage cluster
    • Dark mulch top layer

    Clean, architectural look.

    Watering & Maintenance in Fall

    Fall watering is frequently misunderstood.

    Because evaporation slows:

    • Water deeply once every 5–7 days.
    • Check soil 2 inches down before watering.
    • Avoid daily light watering.

    Overwatering is the #1 fall container killer.

    Fertilizing: Use a balanced slow-release fertilizer at planting. Avoid high nitrogen  it encourages weak growth before frost.

    Pest issues: Watch for aphids and cabbage worms on ornamental kale. Treat with neem oil weekly if needed.

    Protecting Your Whiskey Barrel from Early Frost

    Light frost (28–32°F): Most fall plants tolerate this.

    Hard freeze (below 25°F): Move barrels against the house foundation.

    Why: The structure radiates residual warmth.

    Advanced tip: Wrap barrel sides in burlap to reduce freeze-thaw cracking.

    Budget vs Premium Setup Comparison

    Budget Setup ($80–$120 total)

    • Resin barrel
    • 3–4 seasonal plants
    • Standard potting mix

    Pros: Affordable, lightweight.

    Cons: May need replacing next year.

    Premium Setup ($200–$350 total)

    • Real oak barrel
    • Dwarf conifer centerpiece
    • High-quality soil blend
    • Decorative topdressing

    Pros: Lasts years, multi-season appeal.

    Cons: Higher upfront cost.

    Long-term savings: Evergreen centerpiece can be reused annually.

    Common Beginner Mistakes

    • Planting too sparsely Barrels need density.
    • Ignoring sun direction South-facing containers dry faster.
    • Overcrowding roots Leave space for airflow.
    • Skipping drainage holes Leads to root rot.
    • Using summer annuals They collapse after first frost.

    FAQ: Fall Whiskey Barrel Planter Ideas

    What plants last the longest in fall whiskey barrel planters?

    Ornamental kale, pansies, ivy, and dwarf conifers last longest. Many tolerate temperatures below 28°F.

    How deep should soil be in a whiskey barrel planter?

    Aim for 14–16 inches of usable soil depth. Most half-barrels naturally accommodate this.

    Do whiskey barrel planters need drainage holes?

    Yes. Minimum 3–5 holes. Elevate slightly to ensure water exits freely.

    Can I leave my fall barrel planter out all winter?

    Only if planted with cold-hardy perennials or evergreens suited to your USDA zone. Annuals will decline after sustained freeze.

    How often should I water in autumn?

    Typically every 5–7 days, depending on rainfall and sun exposure.

    Can I reuse the soil next season?

    Yes, if refreshed with compost and perlite. Discard if plants had disease.

    Final Thoughts

    A well-designed fall whiskey barrel planter isn’t just seasonal décor  it’s a structural garden element that elevates your entire outdoor space.

    When you prioritize drainage, root depth, sun exposure, and cold-hardy plant selection, your container won’t fade after the first frost. It will intensify  colors deepen, textures soften, and structure becomes more defined.

    Start with quality soil. Choose plants suited to your USDA zone. Design with intention using thriller, filler, and spiller balance.

    The result isn’t just a pretty planter. It’s a long-lasting autumn display that feels layered, professional, and resilient even in unpredictable weather.

    Invest once. Design wisely. Enjoy it all season.

  • Plastic barrel planter ideas |A beginner guideline

    Every product is independently reviewed and selected by our editors. If you buy something through our links, we may earn an affiliate commission at no extra cost to you.

    A plastic barrel doesn’t look glamorous at first glance. But cut correctly, filled with the right soil mix, and planted with purpose, it can outperform many store-bought planters. I’ve seen $20 recycled barrels produce more food and color than decorative pots costing five times as much. The difference isn’t the container it’s how you build and manage it.

    Introduction

    If you’re working with limited space, tight budgets, or tough weather conditions, plastic barrel planters are one of the most practical container gardening solutions available. They’re lightweight, long-lasting, and easy to customize but they’re also easy to get wrong.

    Most beginners make the same mistakes: poor drainage, compacted soil, wrong root depth, or placing them in the wrong sun exposure. This guide walks you through proven plastic barrel planter ideas, soil structure, drainage setup, light requirements, watering schedules, and maintenance realities so your planter produces strong growth instead of stunted plants.

    Quick Summary

    • Best for: Vegetables, herbs, dwarf shrubs, flowers
    • Ideal depth: 12–24 inches depending on plant type
    • Drainage: Minimum 4–6 holes (½–¾ inch diameter)
    • Soil mix: 40% potting mix, 30% compost, 20% bark fines, 10% perlite
    • Sun exposure: 6–8 hours for vegetables; partial sun for leafy greens
    • USDA zones: 3–11 (seasonal plant choice varies)
    • Watering: 2–4 times per week in summer
    • Budget range: $25–$120 depending on modifications
    • Maintenance level: Moderate

    Why Plastic Barrels Work for Planters

    Plastic barrels (often 30–55 gallons) offer several structural advantages over wood or ceramic containers.

    Why They Perform Well

    • Deep root volume supports larger plants.
    • Lightweight design makes repositioning easier.
    • Non-porous material retains moisture longer.
    • Weather-resistant won’t rot or crack easily.

    However, the non-porous nature means drainage must be engineered properly. Unlike terracotta, plastic doesn’t breathe.

    Cost comparison:

    • Recycled food-grade barrel: $15–$40
    • New decorative plastic barrel planter: $40–$120
    • Raised bed equivalent volume: $150+

    For large-volume growing on a budget, barrels are hard to beat.

    Step 1: Drainage Setup (Most Important Step)

    Poor drainage kills more barrel planters than any other issue.

    How to Properly Drill Drainage

    For a 55-gallon barrel cut in half:

    • Drill 6–8 holes in the base.
    • Hole size: ½ to ¾ inch diameter.
    • Space evenly across bottom.
    • Elevate container 1–2 inches using pot feet or bricks.

    Why this works: Water needs escape pathways. Elevation prevents holes from sealing against patio surfaces.

    Optional layer: Add 1–2 inches of coarse gravel at bottom. This helps protect holes but does not replace proper soil structure.

    Maintenance impact: Check holes each season. Roots can clog them.

    Step 2: Soil Composition for Plastic Barrels

    Because plastic holds moisture longer, soil must drain efficiently.

    Ideal Barrel Soil Mix

    • 40% high-quality potting mix (peat or coco coir based)
    • 30% screened compost
    • 20% pine bark fines
    • 10% perlite or pumice

    Why this works:

    • Bark improves airflow.
    • Perlite prevents compaction.
    • Compost supports microbial life.

    Avoid:

    • Native garden soil (compacts heavily in containers)
    • Straight compost (retains too much moisture)

    Cost impact: DIY mix costs less than premium bagged container soil and performs better long-term.

    9 Practical Plastic Barrel Planter Ideas

    1. Half-Barrel Vegetable Garden

    Best crops:

    • Tomatoes (determinant varieties)
    • Peppers
    • Eggplant
    • Bush beans

    Minimum depth: 18–24 inches

    Sun requirement: 6–8 hours (south or west-facing exposure ideal)

    Why it works: Deep soil supports strong root systems for fruiting plants.

    Watering: 3–4 times weekly in peak summer.

    Beginner mistake: Planting indeterminate tomatoes without staking support.

    Product suggestion: Use heavy-duty tomato cages or trellis systems rated for container use.

    2. Vertical Strawberry Barrel

    Use a full upright barrel.

    How to implement:

    • Drill 2–3 inch planting holes staggered along sides.
    • Fill center with drainage column (PVC pipe with holes).
    • Use lightweight potting mix.

    USDA zones: 4–9 perennial; mulch in winter in colder climates.

    Why it works: Strawberries have shallow roots (6–8 inches).

    Maintenance: Frequent watering vertical systems dry quickly.

    Cost: Higher initial labor but maximizes small-space yield.

    3. Herb Garden Barrel

    Ideal herbs:

    • Basil
    • Parsley
    • Thyme
    • Chives
    • Cilantro

    Soil modification: Add 10% coarse sand for Mediterranean herbs.

    Sun: 6 hours minimum (east-facing works well).

    Why it works: Herbs prefer slightly lean soil and good drainage.

    Watering: When top 1–2 inches dry.

    Common mistake: Overfertilizing reduces flavor concentration.

    4. Flower Power Patio Barrel

    Plant combination:

    • Thriller: Dwarf canna or salvia
    • Filler: Coleus or geraniums
    • Spiller: Sweet potato vine or bacopa

    Sun: Full sun for flowering varieties.

    Why it works: Layering creates visual dimension.

    Fertilizer: Slow-release granules every 8–10 weeks.

    Maintenance: Deadhead flowers regularly to extend bloom cycle.

    5. Self-Watering Reservoir Barrel

    Convert bottom 4–6 inches into water reservoir.

    How:

    • Insert perforated platform.
    • Add fill tube.
    • Use wicking soil.

    Why it works: Consistent moisture reduces blossom end rot in tomatoes.

    Cost: Additional $20–$40 in materials.

    Maintenance: Monitor reservoir weekly in hot weather.

    6. Mini Fruit Tree Planter

    Best varieties:

    • Dwarf lemon (zones 8–11)
    • Dwarf apple (zones 4–8)
    • Fig tree (zones 7–10)

    Minimum depth: 24 inches

    Why it works: Barrel volume supports compact rootstock.

    Soil: Well-draining mix with added compost.

    Maintenance: Annual root pruning every 2–3 years.

    Beginner mistake: Choosing standard-sized trees instead of dwarf rootstock.

    7. Cut-and-Come-Again Salad Barrel

    Plant:

    • Leaf lettuce
    • Spinach
    • Arugula
    • Kale

    Sun: 4–6 hours (east exposure ideal).

    Why it works: Shallow roots; quick harvest cycle.

    Watering: 2–3 times weekly.

    Budget tip: Grow from seed to reduce cost dramatically.

    8. Pollinator-Friendly Barrel

    Plants:

    • Lavender
    • Echinacea
    • Coreopsis
    • Dwarf butterfly bush

    Sun: Full sun required.

    Why it works: Supports bees and butterflies in small spaces.

    Soil: Add extra perlite these plants prefer dry roots.

    9. Compost-to-Plant Hybrid Barrel

    Use bottom half as compost chamber.

    Top half: Plant shallow-root vegetables.

    Why it works: Compost heat boosts early growth.

    Maintenance: Monitor moisture and aeration carefully.

    Advanced option requires monitoring to avoid overheating roots.

    Sun Exposure Strategy for Barrel Placement

    South-facing: Best for fruiting vegetables.

    West-facing: Hot afternoon sun choose heat-tolerant plants.

    East-facing: Balanced for herbs and leafy greens.

    North-facing: Shade-tolerant plants only (ferns, hostas).

    Why placement matters: Plastic absorbs heat, warming soil faster. In hot climates (zones 8–11), dark barrels can overheat roots.

    Solution:

    • Choose lighter-colored barrels.
    • Add 1-inch mulch layer.
    • Provide afternoon shade in extreme heat.

    Watering Guidelines for Plastic Barrels

    Plastic retains moisture longer than terracotta.

    General rule:

    • Check soil 2 inches down.
    • Water deeply until excess drains out.
    • Avoid shallow daily watering.

    Summer schedule:

    • Vegetables: 3–4 times weekly
    • Herbs: 2–3 times weekly
    • Shrubs: Once or twice weekly

    Drip irrigation kits work extremely well for multiple barrels and reduce water waste.

    Pest & Disease Prevention

    Common issues:

    • Aphids
    • Spider mites
    • Fungus gnats

    Prevention:

    • Ensure drainage.
    • Avoid overwatering.
    • Use neem oil when needed.

    Plastic barrels reduce soil-borne disease compared to in-ground beds because soil is controlled.

    Budget vs Premium Setup Comparison

    Budget Build ($25–$60)

    • Recycled barrel
    • DIY soil mix
    • Basic annual plants

    Pros: Affordable, high yield potential.

    Cons: Less decorative.

    Premium Setup ($80–$200)

    • Decorative molded barrel
    • Premium container soil
    • Drip irrigation system
    • Dwarf fruit tree or perennial shrubs

    Pros: Long-term stability, reduced seasonal replanting.

    Cons: Higher upfront cost.

    Long-term: Premium setups often save money over 3–5 years.

    Common Beginner Mistakes

    • Not drilling enough drainage holes.
    • Using garden soil.
    • Planting too many large crops in one barrel.
    • Ignoring sun exposure direction.
    • Letting water sit in saucers.

    FAQ

    How deep should a plastic barrel planter be?

    For vegetables and shrubs, 18–24 inches is ideal. Herbs and greens can grow in 12 inches.

    Are plastic barrels safe for growing food?

    Use food-grade barrels only. Avoid barrels that previously stored chemicals.

    How often should I replace soil?

    Refresh top 30–40% annually with compost and new mix. Full replacement every 3–4 years.

    Do plastic barrels overheat roots?

    They can in hot climates. Use mulch and lighter colors to reduce heat absorption.

    Can I grow root vegetables in a barrel?

    Yes carrots, radishes, and beets grow well in 12–18 inches of loose, sandy soil mix.

    Do I need fertilizer?

    Yes. Container soil loses nutrients quickly. Use slow-release fertilizer every 8–10 weeks.

    Final Thoughts

    Plastic barrel planters are one of the most underrated tools in small-space gardening. They offer deep root volume, durability, and affordability without sacrificing productivity. When built correctly with proper drainage, structured soil, and plants suited to your sun exposure and USDA zone they outperform many decorative planters.

    Start with one well-built barrel. Drill adequate drainage. Use a balanced soil mix. Choose crops that match the depth and sunlight available. Add mulch. Water deeply, not frequently.

    Within one growing season, you’ll see stronger root systems, healthier foliage, and higher yields than most casual container gardeners achieve.

    A simple plastic barrel can become a highly efficient, long-term growing system if you build it with intention.

  • Whiskey barrel planter ideas with lights

    Every product is independently reviewed and selected by our editors. If you buy something through our links, we may earn an affiliate commission at no extra cost to you.

    Soft evening light spilling over weathered wood. Cascading flowers glowing at dusk. A rustic barrel transformed into the focal point of your patio. Whiskey barrel planters with integrated lighting don’t just hold plants they define outdoor spaces.

    Introduction

    Many gardeners struggle with outdoor areas that feel flat or lifeless after sunset. During the day, containers may look vibrant, but once the sun sets, everything disappears into shadow. Installing hardwired landscape lighting can be expensive and invasive. That’s where whiskey barrel planter ideas with lights offer a practical, high-impact solution.

    With the right soil mix, drainage setup, plant selection, and lighting system, you can create a low-maintenance illuminated feature that works in small patios, balconies, entryways, or larger landscapes. This guide walks you through practical designs, lighting integration methods, soil and root depth considerations, and long-term maintenance so your planter looks impressive year-round, not just for a season.

    Quick Summary

    • Best for: Patios, entryways, decks, small gardens
    • Ideal sun exposure: 6+ hours for flowers; partial shade for foliage
    • Recommended soil: Well-draining potting mix (pine bark + compost + perlite)
    • Minimum depth: 12–16 inches for most flowering plants
    • Lighting types: Solar stakes, low-voltage LED strips, waterproof puck lights
    • USDA zones: Works in zones 3–10 (plant selection varies)
    • Maintenance level: Moderate (watering + seasonal replanting)
    • Budget range: $75–$400 depending on lighting system and plant choices

    Why Whiskey Barrel Planters Work So Well with Lighting

    Whiskey barrels are typically made from oak staves bound by metal hoops. Their curved structure and wood grain create natural texture that reflects warm light beautifully.

    Why This Design Works

    • Wood diffuses light softly, reducing harsh glare.
    • Curved edges enhance shadow depth, creating visual dimension.
    • Substantial soil volume supports healthy root systems.
    • Elevated structure improves drainage compared to ground beds.

    Half-barrels typically measure:

    • 24–27 inches diameter
    • 16–18 inches deep

    That depth supports:

    • Shallow-rooted annuals
    • Most herbs
    • Compact shrubs
    • Dwarf ornamental grasses

    However, they are not suitable for:

    • Large shrubs
    • Full-size tomatoes
    • Deep root vegetables (carrots need 12–18 inches minimum, but soil compaction becomes an issue)

    Cost consideration:

    • Real oak barrel halves: $80–$150
    • Resin barrel planters: $40–$90
    • Pre-lit decorative versions: $150–$300+

    Real wood looks better long-term but requires sealing every 1–2 years.

    Soil & Drainage: The Foundation of a Successful Lighted Barrel Planter

    Lighting may draw attention—but soil health determines longevity.

    Proper Soil Composition

    Avoid using garden soil. It compacts quickly and suffocates roots in containers.

    Use this mix:

    • 40% high-quality potting mix (peat or coco coir based)
    • 30% compost
    • 20% pine bark fines
    • 10% perlite or pumice

    Why this works:

    • Pine bark improves structure and aeration.
    • Compost adds microbial life and slow-release nutrients.
    • Perlite prevents waterlogging.

    Drainage is critical because light fixtures often sit near soil level.

    Drainage Setup

    Most barrels do not have adequate drainage holes.

    You should:

    • Drill 3–5 holes (½ inch diameter) in the base.
    • Add 1 inch of coarse gravel at the bottom (optional).
    • Elevate the barrel slightly using planter feet.

    Poor drainage leads to:

    • Root rot
    • Fungus gnats
    • Wood rot near lighting fixtures

    Maintenance impact:

    • Check drainage holes each season.
    • Avoid blocking holes with landscape fabric.

    Lighting Options for Whiskey Barrel Planters

    The lighting system determines cost, installation complexity, and maintenance.

    1. Solar Stake Lights (Beginner-Friendly)

    Best for: Renters, low-budget projects

    How to implement:

    • Insert solar stakes into outer ring of soil.
    • Position on southern or western side for maximum charge.

    Pros:

    • No wiring
    • Affordable ($20–$60 per set)
    • Easy seasonal replacement

    Cons:

    • Shorter lifespan (1–3 years)
    • Weak output in cloudy climates

    Maintenance:

    • Clean solar panels monthly.
    • Replace rechargeable batteries annually.

    2. Low-Voltage LED Strip Lighting (Premium Look)

    Best for: Permanent patios or entryways

    How to implement:

    • Install waterproof LED strips under the barrel lip.
    • Connect to outdoor-rated transformer.
    • Use warm white (2700K–3000K) for natural glow.

    Why it works:

    • Even light distribution
    • Highlights wood grain
    • Professional aesthetic

    Cost:

    • $100–$250 depending on transformer quality

    Maintenance impact:

    • Inspect wiring twice yearly.
    • Keep connectors dry and sealed.

    3. Waterproof Puck Lights (Uplighting Effect)

    Place 2–3 small LED puck lights at soil level to shine upward through foliage.

    Why this is dramatic:

    • Creates layered shadows.
    • Highlights tall ornamental grasses or cascading vines.

    Best plants for uplighting:

    • Fountain grass
    • Coleus
    • Sweet potato vine
    • Dwarf boxwood

    Avoid:

    • Dense plants that block light completely.

    7 Stunning Whiskey Barrel Planter Ideas with Lights

    1. Cascading Flower Glow Barrel

    Plant:

    • Petunias
    • Calibrachoa
    • Bacopa

    Light:

    • Solar stakes around rim

    Sun requirement:

    • Full sun (6–8 hours)

    Why it works: Trailing plants soften barrel edges and allow light to spill downward.

    Watering:

    • 2–3 times weekly in summer.

    Beginner mistake: Overcrowding plants, leading to poor airflow and fungal issues.

    2. Rustic Herb & Lantern Combo

    Plant:

    • Rosemary
    • Thyme
    • Oregano
    • Sage

    Light:

    • Central lantern-style solar light

    Soil:

    • Add extra sand (10%) for drainage.

    Why it works: Mediterranean herbs prefer lean, well-drained soil and tolerate reflective heat from lighting.

    USDA Zones:

    • 7–10 perennial; annual in colder regions.

    Maintenance:

    • Prune monthly to prevent woody growth.

    3. Ornamental Grass Spotlight Barrel

    Plant:

    • Dwarf fountain grass
    • Carex
    • Blue fescue

    Light:

    • 2 uplighting puck LEDs

    Why it works: Grass blades create movement and shadow drama at night.

    Watering:

    • Once weekly once established.

    Budget tip: Use a single specimen plant for a minimalist look.

    4. Seasonal Holiday Light Display Barrel

    Change plants seasonally:

    • Spring: Pansies
    • Summer: Geraniums
    • Fall: Mums + ornamental kale
    • Winter: Evergreen branches

    Lighting:

    • Waterproof string lights woven through foliage.

    Maintenance impact: Seasonal replanting increases cost but keeps display fresh year-round.

    5. Small Shrub Feature Barrel

    Plant:

    • Dwarf hydrangea
    • Compact boxwood
    • Dwarf Japanese maple (zones 5–8)

    Minimum depth:

    • 16–18 inches

    Lighting:

    • Hidden LED strip under rim

    Why it works: Permanent structure anchors design long-term.

    Cost consideration: Shrubs cost more upfront but reduce seasonal replanting expenses.

    6. Succulent Glow Barrel (Warm Climates)

    USDA Zones:

    • 9–11 outdoors year-round

    Soil:

    • 50% cactus mix
    • 25% pumice
    • 25% coarse sand

    Lighting:

    • Soft warm uplighting

    Water:

    • Every 2–3 weeks

    Avoid overwatering most common beginner mistake.

    7. Water Feature Barrel with Submersible Light

    Convert barrel into mini pond.

    Requirements:

    • Pond liner
    • Submersible LED
    • Aquatic plants (water lettuce, dwarf papyrus)

    Maintenance:

    • Monthly algae checks
    • Mosquito prevention tablets

    Higher maintenance but high visual impact.

    Sun Exposure & Placement Strategy

    Correct placement determines plant health and light effectiveness.

    South-facing:

    • Best for flowering displays.

    West-facing:

    • Strong afternoon light; good for heat-tolerant plants.

    North-facing:

    • Shade-tolerant plants only (ferns, hostas).

    East-facing:

    • Balanced light; ideal for mixed containers.

    Lighting tip: Warm light looks best against wood. Avoid cool white (4000K+).

    Budget vs Premium Setup Comparison

    Budget Setup ($75–$150)

    • Resin barrel
    • Standard potting mix
    • Solar stake lights
    • Annual flowers

    Pros: Low upfront cost.

    Cons: Replant yearly, replace solar units.

    Premium Setup ($250–$400+)

    • Real oak barrel
    • Custom soil blend
    • LED low-voltage system
    • Perennial shrubs or grasses

    Pros: Long lifespan, professional finish.

    Cons: Higher installation time and cost.

    Common Beginner Mistakes

    • No drainage holes.
    • Overwatering because barrel “looks dry.”
    • Using garden soil.
    • Blocking solar panels with foliage.
    • Choosing deep-root crops like carrots.

    Pest & Maintenance Basics

    Watch for:

    • Aphids (spray neem oil)
    • Fungus gnats (improve drainage)
    • Wood rot (seal annually with exterior wood sealant)

    Fertilization:

    • Slow-release granular fertilizer every 8–10 weeks.

    FAQ

    What plants grow best in whiskey barrel planters with lights?

    Shallow to medium-rooted plants like petunias, herbs, dwarf grasses, and compact shrubs perform best due to 16–18 inch soil depth.

    Do whiskey barrels need drainage holes?

    Yes. Drill multiple holes to prevent root rot and wood decay.

    Are solar lights bright enough?

    For accent lighting, yes. For dramatic impact, low-voltage LED systems perform better.

    How long do wooden barrels last outdoors?

    5–10 years with proper sealing and drainage.

    Can I grow vegetables in a whiskey barrel planter?

    Yes lettuce, peppers, bush beans, and herbs work well. Avoid deep-root vegetables.

    How often should I water?

    Typically 2–3 times weekly in summer; less in cooler seasons. Always check top 2 inches of soil first.

    Conclusion

    Whiskey barrel planter ideas with lights combine structure, texture, and atmosphere in a way few container designs can match. When built correctly with proper drainage, high-quality soil, thoughtful plant selection, and the right lighting temperature they become more than decorative pieces. They anchor patios, frame entryways, and extend garden enjoyment well past sunset.

    Start simple if needed. Choose one barrel. Install proper drainage. Select plants suited to your sun exposure and USDA zone. Add warm, subtle lighting.

    Within a single season, you’ll transform an ordinary corner into a glowing focal point that looks intentional, professional, and enduring.

    Well-built illuminated planters don’t just enhance a garden they extend how and when you enjoy it.

  • Whiskey barrel planter ideas full sun

    Every product is independently reviewed and selected by our editors. If you buy something through our links, we may earn an affiliate commission at no extra cost to you.

    A whiskey barrel planter in full sun can become the most dramatic feature in your outdoor space or the most frustrating plant graveyard.

    Full sun (6–8+ hours of direct light, especially south- or west-facing exposure) intensifies heat, dries soil quickly, and stresses roots. The good news? A properly prepared whiskey barrel gives you enough depth, moisture buffering, and root insulation to grow everything from dwarf citrus to layered pollinator displays successfully.

    Resin Flower Pot Barrel Planter

    This guide goes beyond pretty plant lists. You’ll learn what actually thrives in full sun barrels, the right soil composition, drainage setup, watering frequency, USDA zone considerations, and how to avoid the most common beginner mistakes.

    Introduction

    Many gardeners underestimate how harsh full sun can be in a container. Unlike in-ground soil, containers heat up faster and dry out quicker. Whiskey barrels help  but only if you use the right soil blend, plant selection, and watering strategy.

    Whether you’re styling a sunny patio, deck, driveway edge, or front entry, this guide will show you:

    • Which plants truly tolerate full sun in barrels
    • How to build a heat-resilient soil mix
    • How often to water in summer
    • How to prevent root rot and sun scorch
    • Budget vs premium setup options

    Done correctly, a whiskey barrel planter can thrive for 5–10+ years.

    Quick Summary

    • Full sun = 6–8+ hours direct light (south/west exposure strongest)
    • Ideal barrel depth: 15–18 inches
    • Minimum drainage holes: 3–5 holes, ½–¾ inch wide
    • Soil mix: 50% high-quality potting mix + 30% compost + 10% pine bark fines + 10% perlite
    • Watering: 2–4 times per week in summer (daily during extreme heat)
    • USDA zones: Most ideas below work in zones 4–10 depending on plant choice
    • Elevate barrel on pot feet to prevent wood rot

    Why Whiskey Barrels Work in Full Sun

    1. Deep Soil Buffers Heat

    Shallow containers overheat quickly. Whiskey barrels are typically 15–18 inches deep, which:

    • Protects roots from temperature spikes
    • Retains moisture longer
    • Allows deeper root establishment

    Why this matters: Roots above 95°F become stressed. Deep soil slows overheating.

    Maintenance impact: Fewer emergency waterings compared to shallow pots.

    2. Wood Insulates Better Than Metal

    Metal planters can cook roots in summer. Wood moderates temperature fluctuations.

    Cost note: Authentic wood barrels cost more upfront ($80–$180), but last longer and protect roots better than thin plastic.

    How to Prepare a Whiskey Barrel for Full Sun

    Step 1: Ensure Proper Drainage

    Drill at least 3–5 holes if none exist.

    Why: Full sun watering is frequent. Without drainage, roots suffocate.

    Common mistake: Adding rocks at the bottom. This reduces effective soil depth and worsens drainage.

    Step 2: Use a Heat-Resilient Soil Mix

    Ideal blend:

    • 50% premium potting mix
    • 30% compost
    • 10% pine bark fines
    • 10% perlite or pumice

    Why it works:

    • Compost improves moisture retention
    • Bark improves drainage
    • Perlite prevents compaction

    Avoid: Native garden soil. It compacts and overheats.

    Step 3: Mulch the Surface

    Add 1–2 inches of shredded bark or compost mulch.

    Why: Reduces evaporation by up to 30%.

    Maintenance benefit: Fewer waterings in peak summer.

    17 Whiskey Barrel Planter Ideas for Full Sun

    1. Dwarf Citrus Tree Feature

    Best for: USDA zones 8–11 (or overwinter indoors in colder zones)

    Examples:

    • Meyer lemon
    • Dwarf lime
    • Calamondin orange

    Sun requirement: 8+ hours direct sun

    Why it works: Deep barrels accommodate woody root systems.

    Watering: When top 2 inches dry.

    Cost factor: Higher initial plant cost, but long-term productivity.

    2. Tomato and Basil Combo Barrel

    Plant:

    • 1 indeterminate tomato (center)
    • Basil around edges

    Depth requirement: 16+ inches

    Support: Install cage at planting time.

    Maintenance: Daily watering in peak summer heat.

    3. Mediterranean Herb Garden

    Plant mix:

    • Rosemary
    • Thyme
    • Sage
    • Oregano
    • Lavender

    Soil adjustment:

    • Increase drainage (add 20% coarse sand)

    Why it works: These plants evolved in dry, sunny climates.

    Beginner mistake: Overwatering herbs.

    4. Pollinator Paradise

    Combine:

    • Coneflower (Echinacea)
    • Salvia
    • Gaillardia
    • Verbena

    Full sun essential.

    Why it works: Concentrated nectar attracts bees and butterflies.

    Maintenance: Deadhead regularly.

    5. Ornamental Grass Statement Planter

    Best grasses:

    • Fountain grass
    • Blue oat grass
    • Switchgrass (dwarf varieties)

    Root depth: 12–16 inches minimum

    Why: Deep roots stabilize tall growth.

    6. Heat-Tolerant Succulent Barrel

    Best for zones 8–11.

    Soil:

    • 50% cactus mix
    • 25% pumice
    • 25% coarse sand

    Drainage must be excellent.

    7. Tropical Patio Look

    Combine:

    • Cannas
    • Elephant ears
    • Coleus (sun varieties)

    Watering: Frequent.

    Cost: Higher fertilizer needs.

    8. Dwarf Olive Tree

    Zones 8–10

    Soil: Extra drainage (add 20% grit)

    Why it works: Olives thrive in hot sun.

    Avoid: Wet soil in winter.

    9. Zinnia Explosion Barrel

    Easy annual option.

    Watering: Moderate but consistent.

    Budget-friendly: Seeds cost less than starter plants.

    10. Pepper Plant Cluster

    Plant:

    • 2–3 pepper plants per barrel

    Full sun required for fruit production.

    Fertilize every 3–4 weeks.

    11. Sun-Loving Perennial Mix

    Combine:

    • Black-eyed Susan
    • Coreopsis
    • Yarrow

    Low maintenance once established.

    12. Strawberry Barrel

    Best for everbearing varieties.

    Soil: Rich in compost.

    Watering: Keep consistently moist.

    13. Bougainvillea (Warm Climates)

    Zones 9–11

    Full intense sun required.

    Avoid overwatering.

    14. Agave and Architectural Succulents

    Best for xeriscape designs.

    Minimal watering once established.

    15. Sun-Loving Annual Color Burst

    Combine:

    • Petunias
    • Calibrachoa
    • Angelonia

    Fertilize biweekly.

    16. Small Fig Tree

    Zones 7–10

    Depth: 16+ inches.

    Winter protection required in colder zones.

    17. Mixed Edible Barrel

    Plant:

    • Kale
    • Swiss chard
    • Nasturtiums

    Great for sunny patios.

    Watering Strategy for Full Sun Whiskey Barrels

    Full sun containers dry faster than in-ground beds.

    General rule:

    • Spring: 2x per week
    • Summer: 3–4x per week
    • Heat waves: Daily

    Check soil 2 inches deep before watering.

    Upgrade option: Install a drip irrigation kit with timer.

    Why it works: Consistent moisture prevents blossom end rot and leaf scorch.

    Budget vs Premium Setup

    Budget Setup ($100–$150 total)

    • Basic wood barrel
    • Quality potting mix
    • Annual plants
    • Manual watering

    Maintenance: Higher watering demand.

    Premium Setup ($200–$400+)

    • Hardwood reinforced barrel
    • Drip irrigation system
    • Slow-release fertilizer
    • Perennial or dwarf tree investment

    Lower long-term maintenance and plant replacement costs.

    Common Beginner Mistakes

    • Underestimating water needs in July heat
    • Overcrowding too many plants
    • Skipping drainage holes
    • Using garden soil
    • Placing barrel directly on concrete without airflow

    FAQ

    What grows best in a whiskey barrel planter in full sun?

    Dwarf fruit trees, tomatoes, peppers, Mediterranean herbs, ornamental grasses, and heat-tolerant perennials.

    How often should I water a whiskey barrel in full sun?

    Usually 3–4 times per week in summer. Daily during extreme heat.

    How deep should a whiskey barrel planter be?

    At least 15–18 inches for trees and vegetables.

    Can I grow a tree in a whiskey barrel?

    Yes, choose dwarf varieties and ensure excellent drainage.

    Do whiskey barrels crack in full sun?

    Over time, yes. Elevate them and avoid constant moisture to extend lifespan.

    Are plastic whiskey barrels good for full sun?

    They’re lighter and cheaper but can overheat more easily than wood.

    Final Thoughts

    Whiskey barrel planter ideas for full sun work beautifully when you respect two things: heat and drainage.

    These containers provide enough depth for serious root systems, better insulation than metal pots, and strong visual impact for patios, decks, and entryways. But success depends on using the right soil mix, watering consistently, and choosing plants that truly love full sun.

    If you match your plant selection to your USDA zone, provide proper drainage, and avoid overcrowding, your whiskey barrel can produce fruit, flowers, and color for years  not just one season.

    Start with one well-planted barrel. Once you see how well it performs in full sun, you’ll likely add more.

  • Half barrel planter ideas outdoor

    Every product is independently reviewed and selected by our editors. If you buy something through our links, we may earn an affiliate commission at no extra cost to you.

    Half barrel planter ideas outdoor gardeners love aren’t just about rustic charm they’re about depth, drainage, and durability. A properly planted half whiskey barrel can support everything from dwarf fruit trees to layered perennial displays for years.

    If you’ve ever struggled with shallow containers that dry out too fast, tip over in wind, or look out of place on a patio, half barrels solve many of those problems. But only if they’re set up correctly.

    This guide walks you through design ideas, soil formulas, drainage setup, plant selection by sun exposure, and common mistakes so your barrel planters thrive instead of rot.

    Introduction

    Outdoor gardeners often want container impact without installing permanent beds. Maybe you’re renting. Maybe your soil is poor clay. Maybe your patio needs vertical interest.

    Half barrel planters offer:

    • Deep root space
    • Excellent stability
    • Rustic aesthetic appeal
    • Versatility for flowers, herbs, shrubs, and small trees

    But many beginners make the same mistake: they treat them like oversized flower pots.

    This article gives you practical, horticulture-backed half barrel planter ideas that actually work based on soil science, root depth needs, drainage design, and climate considerations (USDA zones 3–10 depending on plant choice).

    Quick Summary: What Makes Half Barrel Planters Work

    • Ideal depth: 12–16 inches minimum
    • Drainage holes: At least 3–5 holes, ½–¾ inch diameter
    • Soil mix: 60% high-quality potting mix + 30% compost + 10% perlite
    • Best exposure: South or west-facing for sun lovers; east-facing for mixed plantings
    • Watering: 2–4 times per week in summer (climate dependent)
    • Lifespan: 5–10 years (wood), longer with liner protection

    Why Half Barrel Planters Work So Well Outdoors

    Deep Root Zone = Healthier Plants

    Most half barrels are 12–16 inches deep. That depth supports:

    • Dwarf fruit trees
    • Ornamental grasses
    • Perennial root systems
    • Root vegetables

    Why it works: Deeper soil holds moisture longer and buffers temperature swings. Shallow pots overheat and dry out quickly.

    Maintenance impact: Fewer watering cycles compared to shallow containers.

    Cost factor: Higher upfront cost than plastic pots, but fewer plant losses long term

    Excellent Stability for Windy Patios

    The wide base prevents tipping important for:

    • Tall ornamental grasses
    • Tomato cages
    • Small citrus trees

    In high-wind areas (coastal or open landscapes), lightweight resin pots often fail.

    15 Outdoor Half Barrel Planter Ideas (With Practical Setup Advice)

    1. Dwarf Fruit Tree Statement Planter

    Best for: USDA zones 4–10 Sun: Full sun (south or west-facing)

    Plant options:

    • Dwarf apple
    • Meyer lemon
    • Dwarf peach
    • Fig

    Container depth requirement: Minimum 15 inches

    Soil mix:

    • 50% high-quality potting mix
    • 25% compost
    • 15% pine bark fines
    • 10% perlite

    Why it works: The depth accommodates woody roots and supports long-term growth.

    Maintenance:

    • Fertilize 3 times per growing season
    • Winter protection in zones below 6

    Mistake to avoid: Overwatering. Fruit trees hate soggy roots.

    2. Layered Cottage-Style Flower Display

    Best for: Full sun

    Design formula:

    • Thriller: Upright grass or salvia
    • Filler: Geranium or petunia
    • Spiller: Sweet potato vine

    Why it works: The wide opening allows proper spacing between root balls.

    Watering: Every 2–3 days in summer heat.

    Cost note: Annuals require seasonal replanting budget accordingly.

    3. Rustic Herb Garden Barrel

    Best for: South-facing patios

    Ideal herbs:

    • Rosemary
    • Thyme
    • Sage
    • Oregano

    Soil composition:

    • 50% potting mix
    • 30% coarse sand
    • 20% compost

    Why it works: Herbs prefer fast drainage and moderate fertility.

    Common mistake: Using heavy garden soil. It compacts and suffocates roots.

    4. Shade-Loving Fern and Hostas Display

    Best for: North or east-facing porch

    Plant combination:

    • Hostas
    • Ferns
    • Heuchera

    Soil:

    • Moisture-retentive mix with added compost

    Maintenance: Mulch surface to reduce evaporation.

    Why it works: The barrel holds consistent moisture better than shallow shade pots.

    5. Small Vegetable Garden Barrel

    Best crops:

    • Cherry tomatoes
    • Peppers
    • Bush beans

    Minimum depth:

    • 14 inches for tomatoes

    Support tip: Install cage before roots spread.

    Watering frequency:

    • Daily in peak summer heat

    Affiliate buying tip: Choose food-safe liners for edible crops.

    6. Water-Wise Succulent Barrel

    Soil:

    • 50% cactus mix
    • 25% pumice
    • 25% coarse sand

    Sun: Full sun

    Drainage holes are critical. Add extra if needed.

    Why it works: Wood moderates temperature better than metal planters.

    7. Ornamental Grass Focal Point

    Grass options:

    • Fountain grass
    • Blue fescue
    • Japanese forest grass (shade)

    Root depth: 12+ inches

    Maintenance:

    • Divide every 2–3 years

    8. Seasonal Bulb Display

    Layer planting method:

    • Bottom: Tulips
    • Middle: Daffodils
    • Top: Crocus

    Why it works: Deep soil allows multi-layer bulb planting.

    Maintenance: Remove spent foliage naturally don’t cut early.

    9. Privacy Screen with Bamboo (Clumping Only)

    Use clumping bamboo, never running varieties.

    Barrier tip: Line interior with heavy-duty plastic.

    Maintenance: Annual root inspection.

    10. Mini Pollinator Garden

    Include:

    • Lavender
    • Coneflower
    • Salvia

    Why it works: Concentrated nectar source in small space.

    11. Evergreen Winter Display

    Use:

    • Dwarf spruce
    • Boxwood
    • Winterberry

    USDA zone check required.

    Protection tip: Wrap barrel in burlap in zones 4–5.

    12. Raised Salad Garden

    Grow:

    • Lettuce
    • Arugula
    • Spinach

    Shallow-root friendly.

    Watering: Consistent moisture prevents bitterness.

    13. Decorative Topiary Feature

    Plant:

    • Boxwood
    • Dwarf juniper

    Pruning maintenance: 2–3 times per year.

    14. Mixed Perennial Meadow Barrel

    Combine:

    • Black-eyed Susan
    • Coreopsis
    • Gaillardia

    Full sun required.

    Why it works: Deep soil supports perennial root systems long term.

    15. Self-Watering Converted Barrel

    Install:

    • Reservoir base insert
    • Wicking system

    Best for:

    • Busy homeowners
    • Hot climates

    Cost: Higher upfront, lower plant loss.

    How to Prepare a Half Barrel Planter Correctly

    Step 1: Ensure Proper Drainage

    Drill:

    • 3–5 holes minimum
    • Elevate with pot feet

    Why: Prevents root rot.

    Step 2: Line (But Don’t Suffocate)

    Use landscape fabric, not plastic, unless growing bamboo.

    Why: Preserves wood but allows drainage.

    Step 3: Use the Right Soil Mix

    Never use native soil.

    Ideal base mix:

    • 60% potting mix
    • 30% compost
    • 10% aeration material

    Step 4: Elevate Slightly

    Prevents wood rot and improves airflow.

    Budget vs Premium Barrel Options

    Budget Option ($40–$70)

    • Reclaimed wood barrel
    • May require sealing
    • Shorter lifespan

    Premium Option ($90–$180)

    • Hardwood barrel
    • Steel band reinforcement
    • Longer durability

    Resin half barrels are lighter and cheaper but less stable.

    Common Beginner Mistakes

    • No drainage holes
    • Overcrowding plants
    • Using garden soil
    • Placing sun plants in shade
    • Ignoring winter freeze damage

    FAQ

    How long do half barrel planters last outdoors?

    Wood barrels last 5–10 years depending on climate and drainage setup. Elevating them extends lifespan.

    Do half barrels need drainage holes?

    Yes. Without drainage, roots suffocate and rot. Drill at least 3 holes.

    What can I plant in a half whiskey barrel?

    Dwarf fruit trees, vegetables, herbs, perennials, ornamental grasses, and even small shrubs.

    Are half barrels good for vegetables?

    Yes, especially tomatoes, peppers, and salad greens. Ensure food-safe materials.

    How often should I water a half barrel planter?

    Typically 2–4 times per week in summer. Daily during heatwaves.

    Can I leave half barrel planters outside in winter?

    Yes, but protect wood and ensure soil doesn’t stay waterlogged. In colder zones, wrap with insulation.

    Final Thoughts

    Half barrel planter ideas outdoor gardeners rely on aren’t just about aesthetics they’re about giving roots space, improving drainage control, and creating stable, long-lasting container gardens.

    When set up properly with correct soil composition, adequate drainage, and the right plant selection for your sun exposure half barrels outperform shallow pots in nearly every way.

    They allow you to grow fruit trees on patios, create privacy screens on decks, build layered flower displays, and even produce vegetables in small spaces.

    Choose the right barrel. Prepare it properly. Match plants to light and climate.

    Do that, and a single half barrel can transform an empty patio corner into a productive, high-impact garden feature that lasts for years.

  • How to protect strawberries in hanging baskets from bird

    Every product is independently reviewed and selected by our editors. If you buy something through our links, we may earn an affiliate commission at no extra cost to you.

    Nothing is more frustrating than watching your hanging strawberry baskets fill with ripening fruit only to find them pecked, half-eaten, or completely gone the next morning. Birds are incredibly efficient at spotting ripe strawberries, especially when they’re elevated and fully visible. The good news? With the right protection strategies, you can enjoy your harvest before the birds do.

    Introduction

    If you’re growing strawberries in hanging baskets, you already understand the benefits: better drainage, fewer soil-borne diseases, and cleaner fruit. But elevated planters also make berries highly visible to birds like robins, sparrows, and starlings.

    This guide explains exactly how to protect strawberries in hanging baskets from bird damage, using proven horticultural methods. You’ll learn what works, what fails, how much it costs, and how to maintain protection throughout the growing season without harming wildlife.

    Quick Summary:

    • Use fine mesh netting (¼–½ inch) as your primary defense.
    • Install structured support frames to prevent birds from reaching through netting.
    • Position baskets in less exposed locations (avoid open sight lines).
    • Combine visual deterrents + physical barriers for best results.
    • Water properly overhead splashing attracts birds seeking moisture.
    • Inspect protection weekly during fruiting season.

    Why Birds Target Hanging Strawberries

    Understanding the behavior behind the damage helps you choose the right solution.

    Birds are attracted to strawberries because:

    • Bright red fruit signals ripeness and sugar content.
    • Hanging baskets elevate fruit into clear sight lines.
    • Moist soil and irrigation provide drinking water.
    • Urban and suburban areas have limited natural food sources.

    In USDA Zones 5–9, bird activity increases significantly during late spring and early summer precisely when strawberries ripen.

    Important insight: Birds typically peck once per fruit, ruining dozens in minutes. Prevention must start before fruit turns red.

    Best Physical Barrier: Netting (The Most Reliable Solution)

    Why Netting Works

    Bird netting physically prevents access. Unlike scare tactics, it does not rely on bird behavior patterns.

    When properly installed, netting:

    • Blocks entry
    • Does not harm wildlife
    • Protects continuously
    • Works in all climates

    Choosing the Right Netting

    Not all garden netting is equal.

    Mesh Size

    • Ideal: ¼–½ inch mesh
    • Larger than ½ inch allows beaks through.
    • Smaller mesh increases airflow resistance but offers better protection.

    Material

    • UV-stabilized polyethylene lasts 3–5 seasons.
    • Fine fabric mesh (like insect netting) offers superior protection but costs more.

    Cost Range

    • Budget plastic netting: $10–$20 per roll
    • Heavy-duty UV-resistant netting: $25–$50
    • Fine woven fruit protection mesh: $40–$80

    Premium netting lasts longer and resists tangling—worth it if you grow strawberries annually.

    How to Install Netting on Hanging Baskets (Properly)

    Many gardeners drape netting loosely over baskets. This is a mistake.

    Birds will land on top and peck through.

    Correct Installation Method:

    • Create a Dome Frame
      • Use flexible garden wire or tomato cage rings.
      • Form a dome slightly larger than the basket diameter.
      • Height: 6–8 inches above foliage.
    • Drape Netting Over Frame
      • Secure underneath with clips or zip ties.
      • Ensure no gaps at bottom.
    • Anchor Securely
      • Wind can lift netting.
      • Use binder clips or reusable garden clips.

    Maintenance Impact

    • Weekly inspection required.
    • Remove netting during watering if using overhead irrigation.
    • Self-watering baskets reduce disturbance.

    Alternative Strategy: Cage Systems for Hanging Baskets

    If netting feels messy or inconvenient, consider structured cages.

    Why Cages Work

    Cages prevent sagging and eliminate peck access points.

    Best Materials:

    • Powder-coated wire cloches
    • DIY hardware cloth cylinders (½ inch grid)
    • Custom PVC frame enclosures

    Container Depth Considerations

    Strawberries require:

    • 6–8 inches soil depth minimum
    • Well-draining potting mix (peat/coir + compost + perlite)
    • Drainage holes at bottom

    A cage must not compress foliage or reduce airflow, which can increase fungal disease like Botrytis.

    Cost Comparison

    OptionCostLongevityMaintenance
    DIY wire cageLowHighMinimal
    Commercial clocheMediumHighMinimal
    Custom enclosureHighVery HighMinimal

    For multi-season growers, cages are a worthwhile investment.

    Strategic Placement: Reduce Visibility to Birds

    Birds rely heavily on visual detection.

    Best Placement Tips

    • Hang baskets near walls or under eaves.
    • Avoid open yard exposure.
    • Use shaded patios (south-facing exposure still works if light is adequate).

    Light Requirements Reminder

    Strawberries need:

    • 6–8 hours direct sunlight
    • East or south exposure ideal
    • In very hot USDA Zones 8–10, afternoon shade prevents fruit scorch

    Balancing light and concealment is key.

    Reflective & Visual Deterrents (Secondary Protection)

    These work best when combined with netting.

    Options:

    • Reflective tape
    • Old CDs
    • Motion-activated sprinklers
    • Predator decoys

    Why They Only Partially Work

    Birds quickly adapt to stationary deterrents.

    However, reflective flashes can reduce early-season targeting.

    Cost Range

    • Reflective tape: $10
    • Motion sprinkler: $40–$80
    • Decoys: $15–$30

    Maintenance: Must reposition weekly to stay effective.

    Watering Strategy to Reduce Bird Attraction

    Birds often peck strawberries not just for food—but moisture.

    Smart Watering Practices

    • Water early morning.
    • Avoid frequent overhead watering.
    • Use drip irrigation or self-watering baskets.

    Ideal Soil Mix for Hanging Strawberries

    Use:

    • 40% high-quality potting mix
    • 30% compost
    • 20% coco coir or peat moss
    • 10% perlite

    This ensures:

    • Excellent drainage
    • Consistent moisture
    • Reduced cracking (which attracts birds)

    Watering Frequency

    • Spring: Every 2–3 days
    • Hot summer: Daily check; often daily watering
    • Keep soil moist but never soggy

    Overwatering increases fruit splitting and scent release.

    Common Beginner Mistakes

    1. Waiting Until Fruit Turns Red

    Protection must begin at flowering stage.

    2. Loose Netting

    Sagging netting allows birds to sit and peck.

    3. Ignoring Gaps

    Even a 2-inch opening invites access.

    4. Using Fishing Line Alone

    Often ineffective and can harm wildlife.

    5. Forgetting Pest Balance

    Birds also eat insects. If you exclude birds, monitor for aphids and spider mites.

    Pest & Disease Considerations When Using Netting

    Netting reduces bird access but also changes airflow.

    Monitor for:

    • Botrytis (gray mold)
    • Powdery mildew
    • Aphids

    Ensure:

    • Adequate spacing between plants
    • Air circulation
    • Remove damaged fruit promptly

    Budget vs Premium Protection Setup

    Budget Setup ($30–$50)

    • Plastic netting
    • DIY wire frame
    • Basic potting mix
    • Manual watering

    Maintenance: Higher Durability: 1–2 seasons

    Premium Setup ($150–$300)

    • UV-resistant fine mesh enclosure
    • Powder-coated frame
    • Premium strawberry potting mix
    • Self-watering baskets or drip system
    • Motion sensor deterrent

    Maintenance: Low Durability: 3–5+ seasons

    For frequent growers, premium systems reduce long-term frustration.

    When to Remove Protection

    After final harvest:

    • Remove netting to allow pollinators access if growing everbearing varieties.
    • Clean and store dry.
    • Inspect for tears.

    In USDA Zones 7–10, everbearing strawberries may fruit multiple times protection may be needed intermittently.

    FAQ

    1. What is the best way to protect strawberries in hanging baskets from bird damage?

    Fine mesh netting installed over a dome frame is the most effective and humane solution.

    2. Can birds peck through garden netting?

    Yes, if the mesh is larger than ½ inch or if netting rests directly on fruit.

    3. Do fake owls work to protect strawberries?

    Only temporarily. Birds quickly adapt unless deterrents move or change location.

    4. When should I cover my strawberries?

    Install protection when flowers form before fruit turns red.

    5. Does hanging height affect bird access?

    Yes. Lower baskets near shrubs are sometimes less visible. Fully exposed high baskets attract more attention.

    6. Will netting reduce sunlight to strawberries?

    Fine mesh slightly reduces light but not enough to affect production significantly.

    7. Are birds damaging plants or just fruit?

    Primarily fruit. However, pecking can introduce fungal pathogens.

    Final Thoughts

    Learning how to protect strawberries in hanging baskets from bird damage is about combining smart placement, physical barriers, and consistent maintenance. Netting over a structured frame remains the most reliable solution, especially when installed early and secured properly.

    When you invest in proper protection, you protect months of plant care soil preparation, watering, fertilizing, and pruning. The cost of prevention is small compared to losing your harvest overnight.

    Choose durable materials. Install them correctly. Monitor weekly.

    With the right setup, your hanging baskets can deliver clean, bird-free strawberries all season long and reward you year after year.

  • strawberry planter terracotta

    Every product is independently reviewed and selected by our editors. If you buy something through our links, we may earn an affiliate commission at no extra cost to you.

    There’s something timeless about strawberries spilling over the edges of a terracotta planter. The warm clay tones, the scent of sun-ripened fruit, and the clean look of elevated containers make this one of the most beautiful ways to grow berries in small spaces. But terracotta isn’t just aesthetic it changes how you water, feed, and manage your plants.

    If you use it correctly, a terracotta strawberry planter can produce consistent harvests with fewer root diseases than plastic pots. If you use it incorrectly, your plants will dry out fast and stall.

    This guide explains exactly how to grow strawberries successfully in terracotta planters soil composition, drainage science, watering frequency, container depth, sunlight positioning, and long-term maintenance.

    Introduction

    Strawberries have shallow root systems (6–12 inches deep), making them ideal for container gardening. But terracotta behaves differently than plastic or glazed ceramic.

    Clay is porous. It breathes. It wicks moisture from soil. That’s excellent for preventing root rot but it also means faster drying.

    Most beginner failures in terracotta strawberry planters come from:

    • Underwatering
    • Poor soil composition
    • Insufficient feeding
    • Overcrowding planting pockets

    When managed properly, terracotta creates a healthier root zone with improved oxygen exchange one of the most overlooked advantages in container gardening.

    This guide gives you practical, real-world instructions for building a productive strawberry setup in terracotta planters, whether you’re gardening on a balcony, patio, or compact backyard.

    Quick Summary: Growing Strawberries in Terracotta Planters

    • Ideal planter depth: 8–12 inches minimum
    • Soil pH target: 5.5–6.5
    • Best varieties: Day-neutral (Albion, Seascape, Evie-2)
    • Sun requirement: 6–8+ hours (south-facing preferred)
    • Watering frequency: 3–5 times weekly in warm weather
    • USDA Zones: 3–10 (variety dependent)
    • Drainage: Mandatory bottom holes
    • Fertilizing: Every 2–3 weeks during fruiting
    • Lifespan of plants: 2–3 productive years

    Why Choose a Terracotta Strawberry Planter

    1. Superior Root Aeration

    Terracotta is naturally porous. It allows air exchange through the pot walls.

    Why this matters:

    Strawberry roots need oxygen to absorb nutrients efficiently. In plastic containers, soil can stay too wet and compacted, leading to crown rot and fungal issues.

    Terracotta reduces that risk.

    Maintenance impact: You must water more frequently, but root health improves significantly.

    2. Improved Drainage Reduces Disease

    Strawberries are highly susceptible to:

    • Phytophthora crown rot
    • Root rot
    • Fungal leaf diseases

    Terracotta pulls excess moisture away from roots. Combined with proper drainage holes, it creates a safer growing environment.

    Beginner mistake: Using decorative terracotta pots without drainage holes.

    Always choose planters with multiple drainage holes.

    3. Temperature Regulation

    Clay insulates better than thin plastic.

    • In moderate climates (USDA Zones 4–8), terracotta protects roots from sudden temperature swings.
    • In hot climates (Zones 9–10), pots may heat up in direct afternoon sun.

    Solution: Provide afternoon shade in extreme heat.

    Choosing the Right Terracotta Strawberry Planter

    There are two main styles:

    Traditional Wide Pot

    Best for patios and small gardens.

    Minimum specs:

    • 12–16 inches diameter
    • 10–12 inches deep
    • At least 3 drainage holes

    Plant capacity: 3 strawberry plants per 14-inch pot.

    Why not more? Overcrowding reduces airflow and fruit size.

    Tiered Terracotta Strawberry Planter (With Side Pockets)

    These classic strawberry jars feature multiple planting pockets around the sides.

    Benefits:

    • Vertical growing
    • Excellent airflow
    • Attractive display

    Limitations:

    • Smaller soil volume per pocket
    • Dries out faster

    Buying criteria:

    • Thick clay walls (better insulation)
    • Pre-drilled drainage
    • Stable, wide base to prevent tipping

    Cost range: $40–$120 depending on size and quality.

    Premium versions often include thicker clay, which retains moisture slightly longer.

    Best Strawberry Varieties for Terracotta Planters

    Container growing favors certain types.

    Day-Neutral Varieties (Best Overall)

    • Albion
    • Seascape
    • Evie-2

    Why they work: They fruit continuously when temperatures remain between 35–85°F.

    Maintenance impact: Requires consistent feeding due to repeated fruiting cycles.

    Everbearing Varieties

    • Mara des Bois
    • Toscana (ornamental pink flowers)

    Good for decorative patios where appearance matters as much as yield.

    Avoid June-Bearing (In Most Cases)

    June-bearing strawberries produce one heavy crop and then focus on runner growth.

    In terracotta containers: Runner growth wastes limited nutrients and space.

    Soil Composition for Terracotta Strawberry Planters

    Soil choice determines 70% of your success.

    Never use garden soil in terracotta.

    Ideal Soil Mix (Expert Blend)

    • 50% high-quality potting mix
    • 25% well-aged compost
    • 15% coco coir
    • 10% perlite or pumice

    Target pH: 5.5–6.5

    Why this works:

    Potting mix provides structure. Compost supplies nutrients. Coco coir improves moisture retention (important in porous clay). Perlite ensures drainage.

    Cost consideration: Premium potting mix costs more upfront but reduces disease risk and improves yield.

    Planting Strawberries in a Terracotta Planter

    Step 1: Prepare Drainage Layer (Optional but Helpful)

    Add 1 inch of coarse gravel at bottom.

    Why: Prevents drainage holes from clogging.

    Note: Do not overfill with rocks this reduces soil volume unnecessarily.

    Step 2: Position the Crown Correctly

    Strawberry crown must sit level with soil surface.

    Too deep: Crown rot.

    Too high: Root desiccation.

    Step 3: Space Properly

    In wide pots: Space plants 6–8 inches apart.

    In pocket planters: One plant per pocket only.

    Watering Strawberries in Terracotta (Critical Section)

    Terracotta wicks moisture outward. Expect faster drying than plastic.

    Watering Frequency

    Spring: 2–3 times per week Summer: 3–5 times per week Heatwaves: Daily monitoring

    Soil should remain consistently moist but not soggy.

    Check method: Insert finger 1–2 inches into soil. If dry, water.

    Upgrade Option: Drip Irrigation or Self-Watering Systems

    Highly recommended for:

    • Balconies
    • Busy gardeners
    • Hot climates

    Buying criteria:

    • Adjustable emitters
    • Low-pressure compatibility
    • Timer-ready system

    Cost: $30–$80 for small patio setups.

    Maintenance benefit: Reduces stress cycles that cause small berries.

    Sunlight Requirements

    Strawberries need:

    • Minimum 6 hours direct sunlight
    • 8+ hours for maximum fruiting
    • South-facing exposure ideal
    • Southeast exposure good in hot climates

    In USDA Zones 9–10: Provide afternoon shade to prevent root overheating.

    Balcony tip: Rotate pots weekly for even light distribution.

    Fertilizing Strategy for Terracotta Containers

    Nutrients leach faster in porous containers.

    Feeding Plan

    At planting: Mix in slow-release balanced fertilizer (10-10-10).

    During fruiting: Liquid fertilizer every 2–3 weeks.

    Switch to potassium-rich formula when flowering begins.

    Avoid: High nitrogen mid-season leads to leafy growth, fewer berries.

    Cost impact: Liquid feeding adds ongoing expense but increases yield consistency.

    Pest Prevention and Disease Management

    Common pests:

    • Aphids
    • Spider mites
    • Slugs (less common in raised pots)

    Prevention plan:

    • Neem oil spray every 10–14 days
    • Inspect leaf undersides weekly
    • Remove yellowing leaves immediately

    Why terracotta helps: Improved airflow reduces fungal outbreaks compared to ground beds.

    Winter Care by USDA Zone

    Zones 3–5

    Terracotta can crack in freeze-thaw cycles.

    Action steps:

    • Move to unheated garage
    • Wrap with burlap
    • Insulate with straw

    Zones 6–8

    Light mulch and reduced watering during dormancy.

    Zones 9–10

    Minimal protection required. Monitor moisture.

    Budget vs Premium Setup Comparison

    Budget Setup ($50–$80)

    • Standard terracotta pot
    • DIY soil mix
    • Manual watering

    Pros: Affordable Simple

    Cons: More watering required

    Premium Setup ($120–$200)

    • Large tiered terracotta planter
    • Drip irrigation system
    • Premium potting mix
    • Organic feeding schedule

    Pros: Higher yield Lower plant stress Better aesthetics

    Cons: Higher initial cost

    Long-term benefit: Better fruit consistency and plant longevity.

    Common Beginner Mistakes

    • Underwatering due to clay absorption
    • Overcrowding side pockets
    • Using heavy garden soil
    • Burying the crown too deep
    • Skipping fertilizer mid-season
    • Ignoring drainage holes

    Most terracotta failures are hydration-related not variety-related.

    FAQ

    Are terracotta planters good for strawberries?

    Yes. They improve root aeration and drainage but require more frequent watering.

    How many strawberries fit in a terracotta planter?

    In a 14-inch pot, grow 3 plants. In pocket planters, one per pocket.

    Do strawberries dry out faster in terracotta?

    Yes. Clay wicks moisture, so watering must be more consistent than plastic containers.

    What is the best soil for strawberries in terracotta pots?

    A lightweight mix of potting soil, compost, coco coir, and perlite with pH 5.5–6.5.

    Can terracotta pots stay outside in winter?

    Only in mild climates. In freeze-prone zones, protect or move them to prevent cracking.

    How long do strawberries last in containers?

    Typically 2–3 productive years before yield declines.

    Conclusion

    Growing strawberries in a terracotta planter combines beauty and performance if you manage moisture correctly. The porous clay improves aeration and reduces disease risk, but it demands consistent watering and feeding.

    Choose day-neutral varieties, use a lightweight, well-draining soil mix, position your planter in full sun, and feed regularly during fruiting.

    Do it right, and your terracotta strawberry planter will produce clean, sweet fruit while elevating the look of your patio or balcony for years.

    Smart setup. Consistent care. Strong harvests.

  • Best strawberries for hanging baskets

    Every product is independently reviewed and selected by our editors. If you buy something through our links, we may earn an affiliate commission at no extra cost to you.

    Few things feel more rewarding than harvesting sweet, sun-warmed strawberries cascading from a hanging basket on your balcony or patio. When chosen correctly, the right variety will trail beautifully, produce heavily, and thrive in containers without constant frustration. Choose the wrong one, and you’ll get lots of leaves, few berries, and endless runner tangles.

    This guide breaks down exactly which strawberry varieties perform best in hanging baskets, why they work, and how to grow them successfully with proper soil, drainage, sunlight, and feeding strategies.

    Introduction

    Strawberries naturally spread along the ground. In hanging baskets, they behave differently. Root space is restricted. Soil dries out faster. Nutrients leach quickly. Sun exposure may be uneven depending on direction.

    The key to success is choosing varieties that:

    • Produce fruit continuously (not just once)
    • Have compact or trailing growth
    • Tolerate container stress
    • Perform well in USDA zones 4–10 (depending on cultivar)

    In this expert guide, you’ll learn which varieties outperform lifestyle-blog recommendations, how to plant them properly, and how to avoid the common mistakes that sabotage container strawberries.

    Quick Summary

    • Best overall: ‘Albion’ (day-neutral, high yield, heat tolerant)
    • Best for continuous harvest: ‘Seascape’
    • Best for cold climates (Zones 3–6): ‘Evie-2’
    • Best trailing habit: ‘Toscana’ (ornamental + edible)
    • Soil depth needed: Minimum 8–10 inches
    • Sun requirement: 6–8+ hours (south-facing ideal)
    • Watering frequency: 3–5 times per week in warm weather
    • Soil mix: Light, well-draining, high organic matter
    • Expected yield: 0.5–1.5 lbs per plant per season (container grown)

    What Makes a Strawberry Ideal for Hanging Baskets

    Not all strawberries are suitable for containers.

    1. Day-Neutral or Everbearing Fruiting Habit

    Why it matters:

    • June-bearing varieties produce one large flush, then stop.
    • Hanging baskets benefit from continuous production.

    Day-neutral strawberries fruit when temperatures stay between 35–85°F. That means multiple harvest waves throughout the season.

    Maintenance impact: You’ll harvest more frequently, but feeding must be consistent.

    2. Compact or Moderate Runner Production

    Excessive runners:

    • Drain plant energy
    • Create tangled baskets
    • Reduce fruit size

    Look for controlled runner producers unless you want dramatic trailing growth.

    3. Heat and Drought Tolerance

    Hanging baskets dry out quickly especially in west-facing exposures or windy balconies.

    Varieties with thicker foliage and stronger root systems perform better under container stress.

    Best Strawberries for Hanging Baskets (Expert Picks)

    1. Albion (Best Overall Performance)

    Type: Day-neutral USDA Zones: 4–9 Flavor: Very sweet, firm, high sugar Runner production: Moderate

    Why it works:

    Albion is one of the most reliable container strawberries. It tolerates heat better than many day-neutral varieties and produces large, firm berries ideal for fresh eating.

    Root depth compatibility: Thrives in 8–10 inches of soil.

    Maintenance: Requires consistent feeding every 2–3 weeks during fruiting.

    Cost: Mid-range price for starter plants but worth it for yield consistency.

    Pros:

    • Excellent flavor
    • Long harvest window
    • Good disease resistance

    Cons:

    • Needs regular fertilization

    2. Seascape (Best for Long Harvest Season)

    Type: Day-neutral Zones: 4–9 Flavor: Sweet with mild acidity Runner production: Moderate to high

    Why it works:

    Seascape produces heavily in spring and fall, with lighter summer production in extreme heat.

    Best placement: South-facing or southeast exposure for steady sunlight without extreme afternoon scorch in hot climates.

    Beginner mistake: Letting runners remain attached reduces berry size.

    Maintenance tip: Remove runners unless you want propagation.

    3. Evie-2 (Best for Cold Climates)

    Type: Day-neutral Zones: 3–8 Flavor: Sweet, slightly softer texture Runner production: Low

    Why it works:

    Evie-2 performs exceptionally well in cooler climates and shorter growing seasons. It starts fruiting earlier than many varieties.

    Winter care: In Zones 3–5, baskets must be insulated or moved to a protected area.

    Pros:

    • Reliable in northern climates
    • Early fruiting
    • Compact growth

    Cons:

    • Softer berries (less shelf life)

    4. Toscana (Best Ornamental + Edible Option)

    Type: Everbearing Zones: 4–9 Feature: Pink flowers Runner production: High trailing habit

    Why it works:

    Toscana is ideal if aesthetics matter. It produces edible berries and dramatic pink blooms that cascade beautifully.

    Yield: Lower than Albion but steady.

    Maintenance impact: Needs frequent trimming of runners to avoid energy drain.

    Best use: Decorative balcony baskets.

    5. Mara des Bois (Best Gourmet Flavor)

    Type: Everbearing Zones: 4–8 Flavor: Intense, wild-strawberry aroma Runner production: Moderate

    Why it works:

    Produces smaller berries but unmatched flavor.

    Cost consideration: Often more expensive due to specialty status.

    Maintenance: Sensitive to extreme heat provide afternoon shade in Zones 8–9.

    Choosing the Right Hanging Basket Setup

    Variety matters—but so does container design.

    Basket Size and Depth

    Minimum depth: 8–10 inches Ideal diameter: 12–14 inches Plants per basket: 3 maximum

    Why:

    Strawberry roots grow 6–12 inches deep. Too shallow = stunted growth and poor fruiting.

    Beginner mistake: Overcrowding with 5–6 plants.

    Drainage Requirements

    Strawberries cannot tolerate soggy roots.

    Look for:

    • Multiple drainage holes
    • Breathable liners (coconut coir preferred)
    • Avoid sealed decorative pots without drainage

    Why drainage matters:

    Oxygen in the root zone prevents fungal diseases like crown rot.

    Best Soil Mix for Hanging Basket Strawberries

    Never use garden soil in hanging baskets.

    Ideal Container Mix Composition

    • 50% high-quality potting mix
    • 25% compost (well-aged)
    • 15% coco coir
    • 10% perlite

    Target pH: 5.5–6.5

    Why this works:

    • Compost provides slow-release nutrients.
    • Coir retains moisture without compaction.
    • Perlite ensures drainage.

    Cost impact: Premium potting mix costs more but reduces plant failure rates significantly.

    Watering Strategy (Critical for Success)

    Hanging baskets dry out faster than ground beds.

    Watering Frequency

    Spring: 2–3 times weekly Summer: 4–5 times weekly Extreme heat: Daily monitoring

    Soil should be: Moist, never waterlogged.

    Install drip irrigation or self-watering baskets if possible.

    Buying criteria for self-watering baskets:

    • Reservoir capacity minimum 1 quart
    • Overflow drainage
    • UV-resistant plastic

    Maintenance benefit: Reduces watering frequency and plant stress.

    Fertilizing for Continuous Production

    Container strawberries are heavy feeders.

    Use:

    • Balanced slow-release fertilizer at planting (10-10-10)
    • Liquid feed every 2–3 weeks during fruiting
    • Switch to potassium-rich feed during peak fruiting

    Avoid: High nitrogen fertilizers mid-season (promotes leaves, not fruit).

    Cost impact: Liquid fertilizers add ongoing cost but dramatically improve yield.

    Sunlight Positioning Matters

    Strawberries need:

    • 6–8 hours direct sun
    • South-facing ideal
    • West-facing acceptable in mild climates

    In Zones 8–10: Provide light afternoon shade to prevent heat stress.

    Balcony tip: Rotate baskets weekly for even growth.

    Pest and Disease Prevention in Hanging Baskets

    Common issues:

    • Aphids
    • Spider mites
    • Powdery mildew

    Preventative strategy:

    • Neem oil spray every 10–14 days
    • Weekly leaf inspections
    • Avoid overhead watering

    Why baskets help: Improved airflow reduces fungal outbreaks compared to ground planting.

    Budget vs Premium Setup Comparison

    Budget Setup ($30–$60 per basket)

    • Basic wire basket
    • DIY soil blend
    • Manual watering

    Pros: Affordable

    Cons: Higher maintenance

    Premium Setup ($75–$150 per basket)

    • Self-watering container
    • Premium potting mix
    • Organic fertilizer program
    • Drip irrigation timer

    Pros: More consistent yields Lower plant stress

    Cons: Higher upfront investment

    Long-term benefit: Improved harvest consistency offsets cost.

    Common Beginner Mistakes

    • Choosing June-bearing varieties
    • Overcrowding baskets
    • Letting runners grow unchecked
    • Using heavy garden soil
    • Under-fertilizing
    • Ignoring sun direction

    Most failures come from improper watering and nutrient management not variety choice.

    FAQ:

    What is the best strawberry variety for hanging baskets?

    Albion is widely considered the best overall due to flavor, yield, and heat tolerance.

    How many strawberry plants per hanging basket?

    Maximum three plants in a 12–14 inch basket to prevent overcrowding.

    Do hanging basket strawberries come back every year?

    Yes, in USDA Zones 4–9 with proper winter protection. Containers may require insulation in colder zones.

    How often should I water strawberries in hanging baskets?

    Typically 3–5 times per week in warm weather. Daily checks during heat waves.

    Do strawberries need full sun in baskets?

    Yes. At least 6 hours of direct sunlight. South-facing exposure produces best results.

    Can I grow strawberries indoors in hanging baskets?

    Only with strong grow lights providing 12–14 hours daily. Natural window light alone is usually insufficient.

    Final Thoughts

    The best strawberries for hanging baskets are day-neutral varieties like Albion, Seascape, and Evie-2. They deliver steady harvests, adapt well to container stress, and maximize small-space productivity.

    Success depends less on luck and more on fundamentals:

    • Proper soil composition
    • Adequate root depth
    • Consistent watering
    • Balanced fertilization
    • Correct sun exposure

    When those elements align, even a small balcony can produce pounds of sweet, homegrown strawberries season after season.

    Choose the right variety. Invest in proper containers. Feed consistently. Harvest often.

    Your hanging baskets can become one of the most productive parts of your garden.

  • Strawberry planter tower diy | Build a High-Yield Vertical Strawberry Garden

    Every product is independently reviewed and selected by our editors. If you buy something through our links, we may earn an affiliate commission at no extra cost to you.

    There’s something deeply satisfying about harvesting sun-warmed strawberries from a tower you built yourself. Whether you’re working with a balcony, patio, or compact backyard, a DIY strawberry planter tower lets you grow more fruit in less space without sacrificing plant health or yield.

    Introduction

    If you’ve ever tried growing strawberries in traditional garden beds, you know the challenges: sprawling runners, fungal diseases from poor airflow, fruit rotting on damp soil, and constant weeding. In small spaces, it’s even harder.

    A well-designed strawberry planter tower solves these problems. It improves drainage, increases airflow, maximizes vertical space, and makes harvesting easier. When built correctly with proper soil composition, root depth, irrigation, and sun positioning it can outperform standard ground planting.

    In this guide, I’ll walk you through exactly how to build a high-performing strawberry planter tower, including materials, soil science, irrigation setup, common mistakes, and long-term maintenance strategies.

    Quick Summary

    • Best for: Balconies, patios, small yards
    • Ideal container depth: 8–12 inches for strawberries
    • Soil mix: 40% high-quality potting mix, 30% compost, 20% coco coir, 10% perlite
    • Sunlight: 6–8+ hours (south or west exposure ideal)
    • Watering: 2–4 times per week (more in hot climates)
    • USDA Zones: 3–10 (variety dependent)
    • Cost range: $40–$150 depending on materials
    • Maintenance level: Moderate but manageable

    Why a Strawberry Planter Tower Works Better Than Ground Planting

    1. Improved Drainage Prevents Root Rot

    Strawberries hate sitting in soggy soil. Their shallow root systems (typically 6–12 inches deep) are highly susceptible to crown rot and fungal diseases.

    A vertical tower improves drainage because:

    • Gravity pulls excess water downward.
    • Soil volume is controlled.
    • Drainage holes prevent water pooling.

    Why it works: Proper drainage ensures oxygen reaches roots. Strawberry roots require well-aerated soil to absorb nutrients efficiently.

    Maintenance impact: You must monitor moisture levels more closely than in-ground beds, but disease risk drops significantly.

    2. Better Airflow Reduces Fungal Disease

    Powdery mildew and gray mold thrive in stagnant air. Towers naturally create better spacing between plants.

    How to enhance airflow:

    • Space planting holes at least 6–8 inches apart.
    • Avoid overcrowding.
    • Position tower where cross-breeze is possible.

    Cost impact: Free just thoughtful placement.

    3. Elevated Fruit Means Cleaner Harvests

    Fruit never touches soil, reducing:

    • Slug damage
    • Rot
    • Soil splashing after rain

    This alone increases usable yield dramatically compared to ground-level growing.

    Choosing the Right Type of Strawberry Planter Tower

    Option 1: PVC Pipe Tower (Most Popular DIY Method)

    Materials Needed

    • 4–6 inch diameter PVC pipe (4–5 ft tall)
    • Drill with 2–3 inch hole saw
    • End cap
    • Gravel for bottom drainage
    • Potting mix
    • Central watering tube (optional but recommended)

    Why it works: Vertical tube design maximizes density in small spaces.

    Cost: $40–$80 depending on pipe size and quality.

    Maintenance: Requires consistent watering and monitoring of top sections.

    Option 2: Stacked Planter Pots

    Stackable tiered planters are easier but slightly less space-efficient.

    Pros:

    • Beginner-friendly
    • Easy to rearrange
    • Better root volume per plant

    Cons:

    • More expensive ($80–$150)
    • Slightly heavier

    Look for:

    • UV-resistant plastic
    • Built-in drainage
    • At least 8 inches soil depth per tier

    Option 3: Wooden Vertical Box Tower

    Best for aesthetic patios.

    Requirements:

    • Rot-resistant wood (cedar recommended)
    • Interior liner to prevent rot
    • Drainage holes every 8–12 inches

    Cost: $100–$200 depending on lumber prices.

    Maintenance: Wood requires sealing every 1–2 years.

    Step-by-Step: How to Build a PVC Strawberry Planter Tower

    Step 1: Determine Height and Stability

    Ideal height: 4 feet.

    Why: Taller towers become top-heavy and unstable once watered.

    Secure base:

    • Use a large planter filled with gravel.
    • Anchor into ground if outdoors.
    • Add weight at bottom.

    Beginner mistake: Building too tall without stabilizing base.

    Step 2: Drill Planting Holes

    • Use 2–3 inch hole saw.
    • Stagger holes in spiral pattern.
    • Space holes 6–8 inches vertically.

    Why staggered? Prevents root competition and ensures even sunlight exposure.

    Step 3: Create a Central Watering Column (Highly Recommended)

    Insert a smaller perforated PVC pipe (1–2 inch diameter) down the center.

    Fill this inner pipe with gravel.

    Why it works:

    • Distributes water evenly.
    • Prevents dry pockets in upper sections.
    • Reduces water waste.

    Cost impact: Adds about $10–$20 but significantly improves consistency.

    Step 4: Add Proper Soil Mix

    Ideal Strawberry Soil Composition

    • 40% high-quality potting mix
    • 30% finished compost
    • 20% coco coir (moisture retention)
    • 10% perlite (drainage)

    Target pH: 5.5–6.5

    Why this mix works:

    • Compost feeds plants.
    • Coir holds moisture without waterlogging.
    • Perlite prevents compaction.

    Avoid garden soil. It compacts too heavily in containers.

    Planting Strawberries in a Tower

    Choose the Right Strawberry Type

    June-Bearing

    • One large harvest
    • Best for colder USDA zones (3–8)

    Everbearing

    • Two harvests per season
    • Ideal for containers

    Day-Neutral (Best for Towers)

    • Continuous fruiting
    • Excellent for USDA zones 4–10

    Recommended for vertical systems: Day-neutral varieties.

    Planting Technique

    • Gently tuck roots into holes.
    • Keep crown level with soil surface.
    • Do not bury crown.

    Why: Burying the crown causes rot.

    Spacing: One plant per hole.

    Sunlight Requirements

    Strawberries need:

    • 6–8 hours direct sunlight
    • South-facing exposure ideal
    • West-facing acceptable

    In very hot climates (USDA 9–10):

    • Provide afternoon shade
    • Use shade cloth (30%)

    Why: Excess heat reduces fruit production.

    Balcony tip:

    • Reflective walls increase light.
    • Rotate tower weekly for even growth.

    Watering Strategy for Strawberry Towers

    This is where most DIY towers fail.

    Strawberries in vertical systems dry out faster than ground beds.

    General Watering Guidelines

    • Spring: 2–3 times per week
    • Summer: 3–4 times per week
    • Extreme heat: Daily monitoring

    Soil should remain: Moist but never soggy.

    Install drip irrigation or a gravity-fed drip system if possible.

    Buying criteria for drip kits:

    • Adjustable emitters
    • Pressure regulator
    • Timer compatibility

    Cost: $30–$70 but reduces plant stress dramatically.

    Fertilizing Your Strawberry Tower

    Strawberries are moderate feeders.

    Use:

    • Balanced slow-release fertilizer (10-10-10)
    • Apply every 6–8 weeks

    During fruiting: Switch to potassium-rich feed.

    Avoid high nitrogen during fruiting—it promotes leaves over fruit.

    Maintenance impact: Container strawberries need more frequent feeding than in-ground plants.

    Pest Prevention in Vertical Strawberry Gardens

    Common pests:

    • Aphids
    • Spider mites
    • Slugs (less common in towers)
    • Birds

    Prevention strategies:

    • Neem oil spray every 14 days
    • Inspect undersides of leaves weekly
    • Install bird netting if necessary

    Why vertical growing helps: Better airflow reduces fungal outbreaks.

    Winter Care by USDA Zone

    Zones 3–6

    • Insulate tower with burlap.
    • Move to sheltered location.
    • Mulch top openings.

    Zones 7–10

    • Minimal protection needed.
    • Reduce watering in dormant period.

    Container strawberries are more exposed to freezing than ground plants.

    Budget vs Premium Setup Comparison

    Budget Setup ($40–$70)

    • Basic PVC pipe
    • Manual watering
    • DIY soil blend

    Pros: Affordable Customizable

    Cons: Requires more monitoring

    Premium Setup ($120–$200)

    • Pre-made vertical planter
    • Drip irrigation
    • Organic premium potting mix

    Pros: Lower maintenance More consistent yields

    Cons: Higher upfront cost

    Long-term benefit: Higher yield often offsets initial investment.

    Common Beginner Mistakes

    • Using heavy garden soil
    • Overwatering
    • Ignoring sunlight direction
    • Planting too many strawberries per level
    • Skipping fertilization

    Most failures stem from drainage or improper watering.

    FAQ:

    How many strawberries can you grow in a tower?

    A 4-foot tower can hold 15–25 plants depending on hole spacing. Expect 1–2 pounds per plant annually in optimal conditions.

    How deep do strawberry roots grow?

    Strawberry roots typically grow 6–12 inches deep. Ensure at least 8 inches of soil depth per planting pocket.

    Can strawberries survive winter in a planter tower?

    Yes, but protection depends on USDA zone. In colder climates (Zones 3–6), insulation is essential.

    How often should I replace strawberry plants?

    Productivity declines after 2–3 years. Replace plants or allow runners to establish new growth annually.

    Do strawberry towers need full sun?

    Yes. Minimum 6 hours direct sun. South-facing exposure produces best fruit yield.

    Is a self-watering system worth it?

    For hot climates or busy gardeners, yes. It reduces moisture stress and improves consistency.

    Conclusion

    A well-built strawberry planter tower DIY project isn’t just space-saving it’s yield-optimizing. With the right soil blend, proper drainage, balanced fertilization, and consistent watering, vertical strawberries can outperform traditional beds in small spaces.

    The key is respecting the plant’s biology: shallow roots, sensitivity to overwatering, and high sunlight needs.

    Build it correctly once, and your tower can produce sweet, clean fruit for years. Start with stable construction, invest in proper soil and irrigation, and choose day-neutral varieties for the longest harvest window.

    Small space doesn’t mean small harvest.

  • Hanging strawberry planters | How to Grow Productively Beginner Guideline

    Every product is independently reviewed and selected by our editors. If you buy something through our links, we may earn an affiliate commission at no extra cost to you.

    There’s something deeply satisfying about harvesting strawberries at eye level clean, bright red fruit cascading from a hanging basket. But while hanging strawberry planters look simple, they demand precision in soil structure, watering, and variety selection. Get those right, and you’ll enjoy continuous harvests from a balcony, patio, porch, or small backyard space.

    This guide breaks down exactly how to design, plant, and maintain hanging strawberry planters that actually produce not just survive.

    Introduction

    Many gardeners are drawn to hanging strawberry baskets for small spaces. They’re ideal for balconies, patios, and renters who can’t dig into the ground.

    Yet common problems appear quickly:

    • Soil dries out within hours in summer
    • Plants produce leaves but few berries
    • Roots overheat in shallow baskets
    • Fruit size declines after the first flush

    The issue is almost never the concept it’s improper setup.

    In this comprehensive guide, you’ll learn:

    • The best strawberry varieties for hanging baskets
    • Minimum container depth and size requirements
    • Ideal soil composition and pH
    • Watering strategies that prevent drought stress
    • Fertilizing schedules for consistent fruiting
    • Budget vs premium planter comparisons

    By the end, you’ll have a system designed for both productivity and long-term plant health.

    Quick Summary

    • Use baskets at least 10–12 inches deep
    • Choose day-neutral or everbearing varieties
    • Full sun: 6–8 hours daily (south-facing ideal)
    • Soil pH target: 5.5–6.8
    • Water daily in summer heat
    • Fertilize every 2–3 weeks during fruiting
    • Replace plants every 3–4 years

    Why Hanging Strawberry Planters Work

    Strawberries (Fragaria × ananassa) are naturally suited to hanging systems because:

    • They have shallow root systems (6–8 inches deep)
    • They produce runners that trail
    • Fruit benefits from airflow and reduced soil contact

    Elevating strawberries reduces:

    • Slug damage
    • Soil-borne fungal diseases
    • Fruit rot

    However, hanging systems increase watering frequency and root temperature exposure.

    Choosing the Right Hanging Planter

    Minimum Size Guidelines

    • Depth: 10–12 inches minimum
    • Diameter: 12–16 inches
    • Capacity: 3–5 plants per basket

    Shallower baskets (8 inches or less) dry too quickly and limit yield.

    Why depth matters: Strawberries may have shallow roots, but they need consistent moisture. More soil volume buffers against rapid drying.

    Material Comparison

    Plastic Hanging Baskets

    Pros:

    • Lightweight
    • Retain moisture well
    • Budget-friendly

    Cons:

    • Can overheat in intense sun

    Best for: Hot climates (USDA Zones 8–10) when paired with coco coir mix.

    Wire Baskets with Coco Liners

    Pros:

    • Excellent drainage
    • Attractive

    Cons:

    • Dry out quickly
    • Require daily watering in summer

    Best for: Mild climates (Zones 5–7).

    Self-Watering Hanging Planters

    Pros:

    • Reduced watering frequency
    • More consistent moisture
    • Higher yields

    Cons:

    • Higher upfront cost ($30–$60 per planter)

    Best for: Busy gardeners or hot climates.

    Buying criteria: Choose models with at least a 1–2 quart water reservoir.

    Best Strawberry Varieties for Hanging Planters

    June-bearing varieties produce heavily once per season and are less ideal for hanging baskets.

    Instead, choose:

    Day-Neutral Varieties (Best Option)

    • Albion
    • Seascape
    • Evie-2

    Why they work: Continuous fruiting matches container feeding cycles.

    Everbearing Varieties

    • Ozark Beauty
    • Quinault

    Produce 2–3 flushes per season.

    Avoid vigorous runner-heavy varieties unless you’re willing to prune frequently.

    Soil Composition for Hanging Strawberry Planters

    Never use garden soil.

    Ideal container mix:

    • 40% high-quality potting mix
    • 30% compost
    • 20% perlite or pumice
    • 10% worm castings

    pH: 5.5–6.8

    Why this works:

    • Compost provides nutrients
    • Perlite prevents compaction
    • Lightweight mix reduces basket strain

    Maintenance impact: Better soil reduces watering frequency and improves fruit size.

    Light Requirements

    Strawberries require:

    • 6–8 hours of direct sun daily
    • South-facing exposure preferred
    • East-facing acceptable with strong morning sun

    Less than 6 hours leads to:

    • Smaller berries
    • Reduced sweetness
    • Fewer flowers

    In extremely hot Zones (9–11), light afternoon shade reduces heat stress.

    Watering Hanging Strawberry Planters

    This is where most failures occur.

    Hanging baskets dry faster than ground containers due to:

    • Airflow around all sides
    • Smaller soil volume
    • Direct sun exposure

    Watering Frequency

    • Spring: Every 2–3 days
    • Summer (full sun): Daily, sometimes twice daily
    • Fall: Gradually reduce

    Check moisture 2 inches deep.

    Beginner mistake: Watering lightly. Always water thoroughly until it drains from the bottom.

    Upgrade Option: Drip Irrigation

    Install micro-drip emitters attached to a timer.

    Benefits:

    • Consistent moisture
    • Reduced plant stress
    • Improved fruit size

    Cost: $30–$75 for a small patio system.

    Highly recommended in USDA Zones 8–11.

    Fertilizing for Maximum Yield

    Strawberries in hanging planters exhaust nutrients quickly.

    Feeding Schedule

    • Slow-release balanced fertilizer at planting
    • Liquid feed every 2–3 weeks during fruiting

    Avoid high nitrogen fertilizers.

    Why: Excess nitrogen produces leaves instead of fruit.

    Maintenance impact: Consistent feeding increases berry size and sweetness.

    Temperature & USDA Zone Considerations

    Hardiness: Zones 3–10 depending on variety.

    Cold Climates (Zones 3–6)

    • Bring baskets into unheated garage
    • Or insulate with burlap and straw
    • Avoid freeze-thaw cycles

    Warm Climates (Zones 8–11)

    • Provide afternoon shade
    • Increase watering frequency
    • Watch for spider mites

    Pest & Disease Management

    Common issues:

    • Spider mites (hot, dry climates)
    • Aphids
    • Powdery mildew

    Prevention:

    • Good airflow
    • Avoid overhead watering
    • Weekly inspection
    • Neem oil if needed

    Elevated systems reduce slug damage significantly.

    6 Hanging Strawberry Planter Design Ideas

    1. Classic Porch Basket Trio

    Three identical baskets aligned along porch beam.

    Visual symmetry + consistent harvest.

    2. Tiered Hanging System

    Multiple hooks at staggered heights.

    Maximizes vertical production in small balconies.

    3. Wall-Mounted Hanging Brackets

    Ideal for patios with limited ceiling support.

    Use sturdy anchors rated for wet soil weight.

    4. Self-Watering Balcony System

    Premium setup with drip irrigation and reservoir baskets.

    Lowest maintenance option.

    5. Decorative Wrought-Iron Hanger

    Combines aesthetics with function.

    Ensure structure supports at least 20–25 lbs when wet.

    6. Mixed Strawberry & Herb Basket

    Strawberries + trailing thyme.

    Companion herbs deter some pests.

    Ensure similar watering needs.

    Budget vs Premium Setup Comparison

    Budget Setup ($50–$120)

    • Standard plastic baskets
    • Manual watering
    • DIY soil mix
    • Everbearing plants

    Higher maintenance, daily watering required.

    Premium Setup ($200–$500)

    • Self-watering planters
    • Drip irrigation system
    • Premium soil blend
    • Day-neutral varieties

    Lower labor, higher consistent yield.

    Common Beginner Mistakes

    • Using shallow baskets
    • Underwatering in summer
    • Overcrowding (more than 5 plants per basket)
    • Ignoring fertilization
    • Allowing excessive runners

    Prune runners unless propagating new plants.

    Frequently Asked Questions

    How many strawberry plants fit in a hanging basket?

    3–5 plants in a 12–16 inch basket.

    How often should I water hanging strawberries?

    Daily in summer heat. Check soil moisture regularly.

    Do hanging strawberries produce as much as ground plants?

    Yield per plant is similar, but soil volume limits total production.

    Can hanging strawberry planters survive winter?

    Yes, but protect roots in Zones 3–6.

    What is the best fertilizer for hanging strawberries?

    Balanced slow-release fertilizer plus biweekly liquid feed during fruiting.

    How long do hanging strawberry plants last?

    3–4 productive years before decline.

    Conclusion

    Hanging strawberry planters are one of the most efficient ways to grow fresh fruit in small spaces but they demand attention to soil volume, consistent watering, and proper variety selection.

    Choose baskets at least 10–12 inches deep. Use high-quality, well-draining potting mix. Provide full sun. Water thoroughly and consistently. Feed moderately but regularly.

    Investing in self-watering systems or drip irrigation dramatically reduces stress and improves fruit size and sweetness.

    With the right setup, your balcony or patio can produce steady harvests of clean, flavorful strawberries for years no ground garden required. The key is building a system that supports the plant’s biology, not just its appearance.