Every product is independently reviewed and selected by our editors. If you buy something through our links, we may earn an affiliate commission at no extra cost to you.
If you’re trying to boost flowers, fruiting, or strong root growth and avoid the “giant leafy plant with no blooms” problem the best low nitrogen fertilizer is one that feeds gently without pushing excess foliage.
After years of testing in containers, raised beds, and small backyard plots, the most consistently effective low nitrogen fertilizer is a Fish + Seaweed Bloom Blend (around 2‑8‑4 or 1‑4‑5).
Here’s why it wins and how it compares to other options.
The Overall Best Low Nitrogen Fertilizer
Fish + Seaweed Bloom Blend (e.g., 2‑8‑4)
This is the best-performing low‑N fertilizer I’ve used across tomatoes, peppers, flowering shrubs, and potted annuals.
Why it works so well:
Low nitrogen = no leafy overgrowth
High phosphorus = stronger roots and more blooms
Potassium = better fruit size and plant resilience
Seaweed reduces heat stress and supports flower set
Works quickly (results often visible in 7–10 days)
Real‑world results:
Helps tomatoes switch from leaf growth to fruit setting
Encourages continuous blooms on hibiscus, roses, and bougainvillea
Prevents blossom drop in peppers during hot spells
Good brands to look for (if you want specifics):
Neptune’s Harvest Tomato & Veg Formula (2‑4‑2)
Down to Earth Rose & Flower (4‑8‑4)
Dr. Earth Flower Girl (preferred for pots)
Best Organic Low Nitrogen Fertilizer (Dry)
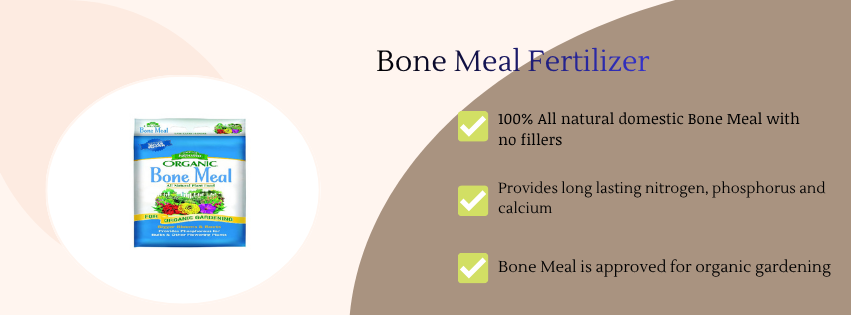
Bone Meal (N‑P‑K around 3‑15‑0)
Perfect for planting holes and long‑term bloom support.
Best for:
Roses
Bulbs
Peppers
Perennial flowers
Not ideal for:
Alkaline soil (nutrients release slowly)
Best Ultra‑Gentle Low Nitrogen Fertilizer
Liquid Seaweed (0‑0‑1 or similar)
Almost zero nitrogen, but incredible for:
Stress recovery
Flowering during heat waves
Boosting fruit set
I use this as a “rescue treatment” for drooping or heat-stressed plants.
Best Free/DIY Low Nitrogen Fertilizer
Wood Ash (0‑2‑4)
Use very lightly about 1 tablespoon per square foot.
Great for:
Fruiting plants
Potatoes
Plants needing potassium
Avoid around:
Blueberries or any acid-loving plants
Seedlings (too strong)
Best Slow-Release Low Nitrogen Fertilizer
Rock Phosphate (0‑3‑0)
Good for long-term root development and flowering.
Best for:
Perennials
Fruit trees
Root crops (carrots, beets, onions)
Not a quick fix think “season-long improvement.”
Which Is Best for Your Situation?
For tomatoes & peppers → Fish + Seaweed Bloom Blend
For roses & bulbs → Bone Meal
For stressed plants → Liquid Seaweed
For fruiting annuals → 2‑8‑4 Bloom Fertilizer
For root crops → Rock Phosphate
For budget gardeners → Wood Ash (lightly!)
FAQ
What N‑P‑K ratio counts as low nitrogen? Anything with N at 0–3 is low nitrogen.
Is low nitrogen fertilizer best for flowering? Yes. It helps plants shift energy from leaves to blooms.
When should I switch to low nitrogen for tomatoes? When the first flowers appear.
Is bone meal enough by itself? Good for roots and blooms, but adding seaweed helps overall plant strength.
Conclusion
The best all-around low nitrogen fertilizer is a Fish + Seaweed Bloom Blend (around 2‑8‑4). It’s effective, gentle, fast-acting, and works beautifully for both vegetable and flowering plants in home gardens especially in containers and raised beds.
Every product is independently
reviewed and selected by our editors. If you buy something through our links,
we may earn an affiliate commission at no extra cost to you.
If you’ve ever fed your plants and suddenly ended up with giant leafy growth but no flowers or fruit, you’ve experienced the classic “too much nitrogen” problem. I’ve run into this repeatedly in my own balcony containers and vegetable beds especially with tomatoes, peppers, and flowering ornamentals.
When plants need blooms, roots, or fruit not leaves you need a good low nitrogen fertilizer. But which ones actually work? And how low is “low”?
This guide breaks down the best low‑nitrogen options based on real-world use and simple gardening science.
Why Low Nitrogen Fertilizers Work
Nitrogen drives leaf growth. When nitrogen is high:
Plants get tall and leafy
Flowering slows
Fruits set poorly
Root crops become misshapen
Low nitrogen fertilizers shift the balance toward:
Blooms
Root development
Strong stems
Fruit production
In my beds, switching to a low‑nitrogen feed mid-season almost always triggers better flowering within 10–14 days.
Optional: compost to blend and improve soil texture
The Best Low Nitrogen Fertilizers (From Actual Garden Use)
1. Bone Meal (N‑P‑K around 3‑15‑0)
Why it works:
Extremely low nitrogen
High phosphorus for strong root and flower development
Perfect for planting bulbs or blooming plants What I’ve seen:
Tulips, roses, and peppers respond especially well
Best when mixed into planting holes
Not ideal for:
Heavy clay soil (breaks down slowly)
2. Bloom Booster or Flowering Fertilizer (e.g., 2‑8‑4 or 1‑4‑5)
Why I use it:
Balanced but low nitrogen
Immediate improvement in flower set on peppers, tomatoes, and annuals Best for:
Tomatoes once flowers appear
Hibiscus, bougainvillea, roses
Indoor flowering houseplants
3. Kelp Meal or Liquid Seaweed (0‑0‑1 or similar)
My favorite gentle option. Benefits:
Almost zero nitrogen
Packed with trace minerals and growth hormones
Great for stressed or heat‑exposed plants Real results:
Helps tomatoes set fruit during hot spells
Keeps potted flowers blooming longer
4. Wood Ash (0‑2‑4)
Works surprisingly well if used carefully. Pros:
Free if you have clean hardwood ash
Raises potassium levels (boosts fruiting) Cons:
Raises soil pH avoid around acid-loving plants
5. Rock Phosphate (0‑3‑0)
Good long-term option. Useful for:
Root crops like carrots and beets
Perennial ornamentals Slow-release, so don’t rely on it for quick fixes.
6. Compost (very low, usually 1‑1‑1)
Compost varies, but most household composts are naturally low in nitrogen. Great for:
Containers needing gentle feeding
Improving soil microbiology
Gardeners who prefer “no-measure” feeding
How to Use Low Nitrogen Fertilizer Safely
1. Match the Fertilizer to the Plant
Good candidates for low nitrogen feeding:
Tomatoes once flowering
Peppers after first blossoms
Cucumbers, squash, melons
Roses and ornamentals
Root crops (carrots, beets, onions)
Avoid low nitrogen for:
Leafy greens
Seedlings
Plants recovering from damage
2. Apply at the Right Stage
For fruiting plants: Switch to low nitrogen once the first flower cluster appears.
For flowering ornamentals: Start when buds form, then repeat every 2–3 weeks.
3. Don’t Overuse
Low nitrogen doesn’t mean “safe to pile on.” Excess phosphorus can cause:
Leaf discoloration
Stunted growth
Use the recommended dose.
4. Combine With Good Watering
Low nitrogen fertilizers often work best in consistently moist not soggy soil. Dry pots absorb nutrients poorly.
Professional Tips & Best Practices
For tomatoes, I switch to a 2‑8‑4 formula once flowers appear.
For roses, a mix of bone meal + liquid kelp works beautifully.
Use wood ash sparingly about 1 tablespoon per square foot.
If plants look leafy but bloomless, flush soil with water first, THEN use low nitrogen feed.
Seaweed is my go‑to for stressed plants it never burns.
Common mistakes:
Using bloom boosters too early (stunts vegetative growth)
Adding bone meal to alkaline soil (nutrients become unavailable)
Thinking “organic = no risk” overfeeding is still possible
FAQ
What N‑P‑K ratio is considered low nitrogen? Anything where the first number is 0–3 is considered low nitrogen.
Can I use low nitrogen fertilizer on all plants? No. Leafy plants like basil, lettuce, cilantro, spinach, and mint need more nitrogen.
Is low nitrogen fertilizer good for tomatoes? Yes once flowering starts. It encourages fruiting instead of leaf growth.
Is bone meal safe for all soil types? Works best in slightly acidic soil. In alkaline soil, it breaks down slowly.
How often should I use low nitrogen fertilizer? Most gardeners feed every 2–4 weeks during the blooming/fruiting period.
When NOT to Use Low Nitrogen Fertilizers
Avoid them for:
Seedlings
Young transplants
Leafy greens
Very poor soil needing overall nutrient improvement
Plants recovering from pruning or damage
In these cases, a balanced (3‑3‑3 or 5‑5‑5) feed works better.
Alternatives to Low Nitrogen Fertilizer
If you don’t have any on hand, try:
Diluted seaweed
Compost tea
A small amount of potash
Cutting back high‑nitrogen fertilizers
Each option gently shifts growth toward flowering.
Conclusion
A good low nitrogen fertilizer helps plants focus on what gardeners want most: flowers, fruits, and strong roots. Bone meal, kelp, bloom boosters, and wood ash are some of the most reliable and affordable options especially for tomatoes, peppers, roses, and fruiting annuals.
Once you match the fertilizer to the plant’s growth stage, you’ll see a noticeable improvement within a couple of weeks. Gardening is always a balance, and low nitrogen fertilizers are one of the easiest tools for steering plants toward healthy blooms and harvests.
Every product is independently reviewed and selected by our editors. If you buy something through our links, we may earn an affiliate commission at no extra cost to you.
If you garden long enough, you eventually wonder whether you can use a dead fish leftovers from fishing, aquarium losses, or seafood scraps as fertilizer. I’ve tested this in my own small backyard beds and large containers over several seasons. It works extremely well, but only if you prepare and bury it correctly.
Used the wrong way, dead fish can:
Smell terrible
Attract raccoons, cats, dogs, rats, and flies
Burn plant roots
Create anaerobic pockets in dense soil
Used the right way, it becomes a slow-release, nutrient-rich fertilizer that supports strong root growth and long-term soil health.
This guide shows exactly how to do it safely based on direct, real garden experience.
Why Using Dead Fish Works
Fish naturally contain:
Nitrogen (leaf and stem growth)
Phosphorus (root and flower development)
Calcium
Magnesium
Trace minerals
In practice, when buried properly:
Fish breaks down slowly
Soil microbes multiply
Plants establish deeper, stronger roots
Growth is steady without chemical spikes
This method is essentially the old “Three Sisters” approach Native American growers used buried fish under crops such as corn or squash.
What Actually You’ll Need
A dead fish or fish parts (heads, guts, carcasses all work)
Optional: biochar or brown leaves (balances nitrogen)
Gloves (highly recommended)
Eco- and beginner-friendly alternatives:
Fish scraps from the kitchen
Fish waste from cleaning store-bought fish
Aquarium fish you need to dispose of
Step-by-Step: How to Use Dead Fish as Fertilizer
1. Choose the Right Plant and Timing
Best time to use whole fish:
Before planting
At the start of spring
When preparing new beds
Best plant types:
Corn
Squash
Tomatoes
Peppers
Fruit trees
Large shrubs
Avoid small pots whole fish decomposes too slowly in containers.
2. Dig a Deep Hole
Depth is critical to avoid smell and animals digging. For annual vegetables:
Dig 10–12 inches deep
For fruit trees or large shrubs:
12–18 inches deep
Never bury fish shallowly. Anything less than 6–8 inches will attract critters.
3. Add Brown Materials
To reduce odor and balance nutrients, add:
A handful of dry leaves
A scoop of compost
A sprinkle of biochar
Crushed eggshells
This helps prevent anaerobic (smelly) decomposition.
4. Place the Fish at the Bottom
Lay the fish flat at the base of the hole. If it’s large, cut it into chunks decomposes faster and more evenly.
Tip: If using guts or fish heads, wrap them in paper before burying. It makes handling easier and reduces early odor.
5. Cover With Soil Before Planting
Add at least 5–6 inches of soil between fish and roots. Direct contact can burn young plants.
Plant above the covered soil layer, then water well.
6. Water Deeply for the First Week
Moist soil activates microbial breakdown and reduces odor. I usually give one deep soak right after planting, then resume normal watering.
7. Monitor Plant Response
Healthy signs include:
Deep green leaves
Strong early growth
Improved drought resistance
More flowers later in the season
What beginners sometimes misread as “overfertilization” is just faster early growth.
Professional Tips & Best Practices
Always bury fish at least 10 inches deep to avoid animals digging.
Don’t use in small pots the smell can linger and decomposition is slow.
Mix in a handful of soil microbes or compost to speed up breakdown.
For hot climates, bury a bit deeper to avoid rapid rot on the surface layer.
For clay soil, dig deeper and widen the hole to allow better oxygen flow.
Common beginner mistakes:
Burying fish too shallow
Planting directly on top of fish
Using fish in poorly drained soil (leads to rot smell)
Adding fish near indoor plants or patio containers
FAQ
Can I use a whole fish as fertilizer? Yes. Just bury it 10–12 inches deep and cover well.
Will using dead fish attract animals? Only if buried too shallow. At proper depth, it’s rarely an issue.
Can I use fish as fertilizer in containers? Not recommended for full fish use fish emulsion instead. Containers smell and attract pests easily.
How long does it take for a fish to break down? In warm soil: 3–6 weeks. In cool soil: up to 10–12 weeks.
Is it safe for edible plants? Yes fish is fully organic and breaks down into nutrients plants easily absorb.
Can I use fish scraps instead of whole fish? Absolutely. Heads, bones, and guts work just as well.
When NOT to Use Dead Fish as Fertilizer
Avoid this method if:
Soil is waterlogged or drains poorly
You garden in containers or very small raised beds
You have persistent raccoon or dog digging problems
You’re growing root vegetables (carrots may fork)
It’s mid-summer with high heat (fish decomposes too quickly near the surface)
For indoor plants: never use whole fish odor and pests are guaranteed.
Alternative Methods
If you want the benefits of fish without burying whole fish, try:
Fish Emulsion
Fast, safe for containers, low odor.
Fish Hydrolysate
More nutrients, ideal for flowering plants.
Fish Meal
Easy to store, long-release, great for raised beds.
Composting Fish Scraps
Hot composting eliminates odor and produces rich compost.
Each method works, but whole buried fish remains the most powerful long-term slow-release option.
Conclusion
Using dead fish as fertilizer is a proven, natural way to boost plant growth when buried correctly and deeply. It provides long-term nutrients, supports soil microbes, and improves plant resilience.
For beginners, the key is depth, soil cover, and choosing large in-ground or raised-bed plants not pots. With a little care, this traditional method becomes one of the most effective organic fertilizing practices in a home garden.
If you plant a heavy feeder over buried fish, you’ll see the difference within a few weeks and even more by mid-season. Happy planting!
Every product is independently
reviewed and selected by our editors. If you buy something through our links,
we may earn an affiliate commission at no extra cost to you.
If you’ve ever bought fish fertilizer expecting explosive plant growth, only to end up with a smelly watering can and uneven results, you’re not alone. I’ve tested multiple brands on my terrace garden, balcony pots, herb containers, and raised beds over the years and I’ve learned that not all fish fertilizers perform the same, especially in small spaces where odor, salt content, and nutrient balance matter more.
This guide cuts through marketing claims and highlights the best fish fertilizers based on real-world use, plant response, and beginner-friendly handling.
Improved soil texture over time But the biggest difference comes from how the fish is processed hydrolyzed fish fertilizers outperform emulsions in almost every test I’ve done.
What Materials You’ll Need
A quality fish fertilizer.
Watering can or hose-end sprayer
Measuring cap
Gloves (optional but helpful)
Optional: seaweed extract to balance nutrients
The Best Fish Fertilizers (Based on Real Use)
1. Alaska Fish Fertilizer 5-1-1 (Best for Beginners)
Why it works well:
Very forgiving even if you overwater slightly
Consistent leaf growth
Affordable and widely available
Where it shines:
Leafy greens
Herbs
Container vegetables
Downsides:
Stronger smell than hydrolyzed options
Not ideal for flowering plants close to bloom time
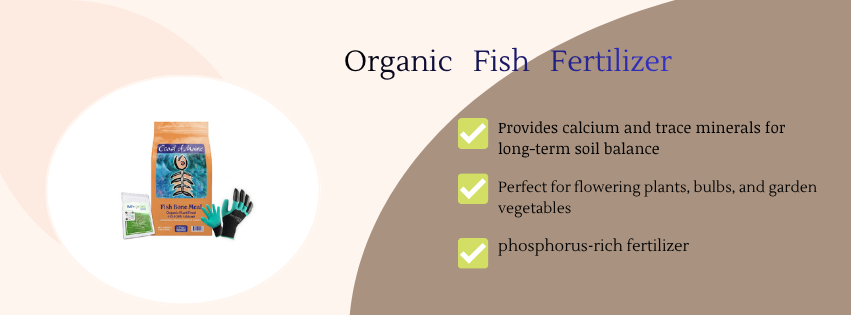
2. Neptune’s Harvest Hydrolyzed Fish Fertilizer (Best Overall)
Why I prefer it:
Much milder smell safer for balconies and small patios
Plants show noticeably deeper green after a week
Great for seedlings (when diluted)
What I’ve seen:
Faster recovery after transplanting
Stronger root systems
Less salt buildup in container soil
3. Neptune’s Harvest Fish + Seaweed Blend (Best for All-Purpose Use)
Why it stands out:
Balanced feeding leaves AND flowers respond well
Seaweed helps reduce leaf stress and supports flowering
My go-to for tomatoes, peppers, and roses early in the season
Best for:
Mixed garden beds
Fruiting plants during early growth
Containers that need consistent feeding
4. Dr. Earth Fish-Based Liquid Fertilizer (Best Organic Blend)
What I like:
Clean ingredient list
Noticeably boosts soil life in raised beds
Lower odor and good micronutrient profile
Suitable for:
Organic-focused gardeners
Soil health improvement over time
5. GS Plant Foods Organic Fish & Kelp (Best for Fast Response)
Real-world results:
Very quick improvement in leaf color
Works well for stressed plants
Good for foliar feeding (dilute heavily)
Not ideal for:
Indoor plants (slightly stronger smell)
How to Use Fish Fertilizer Correctly
1. Dilute Properly
Typical dilution I use:
1–2 tablespoons per gallon for established plants
1 teaspoon per gallon for seedlings or stressed plants
2. Apply at the Right Time
Best:
Early morning
Every 10–14 days
Avoid:
Midday heat
Rainy days (nutrients wash away)
3. Apply to Soil, Not Leaves
Especially in small spaces you’ll reduce smell and avoid leaf spotting.
4. Observe Your Plants
Good signs:
Deeper green foliage
Steadier growth
Warning signs:
Excessive leafiness without blooms (too much nitrogen)
Fungus gnats in overly moist soil
Professional Tips & Best Practices
Shake the bottle well nutrients settle.
Add a bit of seaweed for bloom-heavy plants.
Flush container soil with plain water monthly to prevent buildup.
Store tightly sealed cats and raccoons love the smell.
Common beginner mistakes:
Using fish fertilizer right before flowering
Applying too close to indoor spaces
Overfeeding, especially in small pots
FAQ
What is the best fish fertilizer for tomatoes? Use a fish + seaweed blend early in the season, then switch to a bloom-friendly fertilizer.
Why does my fish fertilizer smell so strong? Emulsions smell more than hydrolyzed options switch to Neptune’s Harvest to reduce odor.
Can I use fish fertilizer indoors? You can, but very sparingly. Even low-odor formulas have some smell.
Is fish fertilizer safe for pets? Yes, but pets may try to dig in. Let soil dry before letting them access the area.
How often should I use fish fertilizer? Every 2 weeks outdoors; every 3–4 weeks indoors.
When Not to Use Fish Fertilizer
Avoid it for:
Plants already producing blooms or fruit
Root crops close to harvest (excess nitrogen causes forking)
Very humid climates (attracts gnats if soil stays wet)
Indoor plants in low ventilation
Alternatives to Fish Fertilizer
Seaweed-only fertilizers: Best for flowering and fruiting
Worm castings: Odorless and great for indoor plants
Balanced organic granules: Slow-release and low-maintenance
Compost tea: Better for soil health without strong smell
Choose based on goals:
Leaf growth → fish fertilizer
Flowers/fruits → seaweed or bloom feed
Low-maintenance → slow-release granules
Conclusion
So, what’s the best fish fertilizer? For most home gardeners, Neptune’s Harvest Hydrolyzed Fish Fertilizer offers the best combination of performance, mild odor, and nutrient balance. Alaska 5-1-1 is a budget-friendly classic, while fish + seaweed blends give the most even results across plant types.
Used correctly, fish fertilizer can make a noticeable difference in leaf color, growth speed, and overall plant health especially in container gardens where nutrients wash out quickly.
Start light, observe your plants, and adjust as needed. Gardening rewards patient experimentation, and fish fertilizer is one tool that consistently earns its spot in my shed.
Every product is independently
reviewed and selected by our editors. If you buy something through our links,
we may earn an affiliate commission at no extra cost to you.
Many gardeners myself included start using fish fertilizer because it promises fast, natural growth. But after testing it on container herbs, leafy greens, flowering plants, and even houseplants, I quickly realized something: fish fertilizer is fantastic for many plants, but not all.
If you’ve ever noticed lush green leaves but disappointing blooms, or you struggled with a lingering smell after feeding your pots, you’ve run into the same issues beginner gardeners often face.
This guide explains clearly and from real use when fish fertilizer works beautifully, when it doesn’t, and how to get the best results without harming your plants or your space.
However, fish fertilizer is primarily nitrogen-heavy, which means:
Leafy plants thrive
Flowering and fruiting plants may grow big leaves but fewer blooms/fruits
Too much nitrogen in pots can cause root burn or fungus gnat issues
So while fish fertilizer is “natural,” it isn’t universally ideal.
What You’ll Need
Liquid fish fertilizer (hydrolyzed versions smell less than emulsions)
Watering can or spray bottle
Measuring spoon or cap
Gloves (fish fertilizer can linger on hands)
Optional: Seaweed extract for more balanced feeding
Budget-friendly alternatives:
Any generic fish emulsion
DIY fish amino acids (for advanced gardeners)
Eco-safe options:
OMRI-certified organic fish fertilizers
Fish + kelp blends
Step-by-Step: How to Use Fish Fertilizer Safely
1. Dilute Properly
Always follow the label, but a safe baseline for most plants is:
1–2 tablespoons per gallon of water For seedlings:
1 teaspoon per gallon
Never apply undiluted fish fertilizer to soil it burns roots fast.
2. Apply at the Right Time
Best timing:
Early morning or late afternoon
Every 10–14 days during active growth
Avoid:
Hot midday hours
Overcast humid days (slower drying, stronger smell)
3. Feed the Soil, Not the Leaves
In small containers, fish fertilizer can smell for hours on foliage. Pour at the soil line instead.
4. Watch for Visual Cues
Signs your plant is benefiting:
Leaves deepen in color
Growth becomes more vigorous
Soil microbes (white fungal threads) become more active
Signs it’s too much:
Mushy stems
Yellowing lower leaves
Fungus gnats appearing
5. Adjust Based on Plant Type
See below for which plants love it—and which don’t.
Professional Tips & Best Practices
Mix fish fertilizer with seaweed for a more balanced nutrient profile.
Flush containers with plain water monthly to avoid salt buildup.
Use outdoors whenever possible the smell, even mild, hangs around indoors.
Store tightly sealed so neighborhood cats and raccoons don’t get curious.
Avoid applying before heavy rain it washes away and wastes nutrients.
Common beginner mistakes:
Using it for flowering plants too close to bloom time
Overfeeding potted plants
Applying indoors (smell + pest interest)
Not shaking the bottle before use (nutrients settle)
FAQ
Does fish fertilizer work for indoor plants? Yes, but only mild, low-dose applications and be prepared for a slight smell. I use it sparingly indoors.
Why does my plant grow leaves but no flowers after using fish fertilizer? You’re giving too much nitrogen. Switch to a bloom fertilizer or add seaweed.
Can I use fish fertilizer on seedlings? Yes, but make it very dilute about 1/4 strength.
Is fish fertilizer safe for pets? Most pets find the smell irresistible. Keep pets away until soil dries.
How often should I apply fish fertilizer? Every 2 weeks for outdoor plants; every 3–4 weeks for indoor ones.
Does fish fertilizer attract animals? Sometimes especially raccoons, cats, and even curious dogs. Water it in well and avoid overuse.
When Not to Use Fish Fertilizer
Avoid or minimize fish fertilizer for:
Flowering plants during bud stage (tomatoes, peppers, roses, hibiscus)
Root crops close to harvest (carrots may fork)
Houseplants in poorly ventilated rooms
Soggy or compacted soil (can lead to rot and pests)
Low-light plants (extra nitrogen makes them leggy)
Climates with high humidity also amplify odor and gnat issues.
Alternative Methods or Solutions
Seaweed Extract Excellent for flowering and fruiting low nitrogen, high micronutrients.
Compost Tea Great for soil structure without strong smell.
Balanced Organic Fertilizers (5-5-5) Better for all-purpose feeding.
Slow-release Organic Pellets Best for busy beginners.
When to choose which:
Fish fertilizer: leafy greens, early growth stages
Seaweed: flowering and fruiting
Pellets: low-maintenance container gardeners
Conclusion
So is fish fertilizer good for all plants? Not exactly. It’s fantastic for leafy, fast-growing plants and early growth stages, but not ideal for bloom-heavy or fruiting plants without balance.
Used correctly, fish fertilizer can give your garden healthier soil, stronger roots, and greener leaves especially in small home gardens where soil nutrients deplete fast.
Start with gentle, diluted doses, watch how your plants respond, and adjust from there. Gardening is slow, forgiving, and wonderfully experimental. With a little observation, fish fertilizer can become one of your most reliable organic tools.
Every product is independently
reviewed and selected by our editors. If you buy something through our links,
we may earn an affiliate commission at no extra cost to you.
If you’ve ever bought liquid fish fertilizer, you already know two things:
it works beautifully on leafy greens, herbs, and flowering plants, and
it’s expensive.
When I started gardening on my small terrace, I went through bottles of the store‑bought stuff. Eventually, after watching how well my vegetables responded to real fish scraps, I began making my own fish fertilizer at home. It’s cheaper, more sustainable, and surprisingly easy as long as you follow the right method to control smell and fermentation.
This guide walks you through the exact process I use today, along with the small lessons I learned the hard way.
Why Homemade Fish Fertilizer Works So Well
Plants respond quickly to fish fertilizer because it supplies slow‑release nitrogen, amino acids, calcium, and trace minerals. In real gardens, I see the biggest improvements in:
stronger recovery after pruning or transplant shock
Unlike synthetic fertilizers, fermented fish fertilizer releases nutrients gradually and supports beneficial soil microbes. This is especially helpful in container gardens, where soil life often needs extra help.
What Materials You’ll Need
You can make fish fertilizer using two main ingredients plus a container.
Basic materials
Fish scraps (heads, bones, guts, or whole small fish)
Jaggery, brown sugar, or molasses
An airtight plastic bucket or jar (with a loose‑fitting lid)
A stirring stick
A strainer
Gloves (highly recommended)
Eco‑friendly options
Use fish scraps from kitchen waste or local fish markets
Choose unrefined jaggery for better microbial fermentation
Container note Avoid metal containers; fermentation liquids can corrode metal.
How to Make Fish Fertilizer (Fish Amino Acid) – Step-by-Step
This is the same process used in many organic farming practices. It ferments instead of rots, so you avoid foul smells when done right.
1. Prepare the fish scraps
Chop the fish into smaller pieces.
Use everything: head, bones, skin.
In warm climates, keep the scraps cold until you’re ready to use them.
Visual cue: The pieces should be about the size of large ice cubes.
2. Mix fish with jaggery or brown sugar (1:1 ratio)
For every 1 kg of fish scraps, use 1 kg of jaggery/brown sugar.
Layer fish, then sugar, then fish, then sugar.
End with a sugar layer on top to prevent surface mold.
Why: The sugar pulls moisture out of the fish and feeds the fermentation microbes.
3. Seal and store the container
Close the container but do not make it airtight; fermentation releases gases.
Keep it in a shaded, cool location such as a balcony corner or under a shelf.
Temperature note: Fermentation is fastest between 20–30°C (68–86°F).
4. Stir every 3–4 days
Use a wooden or plastic stick.
Visual cue: After about a week, you should see liquid collecting at the bottom and a deep brown color forming.
5. Ferment for 2–4 weeks
The longer you ferment, the smoother and less fishy the liquid becomes.
Smell tip: If it smells sweet‑fermented (like soy sauce), it’s perfect. If it smells rotten, too much air got in add more sugar and reseal.
6. Strain and bottle the liquid
Once fermentation is complete:
Strain the liquid fertilizer
Store it in dark, airtight bottles
Keep the bottles out of direct sun
You can reuse the leftover solids by fermenting them again with more sugar, or bury them in the soil around fruit trees.
How to Use Homemade Fish Fertilizer
Dilution matters; fish fertilizer is strong.
General dilution: 1 tablespoon in 1 liter of water For leafy vegetables: every 10–15 days For flowering plants: once every 2–3 weeks For seedlings: use a weaker mix 1 teaspoon per liter
Apply early morning or late evening. Avoid hot afternoons; it can stress the plants.
Professional Tips and Best Practices (From Hands-On Use)
Do not rush fermentation. Under‑fermented mixtures can smell and attract flies.
Keep ants away by placing the bucket inside a larger tray filled with water (simple moat).
Never apply undiluted fertilizer. It can burn tender roots.
Use on moist soil. Applying to dry soil reduces nutrient absorption.
Avoid storing near living areas. Even good fermentation has a noticeable aroma.
Filter well before putting into spray bottles. Small solids can clog nozzles.
Common Mistakes Beginners Make
Using too little sugar this causes rotting instead of fermenting
Keeping the lid fully airtight can cause gas buildup
Leaving in direct sun fermentation overheats and spoils
Not stirring leads to uneven breakdown
FAQ: Natural Voice‑Search Friendly Answers
1. Why does my homemade fish fertilizer smell rotten? It usually means too much air exposure or too little sugar. Add another layer of jaggery, stir gently, and reseal the lid loosely.
2. Can I use cooked fish or fried fish scraps? No. Oils, spices, and salt interfere with fermentation and soil microbes.
3. How long does fish fertilizer last? If bottled tightly and kept in the shade, it lasts 6–12 months.
4. Will it attract pests or cats? Once diluted and applied to the soil, it rarely attracts animals. Fermented fish smells much less than raw fish.
5. Can I use fish fertilizer on indoor plants? Yes but use a weak dilution and avoid overwatering. Some indoor plants may dislike the smell during application.
6. Is fish fertilizer safe for vegetable gardens? Yes. It’s one of the oldest organic fertilizers and safe when applied correctly.
When NOT to Use This Method
Avoid fish fertilizer if:
You garden in extremely hot climates (35°C+/95°F+), where fermentation spoils easily.
You live in a small apartment with no outdoor area it can smell during fermentation.
You’re growing very sensitive plants like some ferns or orchids; they prefer milder feeds.
Alternative Methods (If This One Isn’t Right for You)
1. Fish Emulsion (Cooked Method)
Faster; odor is milder.
Requires heating (not ideal indoors).
Slightly lower nutrient value.
2. Composting Fish Scraps
Mix into a hot compost pile.
Takes longer but zero smell if done right.
3. Store-Bought Fish Fertilizer
Clean, reliable, consistent.
Expensive but beginner-friendly.
If you have outdoor space and want maximum nutrient value, fermentation is still the best method.
Conclusion
Learning how to make fish fertilizer at home gives you one of the most effective organic plant boosters you can use especially in container gardens, where nutrients wash out quickly. With just fish scraps and jaggery, you can create a long-lasting, microbe-rich fertilizer that keeps plants greener, healthier, and more resilient.
It takes patience for the first batch, but once you get the hang of fermentation, it becomes a routine part of gardening one that saves money and reduces waste while giving your plants a noticeable growth boost.
If you want healthier plants without buying expensive fertilizers, this is one of the most reliable DIY methods you can master.
Every product is independently
reviewed and selected by our editors. If you buy something through our links,
we may earn an affiliate commission at no extra cost to you.
When I first started gardening, I didn’t have space for compost bins, tumblers, or fancy setups. What I did have was a small backyard and a corner of soil I wasn’t using. That’s when I learned the simplest method of all: making a compost pit in the ground.
A compost pit is beginner-friendly, low-maintenance, odor-free, and perfect for gardeners who want compost without constant turning or managing bins. In my own garden, pit composting has consistently produced rich, earthy compost that improved soil texture and boosted plant growth especially for vegetables that prefer deep, fertile beds like tomatoes, gourds, and leafy greens.
If you want a quiet, effective way to recycle kitchen scraps and build healthier soil, this guide walks you through the exact steps.
Why This Method Works
Pit composting is one of the oldest and most reliable composting methods. It works because the soil itself helps maintain moisture, regulate temperature, and protect the compost from pests.
The soil insulates the compost, speeding up breakdown.
Worms and microbes naturally migrate in, reducing labor.
Odors stay contained underground.
Moisture levels remain stable, even in hot climates.
Compost feeds the surrounding soil automatically.
In my garden, pits break down faster during warm, rainy seasons, and even in winter they quietly transform waste without attracting pests.
What Materials You’ll Need
Minimal tools everything is simple and backyard‑friendly.
A shovel or spade
A watering can or hose
Browns: dry leaves, cardboard pieces, shredded paper
Greens: fruit and vegetable scraps, coffee grounds, grass clippings
Optional: a simple cover (plywood, metal sheet, or straw)
Optional: brick edging to mark the pit
Eco-friendly choices:
Use fallen leaves as your main carbon source
Recycle cardboard packaging
Avoid pesticides near your pit to protect soil microbes
Step-by-Step: How to Make a Compost Pit in the Ground
1. Choose the right location
Pick a spot that is:
Slightly shaded (prevents drying out)
Away from heavy foot traffic
Not prone to flooding or standing water
At least 1–2 feet away from building foundations
For small yards, corners near beds work well. For fruit trees, a pit nearby enriches the soil naturally.
2. Dig the pit
Typical size for beginners:
Depth: 1.5–2 feet
Width: 2–3 feet
If you live in colder regions, slightly deeper pits help retain heat. If you have clay soil, widen the pit to improve airflow.
3. Add a base layer of browns
Add a 4–6 inch layer of:
Dry leaves
Shredded cardboard
Straw This absorbs moisture and prevents slimy buildup.
4. Add your greens
Add fruit and vegetable scraps, coffee grounds, or fresh grass clippings. Chop large pieces for faster breakdown.
Avoid:
Meat
Dairy
Oily foods
Diseased plants
Pet waste
These attract pests and complicate composting.
5. Add more browns to cover scraps
This is the secret to an odor-free pit. Cover each batch of greens with equal or slightly more browns.
6. Moisten the pile
Water lightly until it feels like a wrung-out sponge. The soil will help maintain moisture, but avoid flooding the pit.
7. Cover the pit
Use:
A flat stone
A wooden plank
A simple metal sheet
Or just a thick layer of leaves
Covering helps retain heat, keep pests out, and protect the pile during rain.
8. Continue filling over time
Keep adding alternating layers of greens and browns until the pit is full. If you add weekly kitchen waste, a pit typically fills in 4–6 weeks.
9. Seal and let it decompose
Once full, cover the pit completely with soil. Allow 6–12 weeks for complete breakdown.
You can plant on top after decomposition root vegetables and leafy greens thrive here.
Pro Tips & Best Practices
Dig multiple pits in rotation if you produce a lot of kitchen waste.
Add a handful of old soil or finished compost to speed decomposition.
Sprinkle wood ash lightly to add potassium (avoid overusing).
If ants appear, your pit is too dry add moisture.
If scraps stay intact for weeks, add more greens and ensure the pit isn’t too dry.
In hot climates, mulch the top with leaves to prevent drying.
FAQ
Why does my compost pit smell bad? It’s too wet or has too many greens. Add dry leaves, cover with soil, and let it rest.
Can I put citrus, onion, or garlic into a compost pit? Yes, moderate amounts are fine. Soil microbes handle them well.
How long does a compost pit take to decompose? Typically 6–12 weeks, faster in warm, moist seasons.
Can I plant directly over the compost pit? Yes. Once the compost has finished breaking down, the soil becomes nutrient-rich great for vegetables or fruit shrubs.
Do compost pits attract pests? Not when properly covered with browns and soil. Avoid meats and oils.
Can I make a compost pit in clay soil? Yes, but widen the pit and add extra dry materials to improve airflow.
When NOT to Use a Compost Pit
Avoid pit composting if:
Your yard has poor drainage or floods easily
You live in a region with burrowing animals
You need frequent access to turn and manage compost
You live in rented housing where digging is restricted
If digging is impossible, use bins or a tumbler.
Alternative Methods
Trench composting
Similar to a pit but long and narrow
Great for vegetable beds
No turning needed
Surface composting (sheet composting)
Add layers directly on the soil
Good for large yards
Not ideal in windy areas
Compost bins
Cleaner and more organized
Faster decomposition with turning
Requires some maintenance
Conclusion
Learning how to make a compost pit in the ground is one of the easiest, most hands-off ways to create rich compost at home. With a simple hole, some kitchen scraps, and regular layering, the soil does most of the work for you.
This method suits beginners, busy gardeners, and anyone who wants natural, healthy soil without maintaining a traditional compost bin. Keep it simple, follow the moisture and layering cues, and trust the process the earth has been composting long before we learned to garden.
Every product is independently
reviewed and selected by our editors. If you buy something through our links,
we may earn an affiliate commission at no extra cost to you.
When I first tried starting a compost pile as a beginner, I thought it would be as simple as tossing kitchen scraps into a corner of the yard. Instead, I got fruit flies, slow decomposition, and a smelly mess.
The problem wasn’t composting it was my method. Composting is a biological process, and like most living systems, it needs the right balance of ingredients, moisture, and airflow. Once I understood that, every compost pile I built whether in a backyard corner, a terrace bin, or a raised bed turned into rich, dark compost that made my soil lighter, healthier, and easier to work with.
If you’re a beginner, this guide will walk you through a composting method that’s simple, forgiving, and suitable for both small and large spaces.
Why This Method WorksFor Beginner
A compost pile works because microbes and insects break down organic material into humus. They need:
When these are balanced, compost heats up naturally and breaks down quickly. In my garden, a well-built pile produces usable compost in 6–10 weeks depending on weather and ingredients.
For beginners, this system is ideal because it’s:
Low-maintenance
Odor-free when done right
Flexible (works with what you have)
Easy to troubleshoot
What Actually You’ll Need
You don’t need fancy equipment. Beginners can start with the basics:
Greens: fruit scraps, vegetable peels, coffee grounds, fresh grass clippings
A garden fork or long stick for turning
Water supply
Optional: compost activator or a handful of soil
Eco-friendly and budget-friendly alternatives:
Use old cardboard boxes instead of buying carbon materials
Keep a small kitchen caddy for collecting scraps
Reuse leaf piles from fall
Step-by-Step: Starting a Compost Pile for Beginners
1. Choose a location
Pick a spot with:
Light shade (prevents the pile from drying too fast)
Easy access to water
Good drainage (avoid low, soggy spots)
If you’re on a terrace or patio, build your pile in a container or large bin instead of directly on the ground.
2. Start with a brown layer
A 4–6 inch layer of dry leaves or cardboard creates airflow at the base and prevents soggy compost later.
3. Add your first greens
Add fruit peels, vegetable scraps, or fresh grass. Do not add:
Meat
Dairy
Oily foods
Diseased plants These attract pests or slow decomposition.
4. Continue layering greens and browns
A simple beginner ratio: 1 part greens : 2 parts browns
This keeps the pile balanced, prevents odors, and speeds up decomposition.
5. Check and adjust moisture
Squeeze a handful of material:
Moist like a wrung‑out sponge = perfect
Too dry = sprinkle water
Too wet = add more shredded cardboard or dry leaves
Humidity and climate matter:
Dry, windy areas need more moisture
Humid climates need more browns
6. Turn the pile every 7–10 days
Use a fork or stick to lift and mix. Signs your pile needs turning:
Smells sour
Looks compacted
Feels cold after being warm
Turning adds oxygen and prevents the pile from going anaerobic.
7. Wait for it to finish
Finished compost is:
Dark brown
Crumbly
Earth‑smelling
No longer heating up
Depending on season and ingredients, expect 6–12 weeks.
Professional Tips & Best Practices
Chop scraps small; they break down faster.
Add a handful of old compost or soil to introduce microbes.
Keep cardboard pieces no larger than your palm.
Cover kitchen scraps with browns immediately to prevent flies.
Don’t overwater soggy piles rot instead of composting.
In hot climates, shade your pile to prevent drying out.
FAQ
Why does my compost smell? You added too many greens or it’s too wet. Add dry leaves or cardboard and turn it.
Can I compost citrus or onions? Yes, in moderation. They break down slower but don’t harm the pile.
How long until I get usable compost? 6–12 weeks in warm months; slower in winter.
Can I compost weeds? Only if your pile gets hot (above 130°F). Otherwise, the seeds may survive.
Do I need a compost bin? No. A simple open pile works, but bins are tidier and retain heat better.
When NOT to Start a Compost Pile
Avoid open-pile composting if:
You live in an area with strict rodent or wildlife regulations
You have limited outdoor space (use a bin instead)
You cannot turn the pile regularly
You need fast compost (bokashi or vermicompost works quicker)
Alternative Composting Methods
Vermicomposting (worm composting)
Great for apartments or balconies
Produces nutrient-rich worm castings
Requires consistent moisture and shade
Bokashi composting
Works indoors
Handles cooked food and meat
Requires bokashi bran
Tumbler composting
Cleaner and faster
Requires a store-bought tumbler
Easier for people with limited mobility
Conclusion
If you’re starting a compost pile for beginners, the most important thing to remember is to keep it simple. Build layers, balance greens and browns, keep the pile moist not soggy and turn it now and then.
With a little observation and patience, your scraps will transform into rich compost that upgrades your soil, boosts plant health, and reduces garden waste. It’s one of the easiest, most satisfying habits you can add to your gardening routine.
Every product is independently
reviewed and selected by our editors. If you buy something through our links,
we may earn an affiliate commission at no extra cost to you.
If you garden in containers or a small backyard like I do, you’ve probably run into the “store‑bought potting mix problem”: it dries out too fast, gets compacted after a season, or just feels lifeless. That’s usually because commercial mixes lack the biology and humus that healthy soil needs.
Learning how to make soil from compost changed the way my terrace and balcony plants grow. When compost is blended correctly with a few structural ingredients, you get a living, nutrient-rich soil that drains well, holds moisture, and supports strong root growth.
This isn’t theory it’s what consistently works across my home garden beds, terrace planters, and even the small pots on my windowsill.
Plants don’t thrive in pure compost. It’s too rich, too dense, and retains more moisture than most roots like. But when compost is mixed with aeration materials (like perlite or coarse sand) and water‑retentive elements (like coco coir), it behaves like high-quality soil.
Compost contributes:
Humus (improves structure and moisture balance)
Active microbes (boost nutrient cycling)
Slow-release nutrients (safe for young roots)
The aeration materials keep the soil fluffy, while the organic fibers help with water retention a balance beginner gardeners often miss. When these ingredients meet, they form a stable, living soil much better than anything bagged.
What Materials You’ll Need
Mature compost (fully broken down, dark, crumbly)
Coco coir or peat moss
Perlite or coarse sand
Garden topsoil (optional, adds minerals)
A large tub or bucket for mixing
Gloves (especially if you have skin sensitivity)
Mesh sieve (optional, for removing clumps)
Eco-friendly options:
Replace perlite with pumice or crushed terracotta
Replace peat with coco coir (more sustainable)
Step-by-Step: How to Make Soil From Compost
1. Check if your compost is ready
Season: Anytime, but avoid mixing wet, freshly finished compost in winter. Cues:
No heat in the pile
Cannot identify original materials
Smells earthy, not sour
Texture is crumbly, not sticky
If your compost is still warm or smelly, let it mature for another couple of weeks.
2. Sift the compost (optional but helpful)
Use a mesh sieve or simple kitchen colander. Remove sticks, stones, and semi‑decomposed pieces. This ensures a smooth, consistent soil mix, especially for seedlings and potted plants.
3. Prepare your base mix
A proven ratio I rely on:
40% compost
40% coco coir or peat moss
20% perlite, pumice, or coarse sand
Why: Compost alone is too dense; coco coir holds water without becoming heavy; perlite keeps roots oxygenated.
4. Add garden soil (optional)
Add about 10–20% real soil if you want more minerals and weight. This helps outdoor containers stay grounded on windy balconies. Skip for seedlings or very light pots.
5. Mix thoroughly
Do this in the shade to preserve compost microbes. Break apart clumps. The final mix should feel light and fluffy, not sticky or soggy.
6. Test moisture
Grab a handful and squeeze:
A few drops = perfect
No moisture = add a little water
Wet stream = add more coco coir or perlite
Consistent moisture is what keeps the soil biologically active.
7. Let the soil “rest” (optional but beneficial)
Allow the mixed soil to sit for 3–5 days in a cool area. This stabilizes microbial activity before planting.
Pro Tips & Best Practices
Use fully mature compost only — immature compost can burn roots.
Add a handful of wood ash for potassium (not for acid-loving plants).
Mix in crushed eggshells for a slow calcium release.
For balcony pots, increase perlite to prevent compaction.
For hot climates, increase coco coir so the soil doesn’t dry too quickly.
Avoid overloading containers with compost it can lead to fungus gnats.
FAQ
1. Can I use only compost as soil? No. Pure compost holds too much moisture and compacts quickly. Plants need structural support and aeration.
2. Why is my compost-based soil attracting gnats? Often caused by overly wet compost or fresh food scraps. Let compost dry slightly before mixing.
3. How often should I refresh soil made from compost? Every 1–2 growing seasons. Add a 20–30% top-up of fresh compost each season.
4. Can I make soil from compost without coco coir? Yes. Use leaf mold, shredded bark, or peat moss as the moisture-holding component.
5. Is compost soil safe for seedlings? Yes, if the compost is mature and diluted. Seedlings prefer soil that is lighter and less nutrient-dense.
When NOT to Use This Method
Avoid compost-heavy soil mixes:
For cacti, succulents, or Mediterranean herbs (use sandier mixes).
In very humid climates where soil stays wet (risk of root rot).
With uncomposted kitchen waste (can attract pests).
Alternative Methods
Using only compost + sand
Good for hardy shrubs and trees, but too coarse for most potted plants.
Compost + garden soil (no aeration agent)
Traditional but heavy; fine for ground beds, not ideal for containers.
Store-bought potting mix + compost
Easiest for beginners and more predictable, but less customizable.
Conclusion
Learning how to make soil from compost is one of the most rewarding skills for home and balcony gardeners. The mix you create becomes a living foundation one that supports stronger roots, better moisture balance, and naturally healthier plants.
Every product is independently
reviewed and selected by our editors. If you buy something through our links,
we may earn an affiliate commission at no extra cost to you.
If you garden in containers or a small backyard like I do, you’ve probably run into the “store‑bought potting mix problem”: it dries out too fast, gets compacted after a season, or just feels lifeless. That’s usually because commercial mixes lack the biology and humus that healthy soil needs.
Learning how to make soil from compost changed the way my terrace and balcony plants grow. When compost is blended correctly with a few structural ingredients, you get a living, nutrient-rich soil that drains well, holds moisture, and supports strong root growth.
This isn’t theory it’s what consistently works across my home garden beds, terrace planters, and even the small pots on my windowsill.
Why This Method Works
Plants don’t thrive in pure compost. It’s too rich, too dense, and retains more moisture than most roots like. But when compost is mixed with aeration materials (like perlite or coarse sand) and water‑retentive elements (like coco coir), it behaves like high-quality soil.
The aeration materials keep the soil fluffy, while the organic fibers help with water retention a balance beginner gardeners often miss. When these ingredients meet, they form a stable, living soil much better than anything bagged.
What Materials You’ll Need
Mature compost (fully broken down, dark, crumbly)
Coco coir or peat moss
Perlite or coarse sand
Garden topsoil (optional, adds minerals)
A large tub or bucket for mixing
Gloves (especially if you have skin sensitivity)
Mesh sieve (optional, for removing clumps)
Eco-friendly options:
Replace perlite with pumice or crushed terracotta
Replace peat with coco coir (more sustainable)
Step-by-Step: How to Make Soil From Compost
1. Check if your compost is ready
Season: Anytime, but avoid mixing wet, freshly finished compost in winter. Cues:
No heat in the pile
Cannot identify original materials
Smells earthy, not sour
Texture is crumbly, not sticky
If your compost is still warm or smelly, let it mature for another couple of weeks.
2. Sift the compost (optional but helpful)
Use a mesh sieve or simple kitchen colander. Remove sticks, stones, and semi‑decomposed pieces. This ensures a smooth, consistent soil mix, especially for seedlings and potted plants.
3. Prepare your base mix
A proven ratio I rely on:
40% compost
40% coco coir or peat moss
20% perlite, pumice, or coarse sand
Why: Compost alone is too dense; coco coir holds water without becoming heavy; perlite keeps roots oxygenated.
4. Add garden soil (optional)
Add about 10–20% real soil if you want more minerals and weight. This helps outdoor containers stay grounded on windy balconies. Skip for seedlings or very light pots.
5. Mix thoroughly
Do this in the shade to preserve compost microbes. Break apart clumps. The final mix should feel light and fluffy, not sticky or soggy.
6. Test moisture
Grab a handful and squeeze:
A few drops = perfect
No moisture = add a little water
Wet stream = add more coco coir or perlite
Consistent moisture is what keeps the soil biologically active.
7. Let the soil “rest” (optional but beneficial)
Allow the mixed soil to sit for 3–5 days in a cool area. This stabilizes microbial activity before planting.
Professional Tips & Best Practices
Use fully mature compost only immature compost can burn roots.
Add a handful of wood ash for potassium (not for acid-loving plants).
Mix in crushed eggshells for a slow calcium release.
For balcony pots, increase perlite to prevent compaction.
For hot climates, increase coco coir so the soil doesn’t dry too quickly.
Avoid overloading containers with compost it can lead to fungus gnats.
FAQ
1. Can I use only compost as soil? No. Pure compost holds too much moisture and compacts quickly. Plants need structural support and aeration.
2. Why is my compost-based soil attracting gnats? Often caused by overly wet compost or fresh food scraps. Let compost dry slightly before mixing.
3. How often should I refresh soil made from compost? Every 1–2 growing seasons. Add a 20–30% top-up of fresh compost each season.
4. Can I make soil from compost without coco coir? Yes. Use leaf mold, shredded bark, or peat moss as the moisture-holding component.
5. Is compost soil safe for seedlings? Yes, if the compost is mature and diluted. Seedlings prefer soil that is lighter and less nutrient-dense.
When NOT to Use This Method
Avoid compost-heavy soil mixes:
For cacti, succulents, or Mediterranean herbs (use sandier mixes).
In very humid climates where soil stays wet (risk of root rot).
With uncomposted kitchen waste (can attract pests).
Alternative Methods
Using only compost + sand
Good for hardy shrubs and trees, but too coarse for most potted plants.
Compost + garden soil (no aeration agent)
Traditional but heavy; fine for ground beds, not ideal for containers.
Store-bought potting mix + compost
Easiest for beginners and more predictable, but less customizable.
Conclusion
Learning how to make soil from compost is one of the most rewarding skills for home and balcony gardeners. The mix you create becomes a living foundation one that supports stronger roots, better moisture balance, and naturally healthier plants.
Take your time, adjust ratios based on your climate and containers, and trust your observations. Gardening improves most when you watch how your plants respond and make small tweaks along the way.