• Unique Bird Bath Ideas Outdoor

    Every product is independently reviewed and selected by our editors. If you buy something through our links, we may earn an affiliate commission at no extra cost to you.

    A thoughtfully placed bird bath can transform a silent yard into a living, breathing ecosystem. Within days, you’ll notice finches, robins, chickadees, and even butterflies stopping by. But not all bird baths work well. Many become algae-filled mosquito bowls or decorative pieces birds ignore entirely.

    If you’re investing time and money into your outdoor space, your bird bath should be both beautiful and biologically functional. Below are unique outdoor bird bath ideas designed with real horticultural insight covering placement, drainage, materials, maintenance, cost, and long-term performance.

    Introduction

    Many homeowners install a bird bath for aesthetic appeal, only to discover birds rarely use it. The common mistakes? Water too deep, poor placement, slippery surfaces, or stagnant water that breeds mosquitoes.

    A well-designed bird bath does more than decorate your garden. It:

    • Supports local bird populations
    • Encourages natural pest control
    • Adds dynamic movement to landscapes
    • Enhances pollinator diversity

    This guide will show you exactly how to choose or build a bird bath that birds actually use while keeping maintenance practical and affordable.

    Quick Summary

    • Water depth: 1–2 inches maximum in center
    • Placement: Partial shade, near shrubs for shelter
    • Surface: Textured or sloped for grip
    • Cleaning frequency: Every 2–3 days in summer
    • Material: Concrete, ceramic, resin, natural stone, or metal (with precautions)
    • Winter care: Heated option in USDA zones 4–7
    • Mosquito prevention: Moving water or frequent refresh

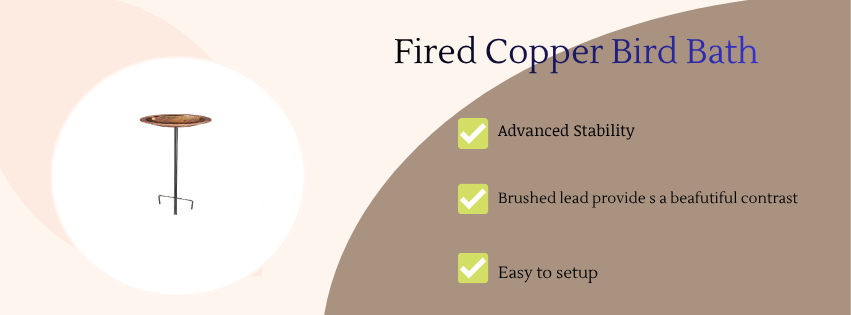
    1. Natural Stone Basin Bird Bath

    Why It Works

    Birds instinctively trust natural materials. A shallow stone basin mimics puddles and rock depressions found in the wild.

    Stone also regulates temperature better than thin metal or plastic, keeping water cooler in summer.

    How to Implement

    • Choose a basin 1.5–2 inches deep
    • Diameter: 14–20 inches
    • Place on compacted gravel base for drainage stability
    • Elevate 2–3 feet to deter predators

    For ground-level installations, create a 2-inch gravel base underneath to prevent sinking and water pooling.

    Cost Considerations

    • Natural carved stone: $80–$250
    • Faux stone resin: $40–$90

    Maintenance Impact

    Low to moderate. Algae forms more slowly on stone, but scrubbing with a stiff brush weekly is still necessary.

    Common Mistake

    Choosing polished stone. Birds need grip look for rough texture.

    2. Solar Fountain Bird Bath (Moving Water Feature)

    Why Moving Water Changes Everything

    Birds locate water by sound. A gentle fountain dramatically increases usage.

    Moving water also:

    • Discourages mosquito breeding
    • Reduces algae stagnation
    • Oxygenates water

    How to Implement

    Choose a solar fountain pump with:

    • 1.5–2W minimum output
    • Adjustable spray height
    • Filter screen to prevent clogging

    Position in south-facing sunlight for consistent power.

    Cost

    • Entry-level solar pump: $25–$40
    • Premium adjustable models: $60–$120

    Maintenance

    Clean pump intake weekly. Debris clogging is the biggest issue.

    Beginner Mistake

    Buying a pump without battery backup. Without direct sun, it stops running.

    3. Ground-Level Bird Bath Oasis

    Best For Naturalistic Gardens

    Some species like mourning doves and towhees prefer ground-level water.
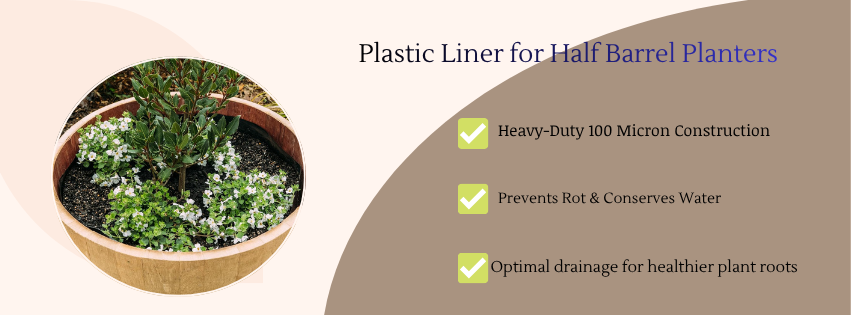
    How to Design It

    • Dig shallow depression
    • Add pond liner
    • Top with sand and small stones
    • Keep depth under 2 inches

    Surround with:

    • Native grasses
    • Low shrubs (3–6 feet away for predator safety)

    Why It Works

    Birds feel secure when they have nearby escape cover—but not dense foliage that hides cats.

    Cost

    $30–$75 DIY setup.

    Maintenance

    Higher maintenance. Ground baths collect debris quickly.

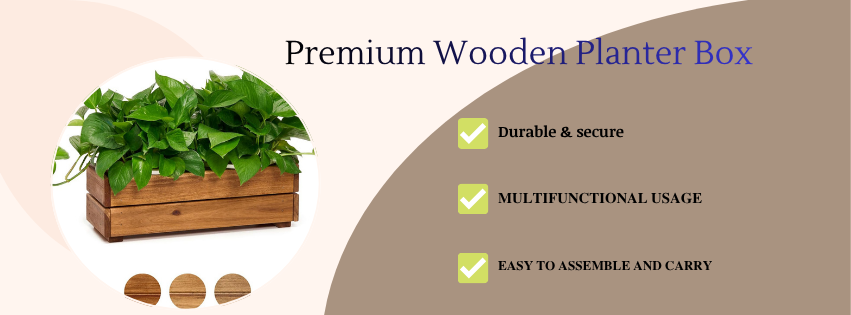
    4. Repurposed Planter Bird Bath

    Small-Space Balcony-Friendly Option

    Unused ceramic planters can become elegant bird baths.

    Implementation

    • Plug drainage hole with waterproof sealant
    • Add 1-inch gravel layer
    • Fill with water up to 1.5 inches
    • Place on plant stand

    For balconies:

    • Ensure weight rating
    • Add saucer below to catch spills

    Why It Works

    Planters are already frost-resistant and outdoor-rated.

    Cost

    $20–$60 depending on material.

    Maintenance

    Similar to standard bowl baths. Avoid glazed surfaces that become slippery.

    5. Tiered Bird Bath with Plant Integration

    Combining Water + Planting

    Incorporate shallow water basin atop a planter filled with:

    • Creeping thyme
    • Trailing lobelia
    • Native sedges

    Soil Composition for Base Planter

    Use:

    • 40% compost
    • 40% high-quality potting mix
    • 20% perlite for drainage

    Why This Works

    Evapotranspiration from plants cools the surrounding microclimate.

    Birds prefer cooler water in summer.

    Container Depth

    Minimum 10–12 inches for plant health.

    Cost

    $75–$200 depending on materials.

    Maintenance

    Moderate plant watering plus basin cleaning.

    6. Hanging Bird Bath for Patios

    Ideal for Predator-Prone Areas

    Hanging baths deter cats.

    Implementation

    • Use sturdy chain rated for outdoor use
    • Diameter: 12–16 inches
    • Install hook into structural beam, not trim

    Light Consideration

    Partial shade (east-facing exposure is ideal).

    Too much direct afternoon sun (west-facing) increases evaporation.

    Cost

    $35–$120.

    Maintenance

    Refill frequently. Smaller volume evaporates quickly.

    7. Heated Winter Bird Bath (Zones 4–7)

    Why Winter Water Is Critical

    Natural water sources freeze. Birds dehydrate more in winter than summer.

    What to Look For

    • Thermostatically controlled heating
    • Energy use under 150 watts
    • GFCI outlet compatibility

    Cost

    $70–$150 initial investment.

    Maintenance

    Minimal check for ice buildup and electrical safety.

    Important Safety Note

    Never add salt or antifreeze.

    8. Minimalist Concrete Modern Bird Bath

    For Contemporary Landscapes

    Concrete complements modern patios and raised beds.

    Construction Tips

    Use:

    • 1:2:3 cement:sand:gravel mix
    • Reinforcement mesh
    • Slight center slope

    Seal with wildlife-safe concrete sealer.

    Why It Works

    Heavy weight prevents tipping. Long lifespan (10+ years).

    Cost

    DIY: $50–$90 Precast: $150–$300

    Maintenance

    Scrub every 5–7 days in warm climates.

    9. DIY Drip-Feature Bird Bath

    The Ultimate Bird Magnet

    A slow drip from irrigation tubing creates irresistible sound.

    How to Install

    Connect:

    • ¼-inch drip line
    • Adjustable emitter (1–3 GPH)
    • Timer

    Position drip over basin edge.

    Why It Works

    Mimics natural rainfall.

    Cost

    $40–$80 if irrigation already exists.

    Maintenance

    Low, but check emitter for mineral buildup.

    Placement Strategy: The Most Overlooked Factor

    Even the best design fails with poor placement.

    Ideal Location Checklist

    • 10–15 feet from dense shrubs
    • Within 5 feet of perching branch
    • Partial shade (east exposure preferred)
    • Visible from indoor viewing window

    Avoid:

    • Under heavy leaf drop
    • Directly beneath bird feeders (contamination risk)

    Water Quality and Cleaning Protocol

    Birds are sensitive to pathogens.

    Cleaning Routine

    • Dump and rinse every 2–3 days
    • Scrub weekly with:
      • 1 part vinegar
      • 9 parts water

    Avoid bleach unless disinfecting after illness outbreak.

    Mosquito Prevention

    • Refresh water frequently
    • Use moving water
    • Never allow standing stagnant water for more than 3 days

    Soil and Landscape Integration

    If placing bath within garden beds:

    Soil Requirements Around Base

    Use well-draining soil:

    • 40% topsoil
    • 30% compost
    • 20% coarse sand
    • 10% perlite

    Good drainage prevents base erosion and mosquito pooling.

    Budget vs Premium Comparison

    FeatureBudget SetupPremium Setup
    MaterialResin/PlasticStone/Concrete
    Longevity2–4 years10+ years
    MaintenanceHigherLower
    StabilityLightweightHeavy, stable
    AestheticDecorativeArchitectural

    If staying under $50, prioritize depth and texture over style.

    Beginner Mistakes to Avoid

    • Water too deep
    • No cleaning routine
    • Full sun placement
    • Slippery glazed surfaces
    • No predator awareness
    • Adding chemicals to water

    Frequently Asked Questions

    1. How deep should an outdoor bird bath be?

    1–2 inches at the center, with gently sloping edges. Deeper water discourages small birds.

    2. Where is the best place to put a bird bath?

    Partial shade, near shrubs for shelter, but at least 10 feet from dense hiding spots for predators.

    3. How often should I clean a bird bath?

    Every 2–3 days in summer. Weekly scrubbing prevents algae buildup.

    4. Do solar fountains scare birds?

    No. In fact, moving water attracts more species. Start with low spray height.

    5. Can bird baths spread disease?

    Yes, if neglected. Regular cleaning eliminates risk.

    6. What is the best material for durability?

    Concrete and natural stone last longest and remain stable in wind.

    7. Do bird baths attract mosquitoes?

    Only stagnant water does. Moving water or frequent dumping prevents breeding.

    Final Thoughts

    A well-designed outdoor bird bath is not just a decorative accessory it is an ecological investment.

    When built correctly with shallow depth, proper placement, stable materials, and routine maintenance it transforms your yard into a functional wildlife habitat.

    You’ll see:

    • Increased bird diversity
    • Natural insect control
    • More pollinator activity
    • Greater connection to seasonal changes

    Start simple if needed. Even a shallow stone basin can make a dramatic difference within days. Over time, upgrading to a fountain or drip system multiplies the benefits.

    The key is not extravagance. It’s functionality.

    Build for the birds first. Beauty follows naturally.

  • What to plant around a bird bath

    Every product is independently reviewed and selected by our editors. If you buy something through our links, we may earn an affiliate commission at no extra cost to you.

    A bird bath alone rarely attracts birds for long. It’s the surrounding plants the shelter, food sources, and layered habitat that turn a simple water feature into a living ecosystem. If your bird bath sits exposed in the lawn and rarely gets visitors, the problem isn’t the water. It’s the landscaping.

    Done correctly, planting around a bird bath creates shade, protection from predators, perching zones, and natural food sources. Done poorly, it creates hiding spots for cats, messy droppings in water, and constant maintenance headaches.

    This guide walks you through exactly what to plant around a bird bath  with real horticultural detail so your garden works for both plants and birds.

    Many homeowners place a bird bath in the center of the yard thinking visibility equals attraction. In reality, birds avoid exposed areas. They need:

    • Quick escape routes
    • Nearby perches
    • Protection from wind
    • Food sources within short flight distance

    The goal isn’t decoration. It’s habitat layering.

    By the end of this guide, you’ll know:

    • Which shrubs, perennials, and grasses work best
    • How far plants should sit from the basin
    • Soil and drainage considerations
    • How sun exposure affects both birds and plants
    • Maintenance realities most blogs ignore

    Quick Summary

    • Plant dense shrubs 3–6 feet away for shelter
    • Use native flowering perennials for pollinators
    •  Add ornamental grasses for cover
    • Avoid thorny or messy fruit trees directly overhead
    • Ensure well-draining soil around the base
    • Maintain clear flight paths
    • Choose plants suited to your USDA zone

    Why Planting Around a Bird Bath Matters

    Bird baths in isolation feel unsafe to birds. They prefer areas where they can:

    • Perch nearby before bathing
    • Escape quickly if threatened
    • Dry off in shrubs
    • Forage for insects or seeds

    Strategic planting increases bird activity significantly often within weeks.

    But plants must be placed correctly.

    Too close = debris and contamination. Too far = birds won’t use the bath.

    The Ideal Layout Around a Bird Bath

    Think in layers.

    Layer 1: Open Access Zone (0–2 Feet)

    Keep this mostly clear.

    • Low groundcovers only
    • No tall plants blocking approach
    • Maintain clear flight path

    This reduces predator ambush risk and keeps water cleaner.

    Layer 2: Perching & Shelter Zone (3–6 Feet Away)

    This is where the magic happens.

    Install:

    • Dense shrubs
    • Small ornamental grasses
    • Flowering perennials

    This gives birds immediate cover after bathing.

    Layer 3: Background Habitat (6+ Feet)

    Here you can plant:

    • Taller shrubs
    • Small native trees
    • Berry-producing plants

    This builds a full ecosystem.

    Best Shrubs to Plant Around a Bird Bath

    Shrubs provide protection and nesting zones.

    1. Serviceberry (Amelanchier spp.)

    • USDA Zones: 4–9
    • Light: Full sun to partial shade
    • Soil: Well-drained loam; tolerates clay if amended
    • Mature height: 10–20 feet

    Why it works: Produces early berries birds love.

    Maintenance: Low. Annual pruning for shape.

    Cost: $40–$120 depending on size.

    Avoid planting directly overhead to prevent water contamination from droppings.

    2. Inkberry Holly (Ilex glabra)

    • Zones: 4–9
    • Light: Full sun to part shade
    • Soil: Slightly acidic, well-draining
    • Height: 5–8 feet

    Why it works: Evergreen cover year-round.

    Maintenance: Minimal pruning. Benefits from mulch.

    Excellent for privacy and wind buffering.

    3. Dwarf Hydrangea

    • Zones: 3–8
    • Light: Morning sun, afternoon shade (east-facing ideal)
    • Soil: Rich, well-draining, high organic matter

    Why it works: Provides shade and insect attraction.

    Beginner mistake: Planting in deep shade reduces blooms.

    Best Perennials Around a Bird Bath

    Perennials attract insects, which feed birds.

    1. Coneflower (Echinacea)

    • Zones: 3–9
    • Full sun (south or west exposure)
    • Soil: Well-drained; tolerates poor soil

    Why it works: Seeds attract finches.

    Maintenance: Deadhead for blooms, leave seed heads in fall.

    2. Black-Eyed Susan (Rudbeckia)

    • Zones: 3–9
    • Full sun
    • Drought tolerant once established

    Low cost and reliable.

    3. Salvia

    • Zones: 4–10 depending on variety
    • Requires 6+ hours of sun
    • Excellent drainage needed

    Why it works: Attracts pollinators, hummingbirds.

    Avoid heavy clay soil unless amended with compost and grit.

    Ornamental Grasses for Cover

    Grasses provide subtle shelter without blocking visibility.

    Feather Reed Grass (Calamagrostis)

    • Zones: 4–9
    • Full sun
    • Height: 3–5 feet

    Low maintenance. Cut back in early spring.

    Little Bluestem

    • Zones: 3–9
    • Drought tolerant
    • Native prairie grass

    Excellent for low-water landscapes.

    Groundcovers Near the Base

    Keep immediate perimeter simple.

    Creeping Thyme

    • Zones: 4–9
    • Full sun
    • Excellent drainage required

    Why it works: Low height, aromatic, pollinator-friendly.

    Sweet Woodruff (Shade Areas)

    • Zones: 4–8
    • Prefers moist, well-drained soil

    Best for north-facing placements.

    Soil Preparation Around a Bird Bath

    Healthy plants = healthy ecosystem.

    Ideal Soil Composition

    For mixed perennial beds:

    • 50% native soil
    • 30% compost
    • 20% coarse sand or expanded shale (for clay soils)

    Why: Improves drainage and root oxygenation.

    Bird baths often sit on compacted lawn soil. Loosen soil 12 inches deep before planting.

    Cost: Compost $5–$8 per bag Soil amendment for 50 sq ft: $40–$80

    Maintenance impact: Better soil reduces watering frequency and plant stress.

    Sunlight Considerations

    Birds prefer partially shaded baths.

    Best Placement:

    • Morning sun (east-facing exposure)
    • Afternoon shade

    Too much west sun heats water excessively in Zones 8–10.

    Match plants to exposure.

    What NOT to Plant Around a Bird Bath

    Avoid these mistakes:

    1. Thorny Roses Too Close

    Blocks access and increases predator hiding spots.

    2. Large Fruit Trees Overhead

    Fruit debris contaminates water quickly.

    3. Invasive Species

    English ivy, bamboo  high maintenance and ecological harm.

    4. Tall Dense Hedge Within 1 Foot

    Creates predator ambush risk.

    Watering & Maintenance Reality

    More plants = more watering.

    Perennials typically need:

    • 1 inch of water weekly
    • Deep watering over frequent shallow watering

    Mulch 2–3 inches deep (but keep away from bird bath pedestal).

    Annual cleanup:

    • Prune shrubs late winter
    • Divide perennials every 3–4 years

    Budget vs Premium Landscape Setup

    Budget ($150–$300)

    • 2–3 shrubs
    • 6–8 perennials
    • Mulch
    • DIY soil amendment

    Maintenance: Moderate

    Premium ($600–$1,500)

    • Native layered planting design
    • Drip irrigation system
    • Decorative stone border
    • Larger specimen shrubs

    Lower long-term watering cost due to irrigation efficiency.

    Drip irrigation kits are worth considering if you want consistent root-zone watering without splashing debris into the bath.

    Pest & Predator Considerations

    Bird-friendly gardens must deter predators.

    • Keep 3–6 feet clearance from dense hiding shrubs.
    • Avoid placing bath directly under feeders (reduces mess).
    • Clean bath every 2–3 days to prevent algae and mosquito breeding.

    Elevated baths (24–36 inches high) are safest.

    Seasonal Strategy by USDA Zone

    Zones 3–5

    Focus on hardy natives and evergreens for winter cover.

    Zones 6–8

    Wide perennial selection available.

    Zones 9–11

    Choose drought-tolerant plants; avoid overwatering.

    FAQ

    How close should plants be to a bird bath?

    Keep dense shrubs 3–6 feet away. Groundcovers can be within 1–2 feet as long as flight access remains open.

    What flowers attract birds to a bird bath?

    Coneflowers, salvia, bee balm, and black-eyed Susans attract insects and seed-eating birds.

    Should a bird bath be in sun or shade?

    Morning sun and afternoon shade is ideal to keep water cool and reduce algae growth.

    Can I plant tall grasses next to a bird bath?

    Yes, but position them 3–5 feet away to avoid blocking access or creating predator hiding spots.

    Do plants around a bird bath make it dirtier?

    If poorly placed, yes. Avoid overhead fruiting trees and excessive leaf drop directly above the basin.

    What soil is best for plants around a bird bath?

    Well-draining loamy soil enriched with compost. Avoid compacted clay without amendment.

    Conclusion

    Planting around a bird bath isn’t about decoration it’s about habitat design.

    When you combine:

    • Clear access zones
    • Layered native shrubs
    • Pollinator-friendly perennials
    • Proper soil preparation
    • Smart sun positioning

    You create a functional ecosystem, not just a garden feature.

    The reward is measurable: more bird visits, healthier plants, reduced maintenance, and a landscape that feels alive year-round.

    Start small if needed. Add two shrubs and a handful of perennials this season. Improve the soil properly. Space plants strategically.

    Within months, your bird bath will no longer sit quietly it will become the center of a thriving backyard sanctuary.

  • How to use a bird bath as a planter | A complete Guideline

    Every product is independently reviewed and selected by our editors. If you buy something through our links, we may earn an affiliate commission at no extra cost to you.

    A forgotten bird bath doesn’t have to sit empty or collect stagnant water. With the right setup, it can become one of the most striking and space-efficient planters in your garden. Whether you’re working with a small patio, balcony, or compact backyard, converting a bird bath into a planter creates height, character, and serious visual impact.

    This guide walks you through exactly how to do it properly so your plants thrive instead of struggle.

    Introduction

    Many gardeners inherit or find old bird baths that crack, leak, or simply don’t attract birds anymore. The problem? Most people either throw them away or try to plant directly into them without understanding drainage, soil depth, or root limitations and the plants fail.

    Done correctly, a bird bath planter can support succulents, herbs, shallow-rooted annuals, and even pollinator plants. Done incorrectly, it becomes a waterlogged root rot disaster.

    Oupeng pebbles polished gravel

    In this guide, you’ll learn:

    • Which bird baths work best
    • How to modify for proper drainage
    • What soil mix to use
    • What plants actually thrive in shallow basins
    • Maintenance realities most blogs ignore

    Quick Summary

    •  Ensure drainage (drill hole or use a liner system)
    •  Ideal soil depth needed: 4–8 inches minimum
    •  Use lightweight, well-draining potting mix
    •  Best for shallow-rooted plants (sedum, herbs, annuals)
    •  Place in correct sun exposure (south or west = full sun)
    •  Water more frequently than ground beds
    •  Fertilize lightly every 4–6 weeks during growing season

    Step 1: Ensure Which Bird Bath Suitable for Planting

    Not all bird baths are equal.

    Material Matters

    Concrete Bird Baths

    • Heavy, stable, weather-resistant
    • Usually thick enough to drill drainage holes
    • Best for permanent garden installations
    • Cost if buying used: $25–$80

    Resin or Plastic Bird Baths

    • Lightweight
    • Easier to drill
    • Less durable long term
    • Good for balconies

    Metal Bird Baths

    • Can overheat in full sun
    • Rust risk unless sealed
    • Best used with liner pots

    If your bird bath has a cracked bowl, that’s fine for planting often cracks improve drainage.

    Step 2: Drainage Is Non-Negotiable

    This is where most DIY conversions fail.

    Bird baths are designed to hold water plants are not.

    Why Drainage Matters

    Without drainage:

    • Roots suffocate
    • Soil becomes anaerobic
    • Fungal root rot develops
    • Mosquitoes breed

    In shallow containers especially, drainage is the difference between success and failure.

    Option 1: Drill a Drainage Hole (Best Long-Term Solution)

    How to Do It

    • Use a masonry bit for concrete
    • Drill 1–2 holes, ½ inch diameter
    • Place hole in lowest point of basin

    Cost: $10–$25 for masonry drill bit if you don’t own one.

    Maintenance impact: Minimal once done.

    Option 2: No-Drill Method (Rental or Delicate Pieces)

    If you can’t drill:

    • Add 1 inch of gravel at base
    • Insert a nursery pot with drainage holes
    • Remove after heavy rain if needed

    This method is less ideal long term but works for balconies or rental homes.

    Step 3: Soil Composition for a Bird Bath Planter

    Because depth is limited, soil quality matters more than in raised beds.

    Ideal Soil Mix

    For most plantings:

    • 60% high-quality potting mix
    • 20% compost (screened, fine texture)
    • 20% perlite or pumice

    Why this works:

    • Potting mix retains moisture
    • Compost feeds plants naturally
    • Perlite prevents compaction in shallow bowls

    Avoid garden soil. It compacts too easily and suffocates roots.

    For Succulent or Drought Displays

    Use:

    • 50% cactus mix
    • 25% perlite
    • 25% coarse sand

    Shallow bowls hold moisture longer than terracotta pots. Fast-draining soil prevents rot.

    Step 4: Understanding Root Depth Limitations

    Most bird bath bowls provide 4–6 inches of depth.

    This restricts plant selection.

    Plants That Work Well

    Shallow-Rooted Annuals

    • Alyssum
    • Lobelia
    • Petunias
    • Pansies

    Root depth needed: 4–6 inches

    Succulents

    • Sedum
    • Echeveria
    • Sempervivum

    Root depth needed: 3–5 inches

    Herbs (Selective)

    • Thyme
    • Chives
    • Oregano

    Avoid:

    • Basil (needs 8–12 inches)
    • Tomatoes
    • Peppers
    • Root vegetables

    Beginner mistake: Overcrowding. In shallow containers, roots compete aggressively.

    Step 5: Sunlight Positioning

    Bird baths are often placed in open garden centers but your plants may need different exposure.

    Light Guidelines

    Full Sun (6–8 Hours Daily)

    South- or west-facing placement Best for:

    • Succulents
    • Petunias
    • Thyme

    Partial Sun (4–6 Hours)

    East-facing is ideal Best for:

    • Pansies
    • Lobelia
    • Lettuce (cool season)

    Shade (Under Trees)

    North-facing Best for:

    • Impatiens
    • Coleus

    Concrete bowls retain heat. In USDA Zones 8–10, full west sun can overheat shallow roots. Monitor mid-afternoon soil temperature.

    Step 6: Watering Strategy for Shallow Containers

    Bird bath planters dry out faster than raised beds but slower than small pots.

    General Watering Frequency

    • Spring: Every 3–4 days
    • Summer: Every 1–2 days in hot climates
    • Fall: Weekly
    • Winter: Only when soil dries completely

    Always check 1 inch below soil surface before watering.

    Why frequent watering matters: Shallow soil holds limited moisture volume.

    Why overwatering is common: Gardeners assume large concrete bowls hold more soil than they do.

    Step 7: Fertilization Schedule

    Bird bath planters are essentially container gardens.

    Nutrients leach out quickly.

    Recommended Fertilizing

    • Slow-release granular fertilizer at planting
    • Liquid fertilizer every 4–6 weeks
    • Reduce feeding in late fall

    Organic option: Worm castings top-dressed every 6 weeks.

    Cost impact: $10–$20 per season.

    Maintenance impact: Low but consistent feeding keeps displays vibrant.

    Step 8: Design Ideas That Actually Work

    1. Succulent Bowl Garden

    Why it works: Low water needs, shallow roots, sculptural look.

    Maintenance: Low.

    Best zones: USDA 9–11 outdoors year-round. In colder zones, move indoors before frost.

    2. Pollinator Mini Garden

    Plant:

    • Dwarf salvia
    • Alyssum
    • Compact marigolds

    Why it works: Elevated height attracts butterflies and bees.

    Maintenance: Moderate watering, deadheading required.

    3. Herb Feature for Patios

    Plant:

    • Thyme (trailing edge)
    • Chives center
    • Oregano filler

    Why it works: Accessible harvesting height.

    Maintenance: Trim regularly to prevent woody growth.

    Budget vs Premium Setup Comparison

    Budget Setup ($30–$60 Total)

    • Secondhand bird bath
    • Basic potting soil
    • Annual flowers
    • No irrigation system

    Best for beginners testing the concept.

    Premium Setup ($150–$300 Total)

    • High-quality concrete or cast stone bath
    • Custom-drilled drainage
    • Premium soil blend
    • Drip irrigation line
    • Layered plant design

    Lower long-term maintenance, stronger plant performance.

    Pest and Disease Prevention

    Because bird bath planters are elevated, they’re less prone to:

    • Slug damage
    • Ground pests

    However, watch for:

    • Aphids (especially on herbs)
    • Powdery mildew in humid climates
    • Root rot from poor drainage

    Prevention tips:

    • Space plants properly
    • Avoid overhead watering late evening
    • Inspect weekly

    Common Beginner Mistakes

    • No drainage hole
    • Using garden soil
    • Overcrowding plants
    • Ignoring sun exposure
    • Planting deep-root crops

    Avoiding these prevents 90% of failures.

    Winter Care by USDA Zone

    Zones 9–11

    Can remain outdoors year-round.

    Zones 6–8

    Hardy perennials may survive; protect during frost.

    Zones 3–5

    Treat as seasonal display. Empty and store bowl or cover to prevent freeze cracking.

    Concrete absorbs moisture and may crack if frozen repeatedly.

    FAQ

    Can you plant directly into a bird bath without drilling holes?

    It’s possible but risky. Without drainage, roots can rot quickly. A liner pot with holes is a safer alternative.

    What plants grow best in a shallow bird bath planter?

    Succulents, alyssum, lobelia, thyme, and compact annuals thrive due to shallow root systems.

    How deep should soil be in a bird bath planter?

    Minimum 4 inches. Ideally 6–8 inches for stronger root development.

    How often should you water a bird bath planter?

    In summer, every 1–2 days depending on heat. Always check soil moisture before watering.

    Can I grow vegetables in a bird bath planter?

    Only shallow-rooted greens like leaf lettuce. Avoid tomatoes, peppers, and carrots.

    Do bird bath planters attract pests?

    Less than ground beds. Elevated design reduces slug and rodent problems.

    Final Thoughts

    A bird bath planter is more than a decorative idea it’s a practical small-space gardening solution when done correctly.

    By focusing on:

    • Proper drainage
    • Shallow-root-appropriate plants
    • High-quality soil
    • Correct sun placement
    • Consistent watering

    You transform an unused garden feature into a productive, visually striking focal point.

    This setup works especially well for patios, balconies, and compact gardens where vertical dimension matters. With minimal cost and manageable maintenance, you gain seasonal color, pollinator support, or even fresh herbs at arm’s reach.

    If you have an old bird bath sitting unused, don’t discard it. Modify it properly, plant it intelligently, and it will become one of the most conversation-worthy elements in your garden.

  • Small bird bath planter ideas

    Every product is independently reviewed and selected by our editors. If you buy something through our links, we may earn an affiliate commission at no extra cost to you.

    A small bird bath doesn’t have to sit empty or collect stagnant water. With the right soil structure, drainage strategy, and plant selection, it can become a stunning shallow planter perfect for patios, balconies, and compact gardens.

    But here’s the reality: bird baths are designed to hold water, not support root systems. Without proper drainage modification and shallow-root planning, most bird bath planters fail within weeks.

    This guide walks you through practical, horticulture-backed small bird bath planter ideas that actually thrive covering soil composition, drainage engineering, sun exposure, plant choices by USDA zone, watering frequency, and long-term maintenance.

    Introduction

    Small bird bath planters are ideal for:

    • Cottage gardens
    • Small-space patios
    • Balcony gardens
    • Entryway accents
    • Memorial or focal displays

    However, they present three structural challenges:

    • Shallow depth (often 2–6 inches)
    • No built-in drainage holes
    • Limited soil volume

    To succeed, you must work with shallow-rooted plants and engineer proper water exit points.

    Let’s break it down step by step.

    Quick Summary:

    • Typical Depth: 2–6 inches
    • Drainage: Drill ¼–½ inch holes or elevate inner liner
    • Best Soil: Lightweight, high-drainage mix
    • Ideal Plants: Succulents, moss, alyssum, hens-and-chicks
    • Sun Exposure: South or east-facing preferred
    • Watering: Every 3–7 days depending on climate
    • USDA Zones: 3–11 (plant dependent)

    Step 1: Evaluate Your Bird Bath Structure

    Bird baths are usually made from:

    • Concrete
    • Resin
    • Ceramic
    • Metal

    Each material impacts drainage and heat retention.

    Concrete

    • Durable
    • Heavy
    • Absorbs moisture
    • Suitable for drilling

    Resin

    • Lightweight
    • Easy to drill
    • May warp in extreme heat

    Ceramic

    • Fragile
    • Risky to drill
    • Best used with insert method

    Metal

    • Heats quickly
    • Not ideal for full-sun succulents in hot zones

    Material influences plant selection and watering frequency.

    Step 2: Add Drainage (Critical Step)

    Without drainage, roots suffocate.

    Option 1: Drill Drainage Holes (Best Method)

    • Use masonry bit for concrete
    • Drill 3–5 holes
    • ¼–½ inch diameter
    • Evenly spaced

    This allows excess water to exit completely.

    Option 2: Use a Hidden Nursery Pot Insert

    If drilling isn’t possible:

    • Place shallow plastic pot inside
    • Drill holes in pot
    • Elevate slightly using small stones

    This allows water to drain into basin without flooding roots.

    Avoid filling entire basin with gravel it creates a perched water table and worsens drainage.

    Step 3: Choose the Right Soil Mix

    Never use heavy garden soil.

    Because bird baths are shallow, soil structure is everything.

    Ideal Soil Composition for Most Plantings

    • 40% compost
    • 30% coco coir or peat moss
    • 20% perlite or pumice
    • 10% coarse sand

    For succulents:

    • 50% cactus mix
    • 30% pumice
    • 20% coarse sand

    Why This Works

    • Perlite increases oxygen
    • Sand improves drainage
    • Compost supplies nutrients
    • Coir stabilizes moisture

    Cost consideration:

    Because volume is small, upgrading to premium mix ($20–25 per bag) is affordable and improves plant survival dramatically.

    Best Small Bird Bath Planter Ideas That Actually Work

    1. Succulent Mini Garden (Most Popular)

    Best for:

    • USDA Zones 8–11 outdoors year-round
    • Cooler zones as seasonal display

    Plants:

    • Hens and chicks (Sempervivum)
    • Sedum
    • Echeveria

    Light:

    6+ hours direct sun (south-facing ideal).

    Watering:

    Every 7–14 days depending on heat.

    Maintenance impact:

    Low.

    Why it works:

    Succulents have shallow root systems and tolerate limited soil depth.

    2. Moss and Shade Garden Bowl

    Perfect for:

    • North or east-facing patios
    • USDA Zones 3–9

    Plants:

    • Sheet moss
    • Small ferns
    • Baby tears (Soleirolia)

    Soil:

    Higher compost content.

    Watering:

    Keep evenly moist but never soggy.

    Maintenance:

    Moderate requires moisture monitoring.

    3. Cottage Flower Display

    Use shallow-rooted annuals:

    • Sweet alyssum
    • Lobelia
    • Dwarf pansies
    • Violas

    Soil depth:

    Minimum 4–6 inches.

    Sun:

    East-facing or partial sun preferred.

    Fertilize every 2 weeks with diluted liquid feed.

    High visual payoff, higher maintenance.

    4. Herb Accent Planter

    Works best with:

    • Thyme
    • Chives
    • Oregano

    Minimum 5–6 inches soil depth required.

    Full sun preferred (6 hours daily).

    Avoid parsley or basil unless basin depth allows 6+ inches.

    5. Rock and Succulent Desert Bowl

    Add:

    • Decorative gravel top-dressing
    • Small stones for contrast

    Benefits:

    • Reduces evaporation
    • Stabilizes soil
    • Enhances visual texture

    Use light-colored stones in hot climates to reduce heat buildup.

    Sun Exposure and Placement Strategy

    Understanding directional light prevents plant stress.

    • South-facing: Best for succulents
    • West-facing: Hot afternoon sun (monitor heat)
    • East-facing: Ideal for flowers and herbs
    • North-facing: Shade plants only

    In USDA Zones 8–10, avoid metal basins in direct afternoon sun due to overheating risk.

    Watering Strategy for Shallow Planters

    Shallow soil dries quickly.

    Typical schedule:

    • Spring: Every 4–5 days
    • Summer: Every 2–3 days (non-succulents)
    • Fall: Weekly

    Always check soil 1–2 inches deep before watering.

    Signs of overwatering:

    • Yellow leaves
    • Mushy stems
    • Mold growth

    Signs of underwatering:

    • Wilting
    • Crispy leaf edges
    • Soil pulling from edges

    Because volume is small, overwatering is more common than underwatering.

    Pest Prevention Basics

    Common issues:

    • Fungus gnats (overwatering)
    • Aphids (flowers)
    • Spider mites (dry climates)

    Prevention:

    • Ensure proper drainage
    • Avoid soggy soil
    • Use neem oil if needed

    Healthy soil structure reduces pest pressure significantly.

    Budget vs Premium Setup

    Budget Setup

    • Existing bird bath
    • Basic potting soil
    • Seasonal flowers

    Cost: $30–60

    Pros:

    Affordable Quick setup

    Cons:

    Shorter plant lifespan More watering

    Premium Setup

    • Drilled drainage holes
    • Premium soil mix
    • Organic slow-release fertilizer
    • Decorative stone top-dressing

    Cost: $75–150

    Pros:

    Improved plant health Lower failure rate Better aesthetics

    Cons:

    Higher upfront investment

    Premium setup reduces replanting costs long term.

    Common Beginner Mistakes

    • Not adding drainage holes
    • Using heavy garden soil
    • Overcrowding plants
    • Ignoring sun direction
    • Overwatering shallow cavities

    Bird bath planters are shallow micro-environments. Precision matters.

    FAQ

    Can I turn any bird bath into a planter?

    Yes, if you add proper drainage or use an insert system.

    How deep does soil need to be?

    Minimum 4 inches for flowers; 6 inches preferred for herbs.

    Do bird bath planters need drainage holes?

    Absolutely. Without drainage, root rot develops quickly.

    Are succulents the best option?

    Yes for shallow basins and sunny exposures.

    How often should I water?

    Every 2–5 days depending on plant type and climate.

    Can I use it indoors?

    Yes, but use a drainage tray and avoid overwatering.

    Final Thoughts

    Small bird bath planter ideas offer a creative way to repurpose decorative garden pieces into living focal points. But success depends on respecting root depth, drainage physics, and soil structure.

    Drill proper drainage holes or use inserts. Choose shallow-rooted plants. Use lightweight, well-aerated soil. Position according to sun direction. Water thoughtfully not excessively.

    When designed correctly, a small bird bath planter becomes a compact, elegant micro-garden that enhances patios, balconies, and entryways with minimal space and maximum charm.

    Approach it like a miniature raised bed, and it will reward you with thriving plants season after season.

  • How to make a tree stump planter

    Every product is independently reviewed and selected by our editors. If you buy something through our links, we may earn an affiliate commission at no extra cost to you.

    A leftover tree stump doesn’t have to be an eyesore. With the right tools and horticultural planning, it can become a long-lasting, low-profile raised planter that blends naturally into your landscape.

    But here’s the reality: most DIY stump planters fail because they trap water, use heavy soil, or aren’t hollowed deep enough for healthy root systems.

    In this guide, I’ll walk you through exactly how to make a tree stump planter that drains properly, supports real plant growth, and lasts for years not just one season.

    Introduction

    If you’ve recently had a tree removed, stump grinding can cost anywhere from $150 to $500 depending on diameter. Turning the stump into a planter is often more affordable and visually appealing.

    However, wood behaves differently than ceramic or plastic containers. It absorbs water. It decomposes. It expands and contracts in freeze-thaw cycles (especially in USDA Zones 3–6).

    To succeed, you must:

    • Create proper drainage
    • Hollow deep enough for root development
    • Use a lightweight, oxygen-rich soil mix
    • Choose plants suited to shallow cavities

    This guide covers all of it step by step.

    Quick Summary

    • Minimum Stump Diameter: 12 inches
    • Ideal Hollow Depth: 6–12 inches depending on plants
    • Drainage Holes: ½–1 inch diameter, 4–8 holes minimum
    • Soil Mix: Compost + coco coir + perlite blend
    • Best Plants: Succulents, herbs, shallow-rooted flowers
    • Lifespan: 3–8 years depending on wood type and climate

    Step 1: Choose the Right Stump

    Not all stumps are equally durable.

    Best Wood Types for Longevity

    • Cedar
    • Oak
    • Black locust
    • Redwood

    These hardwoods resist rot better and can last 5–8 years when properly drained.

    Avoid if possible:

    • Pine
    • Birch
    • Poplar

    Softwoods break down faster, especially in humid climates (USDA Zones 7–9).

    Step 2: Gather the Right Tools

    You’ll need:

    • Power drill with 1-inch spade or auger bit
    • Hammer and chisel
    • Chainsaw (for larger stumps)
    • Safety glasses and gloves

    Optional but helpful:

    • Shop vacuum for debris removal
    • Level (to ensure even cavity)

    Budget impact: If you already own tools, cost is minimal. Otherwise, tool rental may cost $40–80 for the day.

    Step 3: Hollow Out the Stump Properly

    This is the most critical step.

    How Deep Should You Hollow

    Plant TypeSoil Depth Required
    Succulents3–5 inches
    Annual flowers6–8 inches
    Herbs8–10 inches
    Strawberries8–10 inches

    For most plantings, aim for at least 8 inches deep.

    Why Depth Matters

    Deeper soil:

    • Buffers temperature swings
    • Holds moisture longer
    • Supports stronger root systems
    • Reduces watering frequency

    Shallow cavities dry out rapidly and stunt plants.

    Hollowing Technique

    • Drill multiple deep holes across the top surface.
    • Break out wood between holes using chisel.
    • Repeat until desired depth is reached.
    • Remove loose debris completely.

    Do not thin outer walls too much leave at least 2–3 inches thickness for structural stability.

    Step 4: Add Proper Drainage (Non‑Negotiable)

    Without drainage holes, the stump becomes a water basin.

    How to Drill Drainage Holes

    • Drill 4–8 holes through the bottom
    • ½–1 inch diameter
    • Slight downward angle
    • Clear debris from holes

    If stump is still rooted in ground:

    • Drill angled side holes 1–2 inches above soil line

    This allows excess water to escape.

    Common Drainage Mistake

    Adding a thick gravel layer at the bottom without exit holes does NOT improve drainage. It creates a perched water table and increases root rot risk.

    If using gravel, keep it to a thin 1-inch layer directly over drainage holes only.

    Step 5: Use the Right Soil Mix

    Never use heavy native soil.

    Ideal Soil Composition

    For most stump planters:

    • 40% compost
    • 30% coco coir or peat moss
    • 20% perlite or pumice
    • 10% coarse sand

    Why this works:

    • Compost provides nutrients
    • Coir retains moisture
    • Perlite improves aeration
    • Sand increases drainage

    Cost considerations:

    • Budget mix: $12–15 per bag
    • Premium organic mix: $20–25 per bag

    Small stump cavities make upgrading affordable and worthwhile.

    Step 6: Choose the Right Plants

    Stump planters are shallow compared to raised beds.

    Best Plant Choices

    1. Succulents (Zones 8–11 year-round)

    • Sedum
    • Echeveria
    • Sempervivum

    Low maintenance, shallow roots.

    2. Shallow-Rooted Flowers

    • Petunias
    • Pansies
    • Alyssum
    • Lobelia

    High visual impact but require regular feeding.

    3. Herbs

    • Thyme
    • Oregano
    • Chives
    • Parsley

    Require 8–10 inches depth and full sun (6+ hours daily).

    Avoid deep-rooted vegetables like tomatoes or peppers.

    Step 7: Position for Proper Sun Exposure

    Sun direction directly affects watering and plant success.

    • South-facing: Best for herbs and flowers
    • West-facing: Hot afternoon sun (increase watering)
    • East-facing: Ideal balance
    • North-facing: Shade plants only

    In USDA Zones 8–10, partial afternoon shade prevents overheating.

    Step 8: Watering Strategy

    Wood absorbs moisture, which changes watering frequency.

    Typical schedule:

    • Spring: Every 3–5 days
    • Summer: Every 2–3 days
    • Fall: Weekly

    Always check soil 2 inches deep before watering.

    Signs of overwatering:

    • Mushy wood
    • Mold growth
    • Yellow leaves

    Signs of underwatering:

    • Wilting
    • Soil cracking
    • Leaf browning

    Mulching lightly can reduce evaporation.

    Step 9: Extend the Lifespan of Your Stump Planter

    Improve Airflow

    Add gravel or stone around base to reduce soil contact.

    Seal Exterior Only

    Apply plant-safe wood oil or linseed oil to exposed outer surface.

    Do not seal interior cavity.

    Clear Drainage Annually

    Inspect and reopen holes each season.

    Expected lifespan:

    • Hardwood stumps: 5–8 years
    • Softwood stumps: 2–4 years

    Climate impacts longevity significantly.

    Budget vs Premium Setup

    Budget Version

    • Existing stump
    • Basic soil
    • Seasonal flowers

    Cost: $40–80

    Pros: Affordable Low commitment

    Cons: Shorter lifespan More frequent replanting

    Premium Version

    • Hardwood stump
    • Premium soil blend
    • Organic slow-release fertilizer
    • Decorative stone border

    Cost: $100–250

    Pros: Better drainage Stronger plant growth Longer lifespan

    Cons: Higher upfront investment

    For multi-year use, premium setup is more cost-effective long term.

    Common Beginner Mistakes

    • Not drilling drainage holes
    • Hollowing too shallow
    • Using heavy clay soil
    • Overcrowding plants
    • Ignoring sun exposure

    Tree stump planters require thoughtful structure not just aesthetics.

    FAQ

    How long does a tree stump planter last?

    Typically 3–8 years depending on wood type, drainage, and climate.

    Can I grow vegetables in a stump planter?

    Only shallow-rooted crops like lettuce or strawberries. Deep vegetables require more soil depth.

    Do I need to line the inside?

    No plastic liner. If desired, use breathable landscape fabric only.

    What if my stump fills with water after rain?

    Add more drainage holes or clear debris blocking existing holes.

    Should I remove bark?

    No. Bark protects the stump and slows decay.

    Is this suitable for small yards?

    Yes. Stump planters are ideal for small-space gardens and natural landscapes.

    Final Thoughts

    Learning how to make a tree stump planter is less about decoration and more about respecting root biology and water management.

    Hollow deep enough for real root systems. Drill proper drainage holes. Use a lightweight, well-aerated soil mix. Match plant selection to sun exposure and soil depth.

    When done correctly, a stump planter becomes a living focal point blending sustainability, rustic design, and functional gardening into one compact feature.

    Approach it thoughtfully, and it can transform a leftover stump into a thriving garden element for years to come.

  • Tree stump planter ideas with rocks

    Every product is independently reviewed and selected by our editors. If you buy something through our links, we may earn an affiliate commission at no extra cost to you.

    A tree stump planter filled with layered soil, textured stone, and living plants can transform a leftover stump into a natural showpiece. But most stump planters fail because they trap water, use heavy soil, or ignore root depth and drainage physics.

    If you want a tree stump planter with rocks that actually thrives not rots into a mosquito basin this guide walks you through design structure, drainage engineering, soil composition, plant selection by USDA zone, and long-term maintenance realities.

    This is rustic gardening done properly.

    Introduction

    Tree stumps are often left behind after tree removal, especially in small yards where grinding isn’t practical or costs $150–$400. Instead of removing it, you can hollow it and convert it into a raised micro-garden.

    The key challenges:

    • Wood decomposition
    • Water retention
    • Shallow soil cavity
    • Freeze-thaw cracking
    • Poor drainage design

    When built correctly, a stump planter can last 3–8 years depending on wood type and climate. With rock integration, you can improve drainage, stabilize soil, and create visual contrast.

    Let’s break down how to build it right.

    Quick Summary

    • Best Stump Diameter: 12–24 inches minimum
    • Hollow Depth: 6–12 inches depending on plant type
    • Drainage Holes: ½–1 inch diameter drilled through base
    • Rock Use: Drainage layer (limited), top-dress, edging, or side accents
    • Soil Mix: 40% compost, 30% coco coir, 20% perlite, 10% coarse sand
    • Best Plants: Succulents, shallow-rooted flowers, herbs, alpine plants
    • USDA Zones: 3–10 (plant dependent)
    • Lifespan: 3–8 years depending on stump type

    Why Add Rocks to a Tree Stump Planter

    Rocks serve both aesthetic and structural functions.

    Oupeng pebbles polished gravel

    Functional Benefits

    • Improve surface drainage
    • Reduce soil erosion in shallow cavities
    • Stabilize plant roots
    • Add thermal mass in cooler climates
    • Reduce splash-back soil loss during rain

    However, rocks should not replace proper drainage holes.

    Important: Adding a thick gravel layer at the bottom does NOT improve drainage unless water can exit the stump. Otherwise, it creates a perched water table.

    Step 1: Choosing the Right Stump

    Not all stumps perform equally.

    Best Wood Types for Longevity

    • Cedar
    • Oak
    • Black locust
    • Redwood

    Avoid:

    • Birch (moderate rot resistance)
    • Pine (rots quickly)
    • Poplar (retains moisture heavily)

    Hardwoods last longer because dense fibers slow fungal breakdown.

    Step 2: Hollowing the Stump Properly

    Tools:

    • Drill with 1-inch spade bit
    • Hammer and chisel
    • Chainsaw (for large cavities)
    • Safety gear

    Ideal Hollow Depth by Plant Type

    Plant TypeSoil Depth Needed
    Succulents3–5 inches
    Annual flowers6–8 inches
    Herbs8–10 inches
    Strawberries8–10 inches

    Why depth matters:

    • Deeper soil buffers temperature swings
    • Reduces watering frequency
    • Improves nutrient stability

    For most functional planters, aim for 8 inches minimum.

    Step 3: Drainage Engineering (Non-Negotiable)

    Without drainage, stump planters fail.

    How to Add Drainage

    • Drill 4–8 holes through base
    • ½–1 inch diameter
    • Slightly angled downward
    • Clear wood debris fully

    If stump is rooted in ground:

    • Drill angled side drainage holes 1–2 inches above soil line

    This allows excess water to escape.

    Step 4: Smart Rock Integration Ideas

    1. Rock Drainage Collar

    Instead of filling the bottom with gravel, create a thin 1-inch drainage collar over holes.

    Why it works:

    • Prevents soil from clogging holes
    • Maintains airflow

    Do not exceed 1–2 inches thickness.

    2. Rock Top-Dressing

    Add decorative river stones or pea gravel on top of soil.

    Benefits:

    • Reduces evaporation
    • Stabilizes shallow-rooted plants
    • Suppresses weeds

    Best for succulents and alpine plants.

    3. Rock Border Around Base

    Surround stump with:

    • River rock
    • Flagstone
    • Crushed granite

    Benefits:

    • Improves base drainage
    • Reduces rot from soil contact
    • Enhances visual integration

    Especially helpful in USDA Zones 7–9 with humid summers.

    4. Cascading Rock and Plant Combo

    Create layered effect:

    • Taller plant in center
    • Trailing plants near edge
    • Rocks tucked between root zones

    Best plants for cascading effect:

    • Creeping thyme
    • Sedum
    • Lobelia
    • Sweet alyssum

    The Right Soil Mix for Stump Planters

    Never use heavy clay soil from your yard.

    Ideal Soil Composition

    For general use:

    • 40% compost
    • 30% coco coir or peat moss
    • 20% perlite or pumice
    • 10% coarse sand

    For succulents:

    • 40% cactus mix
    • 30% pumice
    • 20% coarse sand
    • 10% compost

    Why this works:

    • Compost provides nutrients
    • Coir retains moisture
    • Perlite improves aeration
    • Sand improves drainage

    Cost impact:

    • Budget soil: $12–15 per bag
    • Premium organic mix: $20–25 per bag

    Small stump cavities make premium soil affordable.

    Best Tree Stump Planter Ideas with Rocks

    1. Succulent Rock Garden Stump

    USDA Zones 8–11 outdoors year-round.

    Sun: South-facing exposure preferred (6+ hours).

    Water: Every 10–14 days.

    Low maintenance, high visual impact.

    2. Woodland Fern & Moss Stump

    Best for shaded north-facing areas.

    Use:

    • Higher compost ratio
    • Natural moss between rocks

    Water consistently but avoid saturation.

    Works well in Zones 3–9.

    3. Herb & Stone Rustic Planter

    Great for patios.

    Plant:

    • Thyme
    • Oregano
    • Parsley
    • Chives

    Use small river rocks between plants.

    Sun: South or west exposure.

    Water: 2–3 times weekly in summer.

    4. Seasonal Flower and Rock Display

    Use annuals like:

    • Petunias
    • Pansies
    • Alyssum
    • Lobelia

    Fertilize every 2 weeks.

    High maintenance but dramatic seasonal color.

    Sun Exposure Strategy

    • South-facing: Best for vegetables and succulents
    • West-facing: Hot afternoon sun; increase watering
    • East-facing: Balanced light for herbs
    • North-facing: Shade plants only

    In hot Zones 8–10, provide afternoon shade to prevent overheating.

    Rocks absorb heat beneficial in cooler climates but potentially stressful in extreme heat.

    Watering and Maintenance

    Typical watering frequency:

    • Spring: Every 3–5 days
    • Summer: Every 2–3 days
    • Fall: Weekly

    Check soil 2 inches deep before watering.

    Signs of overwatering:

    • Mushy stump interior
    • Fungal growth
    • Yellow leaves

    Signs of underwatering:

    • Wilting
    • Dry cracking soil
    • Leaf browning

    Mulch lightly if not using rock top-dressing.

    Extending the Lifespan of a Stump Planter

    Elevation

    If possible, improve airflow around stump base using gravel ring.

    Exterior Sealing

    Apply plant-safe exterior oil to exposed wood (not interior cavity).

    Drainage Monitoring

    Clear debris from holes annually.

    Expected lifespan:

    • Cedar/oak: 5–8 years
    • Pine/birch: 2–4 years

    Climate significantly affects longevity.

    Budget vs Premium Setup

    Budget Version

    • Existing stump
    • Basic soil
    • River rocks
    • Seasonal flowers

    Cost: $40–80

    Pros: Low investment Natural look

    Cons: Shorter lifespan Higher maintenance

    Premium Version

    • Hardwood stump
    • Premium soil mix
    • Landscape fabric lining
    • Decorative stone edging
    • Organic slow-release fertilizer

    Cost: $100–250

    Pros: Longer durability Better drainage Lower plant failure rate

    Cons: Higher upfront cost

    Common Beginner Mistakes

    • Not drilling drainage holes
    • Filling entire bottom with gravel
    • Using heavy clay soil
    • Overplanting shallow cavities
    • Ignoring sun direction

    Stump planters are decorative but still require proper horticultural structure.

    FAQ

    Do rocks improve drainage in stump planters?

    Only if water can exit through drainage holes. Rocks alone do not fix poor drainage.

    How long will a tree stump planter last?

    3–8 years depending on wood type and climate.

    Can I grow vegetables in a stump planter?

    Only shallow-rooted crops like lettuce or strawberries. Deep vegetables require more soil depth.

    Should I seal the inside of the stump?

    No. Interior must remain breathable to prevent trapped moisture.

    Are stump planters good for small yards?

    Yes. They’re ideal for repurposing space without adding bulky containers.

    Do rocks overheat plants?

    In hot climates, dark rocks can increase soil temperature. Use light-colored stones if concerned.

    Final Thoughts

    Tree stump planter ideas with rocks combine natural structure with practical gardening. But success depends on respecting the biology of roots and the physics of water.

    Drill proper drainage holes. Use lightweight, oxygen-rich soil. Add rocks strategically not excessively. Match plant selection to soil depth and sun exposure. Improve airflow around the base.

    When built correctly, a stump planter becomes more than a leftover tree remnant it becomes a functional, long-lasting focal point that enhances small-space landscapes for years.

    Design it with purpose, and it will reward you with layered texture, seasonal color, and resilient growth.

  • Birch Log Planter Ideas A Beginner Guideline

    Every product is independently reviewed and selected by our editors. If you buy something through our links, we may earn an affiliate commission at no extra cost to you.

    Birch log planters have a quiet elegance. The white bark, natural texture, and woodland character instantly soften patios, entryways, and garden beds. But birch is not naturally rot-resistant like cedar or redwood. If you don’t design it properly with drainage, soil structure, and plant selection in mind it can deteriorate within a season or two.

    This guide goes beyond decorative inspiration. You’ll learn how to hollow a birch log correctly, engineer proper drainage, choose the right soil mix, match plants to root depth, and extend the planter’s lifespan across USDA zones. If you want a birch log planter that thrives instead of rots, this is the practical blueprint.

    Introduction

    Most DIY birch log planters fail for three reasons:

    • The cavity is too shallow
    • There are no proper drainage holes
    • Heavy garden soil is used

    Wood behaves differently than ceramic or plastic containers. It absorbs moisture. It expands and contracts with temperature. It decomposes under constant soil contact.

    When built properly, however, birch log planters can last 3–5 years (sometimes longer in dry climates) and create stunning seasonal displays or functional herb gardens.

    This article will show you exactly how to do it right.

    Quick Summary

    • Best Log Diameter: 10–18 inches
    • Minimum Soil Depth: 6–8 inches (10 inches for herbs/strawberries)
    • Drainage Holes: ½-inch diameter, spaced every 3–4 inches
    • Best Soil: Lightweight container mix with compost + perlite
    • Ideal Plants: Succulents, herbs, shallow-rooted flowers, ferns
    • USDA Zones: 3–9 depending on plant selection
    • Average Lifespan: 2–5 years (longer in dry climates)

    Why Choose Birch for a Log Planter

    Birch offers strong visual appeal:

    • White bark brightens shaded areas
    • Natural woodland aesthetic
    • Lightweight compared to oak
    • Easy to hollow

    However, birch is a moderately soft hardwood. It lacks the natural decay resistance of cedar.

    Practical Implications

    • Needs excellent drainage
    • Should not sit directly on wet soil
    • Benefits from exterior sealing
    • Performs better in well-drained climates

    In humid USDA Zones 7–9, expect shorter lifespan unless carefully maintained. In drier Zones 4–6, birch can last longer if elevated and properly drained.

    How to Prepare a Birch Log for Planting

    Step 1: Select the Right Log

    Choose:

    • A cured (not freshly cut) log
    • Diameter of at least 10 inches
    • No active rot or deep cracks
    • Bark mostly intact

    Avoid green wood. As it dries, it shrinks and cracks aggressively, destabilizing soil.

    Step 2: Hollow the Cavity Properly

    Tools:

    • Chainsaw (for rough cut)
    • Drill with spade bit
    • Hammer and chisel
    • Router (optional for uniform depth)

    Ideal Hollow Depth

    Plant TypeSoil Depth Required
    Succulents3–5 inches
    Annual flowers6–8 inches
    Herbs8–10 inches
    Strawberries8–10 inches

    Why depth matters:

    • Deeper soil buffers temperature swings
    • Reduces watering frequency
    • Improves root oxygen exchange

    Shallow cavities dry out within 24–48 hours in summer heat.

    Drainage Engineering: The Make-or-Break Step

    Birch absorbs moisture quickly. Without drainage holes, the interior will stay saturated, accelerating fungal breakdown.

    How to Add Drainage

    • Drill ½-inch holes through the bottom
    • Space holes every 3–4 inches
    • Angle slightly downward
    • Minimum 4–8 holes depending on size

    In heavy rainfall areas, add side drainage holes 1 inch above the base.

    Should You Line the Interior

    Avoid plastic liners. They trap moisture and increase rot risk.

    Instead:

    • Use breathable landscape fabric
    • Punch holes aligned with drainage
    • Do not seal interior wood

    This slows soil contact while allowing airflow.

    The Best Soil Mix for Birch Log Planters

    Never use native garden soil. It compacts in confined spaces and reduces oxygen flow.

    Recommended Soil Composition

    For flowers and herbs:

    • 40% compost
    • 30% coco coir or peat moss
    • 20% perlite or pumice
    • 10% coarse sand

    For succulents:

    • 40% cactus mix
    • 30% pumice
    • 20% coarse sand
    • 10% compost

    Why This Works

    • Compost feeds soil microbes
    • Coir retains moisture without compaction
    • Perlite ensures aeration
    • Sand improves drainage

    Cost impact:

    • Budget mix: $10–15 per bag
    • Premium organic mix: $20–25 per bag

    Because birch cavities are small volume, investing in premium soil is affordable and improves plant survival.

    Birch Log Planter Design Ideas That Actually Work

    1. Succulent Birch Log Arrangement

    Best for:

    • South-facing patios
    • USDA Zones 8–11 outdoors year-round

    Light requirement: 6+ hours direct sun.

    Watering: Every 10–14 days.

    Maintenance impact: Very low.

    Why it works: Succulents have shallow root systems and tolerate limited soil depth.

    2. Woodland Fern Planter

    Ideal for:

    • North or east-facing areas
    • USDA Zones 3–9

    Soil: Higher compost ratio for moisture retention.

    Watering: Keep evenly moist but never soggy.

    Why it works: Ferns naturally grow in decomposing woodland matter.

    Maintenance: Moderate requires consistent moisture monitoring.

    3. Herb Garden Log Planter

    Perfect for:

    • Small balconies
    • Cottage gardens

    Best herbs:

    • Thyme
    • Oregano
    • Chives
    • Parsley

    Avoid large rosemary unless cavity exceeds 10 inches depth.

    Sun: South or west exposure preferred.

    Watering: 2–3 times weekly in summer.

    4. Seasonal Flower Display

    Use for:

    • Pansies (cool season)
    • Petunias (summer)
    • Alyssum
    • Lobelia

    Fertilize every two weeks with diluted liquid fertilizer.

    High visual payoff, but higher maintenance.

    Positioning and Sun Exposure Strategy

    Sun direction directly affects watering frequency.

    • South-facing: Maximum productivity
    • West-facing: Intense heat; soil dries faster
    • East-facing: Ideal balance for herbs
    • North-facing: Shade plants only

    In USDA Zones 8–10, provide partial afternoon shade to prevent root overheating.

    Elevate log on bricks or pot feet to improve air circulation and reduce moisture buildup underneath.

    Watering Strategy for Birch Log Planters

    Wood interacts with moisture differently than plastic or ceramic.

    Expect watering:

    • Every 3–5 days in spring
    • Every 2–3 days in summer
    • Weekly in fall

    Always check soil 2 inches deep before watering.

    Signs of overwatering:

    • Mold growth
    • Soft interior wood
    • Yellowing foliage

    Signs of underwatering:

    • Wilting
    • Soil pulling from sides
    • Dry, crumbly texture

    Adding a 1-inch layer of fine bark mulch reduces evaporation.

    Extending the Lifespan of a Birch Log Planter

    Exterior Sealing

    Apply:

    • Natural linseed oil
    • Plant-safe outdoor wood oil

    Do not fully seal interior cavity.

    Elevation

    Never place directly on soil. Use:

    • Bricks
    • Stone pavers
    • Pot feet

    Airflow reduces rot dramatically.

    Expected lifespan:

    • Dry climate: 4–5 years
    • Humid climate: 2–3 years
    • Very wet regions: Possibly 2 years without maintenance

    Budget vs Premium Setup Comparison

    Budget Setup

    • Found log (free)
    • Basic potting mix
    • No liner
    • Seasonal flowers

    Cost: $30–60

    Pros: Low investment

    Cons: Shorter lifespan Higher decay risk

    Premium Setup

    • Well-seasoned birch log
    • Breathable liner
    • Premium soil mix
    • Slow-release organic fertilizer
    • Elevated base

    Cost: $80–150

    Pros: Longer durability Better plant health Reduced replanting failures

    Cons: Higher upfront cost

    For multi-season use, premium setup offers better long-term value.

    Common Beginner Mistakes

    • Using fresh-cut green birch
    • Skipping drainage holes
    • Using heavy clay soil
    • Overcrowding plants
    • Letting log sit on damp ground

    Birch rewards precision but punishes shortcuts.

    FAQ

    How long do birch log planters last?

    Typically 2–5 years depending on climate and maintenance. Dry climates extend lifespan.

    Can I grow vegetables in a birch log planter?

    Only shallow-rooted crops like lettuce or strawberries. Deep-rooted vegetables require more soil depth.

    Should I remove the birch bark?

    No. The bark protects the wood and adds structural strength.

    Do birch logs rot faster than cedar?

    Yes. Cedar has natural decay-resistant oils. Birch requires more drainage management.

    Can birch log planters survive winter?

    Yes in USDA Zones 3–9, but freeze-thaw cycles may shorten lifespan. Elevation helps.

    Is sealing the inside recommended?

    No. Interior must remain breathable for proper drainage.

    Final Thoughts

    Birch log planter ideas combine rustic design with functional container gardening but success depends on horticultural fundamentals. Drainage, breathable soil, proper depth, and strategic placement matter far more than aesthetics.

    Choose seasoned birch. Hollow deep enough for real root development. Drill adequate drainage holes. Use lightweight soil. Elevate for airflow. Seal only the exterior.

    When done correctly, a birch log planter becomes more than a decorative accent it becomes a thriving woodland feature that brings structure, texture, and life to small-space gardens for multiple seasons.

    Approach it thoughtfully, and it will reward you with natural beauty and healthy growth year after year.

  • Log planter ideas diy | How to Hollow, Plant and Maintain Rustic Wood Planters

    Every product is independently reviewed and selected by our editors. If you buy something through our links, we may earn an affiliate commission at no extra cost to you.

    There’s something deeply satisfying about turning a fallen log into a living planter. It feels resourceful. Grounded. Natural. But most DIY log planters fail within one or two seasons because of poor drainage, improper hollowing depth, or incorrect soil choice.

    If you want a log planter that doesn’t rot prematurely, drown your plants, or dry out in a week, you need more than inspiration you need horticultural strategy.

    This guide walks you through practical, field-tested DIY log planter ideas, including soil composition, drainage methods, root depth planning, plant selection by USDA zone, cost considerations, and long-term maintenance realities.

    Introduction

    DIY log planters are popular in cottage gardens, woodland landscapes, and rustic patios. But wood is an organic material. It decomposes. It absorbs water. It cracks in heat and splits in freeze-thaw cycles.

    Premium Wooden Planter Box

    The difference between a log planter that lasts 5+ years and one that collapses in 12 months comes down to:

    • Proper hollowing depth
    • Drainage engineering
    • Soil structure
    • Plant selection
    • Climate awareness

    This article will help you build a log planter that looks natural—and performs like a professional container garden.

    Quick Summary

    • Best Log Diameter: 10–20 inches minimum
    • Ideal Hollow Depth: 4–8 inches for shallow plants; 8–12 inches for herbs and annuals
    • Drainage: Drill multiple ½-inch holes through the base
    • Soil Type: Lightweight, well-draining container mix
    • Best Plants: Succulents, herbs, shallow-rooted annuals, alpine plants
    • USDA Zones: Suitable in all zones with proper plant matching
    • Expected Lifespan: 2–7 years depending on wood type and climate

    Choosing the Right Log (Why Wood Type Matters)

    Not all logs perform equally. Wood density determines rot resistance and structural longevity.

    Best Wood Types for Log Planters

    • Cedar
    • Redwood
    • Black locust
    • Oak (moderate lifespan)

    These woods contain natural oils or dense fibers that slow decomposition.

    Avoid:

    • Soft pine (rots quickly)
    • Poplar (retains moisture, decays fast)
    • Fresh-cut “green” wood (shrinks and cracks aggressively)

    Why This Matters

    Log planters are constantly exposed to:

    • Irrigation moisture
    • Soil microbes
    • Freeze-thaw expansion
    • UV radiation

    Dense hardwoods resist fungal decay longer, reducing replacement frequency and long-term cost.

    How to Hollow Out a Log Properly

    This is where most DIY attempts go wrong.

    Tools Actually You’ll Need

    • Chainsaw (for length cuts)
    • Drill with spade or auger bit
    • Hammer and chisel
    • Safety goggles and gloves

    For precision hollowing, a plunge router can create even depth.

    Ideal Hollow Depth by Plant Type

    Plant TypeMinimum Soil Depth
    Succulents3–5 inches
    Annual flowers6–8 inches
    Herbs8–10 inches
    Lettuce/greens6–8 inches
    Strawberries8–10 inches

    Why Depth Matters

    Roots need:

    • Oxygen exchange
    • Moisture buffering
    • Nutrient availability

    Too shallow:

    • Soil dries in 1–2 days
    • Plants become stunted
    • Roots overheat

    For most functional planting, aim for 8 inches minimum depth.

    Drainage: The Critical Structural Step

    Wood absorbs water. If drainage is poor, your log becomes a soggy sponge.

    How to Add Drainage

    After hollowing:

    • Drill 4–8 drainage holes
    • ½-inch diameter minimum
    • Evenly spaced along base
    • Slightly angled for runoff

    In heavy rainfall areas (USDA Zones 6–9 with wet seasons), increase hole count.

    Should You Line a Log Planter?

    This is debated.

    Pros of Lining (Landscape Fabric or Plastic Sheet)

    • Slows wood decay
    • Extends lifespan
    • Protects interior walls

    Cons

    • Can trap moisture
    • Reduces natural drainage
    • Encourages root rot if not perforated

    Best compromise: Use breathable landscape fabric not plastic and puncture it above drainage holes.

    The Right Soil Mix for Log Planters

    Never use garden soil directly from your yard.

    It compacts inside containers and suffocates roots.

    Ideal Soil Composition

    For most log planters:

    • 40% compost
    • 30% coco coir or peat moss
    • 20% perlite or pumice
    • 10% coarse sand (for herbs/succulents)

    Why This Works

    • Compost feeds soil microbes
    • Coir/peat retains moisture
    • Perlite improves oxygen flow
    • Sand increases drainage in shallow cavities

    Cost considerations:

    • Budget mix: $8–12 per bag
    • Premium organic container mix: $18–25 per bag

    Since log planters are usually small volume, upgrading soil quality is cost-effective.

    Best DIY Log Planter Ideas That Actually Thrive

    1. Succulent Log Planter (Low Maintenance Winner)

    Best for:

    • USDA Zones 8–11 outdoors year-round
    • Colder zones as seasonal or indoor decor

    Why it works: Succulents have shallow root systems and tolerate limited soil volume.

    Light:

    • 6+ hours bright sun (south-facing exposure ideal)

    Watering:

    • Every 10–14 days (ensure full drainage)

    Maintenance impact: Very low. Ideal for beginners.

    2. Woodland Fern Log Planter

    Perfect for:

    • Shady north-facing gardens
    • USDA Zones 4–9

    Use:

    • 6–8 inches soil depth
    • High organic compost content

    Why it works: Ferns naturally grow in decomposing wood environments.

    Watering:

    • Keep consistently moist but never saturated.

    Maintenance: Moderate requires moisture monitoring.

    3. Herb Log Planter for Patios

    Great for:

    • Small balconies
    • South or west-facing patios

    Best herbs:

    • Thyme
    • Oregano
    • Chives
    • Parsley

    Avoid deep-rooted herbs like rosemary unless depth exceeds 10 inches.

    Watering: 2–3 times weekly in summer.

    Cost: Low to moderate; herbs are affordable starter plants.

    4. Seasonal Flower Log Centerpiece

    Use 6–8 inches depth for:

    • Petunias
    • Pansies
    • Lobelia
    • Alyssum

    These shallow-rooted annuals thrive in limited soil.

    Maintenance: High seasonal watering and fertilizing every 2 weeks.

    Best for visual impact rather than food production.

    Light Exposure: Positioning Your Log Planter

    Understanding directional sun is critical.

    • South-facing: Full sun (best for herbs and succulents)
    • West-facing: Hot afternoon sun (may require more watering)
    • East-facing: Gentle morning sun (ideal for lettuce and herbs)
    • North-facing: Shade plants only

    Logs heat up in direct sun. In Zones 8–10, consider partial afternoon shade to prevent soil overheating.

    Watering Strategy for Wooden Containers

    Wood absorbs moisture from soil, which changes watering frequency.

    Expect to water:

    • Every 2–3 days in summer heat
    • Weekly in mild spring weather

    Always check soil 2 inches below surface.

    Signs of overwatering:

    • Mushy wood interior
    • Fungus growth
    • Yellowing leaves

    Signs of underwatering:

    • Soil pulling from wood edges
    • Wilting midday

    Extending the Lifespan of a Log Planter

    Seal the Exterior Only

    Use:

    • Natural wood sealant
    • Linseed oil
    • Outdoor plant-safe wood preservative

    Never seal interior completely it traps moisture.

    Expected lifespan by wood type:

    • Cedar/redwood: 5–7 years
    • Oak: 3–5 years
    • Softwoods: 2–3 years

    Climate impacts longevity significantly. Wet climates shorten lifespan.

    Budget vs Premium DIY Log Planter Setup

    Budget Version

    • Found log (free)
    • Basic potting soil
    • No liner
    • Seasonal annuals

    Cost: $20–40 total

    Pros: Affordable and rustic

    Cons: Short lifespan Higher maintenance

    Premium Version

    • Rot-resistant hardwood
    • Breathable liner
    • Premium soil blend
    • Organic slow-release fertilizer

    Cost: $60–120

    Pros: Longer lifespan Better plant health Less soil compaction

    Cons: Higher upfront effort and cost

    Long-term, premium setup reduces replanting failures.

    Common Beginner Mistakes

    • Hollowing too shallow
    • Skipping drainage holes
    • Using heavy garden soil
    • Overplanting small cavities
    • Expecting deep-rooted vegetables to thrive

    Log planters are decorative and functional but they are not raised beds.

    FAQ

    How long do DIY log planters last?

    Depending on wood type and climate, 2–7 years. Cedar and redwood last the longest.

    Can I grow vegetables in a log planter?

    Yes, but only shallow-rooted crops like lettuce, strawberries, or small herbs. Deep-rooted vegetables require more soil depth.

    Should I treat the inside of the log?

    No. Avoid sealing the interior. It must breathe and drain properly.

    Do log planters need drainage holes?

    Absolutely. Without drainage, roots suffocate and wood decays rapidly.

    Can I use fresh-cut logs?

    Not recommended. Fresh wood shrinks, cracks, and distorts as it dries.

    Are log planters good for small gardens?

    Yes. They’re excellent for balconies, patios, and cottage-style landscapes when soil depth is matched to plant type.

    Final Thoughts

    DIY log planter ideas can be both beautiful and functional if built with horticultural awareness. The key is respecting the biology of roots and the natural behavior of wood.

    Choose rot-resistant wood. Hollow deep enough for real root development. Drill proper drainage. Use a lightweight, oxygen-rich soil mix. Match plants to soil depth and sun exposure.

    When done correctly, a log planter becomes more than decoration. It becomes a thriving micro-ecosystem that blends natural materials with intentional gardening.

    Build it thoughtfully, and it will reward you with seasons of growth and a rustic focal point that feels truly rooted in the landscape.

  • Large plastic half barrel planters

    Every product is independently reviewed and selected by our editors. If you buy something through our links, we may earn an affiliate commission at no extra cost to you.

    Large plastic half barrel planters give you the look of rustic wood with the practicality modern gardeners actually need. If you’ve ever struggled to move a heavy whiskey barrel, dealt with rotting wood, or watched soil dry out too quickly in summer heat, you already understand the problem.

    These oversized containers can transform patios, decks, balconies, and small yards into productive growing spaces but only if you use them correctly. In this guide, I’ll walk you through soil composition, drainage setup, root depth planning, plant selection, cost considerations, and long-term maintenance so you get real performance not just decorative appeal.

    Introduction

    Many gardeners buy large half barrel planters because they look charming and promise instant impact. But without proper drainage holes, correct soil structure, and thoughtful plant selection, these containers can turn into waterlogged root zones or dry out in days.

    If you want thriving vegetables, ornamental grasses, dwarf trees, or seasonal displays in large plastic half barrels, you need to understand how container physics works.

    This guide will show you:

    • Why plastic half barrels outperform wood in many climates
    • How to prepare them for optimal drainage
    • What soil mix actually works
    • Which plants thrive (and which struggle)
    • Budget vs premium setup considerations
    • Common beginner mistakes to avoid

    Quick Summary: Large Plastic Half Barrel Planters at a Glance

    • Typical Size: 20–27 inches diameter, 14–18 inches deep
    • Best For: Dwarf trees, shrubs, tomatoes, peppers, herbs, ornamental grasses
    • Minimum Soil Depth Needed: 12–18 inches for most vegetables
    • Drainage: Must drill 4–8 holes (½–¾ inch diameter)
    • Soil Type: Lightweight, well-draining potting mix (not garden soil)
    • Sun Exposure: Most crops require 6–8 hours of direct sun (south or west facing)
    • Watering Frequency: 2–4 times per week in summer depending on climate
    • USDA Zones: Suitable in all zones when matched to plant selection

    Why Large Plastic Half Barrel Planters Are So Popular

    The Practical Advantages Over Wooden Barrels

    Many gardeners assume real wood barrels are superior. In reality, plastic often performs better long term.

    1. Weight and Mobility

    A true oak whiskey barrel filled with moist soil can exceed 300–400 pounds. Once placed, it stays there.

    Plastic half barrels:

    • Weigh 10–25 pounds empty
    • Are easier to reposition seasonally
    • Reduce strain on decks and balconies

    For renters or small-space gardeners, mobility is a major advantage.

    2. Durability and Weather Resistance

    Wood barrels:

    • Dry out and shrink in hot climates
    • Rot at the base
    • Develop metal band rusting

    Plastic planters:

    • Resist rot
    • Withstand freeze-thaw cycles
    • Last 5–10+ years with UV-resistant materials

    In USDA Zones 4–7, where freeze cycles are common, plastic performs better long term.

    3. Water Retention Efficiency

    Plastic does not wick moisture like wood. That means:

    • Slower evaporation
    • More stable root hydration
    • Less frequent watering

    However, this also increases the risk of overwatering drainage becomes critical.

    Choosing the Right Large Plastic Half Barrel Planter

    Not all planters are created equal. Size, thickness, and drainage options matter.

    Ideal Dimensions for Healthy Root Systems

    For most crops and ornamental plants:

    • Diameter: 22–27 inches
    • Depth: Minimum 14–18 inches
    • Soil Volume: 8–15 gallons

    Why Depth Matters

    Roots need vertical space for:

    • Oxygen exchange
    • Nutrient uptake
    • Structural anchoring

    Shallow planters lead to:

    • Stunted growth
    • Increased watering frequency
    • Nutrient instability

    Root depth guidelines:

    • Herbs: 6–12 inches
    • Lettuce: 6–8 inches
    • Peppers: 12–14 inches
    • Tomatoes: 16–18 inches
    • Dwarf fruit trees: 18+ inches

    If you plan to grow tomatoes or dwarf citrus, choose the deepest model available.

    Drainage: The Most Critical Step Most Gardeners Skip

    Many plastic half barrels come without drainage holes.

    This is a serious problem.

    Why Drainage Is Non-Negotiable

    Roots need oxygen. When soil stays saturated:

    • Roots suffocate
    • Fungal pathogens multiply
    • Root rot develops

    In container gardening, drainage is survival.

    How to Add Proper Drainage

    Drill:

    • 4–8 holes
    • ½–¾ inch diameter
    • Evenly spaced along the base

    For heavy rainfall regions:

    • Add side drainage holes 1 inch above base to prevent flooding

    Do NOT:

    • Add gravel at the bottom (this creates a perched water table)

    Instead:

    • Use a high-quality potting mix designed for containers

    The Right Soil Mix for Large Plastic Half Barrel Planters

    Never use garden soil. It compacts in containers and restricts oxygen flow.

    Ideal Soil Composition

    A high-performance container mix should contain:

    • 40–50% peat moss or coco coir
    • 20–30% compost
    • 20–30% perlite or pumice
    • Slow-release organic fertilizer

    Why This Works

    • Peat/coco retains moisture
    • Compost feeds microbes
    • Perlite improves aeration
    • Fertilizer provides consistent nutrients

    Cost impact:

    • Budget potting mix: $8–12 per bag (may lack aeration)
    • Premium organic mix: $15–25 per bag (better drainage and nutrient profile)

    Large barrels may require 2–3 bags.

    Long-term savings come from fewer plant failures.

    Best Plants for Large Plastic Half Barrel Planters

    1. Tomatoes

    • Depth: 16–18 inches
    • Sun: 6–8 hours (south-facing exposure ideal)
    • Water: 3–4 times per week in summer

    Choose determinate or patio varieties for easier management.

    Maintenance:

    • Requires staking or cages
    • Weekly fertilizing once fruiting

    2. Peppers

    • Depth: 12–14 inches
    • Thrive in warm soil
    • Less water demand than tomatoes

    Peppers perform exceptionally well in plastic containers due to stable moisture.

    3. Dwarf Fruit Trees

    • USDA Zones: Match to tree variety
    • Depth: Minimum 18 inches
    • Require winter protection in Zones 5 and below

    Use well-draining citrus or tree-specific potting mix.

    Cost:

    • Dwarf tree: $40–90
    • Planter: $30–60
    • Soil + fertilizer: $40–70

    High upfront cost, but productive for years.

    4. Ornamental Grasses & Shrubs

    • Low maintenance
    • Excellent for privacy
    • Deep-rooted varieties stabilize large containers

    Good choice for patios needing visual screening.

    Watering Strategy: How Often and Why It Matters

    Large plastic containers retain moisture longer than clay pots.

    Typical watering frequency:

    • Spring: 1–2 times per week
    • Summer: 2–4 times per week
    • Fall: Reduce gradually

    Always check soil 2 inches below surface.

    Signs of overwatering:

    • Yellow leaves
    • Fungus gnats
    • Soggy soil smell

    Signs of underwatering:

    • Wilting at midday
    • Dry soil pulling from edges

    Self-watering inserts can reduce labor but require careful monitoring to avoid root rot.

    Light Exposure: Positioning for Maximum Growth

    Sun direction impacts productivity.

    • South-facing: Best for vegetables
    • West-facing: Strong afternoon sun (watch for heat stress)
    • East-facing: Gentle morning sun (good for herbs)
    • North-facing: Limited; suitable for shade plants only

    On balconies, reflective heat from walls can increase soil temperature by 5–10°F.

    In hot USDA Zones 8–10, consider partial afternoon shade for tomatoes.

    Pest Prevention in Large Containers

    Container gardens are not immune.

    Common issues:

    • Aphids
    • Spider mites
    • Fungus gnats

    Prevention basics:

    • Avoid overwatering
    • Ensure air circulation
    • Use neem oil or insecticidal soap as needed

    Healthy, well-drained soil reduces pest pressure significantly.

    Budget vs Premium Setup Comparison

    Budget Setup

    • Thin plastic planter
    • Basic potting soil
    • Manual watering
    • Seasonal annual plants

    Cost: $60–100 per container

    Pros:

    • Low entry cost
    • Good for beginners

    Cons:

    • May crack over time
    • Lower soil quality reduces yield

    Premium Setup

    • UV-resistant thick plastic planter
    • Premium organic soil mix
    • Drip irrigation kit
    • Slow-release fertilizer

    Cost: $150–250 per container

    Pros:

    • Higher yields
    • Less maintenance
    • Long-term durability

    Cons:

    • Higher upfront cost

    For serious food production, premium setup pays off within 1–2 seasons.

    Common Beginner Mistakes

    • Not drilling drainage holes
    • Using garden soil
    • Overcrowding plants
    • Underestimating water needs in peak summer
    • Choosing full-size plants instead of dwarf varieties

    Large containers reduce risk—but they don’t eliminate poor technique.

    FAQ

    Are plastic half barrel planters good for vegetables?

    Yes. Their depth and soil volume support crops like tomatoes, peppers, and eggplant, provided drainage holes are added and high-quality potting mix is used.

    How many drainage holes should I drill?

    Drill 4–8 holes, ½–¾ inch wide. In rainy climates, add side holes 1 inch above the base.

    Do plastic barrels overheat roots?

    In extreme heat (Zones 9–10), dark plastic can warm soil excessively. Use mulch on top and consider light-colored containers to reduce heat absorption.

    Can I grow a dwarf fruit tree in a half barrel planter?

    Yes, if the container is at least 18 inches deep and you use a well-draining citrus or tree mix. Fertilize consistently during growing season.

    How long do plastic half barrel planters last?

    Quality UV-resistant models last 5–10+ years. Cheaper thin plastic may degrade in 2–3 seasons.

    Should I put rocks at the bottom for drainage?

    No. This creates a perched water table and increases root rot risk. Proper drainage holes and soil structure are more effective.

    Conclusion

    Large plastic half barrel planters offer one of the most versatile, practical solutions for container gardening in small spaces. They combine volume, durability, and mobility making them ideal for vegetables, dwarf trees, and statement ornamental displays.

    When set up correctly with proper drainage, high-quality soil, adequate depth, and thoughtful plant selection they outperform smaller pots and eliminate many common container problems.

    The key is understanding why drainage, soil structure, and sun exposure matter. Once those fundamentals are in place, these planters can produce abundant harvests and dramatic patio displays for years.

    Invest wisely, prepare them properly, and treat them like miniature raised beds. The payoff is healthier roots, stronger plants, and a garden that thrives even in limited space.

  • Whiskey barrel liner home depot

    Every product is independently reviewed and selected by our editors. If you buy something through our links, we may earn an affiliate commission at no extra cost to you.

    A whiskey barrel planter is one of the most beautiful ways to grow flowers, herbs, or even dwarf shrubs. But without the right liner, that rustic charm can quickly turn into rotting wood, poor drainage, and stunted plants. If you’re searching for a whiskey barrel liner at Home Depot, you’re likely trying to protect your investment and grow healthier plants in the process. This guide will help you choose the right liner, install it properly, and avoid common mistakes that shorten the life of both your planter and your plants.

    Introduction

    Half whiskey barrels are popular for patios, entryways, and small backyard gardens because they provide generous root depth and strong visual impact in limited space. However, many gardeners install them incorrectly.

    The most common issues I see:

    • Waterlogged roots due to poor drainage
    • Wood rotting within 1–3 seasons
    • Liners that trap too much moisture
    • Shallow soil depth from improper fitting inserts

    If you’re shopping for a whiskey barrel liner at Home Depot, you need to understand which type works for your climate, what soil system to use, and how to balance drainage with wood preservation.

    This guide will walk you through the practical, real-world decisions that determine whether your barrel planter lasts two years or ten.

    Quick Summary

    • Standard half whiskey barrels hold 20–25 gallons of soil.
    • Ideal soil depth: 12–16 inches minimum.
    • Use liners to reduce wood rot and extend barrel lifespan.
    • Always drill drainage holes if using a solid liner.
    • Best soil mix: 60% high-quality potting mix, 20% compost, 20% aeration material.
    • Watering frequency: 2–4 times per week in summer depending on exposure.
    • USDA zones: Suitable in all zones with proper plant selection.
    • Budget liner: heavy-duty plastic insert.
    • Premium option: molded resin or rigid polyethylene liner.

    Understanding Whiskey Barrel Liners: Why They Matter

    Why Use a Liner at All

    A traditional half barrel is made from oak or similar hardwood. While durable, constant moisture accelerates:

    • Wood rot
    • Metal band corrosion
    • Structural warping

    A liner serves three primary functions:

    • Protects the wood from constant soil moisture
    • Improves drainage control
    • Extends barrel life from 2–3 years to 7–10+ years

    However, liners must be used correctly. Completely sealing the barrel without drainage creates anaerobic soil conditions that suffocate roots.

    Types of Whiskey Barrel Liners at Home Depot

    When searching “whiskey barrel liner Home Depot,” you’ll typically encounter four categories:

    1. Flexible Plastic Liners

    Best for: Budget gardeners Cost range: $10–$25

    These are thin, flexible inserts that conform to the interior of the barrel.

    Pros

    • Affordable
    • Easy to install
    • Lightweight

    Cons

    • Can tear over time
    • Require drilled drainage holes
    • May collapse inward under heavy soil weight

    Maintenance Impact

    Expect 2–4 years of use before replacement.

    Installation Tip

    Always punch or drill 4–6 drainage holes (½ inch diameter) at the base before filling with soil.

    2. Molded Resin or Polyethylene Inserts

    Best for: Long-term durability Cost range: $30–$60

    These rigid liners are shaped specifically for half whiskey barrels.

    Why They Work

    Rigid inserts:

    • Maintain consistent shape
    • Distribute soil pressure evenly
    • Improve airflow between wood and liner

    Pros

    • Long lifespan (5–10 years)
    • Better structural stability
    • Often include pre-molded drainage

    Cons

    • Higher upfront cost
    • Must match barrel dimensions precisely

    If you’re investing in perennial shrubs or dwarf trees, this is the better long-term choice.

    3. Coconut Coir Liners

    Less common at big box stores but occasionally available.

    Best for: Decorative flower barrels Cost range: $20–$40

    Pros

    • Excellent drainage
    • Natural aesthetic
    • Promotes airflow

    Cons

    • Breaks down within 1–2 seasons
    • Doesn’t protect wood from moisture long-term

    I don’t recommend coir liners if your primary goal is barrel longevity.

    4. DIY Heavy-Duty Plastic Sheeting

    Some gardeners purchase thick contractor-grade plastic instead.

    Cost

    Under $15

    Reality Check

    It works temporarily but:

    • Often traps too much water
    • Easily tears at the base
    • Can create soggy root conditions

    This is strictly a short-term solution.

    Choosing the Right Size Liner

    Most standard half whiskey barrels measure:

    • 24 inches diameter (top)
    • 16–18 inches diameter (bottom)
    • 16–18 inches deep

    Why Depth Matters

    Vegetables and herbs require specific root depth:

    • Lettuce: 6–8 inches
    • Herbs: 8–12 inches
    • Peppers: 12–14 inches
    • Tomatoes (determinate): 14–16 inches
    • Dwarf shrubs: 16+ inches

    If the liner reduces soil depth below 12 inches, root restriction will reduce yields.

    Always measure your barrel before purchasing a liner.

    Drainage: The Most Critical Factor

    No liner works without proper drainage.

    Why Drainage Is Essential

    Roots require oxygen. When water saturates soil continuously:

    • Fungal pathogens increase
    • Roots suffocate
    • Growth stalls

    How to Set Up Drainage Correctly

    • Drill 4–6 drainage holes in liner bottom.
    • Add 1 inch of coarse pine bark or gravel (optional but helpful).
    • Use a well-aerated potting mix.

    Avoid adding thick gravel layers that reduce soil volume significantly.

    Soil Composition for Whiskey Barrel Planters

    Never use garden soil directly in barrels.

    Ideal Mix (By Volume)

    • 60% high-quality potting mix
    • 20% compost
    • 20% perlite or pine bark fines

    Why This Works

    • Potting mix retains moisture.
    • Compost improves nutrient density.
    • Perlite/pine bark increases oxygen flow.

    Cost Consideration

    Expect to spend:

    • $20–$40 filling one half barrel properly.

    This upfront cost prevents stunted plants and disease later.

    Light Exposure and Placement

    Whiskey barrels are heavy once filled. Choose placement carefully before planting.

    Sun Exposure Guidelines

    • South-facing: Full sun (6–8+ hours)
    • West-facing: Intense afternoon sun (monitor moisture)
    • East-facing: Gentle morning sun (ideal for herbs)
    • North-facing: Limited light (best for shade plants)

    USDA Zone Considerations

    Barrel planters are suitable in Zones 3–10 with proper plant selection.

    In colder zones:

    • Insulate sides in winter
    • Elevate slightly off ground
    • Avoid letting water freeze inside

    Watering Frequency and Irrigation Options

    Barrels dry out faster than in-ground beds.

    Typical Summer Watering

    • Full sun: Every 1–2 days
    • Partial sun: 2–3 times weekly

    Check soil moisture 2 inches below surface before watering.

    Best Irrigation Options

    • Drip irrigation kits
    • Self-watering inserts
    • Adjustable micro-sprayers

    Buying Criteria

    Choose drip kits with:

    • Pressure regulator
    • Adjustable emitters
    • ¼-inch tubing compatibility

    Self-watering systems reduce maintenance but increase upfront cost.

    Best Plants for Whiskey Barrel Planters

    Vegetables

    • Bush tomatoes
    • Peppers
    • Eggplant
    • Leafy greens

    Herbs

    • Basil
    • Thyme
    • Rosemary (excellent drainage required)
    • Parsley

    Ornamentals

    • Dwarf hydrangeas
    • Compact boxwood
    • Petunias
    • Geraniums

    Avoid aggressive root systems like mint unless contained separately.

    Common Beginner Mistakes

    1. Skipping Drainage Holes

    Leads to root rot within weeks.

    2. Using Garden Soil

    Compacts quickly and suffocates roots.

    3. Overcrowding Plants

    One barrel ≠ unlimited space.

    Example:

    • One tomato + 2 basil plants is ideal.
    • Three tomato plants is too many.

    4. Not Considering Weight

    A filled barrel can exceed 150–200 pounds.

    Place before filling.

    Budget vs Premium Setup Comparison

    FeatureBudget SetupPremium Setup
    LinerFlexible plasticMolded resin
    SoilBasic potting mixCustom blended
    IrrigationHand wateringDrip system
    Lifespan2–4 years7–10 years
    Cost$60–$90 total$150–$250 total

    Premium setups reduce maintenance time and long-term replacement costs.

    Pest Prevention Basics

    Common issues include:

    • Aphids
    • Spider mites
    • Fungus gnats

    Prevention Strategy

    • Use sterile potting mix.
    • Avoid overwatering.
    • Apply neem oil preventatively.
    • Maintain airflow around barrel.

    Elevating the barrel slightly reduces slug access.

    Frequently Asked Questions

    What size liner fits a standard whiskey barrel from Home Depot?

    Most require a 24-inch diameter liner tapering to 16–18 inches at the base. Always measure internal dimensions before purchasing.

    Do whiskey barrel liners need drainage holes?

    Yes. Without drainage holes, roots will suffocate and rot. Drill 4–6 half-inch holes minimum.

    Can I grow vegetables in a lined whiskey barrel?

    Absolutely. Ensure at least 12–16 inches of soil depth and use high-quality potting mix.

    How long does a whiskey barrel planter last with a liner?

    With a rigid liner and proper drainage, 7–10 years is realistic. Without a liner, wood may degrade in 2–3 years.

    Is a liner better than drilling holes directly in the barrel?

    Yes for longevity. Drilling holes alone still exposes wood to constant moisture.

    What soil should I use in a whiskey barrel planter?

    A mix of potting soil, compost, and aeration material (perlite or bark fines). Never use native garden soil alone.

    Final Thoughts

    A whiskey barrel planter is not just decorative it’s a high-capacity growing system when set up correctly. Choosing the right whiskey barrel liner at Home Depot is about more than protecting wood. It directly impacts root health, drainage performance, and long-term plant success.

    When you:

    • Select the correct liner type
    • Ensure proper drainage
    • Use high-quality soil
    • Match plants to sunlight exposure

    You transform a simple rustic container into a productive, long-lasting garden feature.

    Invest once, install it correctly, and your barrel can produce thriving herbs, vegetables, or ornamentals for years to come. The difference between disappointment and abundance is almost always in the setup.