Category: Low Maintenance Plants

  • Wooden wheelbarrow planter ideas

    Every product is independently reviewed and selected by our editors. If you buy something through our links, we may earn an affiliate commission at no extra cost to you.

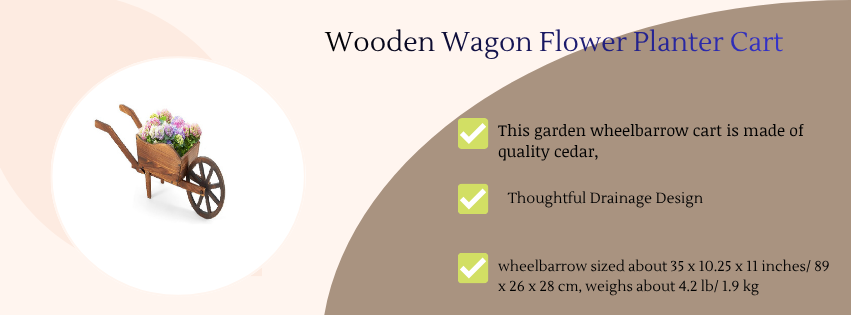
    A wooden wheelbarrow planter adds instant charm to a garden but if planted incorrectly, it can rot, dry out, or collapse within a season.

    Done properly, a wheelbarrow planter becomes a focal point that blends rustic character with intentional plant design. The key is treating it like a functional container garden not just a decorative prop filled with random flowers.

    This guide covers practical wooden wheelbarrow planter ideas, including soil composition, drainage setup, container depth strategy, plant combinations by sun exposure, USDA zone considerations, watering frequency, and maintenance realities.

    Introduction

    Most people place a few flowers into a decorative wheelbarrow and hope for the best. Within weeks, they face:

    • Poor drainage
    • Wood rot from trapped moisture
    • Plants that outgrow shallow soil
    • Uneven watering
    • Seasonal decline

    Wooden wheelbarrows are typically shallow and vulnerable to water damage. To succeed, you must manage drainage, protect the wood, choose the right root depth plants, and plan for irrigation.

    In this guide, you’ll learn how to turn a wooden wheelbarrow into a long-lasting, high-impact planter that thrives season after season.

    Quick Summary Box

    • Minimum soil depth needed: 8–12 inches (modify if shallower)
    • Always drill multiple ½-inch drainage holes
    • Line interior with landscape fabric, not plastic
    • Best for annuals, shallow-rooted perennials, herbs, or succulents
    • Watering frequency: Every 1–2 days in summer
    • Best placements: Full sun (6–8 hrs) or partial sun depending on plant choice
    • Protect wood annually with exterior-grade sealant

    Is a Wooden Wheelbarrow a Good Planter

    Yes wooden wheelbarrow is a good planter.

    Most decorative wooden wheelbarrows are:

    • 6–10 inches deep
    • Made of softwood (pine or fir)
    • Vulnerable to constant moisture

    They are best treated as shallow raised beds on wheels rather than deep containers.

    Preparing a Wooden Wheelbarrow for Planting

    1. Protect the Wood

    Why it matters: Constant wet soil accelerates rot.

    How to do it:

    • Apply exterior-grade, plant-safe wood sealant.
    • Let cure completely before planting.

    Cost: $15–$25 for sealant. Maintenance: Reapply annually.

    2. Improve Drainage

    Most decorative models lack sufficient holes.

    Steps:

    • Drill 3–6 holes (½ inch diameter) in the base.
    • Slightly elevate front if needed to encourage drainage.

    Avoid plastic liners they trap water and cause root rot.

    Instead: Line with breathable landscape fabric.

    3. Soil Composition

    Never use garden soil.

    Ideal mix for wooden wheelbarrow planters:

    • 60% lightweight potting mix
    • 20% compost
    • 20% perlite or pine bark fines

    Why: Shallow containers need aeration and moisture balance.

    Cost: $10–$20 per fill depending on size.

    Understanding Sun Exposure Before Choosing Plants

    Wheelbarrows are often placed:

    • Near fences (partial sun)
    • On patios (full sun)
    • Under trees (bright shade)

    Sun Exposure Guide

    • South/West facing: 6–8+ hours direct sun (higher heat stress)
    • East facing: Gentle morning sun
    • North facing: Shade or bright indirect

    Match plant combinations to exposure or expect failure.

    12 Wooden Wheelbarrow Planter Ideas

    Each idea includes WHY it works, HOW to plant it, and maintenance considerations.

    1. Rustic Cottage Flower Mix (Full Sun)

    Thriller: Dwarf sunflower Filler: Zinnias Spiller: Trailing lobelia

    Why it works: Bright colors complement rustic wood.

    Depth needed: 10–12 inches.

    Water: Daily in hot weather.

    Maintenance: Deadhead weekly.

    2. Cascading Petunia Display

    Best for: Full sun front yard focal point.

    Plant densely with wave petunias.

    Why: They spill beautifully over sides.

    Water: Daily in summer.

    Fertilize: Every 2 weeks.

    3. Succulent Wheelbarrow Garden (Low Water)

    Best for: Zones 9–11 (or seasonal in cooler zones)

    Plants:

    • Echeveria
    • Sedum
    • Sempervivum

    Soil: 50% cactus mix + 50% perlite.

    Water: Every 7–10 days.

    Very low maintenance and minimal wood rot risk.

    4. Herb Garden Wheelbarrow

    Best for: East or south-facing patios.

    Plants:

    • Basil
    • Thyme
    • Oregano
    • Parsley

    Depth: 8–10 inches minimum.

    Water: Every 1–2 days.

    Mistake to avoid: Overwatering Mediterranean herbs like rosemary.

    5. Shade-Loving Fern & Coleus Combo

    Best for: North-facing porch.

    Thriller: Boston fern Filler: Coleus Spiller: Creeping Jenny

    Water: Every 2–3 days.

    Maintenance: Pinch coleus to prevent legginess.

    6. Mini Vegetable Garden

    Best for: Small-space edible gardening.

    Plants:

    • Lettuce
    • Radishes
    • Spinach

    Root depth: 6–8 inches sufficient.

    Harvest cycle: Every 30–45 days.

    Budget-friendly option.

    7. Seasonal Swap Planter

    Keep soil base consistent.

    Rotate:

    • Spring bulbs
    • Summer annuals
    • Fall mums
    • Winter greens

    Why: Extends use year-round.

    Higher maintenance but strong curb appeal.

    8. Vintage White & Green Design

    Plants:

    • White begonias
    • Dusty miller
    • Ivy

    Works well in partial sun.

    Elegant and understated.

    9. Pollinator-Friendly Mix

    Plants:

    • Salvia
    • Verbena
    • Alyssum

    Attracts bees and butterflies.

    Requires consistent watering in heat.

    10. Ornamental Grass Accent

    Plant:

    • Dwarf fountain grass
    • Trailing calibrachoa

    Creates height and movement.

    Requires at least 10–12 inches depth.

    11. Fall Harvest Theme

    Plants:

    • Ornamental cabbage
    • Pansies
    • Mini pumpkins (decorative)

    Thrives in cooler temperatures (Zones 3–8 fall season).

    12. Tropical Summer Display

    Plants:

    • Caladium
    • Sweet potato vine
    • Impatiens (sun-tolerant varieties)

    Higher water demand but dramatic foliage.

    Watering Strategy for Wooden Wheelbarrow Planters

    Shallow containers dry faster.

    General rule:

    • Full sun: Daily in summer
    • Partial sun: Every 2 days
    • Shade: 2–3 times per week

    Check moisture 2 inches deep.

    Consider small drip irrigation kits if near water source.

    Self-watering inserts can help but must not trap moisture against wood.

    Fertilizing

    Nutrients leach quickly in shallow planters.

    Use:

    • Slow-release fertilizer at planting
    • Liquid feed every 2–4 weeks

    Cost: $10–$20 per season.

    Without feeding, flowering plants decline by mid-season.

    Pest Prevention

    Common issues:

    • Aphids
    • Slugs (especially near ground)
    • Spider mites in heat

    Prevention:

    • Elevate wheelbarrow slightly
    • Inspect weekly
    • Use neem oil or insecticidal soap as needed

    Good airflow reduces fungal problems.

    USDA Zone Considerations

    In cold climates (Zones 3–6):

    • Empty soil before winter to protect wood.
    • Store under cover.

    In warm climates (Zones 8–11):

    • Monitor wood for sun cracking.
    • Re-seal annually.

    Budget vs Premium Setup

    Budget ($50–$150)

    • Decorative wooden wheelbarrow
    • Annual flowers
    • Manual watering

    Shorter lifespan (2–4 years typical).

    Premium ($200–$500)

    • High-quality hardwood wheelbarrow
    • Drip irrigation
    • Seasonal planting rotations

    Longer lifespan with proper sealing.

    Common Beginner Mistakes

    • No drainage holes
    • Using plastic liner
    • Overcrowding plants
    • Choosing deep-root vegetables
    • Ignoring wood maintenance

    Wooden wheelbarrows require seasonal attention.

    FAQ

    How deep does soil need to be in a wheelbarrow planter?

    At least 8–12 inches for most annuals and herbs. Root vegetables require deeper containers.

    How do you keep a wooden wheelbarrow from rotting?

    Seal annually, ensure drainage holes, and avoid water pooling.

    Can you grow vegetables in a wooden wheelbarrow?

    Yes, shallow-rooted crops like lettuce, spinach, and radishes perform well.

    What flowers grow best in a wheelbarrow planter?

    Petunias, zinnias, calibrachoa, alyssum, and coleus depending on sun exposure.

    Should I line a wooden wheelbarrow planter?

    Use breathable landscape fabric not plastic to protect wood while allowing drainage.

    How often should you water?

    Daily in hot full sun; every 2–3 days in shade.

    Final Thoughts

    A wooden wheelbarrow planter works best when treated as a functional container garden with structural limitations not simply rustic décor.

    When you:

    • Protect the wood
    • Improve drainage
    • Choose shallow-rooted plants
    • Match combinations to sun exposure
    • Maintain consistent watering and fertilizing

    You extend the life of both the planter and the plants inside it.

    Start with one well-designed planting plan suited to your climate and exposure. With proper maintenance, a wooden wheelbarrow can become a rotating seasonal centerpiece that enhances your garden’s character year after year.

  • Plant combination ideas for container gardens full sun

    Every product is independently reviewed and selected by our editors. If you buy something through our links, we may earn an affiliate commission at no extra cost to you.

    Full sun container gardens can be spectacular or they can burn out by mid-summer.

    If your pots sit on a south- or west-facing patio, driveway, balcony, or front entry, you’re dealing with intense light, reflected heat, faster soil evaporation, and higher nutrient demand. The wrong plant combinations will wilt, stretch, or collapse within weeks.

    The right combinations, built with proper soil structure and smart layering, will thrive all season with manageable maintenance.

    This guide gives you professionally designed plant combination ideas for container gardens in full sun, plus the technical details most blogs skip soil composition, root depth, watering schedules, fertilizer strategy, and long-term care.

    Introduction

    Many gardeners assume “full sun plants” automatically succeed in containers. That’s not true.

    Container plants face:

    • Faster moisture loss
    • Higher root-zone temperatures
    • Limited soil volume
    • Increased fertilizer leaching

    Without the right plant pairings and soil setup, even sun-loving plants struggle.

    Worth Garden Tall 20 Planter

    In this guide, you’ll learn how to:

    • Choose heat-tolerant plant combinations
    • Build soil that drains well but retains moisture
    • Match container depth to root systems
    • Reduce watering frequency
    • Avoid common beginner mistakes

    By the end, you’ll be able to design full sun containers that look lush in July not exhausted.

    Quick Summary

    • Full sun = 6–8+ hours direct sunlight daily
    • Ideal container depth: 12–24 inches depending on plant roots
    • Soil mix: 60% high-quality potting mix + 20% compost + 20% perlite or pine bark
    • Watering: Typically daily in peak summer heat
    • Fertilize every 2–4 weeks during active growth
    • Use the Thriller–Filler–Spiller formula
    • Best exposures: South- or west-facing patios, balconies, entryways

    Understanding Full Sun in Containers

    What “Full Sun” Really Means

    Full sun requires:

    • Minimum 6 hours direct light
    • Often 8+ hours in summer
    • Intense afternoon heat (especially west-facing)

    Hard surfaces (concrete, brick, stone) increase root-zone temperature by 10–20°F.

    Why it matters: Roots suffer before foliage does. Containers can reach temperatures that stress even drought-tolerant plants.

    Soil & Drainage Setup for Full Sun Containers

    Ideal Soil Composition

    For healthy roots in high heat:

    • 60% premium potting mix (peat or coco-based)
    • 20% compost (adds nutrients and microbial life)
    • 20% perlite or pine bark fines (improves drainage)

    Why this works:

    • Compost improves moisture retention.
    • Perlite prevents compaction.
    • Bark fines improve air flow.

    Avoid garden soil it compacts and suffocates roots.

    Cost Impact

    Expect $15–$30 in soil per 18–20 inch container. Skimping here leads to root rot or constant watering.

    Drainage Requirements

    • Minimum one ½-inch drainage hole
    • Raise pots on pot feet
    • Never add rocks at bottom (myth creates perched water table)

    Good drainage prevents fungal disease and root rot.

    Container Size & Root Depth Guidelines

    Plant roots need space:

    • Annual flowers: 12–14 inches deep
    • Ornamental grasses: 16–18 inches
    • Tomatoes/peppers: 18–24 inches
    • Small shrubs: 18–24 inches minimum

    Shallow containers dry too quickly and restrict growth.

    12 Proven Plant Combination Ideas for Full Sun Containers

    Each combination uses the Thriller–Filler–Spiller method for balance and performance.

    1. Bold Heat-Tolerant Color Explosion

    Best for: South-facing patios (USDA Zones 7–11)

    Thriller: Canna lily Filler: Lantana Spiller: Sweet potato vine

    Why it works: All tolerate heat above 90°F.

    Watering: Daily in peak summer.

    Maintenance: Deadhead lantana occasionally.

    Cost: Moderate (cannas may be $15–$25 each).

    2. Low-Water Mediterranean Mix

    Best for: Zones 8–11

    Thriller: Rosemary (upright variety) Filler: Lavender Spiller: Trailing thyme

    Soil: Add extra perlite (30%) for drainage.

    Why it works: These plants prefer lean, well-draining soil.

    Watering: 2–3 times per week once established.

    Beginner mistake: Overwatering herbs.

    3. Pollinator Power Container

    Thriller: Salvia Filler: Zinnias Spiller: Verbena

    Why it works: All attract bees and butterflies.

    Maintenance: Deadhead zinnias weekly.

    Water: Every 1–2 days in heat.

    4. Modern Grass & Texture Design

    Thriller: Purple fountain grass Filler: Angelonia Spiller: Calibrachoa

    Why it works: Contrasting textures create movement.

    Container depth: Minimum 16 inches.

    5. Drought-Tolerant Succulent Statement

    Best for: Zones 9–11

    Thriller: Agave Filler: Echeveria Spiller: Sedum

    Soil: 50% cactus mix + 50% perlite.

    Water: Every 7–10 days.

    Maintenance: Very low.

    6. Tropical Resort Look

    Thriller: Elephant ear Filler: Coleus (sun-tolerant varieties) Spiller: Sweet potato vine

    Water: Daily during hot periods.

    Soil: Moisture-retentive mix.

    Higher maintenance but dramatic results.

    7. Classic Red, White & Blue Combo

    Thriller: Blue salvia Filler: White petunias Spiller: Red calibrachoa

    Ideal for front entry symmetry.

    8. Edible Patio Garden

    Thriller: Tomato (determinate variety) Filler: Basil Spiller: Nasturtium

    Container: Minimum 18–24 inches deep.

    Water: Daily.

    Fertilize: Biweekly with vegetable fertilizer.

    9. Desert-Inspired Container

    Thriller: Yucca Filler: Gaillardia Spiller: Trailing lantana

    Excellent for hot, dry regions.

    10. Monochrome Purple Drama

    Thriller: Purple fountain grass Filler: Petunias (deep purple) Spiller: Verbena

    Elegant and cohesive.

    11. Compact Balcony Combo

    Thriller: Dwarf sunflower Filler: Portulaca Spiller: Bacopa

    Portulaca thrives in extreme heat.

    12. Long-Blooming Low Maintenance Mix

    Thriller: Angelonia Filler: Vinca Spiller: Scaevola

    Why it works: All tolerate heat and resist disease.

    Water: Every 1–2 days.

    Minimal deadheading required.

    Watering Strategy for Full Sun Containers

    Full sun containers dry fast.

    General Guidelines:

    • 12–16 inch pots: Daily in summer
    • 18–24 inch pots: Every 1–2 days
    • Early morning watering preferred

    Self-watering planters reduce frequency but still require monitoring.

    Drip irrigation kits are ideal for multiple containers.

    Fertilizing for Strong Performance

    Sun + watering = nutrient loss.

    Use:

    • Slow-release granular fertilizer at planting
    • Liquid fertilizer every 2–4 weeks

    Cost: $10–$25 per season.

    Without fertilizing, plants stall by midsummer.

    Pest & Disease Prevention

    Common issues:

    • Spider mites (hot, dry conditions)
    • Aphids
    • Powdery mildew (if airflow is poor)

    Prevention:

    • Space plants properly
    • Inspect weekly
    • Use neem oil as preventative

    Budget vs Premium Container Setup

    Budget ($100–$250 total)

    • Plastic or resin pots
    • Annual flowers
    • Manual watering

    Higher seasonal replacement cost.

    Premium ($400–$1,000+)

    • Fiberglass or ceramic planters
    • Drip irrigation
    • Mixed perennials + annuals

    Lower maintenance over time.

    Common Beginner Mistakes

    • Using too-small containers
    • Ignoring watering frequency
    • Overcrowding plants
    • Skipping fertilizer
    • Using heavy garden soil

    Full sun containers demand proactive care.

    Frequently Asked Questions

    What plants grow best in full sun containers?

    Lantana, salvia, petunias, zinnias, ornamental grasses, rosemary, lavender, and vinca perform reliably in 6–8+ hours of sun.

    How often should I water full sun container gardens?

    Daily during peak summer heat, especially in containers under 16 inches deep.

    What is the best soil for full sun containers?

    A well-draining mix of potting soil, compost, and perlite or pine bark to balance moisture retention and aeration.

    Can perennials survive in full sun containers?

    Yes, if containers are large enough (18–24 inches deep) and winter protection matches your USDA zone.

    Why do my full sun containers wilt even when watered?

    Likely root-zone overheating or poor drainage. Check soil structure and container size.

    Should I mulch container plants?

    Yes. A 1-inch layer of bark fines reduces moisture loss and stabilizes temperature.

    Conclusion

    Designing successful plant combinations for container gardens in full sun requires more than choosing “sun-loving” flowers.

    It requires:

    • Proper container depth
    • High-quality soil structure
    • Smart plant layering
    • Consistent watering
    • Ongoing fertilization

    When you build the foundation correctly, full sun becomes an advantage not a challenge. Your containers will bloom longer, require fewer replacements, and create stronger visual impact all season.

    Start with one well-designed container, monitor its performance, and refine your watering and fertilizer routine. Over time, you’ll develop combinations that thrive in your specific microclimate and outperform generic garden center displays.

  • Large planter ideas for front of house

    Every product is independently reviewed and selected by our editors. If you buy something through our links, we may earn an affiliate commission at no extra cost to you.

    A pair of oversized planters flanking your front door can completely transform how your home feels. Done well, they add architectural strength, color through the seasons, and a sense of intention. Done poorly, they become expensive containers of struggling plants.

    If you’re investing in large front porch planters, this guide will help you choose the right containers, soil, plant combinations, and maintenance plan so they look polished year-round, not tired after one season.

    Introduction

    Most homeowners struggle with the same issues:

    • Planters that dry out too fast
    • Plants that outgrow containers or become rootbound
    • Arrangements that look sparse after a few months
    • Expensive pots that crack after winter

    Large planters at the front of the house need more than decorative appeal they require correct soil structure, proper drainage, strategic plant layering, and climate-appropriate selections.

    In this guide, you’ll learn exactly how to design, plant, and maintain large outdoor planters that enhance curb appeal while remaining practical and sustainable.

    Quick Summary Box

    • Minimum planter depth: 16–24 inches for mixed arrangements
    • Soil: High-quality potting mix + compost + drainage amendment (perlite/pine bark)
    • Sun exposure matters: South/west = high heat; North/east = moderate light
    • Use the Thriller–Filler–Spiller formula for visual balance
    • Watering: Typically 2–4 times per week in summer, depending on climate
    • Choose frost-proof containers in USDA Zones 6 and below
    • Install drip irrigation or self-watering inserts for lower maintenance

    Understanding Your Front Entry Microclimate

    Before choosing plants or planters, assess the conditions around your front door.

    Sun Exposure Direction

    • South-facing entry: Full sun, high heat reflection from walls
    • West-facing entry: Intense afternoon heat
    • East-facing entry: Gentle morning sun
    • North-facing entry: Shade to bright indirect light

    Why this matters: Large containers heat up faster than ground soil, stressing roots. South and west exposures often require drought-tolerant plants and more frequent watering.

    USDA Hardiness Zones

    If you live in:

    • Zones 3–6: Planters must withstand freeze-thaw cycles
    • Zones 7–9: Heat tolerance and irrigation efficiency matter most
    • Zones 10–11: Focus on drainage and fungal prevention

    Cold climates require frost-resistant materials like fiberglass, concrete, or high-fired ceramic.

    Choosing the Right Large Planters

    Size Guidelines

    For front-of-house impact:

    • Minimum diameter: 18–24 inches
    • Minimum depth: 16–24 inches
    • For small trees/shrubs: 24–30 inches deep

    Why depth matters: Roots need space to anchor plants and regulate moisture. Shallow containers dry out quickly and limit plant longevity.

    Best Materials (Pros & Cons)

    1. Fiberglass Planters

    Pros: Lightweight, frost-resistant, modern look Cons: Higher upfront cost ($150–$400 each) Maintenance: Low

    Best for: Long-term curb appeal with minimal seasonal replacement.

    2. Concrete or Stone

    Pros: Extremely durable, upscale look Cons: Heavy, expensive, difficult to reposition Maintenance: Very low

    Best for: Permanent architectural statement pieces.

    3. High-Fired Ceramic

    Pros: Classic aesthetic Cons: May crack in freeze zones Maintenance: Moderate

    Best for: Zones 7+ or covered porches.

    Soil Composition for Large Outdoor Planters

    Never use garden soil. It compacts in containers and suffocates roots.

    Ideal Soil Mix

    • 60% high-quality potting mix
    • 25% compost
    • 15% perlite or pine bark fines

    Why this works:

    • Potting mix provides structure.
    • Compost adds nutrients.
    • Perlite or bark ensures drainage.

    Cost consideration:

    • Expect $20–$35 per large planter fill.
    • Skimping on soil leads to root rot and plant failure.

    12 Stunning Large Planter Ideas for Front of House

    1. Symmetrical Evergreen Statement Planters

    Best for: Formal homes

    Thriller: Boxwood, dwarf spruce, or arborvitae Filler: Heuchera or pansies Spiller: Ivy or creeping Jenny

    Maintenance:

    • Prune 1–2 times per year
    • Water weekly in cooler months

    Why it works: Evergreens provide structure year-round.

    2. Modern Minimalist Architectural Look

    Use:

    • Snake plant (Zone 9+)
    • Agave (Zones 8–11)
    • Upright grasses

    Planter: Matte black or concrete.

    Low water, low maintenance.

    3. Layered Flower Explosion (Full Sun)

    For south-facing entries:

    • Thriller: Canna lily
    • Filler: Zinnias or lantana
    • Spiller: Sweet potato vine

    Water 3–4 times per week in peak heat.

    4. Shade-Friendly Lush Entry Planters

    For north-facing homes:

    • Thriller: Fatsia japonica
    • Filler: Coleus
    • Spiller: Ferns

    Shade planters dry more slowly water 1–2 times weekly.

    5. Small Ornamental Tree in Oversized Pot

    Trees that work:

    • Dwarf Japanese maple (Zones 5–8)
    • Olive tree (Zones 8–10)
    • Dwarf citrus (Zones 9–11)

    Container depth: Minimum 24 inches.

    Expect higher soil cost but long-term impact.

    6. Seasonal Swap System Planters

    Keep evergreen base. Swap fillers quarterly.

    Budget-friendly long-term.

    7. Tall Grass & Texture Planters

    Use:

    • Purple fountain grass
    • Blue fescue
    • Sedum

    Low watering needs.

    8. Classic Hydrangea Front Entry

    Best for east-facing entries.

    Container depth: 18–24 inches.

    Soil: Slightly acidic (pH 5.5–6.5).

    9. Herb & Edible Statement Planters

    Rosemary, lavender, ornamental kale.

    Needs full sun and well-draining soil.

    10. Monochrome White & Green Design

    White begonias + dusty miller + ivy.

    Clean and upscale.

    11. Tropical Resort Look

    Elephant ears + caladium + trailing vines.

    High water needs.

    12. Winter-Interest Evergreen + Branch Planters

    Use:

    • Dwarf conifers
    • Red twig dogwood branches
    • Winterberry

    Requires frost-proof containers.

    Drainage: The Most Overlooked Factor

    Every large planter must have:

    • At least one ½-inch drainage hole
    • Pot feet to elevate from ground

    Why it matters: Standing water causes root rot within days in warm weather.

    Beginner mistake: Adding rocks at bottom instead of proper soil mix.

    Watering Large Front Door Planters

    Summer guideline:

    • Full sun: 3–4 times weekly
    • Shade: 1–2 times weekly

    Check by inserting finger 2 inches deep.

    Self-watering systems reduce frequency but still require monitoring.

    Drip irrigation kits are ideal for consistency and time savings.

    Pest Prevention & Plant Health

    Common issues:

    • Aphids
    • Spider mites
    • Fungus gnats

    Prevention:

    • Avoid overhead watering at night
    • Maintain airflow
    • Use neem oil monthly as preventive

    Inspect weekly.

    Budget vs Premium Setup Comparison

    Budget Setup ($150–$300 total)

    • Resin planters
    • Annual flowers
    • Manual watering

    Higher seasonal replacement cost.

    Premium Setup ($600–$1,500+)

    • Fiberglass or concrete planters
    • Drip irrigation
    • Perennials + shrubs

    Lower long-term maintenance.

    Common Beginner Mistakes

    • Choosing containers too small
    • Ignoring sun exposure
    • Overcrowding plants
    • Forgetting winter drainage
    • Using cheap soil

    Large planters are investments design for durability.

    Frequently Asked Questions

    What size planter is best for the front door?

    At least 18–24 inches wide and 16–24 inches deep for balanced proportions and healthy root systems.

    How do you keep large planters from drying out?

    Use moisture-retentive potting mix, mulch the surface, and consider self-watering inserts.

    Can large planters stay outside in winter?

    Yes, if frost-proof and well-drained. Avoid ceramic in freezing climates.

    How often should you fertilize front porch planters?

    Every 4–6 weeks during growing season using balanced liquid fertilizer.

    What are the best low-maintenance plants for large planters?

    Boxwood, dwarf conifers, ornamental grasses, lavender, and sedum.

    Should I line large planters?

    Not necessary if drainage holes are adequate. Avoid plastic liners that trap water.

    Final Thoughts

    Large planters at the front of your house are more than decorative accessories they are structural design elements that shape first impressions.

    When you choose the right size, invest in quality soil, respect sun exposure, and design with layered plant structure, you create containers that thrive instead of merely survive.

    Start with durable planters, build a proper soil foundation, and match plants to your microclimate. The result is long-term curb appeal, healthier plants, and significantly less seasonal frustration.

    Well-designed large front entry planters elevate your home every single day not just during peak bloom.

  • Ideas to recycle plastic bottles to make beautiful two tiered flower pots

    Every product is independently reviewed and selected by our editors. If you buy something through our links, we may earn an affiliate commission at no extra cost to you.

    A two-tiered flower pot made from recycled plastic bottles can transform a small balcony, patio corner, or windowsill into a layered floral display without the cost of stacked ceramic planters.

    But for a two-tier system to look beautiful and grow healthy plants, it must support:

    • Proper root depth
    • Reliable drainage
    • Stable weight distribution
    • Balanced sunlight exposure
    • Moisture control between tiers

    In this guide, I’ll walk you through practical, durable, and visually appealing two-tier bottle planter ideas along with soil composition, plant pairing, structural stability, and long-term maintenance.

    Most DIY stacked bottle planters fail for one of three reasons:

    • Poor drainage between tiers
    • Top-heavy instability
    • Wrong plant selection for shallow containers

    When tiers share drainage incorrectly, the top pot floods the lower one. When weight isn’t distributed properly, the system tips. When large-root plants are used, they outgrow the container quickly.

    If you build with structure in mind, however, two-tier bottle planters can become productive vertical gardens ideal for USDA Zones 3–10 (seasonally outdoors).

    This guide focuses on designs that actually support plant health not just decoration.

    Quick Summary Box

    • Best bottle size: 2L soda bottles (thick PET plastic)
    • Minimum depth per tier: 6–8 inches
    • Drainage: 3–5 holes per tier (5–8mm diameter)
    • Ideal soil mix: 40% potting mix, 30% compost, 20% coco coir, 10% perlite
    • Best plant pairing: Upright plant on top, trailing plant on bottom
    • Sun: South-facing for flowers, east-facing for delicate plants
    • Lifespan: 1–3 years outdoors

    Core Design Principles for Two-Tier Bottle Planters

    Before choosing a design, understand what makes a stacked planter succeed.

    1. Independent Drainage per Tier

    Each tier must drain separately.

    Why:

    If the top tier drains directly into the lower tier without overflow control, the bottom roots become waterlogged.

    Solution:

    • Drill 3–5 drainage holes at the bottom of each tier.
    • Add a side overflow hole ½ inch above the base.
    • Allow slight air gap between tiers if stacking vertically.

    2. Weight Distribution

    Wet soil weighs approximately:

    • 2L bottle filled with soil: 3–5 lbs

    Two tiers combined: 6–10 lbs.

    Always:

    • Use strong nylon rope or metal rod for vertical support.
    • Keep heavier plants on bottom tier.

    3. Root Depth Guidelines

    Plant TypeMinimum Depth
    Herbs6 inches
    Pansies6 inches
    Petunias6–8 inches
    Strawberries6–8 inches
    Leafy greens6 inches

    Avoid tomatoes unless depth exceeds 12 inches.

    Idea 1: Vertical Stack Tower (Rod-Supported)

    Best For:

    Balconies, patios, small outdoor walls

    How It Works

    • Cut two 2L bottles horizontally.
    • Drill drainage holes in both.
    • Insert a metal rod or thick PVC pipe through center.
    • Stack vertically with spacers between tiers.

    Why it works:

    • Strong central support.
    • Allows airflow between layers.
    • Compact footprint.

    Plant Pairing

    Top tier:

    • Upright flower (marigold, pansy)

    Bottom tier:

    • Trailing petunia or strawberry

    Light Placement: South- or west-facing for full bloom production.

    Maintenance: Moderate watering frequency (every 1–2 days in summer).

    Cost: $10–$25 depending on support materials.

    Idea 2: Hanging Two-Tier Cascade Planter

    Best For:

    Railings, pergolas, balcony hooks

    Construction

    • Create two horizontal bottle planters.
    • Punch 4 holes near rim of each.
    • Thread strong nylon rope vertically.
    • Leave 6–8 inches between tiers.

    Important: Tie knots below each tier to support weight.

    Why this works:

    • Excellent airflow.
    • Visually dynamic.
    • Reduces ground pests.

    Best Plants:

    Top:

    • Basil or upright geranium

    Bottom:

    • Trailing lobelia or ivy

    Avoid overcrowding.

    Maintenance impact: Higher watering frequency due to airflow exposure.

    Idea 3: Offset Tiered Wall Planter

    Best For:

    Fences or mounted boards

    How to Build

    • Mount two bottles side-by-side but vertically offset.
    • Secure using screws and washers through bottle edges.
    • Drill independent drainage holes.

    Why this works:

    • Balanced weight distribution.
    • Easy to access for watering.
    • Ideal for decorative wall gardens.

    Soil Mix: 40% potting mix 30% compost 20% coco coir 10% perlite

    Drainage is especially critical in wall systems.

    Idea 4: Decorative Wrapped Two-Tier Display

    If aesthetics are a priority:

    • Paint exterior white (reflects heat).
    • Wrap with jute rope or fabric.
    • Use stencils or textured acrylic paint.

    Never paint the interior where soil contacts plastic.

    Why white paint helps:

    • Reduces root overheating in Zones 8–10.
    • Extends bottle lifespan under UV exposure.

    Idea 5: Self-Watering Two-Tier Hybrid

    For reduced maintenance:

    • Insert smaller inverted bottle neck into lower tier soil.
    • Use wick irrigation (cotton rope).
    • Add water reservoir chamber at bottom.

    Best for:

    • Herbs
    • Lettuce
    • Small flowering plants

    Maintenance: Lower daily watering needs.

    Cost: $20–$40 depending on materials.

    Best Soil Mix for Two-Tier Bottle Pots

    Small containers demand light, aerated soil.

    Recommended blend:

    • 40% high-quality potting mix
    • 30% screened compost
    • 20% coco coir
    • 10% perlite

    Why this works:

    • Compost supports flowering.
    • Perlite prevents compaction.
    • Coir balances moisture retention.
    • Potting mix stabilizes root environment.

    Never use garden soil.

    Watering & Fertilizing Strategy

    Water thoroughly until drainage occurs.

    Frequency:

    • Summer: Every 1–2 days
    • Spring/Fall: Every 2–4 days

    Fertilize:

    • Liquid fertilizer every 2–3 weeks
    • Half-strength dilution

    Small containers lose nutrients quickly.

    Sunlight Placement Guide

    South-facing: Maximum bloom production.

    West-facing: Monitor overheating.

    East-facing: Best for herbs and delicate flowers.

    North-facing: Use LED grow lights (4000–6500K spectrum).

    Common Beginner Mistakes

    • Allowing top tier drainage into lower tier without overflow hole
    • Overcrowding plants
    • Using thin, weak bottles
    • Ignoring wet weight when hanging
    • Using dense garden soil

    Structural stability and drainage determine long-term success.

    Budget vs Premium Setup Comparison

    Budget ($0–$30)

    • Recycled bottles
    • DIY soil mix
    • Nylon rope
    • Manual watering

    Higher maintenance.

    Mid-Range ($50–$150)

    • Premium potting soil
    • Stainless mounting hardware
    • Decorative finish
    • Liquid fertilizer

    More stable and attractive.

    Premium Vertical Floral Feature ($200+)

    • Modular mounting system
    • Integrated drip irrigation
    • LED grow lighting
    • Commercial-grade potting blend

    Low maintenance and year-round use.

    USDA Zone Considerations

    Outdoor seasonal use:

    • Zones 3–5: Bring indoors before frost.
    • Zones 6–8: Ideal growing performance.
    • Zones 9–10: Monitor heat stress carefully.

    Plastic containers offer minimal insulation during freezing weather.

    FAQ

    How do I prevent the bottom tier from becoming waterlogged?

    Ensure each tier has independent drainage holes and a side overflow hole.

    What flowers work best in two-tier bottle pots?

    Petunias, pansies, marigolds, lobelia, and strawberries.

    Can I grow vegetables in two-tier bottle planters?

    Yes, shallow-root crops like lettuce and herbs. Avoid deep-root vegetables.

    How long do bottle planters last outdoors?

    Typically 1–3 years before UV degradation.

    Is it safe to grow edible plants in recycled bottles?

    Yes, if bottles are food-grade and thoroughly cleaned.

    How heavy is a two-tier system?

    Approximately 6–10 lbs when fully watered.

    Conclusion

    Recycling plastic bottles into beautiful two-tiered flower pots is more than a decorative DIY project it’s a practical vertical gardening solution for small spaces.

    When you prioritize:

    • Independent drainage
    • Adequate root depth
    • Stable weight support
    • Balanced sunlight exposure
    • Proper soil composition

    You create a system that’s both attractive and horticulturally sound.

    Start with one two-tier unit. Test plant pairings. Monitor drainage. Once successful, scale into a full vertical floral wall.

    With the right structure, recycled plastic becomes productive growing space not waste.

  • Recycling plastic bottles into flower pots benefits

    Every product is independently reviewed and selected by our editors. If you buy something through our links, we may earn an affiliate commission at no extra cost to you.

    Recycling plastic bottles into flower pots isn’t just a creative DIY trend it’s a practical, low-cost container gardening strategy with real environmental and horticultural advantages.

    When designed correctly, plastic bottle planters can grow herbs, flowers, leafy greens, and even strawberries in tight urban spaces while reducing landfill waste and lowering your gardening budget.

    In this guide, we’ll break down the true benefits, the real limitations, and the best ways to maximize results from drainage setup to soil composition and plant selection.

    Introduction

    Many people recycle plastic bottles into flower pots because it feels eco-friendly. But few stop to ask:

    • Do they actually grow plants well?
    • Are they safe?
    • Do they save money long-term?
    • Are they durable outdoors?

    As someone who works extensively with small-space and balcony gardens, I’ve seen both failures and highly productive systems built from recycled bottles.

    The difference isn’t creativity.

    It’s understanding container gardening fundamentals root depth, drainage, soil structure, sunlight exposure, and maintenance reality.

    This article explains exactly why recycling plastic bottles into flower pots works, when it doesn’t, and how to do it properly.

    Quick Summary Box

    • Reduces plastic waste entering landfills
    • Saves $5–$25 per container
    • Lightweight and balcony-safe
    • Ideal for herbs, leafy greens, and shallow-rooted flowers
    • Requires proper drainage holes
    • Best soil mix: 40% potting mix, 30% compost, 20% coco coir, 10% perlite

    1. Environmental Benefits

    Reduces Plastic Waste in Landfills

    Plastic bottles can take hundreds of years to degrade.

    By converting bottles into flower pots, you:

    • Extend their useful life
    • Reduce landfill contribution
    • Lower demand for new plastic container production

    Why this matters practically:

    Most store-bought plastic planters are made from new molded plastic. Recycling reduces the need for additional manufacturing energy.

    However:

    This is reuse, not permanent recycling. Eventually, UV light degrades plastic. Expect 1–3 years of outdoor use before replacement.

    Lowers Carbon Footprint of Gardening

    Buying new pots involves:

    • Manufacturing
    • Packaging
    • Transportation

    Reusing bottles eliminates those costs.

    For urban gardeners scaling vertically (10–30 small containers), this can significantly reduce material demand.

    2. Financial Benefits

    Major Cost Savings

    Average retail container prices:

    • Small decorative pots: $5–$15 each
    • Hanging planters: $15–$30
    • Vertical wall systems: $100+

    Recycled bottles: Free.

    For a 20-container balcony herb system, that can save $100–$300 upfront.

    Affordable Entry into Gardening

    Beginners often hesitate due to setup costs.

    Plastic bottle planters:

    • Remove financial barriers
    • Allow experimentation
    • Reduce risk of investment loss if plants fail

    Maintenance cost remains (soil, fertilizer), but container cost drops to zero.

    3. Lightweight & Balcony-Safe

    Wet soil is heavy.

    Example:

    A 12-inch ceramic pot with wet soil can weigh 20–30 lbs.

    A 2-liter bottle planter with moist soil weighs about 3–5 lbs.

    Why this matters:

    • Safer for apartment railings
    • Reduces structural stress on balconies
    • Easier to move during extreme weather

    Always check balcony load limits when scaling up multiple containers.

    4. Ideal for Vertical Gardening

    Plastic bottles are narrow and modular.

    This makes them perfect for:

    • Hanging planters
    • Vertical garden walls
    • Fence-mounted systems
    • Railing planters

    Why vertical works:

    • Maximizes sunlight exposure
    • Improves airflow
    • Reduces ground pest pressure

    Best plants for vertical bottle systems:

    • Basil
    • Parsley
    • Thyme
    • Lettuce
    • Spinach
    • Strawberries
    • Petunias

    Root depth requirement: Minimum 6 inches for herbs and greens.

    5. Moisture Retention Advantage

    Plastic retains moisture longer than terracotta.

    In small containers, this can be beneficial.

    Why it works:

    • Less evaporation
    • Fewer watering cycles
    • Reduced drought stress

    However:

    Without drainage holes, this becomes a disadvantage.

    Proper drainage is non-negotiable.

    6. Customizable Drainage & Design

    Unlike pre-made pots, you control:

    • Hole placement
    • Number of drainage holes
    • Side overflow protection
    • Vertical stacking options

    Recommended drainage setup:

    • 3–5 holes (5–8mm diameter) at bottom
    • 1 overflow hole ½ inch above base

    Why this matters:

    Small containers are highly sensitive to overwatering. Custom drainage prevents root rot.

    7. Educational & Community Benefits

    Recycled bottle gardens:

    • Teach children sustainability
    • Encourage community gardening
    • Promote urban greening

    They’re often used in schools and community projects because they’re low-cost and scalable.

    8. Practical Gardening Benefits

    Root Control

    Bottle containers restrict aggressive root spread.

    Good for:

    • Mint (contains invasive growth)
    • Small herbs
    • Controlled strawberry runners

    Pest Reduction

    Elevated bottle systems reduce:

    • Slug damage
    • Soil-borne pests
    • Certain fungal splash diseases

    Good airflow improves plant health.

    Real Limitations You Should Know

    EEAT requires transparency.

    1. Limited Root Space

    Most bottles allow 4–8 inches of soil depth.

    Not suitable for:

    • Large tomatoes
    • Zucchini
    • Deep-rooted vegetables

    Choose plants accordingly.

    2. UV Degradation

    Sun exposure weakens plastic over time.

    Expect:

    • 1–3 years lifespan outdoors
    • Longer indoors

    White paint on exterior can reduce UV damage.

    3. Heat Retention in Hot Climates

    In USDA Zones 8–10:

    Clear plastic can overheat roots.

    Solutions:

    • Paint exterior white
    • Wrap with jute or fabric
    • Avoid harsh west-facing afternoon sun

    Soil Composition for Successful Bottle Flower Pots

    The container only works if the soil works.

    Recommended mix:

    • 40% potting soil
    • 30% compost
    • 20% coco coir
    • 10% perlite

    Why:

    • Prevents compaction
    • Improves aeration
    • Stabilizes moisture
    • Supports nutrient availability

    Avoid garden soil.

    Watering & Fertilizing Considerations

    Small containers require more attention.

    Watering frequency:

    • Summer: Every 1–2 days
    • Spring/Fall: Every 2–4 days
    • Indoors: Weekly

    Fertilize:

    Every 2–3 weeks with diluted liquid fertilizer.

    Small soil volume depletes nutrients quickly.

    Budget vs Store-Bought Comparison

    FeatureRecycled BottleStore-Bought Plastic Pot
    CostFree$5–$20
    Lifespan1–3 years3–5+ years
    Drainage ControlCustomPre-drilled
    AestheticsDIYPolished
    WeightVery lightModerate

    Conclusion:

    Bottle pots are ideal for short- to medium-term systems and vertical gardens.

    USDA Zone Considerations

    Outdoor use:

    • Zones 3–5: Seasonal only (bring indoors before frost)
    • Zones 6–8: Excellent performance
    • Zones 9–10: Monitor heat stress

    Plastic containers do not insulate roots well in freezing climates.

    FAQ

    Is it safe to grow vegetables in plastic bottle pots?

    Yes, if bottles are food-grade and clean.

    How long do plastic bottle flower pots last?

    Typically 1–3 years outdoors depending on UV exposure.

    What plants grow best in recycled bottle pots?

    Herbs, leafy greens, strawberries, and shallow-rooted flowers.

    Do bottle pots need drainage holes?

    Absolutely. Without drainage, root rot is likely.

    Are recycled bottle pots environmentally friendly?

    They extend plastic lifespan and reduce new container demand, but they are not permanent solutions.

    Can I sell plants grown in recycled bottle pots?

    Yes, but presentation matters. Decorative wrapping improves appearance.

    Final Thoughts

    Recycling plastic bottles into flower pots offers real environmental, financial, and practical gardening benefits especially for small spaces and urban growers.

    They are:

    • Affordable
    • Lightweight
    • Scalable
    • Suitable for vertical gardening
    • Ideal for herbs and compact flowers

    But they require:

    • Proper drainage
    • Correct soil structure
    • Thoughtful plant selection
    • Consistent watering

    When built intentionally, recycled bottle pots become productive micro-garden systems not just DIY decorations.

    Start small. Build correctly. Scale vertically.

    That’s how simple plastic waste turns into sustainable growing space.

  • Plastic bottle flower vase | How to Turn Recycled Bottles into Durable

    Every product is independently reviewed and selected by our editors. If you buy something through our links, we may earn an affiliate commission at no extra cost to you.

    A plastic bottle flower vase can be more than a quick craft project. With the right cuts, drainage, and soil setup, it can function as a long-lasting planter for fresh flowers, rooted cuttings, or small flowering plants especially in apartments, balconies, and small-space gardens.

    The key difference between a decorative bottle vase and a horticulturally functional one comes down to structure: water control, root depth, light placement, and material durability.

    In this complete guide, you’ll learn how to make a plastic bottle flower vase that not only looks good but also supports healthy plant growth.

    Introduction

    Many DIY plastic bottle vases look attractive on day one but fail within weeks.

    Why?

    • No drainage
    • Incorrect soil
    • Overheating in sunlight
    • Shallow root space
    • Weak structural support

    If you want your recycled bottle vase to hold fresh cut flowers or grow flowering plants successfully, you must treat it like a real container system.

    This guide walks you through:

    • Step-by-step construction
    • Soil composition recommendations
    • Drainage design
    • Best flowers for bottle vases
    • Watering frequency
    • Indoor vs balcony placement
    • Budget vs upgraded setups

    Whether you’re styling a windowsill or building a balcony flower wall, you’ll know exactly what works and why.

    Quick Summary Box

    • Best bottle size: 1.5–2 liter soda bottles
    • Minimum depth for flowering plants: 6–8 inches
    • Drainage holes: 3–5 holes (5–8mm diameter)
    • Ideal soil mix: 40% potting soil, 30% compost, 20% coco coir, 10% perlite
    • Best flowers: Pansies, petunias, marigolds, small kalanchoe
    • Sun exposure: South/west for flowering plants, east for delicate blooms
    • USDA zones: Outdoor use in Zones 3–10 (seasonal)

    We’ll address both design and plant health.

    Choosing the Right Plastic Bottle

    Not all bottles perform equally.

    Best Options

    • 1.5–2 liter soda bottles
    • Thick PET plastic
    • Clear or lightly tinted

    Why thicker plastic matters:

    • Holds soil weight without collapsing
    • More UV resistant
    • Easier to drill drainage holes

    Avoid:

    • Thin disposable water bottles
    • Bottles that previously stored chemicals

    Cost: Free.

    Maintenance impact: Thicker bottles last 1–3 years outdoors before UV degradation.

    Step-by-Step: How to Make a Plastic Bottle Flower Vase

    Step 1: Decide Vase Type

    There are two main designs:

    1. Decorative Water Vase (for Cut Flowers)

    • Cut bottle top off evenly.
    • Smooth edges with sandpaper or tape trim.
    • Fill with clean water.

    Best for: Roses, carnations, daisies, tulips.

    No drainage needed because soil isn’t used.

    Maintenance: Change water every 2–3 days to prevent bacterial buildup.

    2. Functional Flower Planter Vase (with Soil)

    • Cut bottle in half (horizontal cut).
    • Use bottom half as planter.
    • Height should allow 6–8 inches of soil depth.

    This design supports rooted flowering plants.

    Step 2: Add Drainage Holes (For Soil-Based Vase)

    Critical for plant health.

    How:

    • Drill 3–5 holes at bottom.
    • Each hole 5–8mm wide.
    • Add one side overflow hole ½ inch above base.

    Why:

    Plastic traps moisture. Without drainage, roots suffocate and rot.

    Optional upgrade: Place small mesh over holes to prevent soil loss.

    Step 3: Prepare the Ideal Potting Mix

    Small containers need lightweight, well-draining soil.

    Recommended Soil Composition

    • 40% quality potting mix
    • 30% compost
    • 20% coco coir
    • 10% perlite

    Why it works:

    • Compost feeds flowering plants.
    • Perlite prevents compaction.
    • Coir stabilizes moisture.
    • Potting mix supports structure.

    Avoid:

    • Garden soil (too dense).
    • Pure compost (retains excess moisture).

    Cost consideration: DIY mixing saves money for multiple vases.

    Best Flowers for Plastic Bottle Vases

    Because bottles are compact, choose shallow-rooted plants.

    1. Pansies

    • Root depth: 6 inches
    • Sun: Full sun to partial
    • Zones: 3–9

    Great for cooler seasons.

    2. Petunias

    • Root depth: 6–8 inches
    • Sun: 6+ hours (south-facing ideal)
    • Zones: 9–11 perennial, annual elsewhere

    Heavy bloomers require fertilizing every 2 weeks.

    3. Marigolds

    • Root depth: 6 inches
    • Sun: Full sun
    • Heat tolerant

    Beginner-friendly and pest resistant.

    4. Kalanchoe (Indoors)

    • Root depth: 4–6 inches
    • Light: Bright indirect (east-facing ideal)
    • Water: Allow soil to dry between watering

    Good option for indoor decorative vases.

    Light Placement Strategy

    Sun exposure directly affects bloom production.

    • South-facing: Maximum flowering performance.
    • West-facing: Strong afternoon heat monitor soil moisture.
    • East-facing: Best for delicate blooms and indoor windowsills.
    • North-facing: Limited flowering unless using grow lights.

    Indoor tip: Use full-spectrum LED grow lights (4000–6500K) placed 6–12 inches above plants for winter blooming.

    Budget lights work for small vases. Premium systems improve bloom density.

    Watering Guidelines

    Because bottle containers are small:

    Outdoor Flowering Plants

    • Summer: Every 1–2 days
    • Spring/Fall: Every 2–4 days

    Indoor Plants

    • Once per week (adjust based on dryness)

    Always water thoroughly until excess drains out.

    Avoid: Light daily sprinkling.

    Why: Deep watering strengthens root systems and prevents salt buildup.

    Fertilizing Small Flower Vases

    Flowering plants consume nutrients rapidly.

    Use:

    • Balanced liquid fertilizer (10-10-10)
    • Or bloom booster during flowering stage

    Frequency: Every 2–3 weeks at half strength.

    Overfertilizing burns roots in small containers. Dilute properly.

    Preventing Common Problems

    1. Root Rot

    Cause: Poor drainage.

    Solution: Add proper holes and use aerated soil.

    2. Overheating

    Clear plastic magnifies sunlight.

    Solution:

    • Paint exterior white.
    • Wrap with jute or fabric.
    • Avoid direct west-facing heat in hot climates.

    3. Algae Growth (Clear Bottles)

    Light + moisture encourages algae.

    Solution: Paint exterior or wrap container.

    Decorative Upgrades (Without Harming Plant Health)

    • Acrylic paint (exterior only)
    • Twine wrapping
    • Fabric covers
    • Hanging rope macrame

    Never paint interior surfaces that contact soil.

    Budget vs Upgraded Setup

    Ultra Budget ($0–$20)

    • Recycled bottles
    • DIY soil mix
    • Manual watering

    Maintenance: Higher monitoring required.

    Mid-Range ($50–$150)

    • High-quality potting soil
    • Decorative hanging system
    • Liquid fertilizer
    • Drip irrigation kit (for multiple vases)

    Maintenance: Moderate.

    Premium Indoor Floral Setup ($200+)

    • Designer mounting system
    • LED grow lights
    • Self-watering reservoirs
    • Premium potting blend

    Maintenance: Lower long-term.

    USDA Zone Considerations

    Outdoor bottle vases function seasonally:

    • Zones 3–5: Bring indoors before frost.
    • Zones 6–8: Most annual flowers thrive.
    • Zones 9–10: Monitor heat stress.

    Plastic retains heat  extreme sun can stress roots.

    FAQ

    1. Can plastic bottle vases hold soil safely?

    Yes, if drainage holes are added and proper potting mix is used.

    2. How long do plastic bottle planters last?

    Typically 1–3 years outdoors depending on sun exposure.

    3. What flowers grow best in bottle planters?

    Pansies, petunias, marigolds, and small indoor flowering plants like kalanchoe.

    4. Do plastic bottle vases need fertilizer?

    Yes. Small containers deplete nutrients quickly. Feed every 2–3 weeks.

    5. Can I hang plastic bottle flower vases?

    Yes. Reinforce with strong nylon rope or coated wire. Ensure total wet weight is supported.

    6. Is clear plastic safe in full sun?

    It can overheat roots. Painting or wrapping the bottle reduces heat stress.

    Conclusion

    A plastic bottle flower vase can be decorative, functional, and surprisingly productive if built correctly.

    The transformation happens when you apply real container gardening principles:

    • Proper drainage
    • Adequate root depth
    • Aerated soil mix
    • Correct sun placement
    • Consistent watering

    Start with one or two bottles. Choose compact flowering plants. Monitor drainage and light exposure. Once you see healthy blooms and strong root development, you can scale into a vertical floral display for your balcony or windowsill.

    Recycling becomes gardening when you respect plant biology.

    Build it well, and your plastic bottle vase won’t just hold flowers  it will grow them.

  • Diy Plant Pots From Recycled Materials

    Every product is independently reviewed and selected by our editors. If you buy something through our links, we may earn an affiliate commission at no extra cost to you.

    You don’t need designer planters to grow thriving herbs, flowers, or vegetables. Some of the most productive containers I’ve used were made from recycled buckets, crates, tins, and household discards modified correctly for drainage, root depth, and soil structure.

    The difference between a “Pinterest craft pot” and a functional growing container comes down to horticulture fundamentals: drainage, volume, material behavior, and placement.

    In this guide, you’ll learn how to turn common recycled materials into long-lasting, plant-safe containers that support real root development not just short-term décor.

    Introduction

    Many DIY plant pots fail because they ignore how roots behave in containers.

    Poor drainage suffocates roots. Shallow containers stunt growth. Metal overheats. Thin plastic cracks under UV exposure. And garden soil compacts into a brick.

    If you want recycled planters that actually grow healthy plants, you need to build them with:

    • Proper drainage holes
    • Correct container depth
    • The right potting mix
    • Sunlight placement strategy
    • Realistic watering discipline

    This guide walks you through proven materials, step-by-step modifications, soil recipes, and plant pairings whether you’re gardening on a balcony, patio, or windowsill.

    Quick Summary Box

    • Minimum container depth: 6–8 inches for herbs/greens, 10–12 inches for vegetables
    • Drainage holes: 3–6 holes (¼–½ inch wide depending on size)
    • Ideal soil mix: 40% potting mix, 30% compost, 20% coco coir, 10% perlite
    • Best materials: Food-grade buckets, wooden crates, tin cans (lined), plastic tubs
    • Avoid: Treated lumber, toxic paint residue, sealed containers without drainage
    • Sun exposure: South/west for vegetables, east for herbs
    • USDA Zones: Works outdoors in Zones 3–10 (season dependent)

    This guide delivers functional container systems, not just craft ideas.

    The Core Principles of Functional DIY Plant Pots

    Before choosing materials, understand what makes a container horticulturally sound.

    1. Drainage Is Non-Negotiable

    Roots require oxygen. When water fills all air spaces in soil, anaerobic conditions form and roots rot.

    Every recycled container must have:

    • Multiple drainage holes at the base
    • Optional side overflow hole (½ inch above bottom)

    Cost impact: Free if you own a drill. Maintenance impact: Proper drainage reduces fungal disease and watering stress.

    2. Depth Determines What You Can Grow

    Root depth requirements:

    Plant TypeMinimum Depth
    Microgreens2–3 inches
    Herbs6 inches
    Leafy greens6–8 inches
    Strawberries8 inches
    Peppers10–12 inches
    Tomatoes12–18 inches

    Shallow containers dry faster and limit nutrient storage.

    Beginner mistake: Trying to grow tomatoes in a 6-inch container.

    3. Soil Structure Matters More Than Container Style

    Never use garden soil in recycled pots.

    It compacts, drains poorly, and suffocates roots.

    Ideal DIY Potting Mix:

    • 40% high-quality potting soil
    • 30% screened compost
    • 20% coco coir or peat moss
    • 10% perlite or pumice

    Why it works:

    • Compost feeds plants
    • Perlite adds aeration
    • Coir regulates moisture
    • Potting soil stabilizes structure

    Budget tip: Buying ingredients separately is cheaper for multiple containers.

    Best Recycled Materials for DIY Plant Pots

    1. Food-Grade Plastic Buckets (Highly Recommended)

    Best for: Tomatoes, peppers, potatoes, cucumbers

    Why they work:

    • Durable
    • Deep root space
    • Lightweight
    • Weather resistant

    How to Modify:

    • Drill 4–6 drainage holes (½ inch diameter)
    • Add one overflow hole on the side
    • Elevate slightly on pot feet or bricks

    Cost: Often free from bakeries or restaurants.

    Maintenance: Low. Last 3–5+ years outdoors.

    Pro tip: White buckets reflect heat better than dark ones.

    2. Wooden Crates

    Best for: Lettuce, spinach, herbs

    Why they work:

    • Good airflow
    • Natural insulation
    • Visually appealing

    How to Modify:

    • Line interior with landscape fabric
    • Drill drainage holes if base is solid
    • Avoid pressure-treated wood (chemical leaching risk)

    Root depth: Choose crates at least 8–10 inches deep.

    Cost: $0–$20 depending on source.

    Maintenance: Moderate. Wood may degrade in 2–4 years.

    Seal with food-safe linseed oil to extend life.

    3. Tin Cans (Small-Scale Growing)

    Best for: Herbs, succulents

    Limitations:

    • Heat retention
    • Shallow depth
    • Rust over time

    How to Modify:

    • Drill 3–4 small holes at base
    • Consider adding a thin plastic liner with holes
    • Paint exterior with rust-resistant paint

    Placement: Avoid full afternoon sun (west-facing balconies).

    Maintenance: Higher. Monitor soil moisture carefully.

    4. Old Storage Tubs or Plastic Bins

    Best for: Raised container beds

    Choose bins:

    • At least 10–12 inches deep
    • Thick, UV-resistant plastic

    Modification:

    • Drill 6–8 drainage holes (½ inch)
    • Consider adding casters for mobility

    Cost: $10–$30 if not recycled.

    Great for renters who need movable gardens.

    5. Woven Baskets (With Liner)

    Best for: Decorative herb containers

    Always:

    • Use thick plastic liner with drainage holes
    • Elevate off ground

    Maintenance: High. They dry quickly.

    Budget vs premium: Synthetic woven baskets last longer outdoors.

    Matching Recycled Pots to Plants

    Herbs (Zones 3–10 Seasonal)

    • Basil (6+ hours sun)
    • Parsley (4–6 hours)
    • Thyme (full sun)
    • Mint (partial sun)

    Watering: Every 2–4 days depending on temperature.

    Fertilize: Diluted liquid fertilizer every 3 weeks.

    Leafy Greens

    Prefer: East-facing exposure or partial sun.

    Reason: Strong afternoon heat causes bolting.

    Water: Consistent moisture; avoid drought cycles.

    Fruiting Vegetables

    Tomatoes and peppers require:

    • 12–18 inch depth
    • South-facing exposure
    • Regular feeding (every 2 weeks)

    Use larger buckets or tubs only.

    Watering Strategy for Recycled Containers

    Smaller containers dry faster than ground soil.

    General watering frequency:

    • Summer: Every 1–2 days
    • Spring/Fall: Every 3–4 days
    • Indoors: Weekly (depending on light)

    Best method: Water deeply until excess drains out.

    Avoid: Frequent shallow watering.

    Optional upgrade: Install a simple drip irrigation kit for larger setups.

    Pest & Disease Prevention

    Common issues:

    • Aphids
    • Spider mites
    • Fungal leaf spots

    Prevention strategies:

    • Ensure airflow between pots
    • Avoid overcrowding
    • Apply neem oil at first sign of pests
    • Remove yellowing leaves promptly

    Drainage prevents 80% of root diseases.

    Budget vs Premium Setup Comparison

    Ultra Budget ($0–$50)

    • Recycled buckets/tubs
    • DIY soil mix
    • Manual watering

    Best for beginners.

    Maintenance: Higher involvement.

    Mid-Range ($100–$250)

    • High-quality potting mix
    • Drip irrigation system
    • Food-grade containers
    • Organic liquid fertilizer

    Lower stress, higher productivity.

    Premium Container System ($300+)

    • Self-watering containers
    • Integrated reservoir systems
    • Premium potting blend
    • Full sun positioning with grow lights for winter

    Best for year-round growing indoors.

    Lower maintenance, higher initial investment.

    Common Beginner Mistakes

    • No drainage holes
    • Using treated lumber
    • Overfilling containers without airflow space
    • Ignoring sun direction
    • Using garden soil
    • Underestimating weight on balconies

    Always calculate wet soil weight before hanging or stacking.

    USDA Zone Considerations

    • Zones 3–5: Short growing season; start indoors early.
    • Zones 6–8: Ideal for most container vegetables.
    • Zones 9–10: Monitor heat stress and increase watering frequency.

    In hot climates: Use light-colored containers to reduce root overheating.

    FAQ

    1. What household items can be used as plant pots?

    Food-grade buckets, wooden crates, tin cans, storage bins, baskets with liners, and large yogurt containers as long as you add drainage holes.

    2. Is it safe to grow vegetables in recycled plastic containers?

    Yes, if they are food-grade and free from chemical residue.

    3. How deep should a DIY plant pot be?

    Minimum 6 inches for herbs, 12+ inches for fruiting vegetables.

    4. Can I use cardboard as a plant pot?

    Only short-term. It degrades quickly when wet.

    5. Do recycled containers need special soil?

    Yes. Use lightweight potting mix with compost and perlite never garden soil.

    6. How often should I fertilize container plants?

    Every 2–3 weeks during active growth with diluted liquid fertilizer.

    Final Thoughts

    DIY plant pots from recycled materials can be just as productive as store-bought containers   when built correctly.

    The key isn’t creativity alone. It’s respecting root depth, drainage, soil structure, and sunlight direction.

    Start simple:

    • One food-grade bucket
    • One quality soil mix
    • One herb or vegetable suited to your space

    Once you understand how roots behave in containers, you can scale your recycled system confidently.

    Over time, this approach saves money, reduces waste, and transforms balconies, patios, and small yards into productive growing spaces.

    Build smart. Drain well. Grow consistently.

    That’s how recycled containers become real gardens.

  • How to make hanging planters from plastic bottles

    Every product is independently reviewed and selected by our editors. If you buy something through our links, we may earn an affiliate commission at no extra cost to you.

    Hanging planters made from plastic bottles are one of the smartest small‑space gardening solutions  but only if they’re built with proper drainage, soil structure, and plant selection in mind.

    Too many DIY tutorials focus on cutting and decorating while ignoring root depth, watering control, and sunlight direction. The result? Soggy soil, dying herbs, and dripping messes indoors.

    This guide shows you exactly how to make hanging planters from plastic bottles that are structurally secure, horticulturally sound, and productive whether you’re growing indoors, on a balcony, or under a patio overhang.

    Introduction

    Hanging planters behave differently from ground-level containers.

    They:

    • Dry out faster due to air circulation
    • Experience more temperature fluctuation
    • Drain more quickly
    • Require lighter soil mixes

    If you compensate correctly  by choosing the right bottle size, adding proper drainage, using aerated potting mix, and selecting shallow-rooted plants hanging plastic bottle planters can produce herbs, lettuce, strawberries, and compact flowers successfully.

    This step‑by‑step guide covers construction, soil composition, watering frequency, light direction, USDA zone considerations, and common beginner mistakes.

    Quick Summary Box

    • Best bottle size: 2‑liter soda bottles
    • Soil depth: Minimum 6–8 inches
    • Drill 4–6 drainage holes (¼ inch)
    • Use lightweight potting mix with perlite
    • Choose shallow-rooted plants
    • South-facing exposure for fruiting plants
    • Water when top 1 inch is dry
    • Secure hanging support properly

    Why Hanging Bottle Planters Work (and Where They Fail)

    Benefits

    • Space-saving vertical gardening
    • Lightweight containers
    • Ideal for balconies and small patios
    • Low material cost

    Common Failures

    • No drainage holes
    • Overcrowding plants
    • Using heavy garden soil
    • Weak hanging support
    • Underestimating wind exposure

    Proper setup prevents these issues.

    Step 1: Choose the Right Plastic Bottle

    Best Options

    2‑Liter Soda Bottles (Most Versatile)

    • Soil depth: 6–8 inches
    • Supports herbs, lettuce, strawberries

    1‑Gallon Water Jugs

    • Soil depth: 8–10 inches
    • Suitable for dwarf peppers or larger herbs

    Avoid thin, brittle plastic for outdoor use.

    UV exposure degrades low-quality bottles within 1–2 seasons.

    Step 2: Cutting the Bottle (Two Proven Designs)

    Design 1: Horizontal Hanging Planter (Most Popular)

    • Lay bottle sideways
    • Cut a large rectangular opening on one side
    • Drill two holes near each end (for rope)
    • Drill 4–6 drainage holes in bottom

    Why it works:

    Provides wide planting space and balanced weight distribution.

    Design 2: Vertical Hanging Planter

    • Cut side window
    • Keep bottle upright
    • Drill 4–6 drainage holes at base
    • Add two holes near neck for hanging cord

    Best for:

    • Strawberries
    • Trailing herbs

    Step 3: Add Proper Drainage (Critical for Hanging Planters)

    Hanging planters dry faster but still need drainage.

    Drainage Setup

    • 4–6 holes, ¼ inch diameter
    • Add 1–2 side holes ½ inch above base
    • Elevate slightly using washers if indoors

    Why it matters:

    Without drainage, roots suffocate. With too much drainage and poor soil, soil washes out.

    Balance is key.

    Step 4: Use the Correct Soil Mix

    Never use backyard soil in hanging planters.

    Ideal Soil Composition

    • 50% coco coir or peat moss
    • 30% compost
    • 20% perlite

    Why this works:

    • Perlite reduces weight
    • Improves airflow
    • Prevents compaction
    • Allows excess water to drain freely

    Cost impact:

    High-quality potting mix costs more upfront but reduces plant failure and pest problems.

    Step 5: Secure Hanging Support Properly

    This is often overlooked.

    Hanging Options

    • Nylon rope (weather-resistant)
    • Metal chain
    • S-hooks and wall brackets
    • Balcony rail hooks

    Load capacity guideline:

    A 2‑liter planter filled with moist soil weighs 5–8 pounds.

    Ensure support can handle at least 10 pounds for safety.

    Maintenance impact:

    Check knots and attachment points monthly.

    Step 6: Choose the Right Plants

    Hanging containers have limited root depth and faster moisture loss.

    Best Plants for Hanging Bottle Planters

    Herbs

    • Basil
    • Parsley
    • Thyme
    • Oregano

    Require 6–8 inches soil depth.

    Leafy Greens

    • Lettuce
    • Arugula
    • Spinach

    Minimum 4–6 inches soil depth.

    Strawberries

    • 8 inches soil depth
    • Full sun required

    USDA Zones 4–11 outdoors.

    Compact Flowers

    • Petunias
    • Alyssum
    • Pansies

    Shallow root systems.

    Avoid:

    • Indeterminate tomatoes
    • Large root vegetables
    • Heavy fruiting plants without strong support

    Step 7: Sunlight Planning

    South-Facing Exposure

    • 6–8 hours direct sun
    • Best for strawberries and peppers

    East-Facing

    • Gentle morning sun
    • Ideal for greens and herbs

    West-Facing

    • Hot afternoon sun
    • Increase watering frequency

    North-Facing

    • Low light
    • Use grow lights indoors

    If growing indoors, use full-spectrum LED lights (20–40 watts per shelf, 12–14 hours daily).

    Watering Strategy for Hanging Planters

    Hanging planters dry faster due to airflow.

    General watering schedule:

    • Indoor: Every 2–3 days
    • Outdoor summer: Daily check required
    • Strawberries/fruiting plants: Keep consistently moist

    Always check soil 1 inch deep before watering.

    Overwatering causes more damage than underwatering.

    Fertilizing Hanging Bottle Planters

    Limited soil volume means limited nutrients.

    For leafy plants:

    • Balanced liquid fertilizer every 2–3 weeks

    For fruiting plants:

    • Add slow-release fertilizer at planting
    • Supplement every 2 weeks

    Cost: $10–$20 per bottle of fertilizer lasts entire season.

    Pest Prevention Basics

    Hanging planters may attract:

    • Aphids
    • Spider mites
    • Whiteflies

    Prevention:

    • Ensure airflow
    • Avoid overcrowding
    • Inspect weekly
    • Use neem oil spray if necessary

    Healthy plants resist pests better.

    Budget vs Premium Hanging Setup

    Budget Setup ($40–$70)

    • Recycled bottles
    • Basic potting mix
    • Nylon rope
    • Seed packets

    Ideal for balconies and kitchens.

    Premium Setup ($120–$250)

    • UV-resistant decorative paint
    • High-quality potting mix
    • Slow-release fertilizer
    • Wall brackets
    • Drip irrigation kit (for multiple planters)

    Premium reduces watering labor and improves durability.

    Common Beginner Mistakes

    • No drainage holes
    • Using heavy soil
    • Hanging in low-light areas
    • Weak rope or insecure mounting
    • Overcrowding plants

    Correct these and hanging bottle planters become reliable micro-gardens.

    FAQ

    1. What size bottle is best?

    2‑liter bottles are the most versatile.

    2. Do hanging bottle planters need drainage holes?

    Yes. Always drill 4–6 holes.

    3. How much weight can a hanging bottle planter hold?

    Typically 5–8 pounds when filled with moist soil.

    4. How often should I water?

    Check daily outdoors. Indoors every 2–3 days.

    5. What’s the easiest plant to start with?

    Leaf lettuce or basil.

    6. Can I grow strawberries?

    Yes, with 8 inches soil depth and full sun.

    Final Thoughts

    Learning how to make hanging planters from plastic bottles is about more than cutting and tying rope.

    The difference between a thriving vertical garden and a failed DIY project comes down to:

    • Proper drainage
    • Lightweight soil composition
    • Correct root depth
    • Secure hanging support
    • Appropriate sunlight exposure
    • Consistent watering

    Start with one horizontal 2‑liter herb planter in a bright location. Monitor moisture carefully. Once successful, expand into a full vertical system.

    Hanging gardens save space. Recycled materials save money. Proper technique ensures long-term growth.

    Build it smart  and your hanging bottle planters will produce season after season.

  • Large plastic bottle planters diy

    Every product is independently reviewed and selected by our editors. If you buy something through our links, we may earn an affiliate commission at no extra cost to you.

    Large plastic bottle planters can grow far more than microgreens. When you use 1‑gallon water jugs, 2‑liter bottles in clusters, or large cooking oil containers, you can support strawberries, peppers, bush beans, leafy greens, and even compact root vegetables.

    But larger bottles don’t automatically mean better growth. Without proper drainage, soil structure, and root-depth planning, they fail just like smaller ones.

    This guide shows you how to build large plastic bottle planters DIY-style using real container gardening principles so your recycled containers produce healthy, productive plants.

    Before you spend $40 on a large patio planter, consider this: a properly modified 1‑gallon water bottle can support a thriving pepper plant if you build it with the right soil depth, drainage, and light exposure.

    Introduction

    Most DIY bottle planter tutorials are designed for decoration or shallow-rooted plants. But large plastic bottles like 1‑gallon water jugs or 5‑liter containers allow deeper root systems and better moisture stability.

    The challenge?

    • Plastic retains water longer than clay
    • Large containers tempt overwatering
    • Poor drainage causes root rot
    • Inadequate soil mix leads to compaction

    This guide covers everything you need:

    • Proper container depth guidelines
    • Drainage hole placement
    • Soil composition formulas
    • Sunlight direction planning
    • Watering schedules
    • USDA zone considerations
    • Cost comparisons (budget vs premium setups)

    By the end, you’ll know exactly how to convert large plastic bottles into productive container gardens.

    Quick Summary Box

    • Best containers: 1‑gallon (4L) water jugs or 5‑liter bottles
    • Minimum soil depth: 8–12 inches for most crops
    • Add 6–10 drainage holes (¼–⅜ inch)
    • Use high-quality container potting mix
    • Place fruiting plants in south-facing sun
    • Fertilize every 2–3 weeks
    • Elevate containers to prevent waterlogging

    Why Use Large Plastic Bottle Planters?

    1. Increased Root Volume = Healthier Plants

    Plants thrive when roots can expand freely.

    Compared to 1‑liter bottles (4–5 inches soil depth), large bottles provide:

    • 8–12 inches soil depth
    • More stable moisture levels
    • Greater nutrient retention

    Why it works: Larger soil mass buffers temperature swings and moisture fluctuations.

    Maintenance impact: Slightly less frequent watering than small bottles.

    2. Budget-Friendly Large Containers

    Cost comparison:

    • 12‑inch decorative outdoor planter: $30–$60
    • Recycled 1‑gallon water jug: Free

    Total setup cost (per container):

    • Potting mix: $3–$5 worth
    • Seedling: $3–$6
    • Fertilizer: Minimal per plant

    You can build 6 large planters for under $60.

    Step 1: Choosing the Right Large Bottle

    Best Large Bottle Options

    1‑Gallon Water Jugs (4L)

    • Soil depth: 8–10 inches
    • Ideal for: peppers, bush beans, strawberries

    5‑Liter Cooking Oil Containers

    • Soil depth: 10–12 inches
    • Good for: dwarf tomatoes, eggplant, deep-rooted herbs

    Large Soda Bottles (Grouped)

    • Combine 2–3 bottles for wider planting bed

    Avoid thin, brittle plastic if placing outdoors long-term.

    UV exposure can degrade plastic in 1–2 growing seasons.

    Root Depth Guidelines for Large Bottle Planters

    Plant TypeRecommended Soil Depth
    Leaf lettuce6 inches
    Kale8–10 inches
    Strawberries8–10 inches
    Bush beans8–10 inches
    Dwarf peppers10 inches
    Dwarf tomatoes12 inches minimum
    Radishes6–8 inches

    Indeterminate tomatoes require at least 15–18 inches not suitable for most bottle planters.

    Step 2: Proper Drainage for Large Containers

    Large plastic containers retain more water.

    Why Drainage Is Critical

    Without adequate drainage:

    • Lower soil layers remain saturated
    • Roots rot from the bottom upward
    • Nutrient uptake declines

    How to Add Drainage Correctly

    • Drill 6–10 holes in the base
    • Hole size: ¼–⅜ inch
    • Add 2–3 holes 1 inch above base (side drainage)

    Why side holes help: They prevent water from pooling at the very bottom.

    Elevate container on bricks or pot feet.

    Maintenance impact: Reduces root rot and fungus gnats.

    Step 3: Soil Composition for Large Bottle Planters

    Never use garden soil.

    Ideal Container Mix

    For productive large bottle planters:

    • 50% coco coir or peat moss
    • 30% compost
    • 20% perlite

    For fruiting crops (peppers, tomatoes):

    Add slow-release organic fertilizer at planting time.

    Why this works:

    • Ensures aeration in deeper soil layers
    • Prevents compaction
    • Supports strong root growth

    Cost consideration: Premium potting mix costs more but dramatically improves yield and reduces plant stress.

    Step 4: Sunlight Requirements

    Light exposure determines productivity.

    Outdoor Placement

    South-Facing (Best)

    • 6–8+ hours direct sun
    • Required for peppers and tomatoes

    East-Facing

    • Morning sun
    • Suitable for greens and herbs

    West-Facing

    • Strong afternoon sun
    • Monitor soil drying

    Indoor Placement

    If growing indoors:

    • Place near south-facing window
    • Supplement with LED grow lights if needed

    Buying criteria for grow lights:

    • Full-spectrum
    • 30–50 watts per plant
    • Adjustable height
    • 12–14 hour timer

    Cost range: $40–$120 depending on size.

    8 Large Plastic Bottle Planter DIY Ideas

    1. Deep Pepper Planter

    Use 5‑liter container.

    Requirements:

    • 10–12 inches soil
    • Full sun
    • Fertilize every 2 weeks

    Stake plant for support.

    2. Strawberry Hanging Jug

    Cut large side opening.

    Soil depth: 8–10 inches.

    Daily moisture checks during summer.

    USDA Zones: 4–11 outdoors.

    3. Kale or Swiss Chard Planter

    Needs:

    • 8–10 inches soil
    • 6 hours sunlight

    Cool-season crop (Zones 3–9).

    4. Dwarf Tomato Bottle Planter

    Use only compact or patio varieties.

    Requirements:

    • 12 inches soil
    • Strong sunlight
    • Consistent feeding

    Avoid indeterminate varieties.

    5. Bush Bean Planter

    Soil depth: 8–10 inches.

    Provide small trellis support.

    High yield in small footprint.

    6. Mini Raised Bed Cluster

    Group 3–4 large bottles side-by-side.

    Creates shallow “modular bed.”

    Good for:

    • Salad greens
    • Companion planting

    7. Root Vegetable Planter (Radishes)

    Minimum: 8 inches soil.

    Harvest in 25–30 days.

    8. Herb Combination Planter

    Use wide 5‑liter container.

    Combine:

    • Thyme
    • Oregano
    • Basil

    Ensure adequate spacing to prevent overcrowding.

    Watering Guidelines for Large Bottle Planters

    Larger containers dry slower but still require monitoring.

    General schedule:

    • Outdoor summer: Check daily
    • Indoor: Every 3–4 days
    • Fruiting plants: Maintain consistent moisture

    Insert finger 2 inches deep to test moisture.

    Never water on a fixed schedule without checking soil.

    Fertilizing Strategy

    Large bottle planters still contain limited nutrients.

    For leafy greens:

    • Balanced liquid fertilizer every 2–3 weeks

    For fruiting crops:

    • Add compost at planting
    • Liquid feed every 2 weeks

    Cost: $10–$20 fertilizer lasts full season.

    Pest Prevention Basics

    Common issues:

    • Aphids
    • Spider mites
    • Whiteflies
    • Fungus gnats

    Prevention:

    • Proper drainage
    • Adequate spacing
    • Neem oil spray as needed
    • Avoid overcrowding

    Healthy plants resist pests better.

    Budget vs Premium Setup

    Budget Setup ($50–$80 total)

    • Recycled bottles
    • Standard potting mix
    • Seedlings
    • Manual watering

    Ideal for beginners.

    Premium Setup ($150–$300)

    • High-grade potting mix
    • Organic slow-release fertilizer
    • Drip irrigation kit
    • Decorative paint finish
    • Grow lights for indoor setups

    Premium reduces maintenance and increases yield reliability.

    Common Beginner Mistakes

    • Not drilling enough drainage holes
    • Using garden soil
    • Growing deep-root crops in shallow containers
    • Overwatering large containers
    • Ignoring sunlight direction

    Correct these and large bottle planters become highly productive.

    FAQ

    1. How deep should a large bottle planter be?

    At least 8–12 inches depending on plant type.

    2. Can I grow tomatoes in large bottle planters?

    Yes, but only dwarf or patio varieties.

    3. Do large plastic planters need more drainage holes?

    Yes, 6–10 holes minimum.

    4. How long do they last outdoors?

    Usually 1–2 seasons before UV damage weakens plastic.

    5. What’s the best crop for beginners?

    Bush beans or kale forgiving and productive.

    6. Can I use them year-round?

    In USDA Zones 9–11 possibly. In colder zones, protect from frost.

    Final Thoughts

    Large plastic bottle planters DIY projects can rival traditional container gardens if built correctly.

    The difference between success and failure comes down to:

    • Proper drainage
    • Correct soil composition
    • Adequate root depth
    • Strong sunlight exposure
    • Consistent moisture management

    Start with one deep 5‑liter pepper planter in a sunny location. Focus on soil quality and drainage. Once you see stable growth and healthy foliage, expand into a modular bottle garden system.

    Recycled containers can grow serious food. But only when you treat them like real containers.

    Build smart and your large bottle planters will produce season after season.

  • Plastic bottle planters diy | A Guide to Building Functional Space‑Saving Container Gardens

    Every product is independently reviewed and selected by our editors. If you buy something through our links, we may earn an affiliate commission at no extra cost to you.

    Plastic bottle planters aren’t just a craft trend  they’re a practical way to grow herbs, leafy greens, strawberries, and compact flowers in small spaces. But if you skip proper drainage, soil structure, and root depth planning, they fail fast.

    This DIY guide shows you how to build plastic bottle planters that actually support healthy root systems, balanced moisture, and consistent growth whether you’re gardening indoors, on a balcony, or in a small backyard.

    Before you buy another $30 decorative planter, look at your recycling bin. A properly modified 2‑liter bottle can grow fresh basil, lettuce, or even dwarf peppers if you build it like a real container garden.

    Introduction

    Many DIY plastic bottle planters look good for photos but ignore horticultural basics. The result’s are give below one after another

    • Soggy soil
    • Root rot
    • Weak growth
    • Fungus gnats
    • Plants that die within weeks

    The truth is simple: containers are mini ecosystems. They need airflow, drainage, appropriate soil composition, and enough depth for roots.

    This guide walks you through proven DIY plastic bottle planter designs with exact soil blends, drainage requirements, light placement advice, USDA zone considerations, and cost breakdowns.

    By the end, you’ll know how to build planters that are affordable, attractive, and productive.

    Quick Summary Box

    • Best bottle size: 2‑liter for versatility
    • Minimum soil depth: 4–8 inches depending on plant
    • Always drill 4–6 drainage holes (¼ inch wide)
    • Use lightweight potting mix (never garden soil)
    • Match plant type to root depth
    • Water only when top 1 inch of soil is dry
    • Use south-facing light for fruiting plants
    • Fertilize lightly every 2–3 weeks

    Why Plastic Bottle Planters Can Work

    Moisture Retention

    Plastic is non‑porous, meaning it retains water longer than terracotta. That’s helpful for shallow-rooted plants like lettuce and herbs.

    However, this increases the risk of overwatering  especially indoors.

    Maintenance impact: You must monitor soil moisture carefully.

    Cost Efficiency

    Typical decorative planter: $15–$40 Recycled bottle: Free

    A complete 6‑planter setup typically costs:

    • Potting mix: $15–$25
    • Seeds or starter plants: $10–$25
    • Optional paint/supplies: $10–$20

    Total: $35–$70 for a small container garden.

    Step 1: Choosing the Right Bottle Size

    Root depth determines success.

    1‑Liter Bottles

    • Soil depth: 4–5 inches
    • Best for: microgreens, baby lettuce
    • Requires frequent watering

    2‑Liter Bottles (Most Practical)

    • Soil depth: 6–8 inches
    • Suitable for: basil, parsley, strawberries, marigolds
    • More forgiving moisture control

    1‑Gallon Water Bottles

    • Soil depth: 8–10 inches
    • Ideal for: dwarf peppers, compact flowering plants

    Root Depth Guidelines

    Plant TypeMinimum Soil Depth
    Microgreens2–3 inches
    Lettuce4–6 inches
    Herbs6–8 inches
    Strawberries8 inches
    Dwarf peppers8–10 inches

    Avoid full-size tomatoes unless using containers at least 12 inches deep.

    Step 2: Add Proper Drainage

    This is the most critical step.

    Why Drainage Matters

    Roots need oxygen to absorb nutrients. Saturated soil causes:

    • Root suffocation
    • Fungal diseases
    • Fungus gnats
    • Nutrient imbalance

    How to Create Drainage

    • Drill 4–6 holes in the bottom
    • Hole size: ¼ inch
    • Elevate slightly on pebbles or bottle caps
    • Place on drainage tray indoors

    Never skip this step.

    Maintenance impact: Proper drainage reduces pest problems and plant loss.

    Step 3: Use the Right Soil Mix

    Garden soil is too dense for small containers.

    Ideal DIY Potting Mix

    Look for or mix:

    • 50–60% peat moss or coco coir
    • 25–35% compost
    • 10–20% perlite

    Why this works:

    • Maintains airflow
    • Prevents compaction
    • Retains moisture without waterlogging

    Avoid:

    • Heavy clay soil
    • Pure compost
    • Yard soil

    Cost consideration: Quality potting mix reduces long-term plant replacement costs.

    8 Practical DIY Plastic Bottle Planter Designs

    1. Basic Horizontal Planter

    Cut bottle lengthwise.

    Best plants:

    • Leaf lettuce
    • Spinach
    • Arugula

    Light: East- or south-facing window indoors.

    2. Vertical Hanging Planter

    Cut side window and hang with rope.

    Best for:

    • Herbs
    • Trailing flowers

    Check daily in hot weather outdoors.

    3. Self-Watering Bottle Planter

    Cut bottle in half. Invert top into bottom with cotton wick.

    Why it works: Capillary action pulls moisture upward.

    Best plants:

    • Basil
    • Lettuce

    Maintenance: Refill water reservoir weekly.

    4. Tiered Bottle Tower

    Stack bottles vertically.

    Ideal for:

    • Strawberries
    • Compact greens

    Requires stable support structure.

    5. Indoor Herb Wall

    Attach bottles near bright window.

    Add LED grow lights if light is insufficient.

    Buying criteria for grow lights:

    • Full-spectrum
    • 20–40 watts per shelf
    • 12–14 hour timer

    Cost: $30–$100.

    6. Microgreens Bottle Tray

    Fill with 2–3 inches soil.

    Harvest in 10–14 days.

    Low maintenance, high success rate.

    7. Dwarf Pepper Planter

    Use 2‑liter bottle.

    Requirements:

    • 8–10 inches soil depth
    • South-facing window or full sun outdoors
    • Fertilize every 2 weeks

    8. Balcony Rail Planter

    Secure horizontally to railing.

    USDA Zones:

    • Cool-season greens: Zones 3–9
    • Warm-season annuals: Zones 4–11

    Monitor moisture daily in summer heat.

    Light Requirements

    Understanding sun direction prevents weak growth.

    South-Facing

    6–8 hours direct sun. Best for fruiting plants.

    East-Facing

    Morning sun. Ideal for greens and herbs.

    West-Facing

    Strong afternoon heat. Monitor soil moisture.

    North-Facing

    Low light. Use grow lights for most plants.

    Watering Guidelines

    Small plastic containers hold moisture longer but have limited soil volume.

    General schedule:

    • Indoor herbs: Every 2–3 days
    • Outdoor summer containers: Daily moisture check
    • Succulents: Every 10–14 days

    Always test soil 1 inch deep before watering.

    Overwatering is the most common DIY mistake.

    Fertilizing Plastic Bottle Planters

    Small soil volumes deplete nutrients quickly.

    Use:

    • Balanced liquid fertilizer (10‑10‑10)
    • Apply every 2–3 weeks

    Organic options:

    • Fish emulsion
    • Seaweed extract

    Cost: $10–$20 per bottle lasts months.

    Pest Prevention Basics

    Common pests:

    • Fungus gnats
    • Aphids
    • Spider mites

    Prevention:

    • Avoid soggy soil
    • Ensure airflow
    • Use neem oil if necessary

    Healthy soil and correct watering prevent most issues.

    Beginner Mistakes to Avoid

    • No drainage holes
    • Using garden soil
    • Overcrowding plants
    • Choosing deep-root crops
    • Ignoring sunlight direction

    Correct these and DIY bottle planters become reliable growing systems.

    Budget vs Premium DIY Setup

    Budget Setup ($35–$60)

    • Recycled bottles
    • Basic potting mix
    • Seeds
    • Natural sunlight

    Best for beginners.

    Premium Setup ($100–$200)

    • LED grow lights
    • Self-watering inserts
    • Organic fertilizers
    • Drip irrigation kit for outdoor setups
    • Decorative finishes

    Premium reduces maintenance and improves consistency.

    FAQ

    1. Are plastic bottle planters good for vegetables?

    Yes, for shallow-rooted vegetables like lettuce, spinach, and dwarf peppers.

    2. Do I need drainage holes?

    Absolutely. Without them, root rot is likely.

    3. How long do bottle planters last?

    Typically 1–2 growing seasons before UV degradation.

    4. What soil works best?

    Lightweight potting mix with peat/coir and perlite.

    5. Can I grow indoors year-round?

    Yes, with sufficient light or LED grow lights.

    6. Are they safe for edible plants?

    Yes, if bottles previously contained beverages and are cleaned thoroughly.

    Final Thoughts

    Plastic bottle planters DIY projects can be practical, affordable, and surprisingly productive when built with real container gardening principles.

    Success depends on:

    • Proper drainage
    • Correct soil composition
    • Adequate root depth
    • Appropriate light exposure
    • Careful watering

    Start with a simple 2‑liter herb planter in a bright window. Once you master moisture control and plant selection, expand into vertical walls or balcony systems.

    Recycling saves money. Growing your own herbs saves grocery costs. Combining both creates a sustainable, small‑space gardening system that actually works.

    Build it properly and your DIY bottle planters won’t just look creative. They’ll produce real results.