Author: Adams Charles

  • How long does spinach take to grow indoors

    How long does spinach take to grow indoors

    Every product is independently reviewed and selected by our editors. If you buy something through our links, we may earn an affiliate commission at no extra cost to you.

    If you’ve ever wondered how long does spinach take to grow indoors, you’re asking the right question and not just for gardening reasons. In my experience working with U.S. homeowners and renters, spinach is one of the most rewarding edible plants for indoor spaces because it grows quickly, thrives in small areas, and fits naturally into organic home décor ideas. Knowing the realistic indoor growth timeline helps you plan your care routine, manage expectations, and design a calm, productive living environment that supports both wellness and sustainability.

    Growing spinach indoors isn’t only about harvesting greens. It contributes to better indoor air balance, reduces stress through daily plant care, and supports sustainable home design by cutting down on packaged produce and food waste. When grown organically, spinach becomes part of a toxin-free, natural interior decoration strategy functional, beautiful, and deeply practical.

    This guide is written from real-world experience, not theory. It’s designed to help you grow spinach indoors successfully, whether you live in a small apartment, a rental with limited light, or a family home with seasonal climate challenges.

    Why Understanding Indoor Spinach Growth Time Matters

    Indoor gardening often fails not because people lack interest, but because expectations don’t match reality. Spinach is fast-growing, but “fast” depends on light, temperature, and care habits.

    Health & Indoor Air Quality

    Living plants, including spinach, help regulate humidity and encourage better airflow when grouped with other indoor plants and natural materials. In homes with dry winter air or sealed windows, this subtle balance matters.

    Mental Well-Being & Stress Reduction

    In real homes I’ve worked in, fast-growing plants like spinach provide visible progress within days. That sense of momentum sprouts emerging, leaves expanding reduces stress and builds confidence, especially for beginners.

    Sustainability & Environmental Impact

    Spinach grown indoors uses minimal space, water, and energy compared to transported greens. It supports organic gardening practices while reducing plastic packaging and food miles.

    Creating a Toxin-Free, Calming Living Space

    Organic indoor spinach requires no chemical sprays or synthetic fertilizers, making it ideal for kitchens, living rooms, and homes with children or pets.

    So, How Long Does Spinach Take to Grow Indoors? A Realistic Timeline

    Let’s address the core question clearly and honestly.

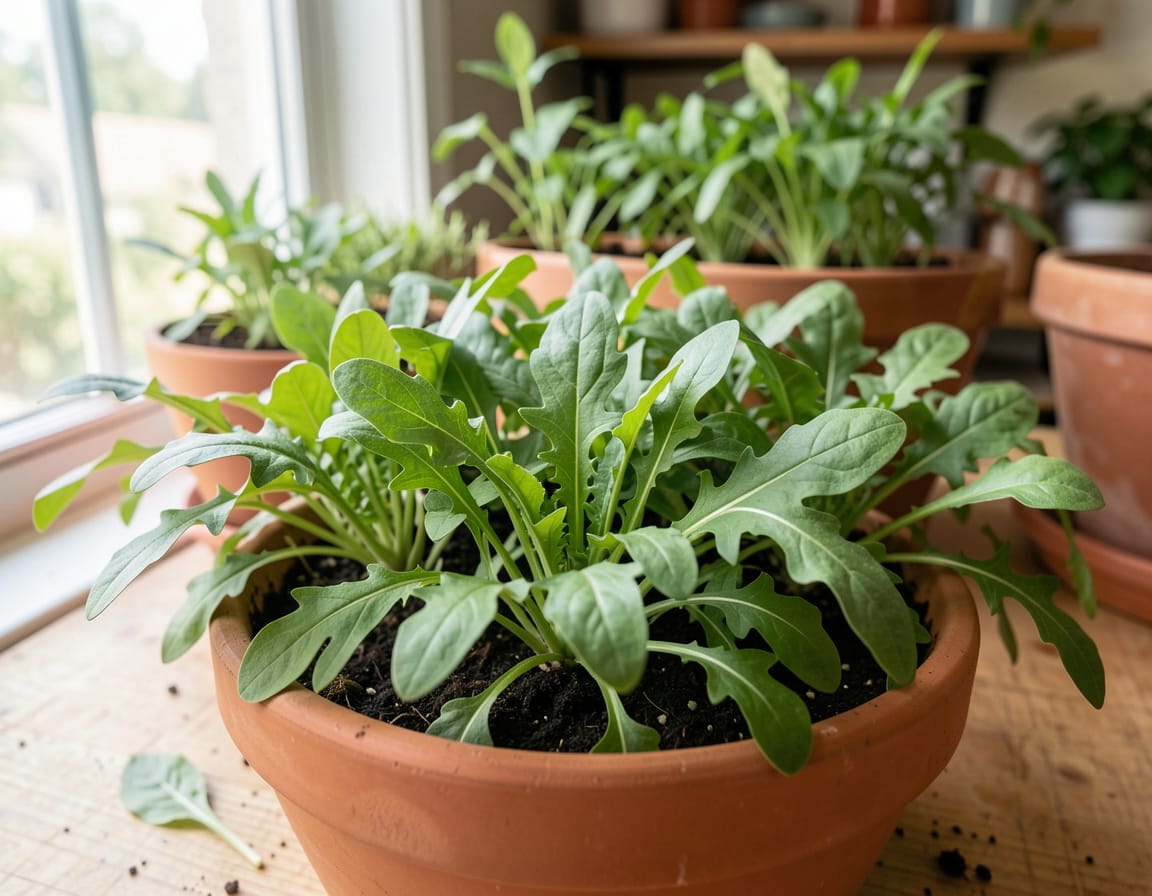
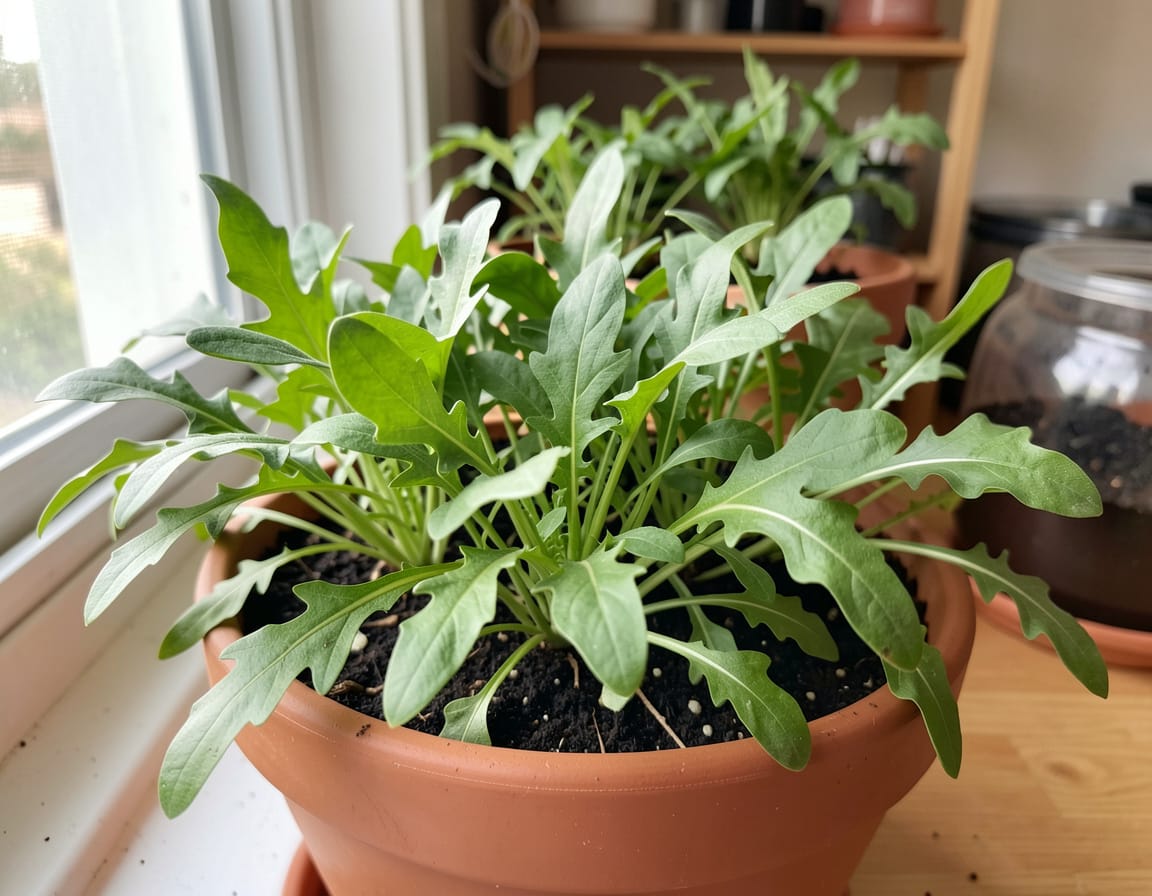
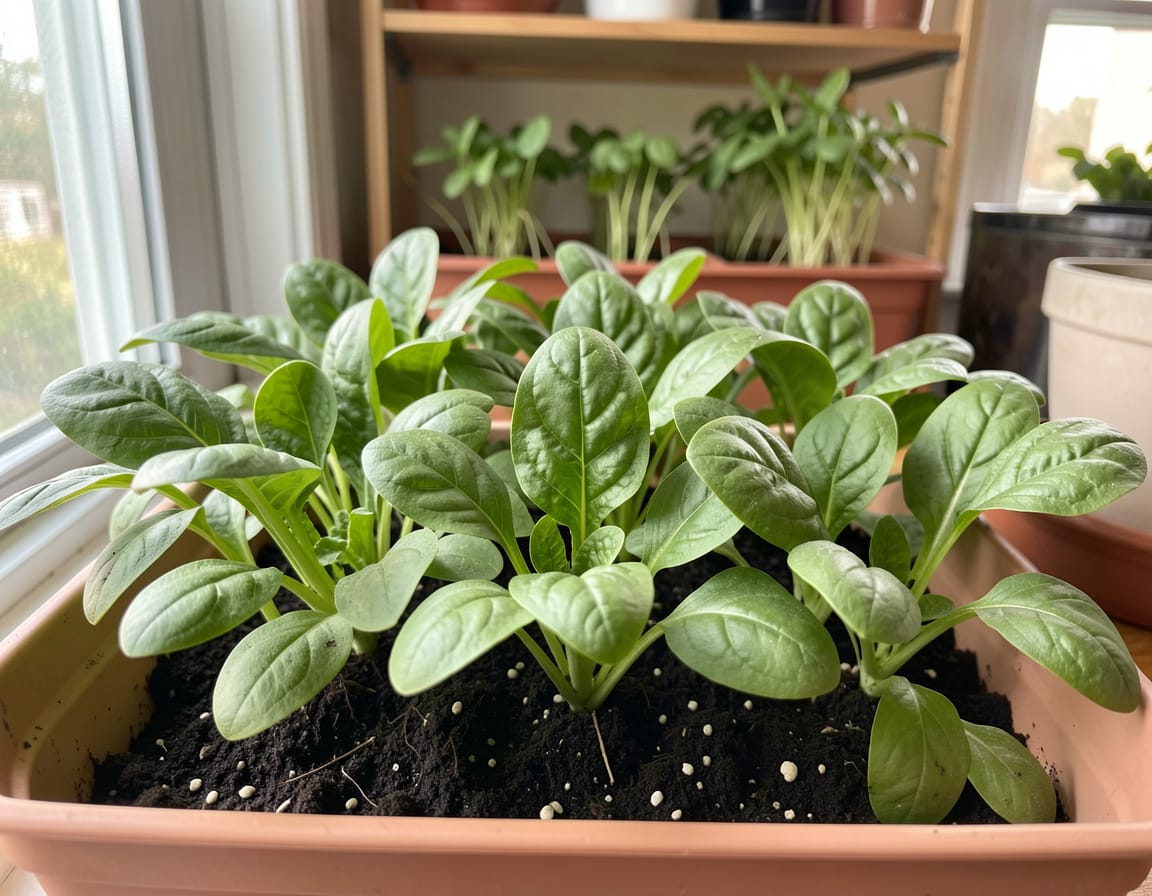
    In most indoor environments, spinach takes 30 to 45 days to reach harvestable size, depending on how you grow it and what you consider “ready.”

    Here’s how that breaks down in real indoor conditions:

    Day 1–7: Germination

    • Seeds sprout in 5–7 days
    • Cooler indoor temperatures (60–70°F) speed germination
    • Consistent moisture is critical

    Day 8–21: Early Leaf Development

    • Small, tender leaves form
    • Plants focus on root establishment
    • Light quality becomes crucial

    Day 22–30: Baby Spinach Stage

    • Leaves are 3–4 inches long
    • Ideal for baby spinach harvest
    • Best flavor and tenderness

    Day 31–45: Full Leaf Harvest

    • Mature leaves develop
    • Suitable for cooking and salads
    • Regular harvesting encourages regrowth

    In my experience, most indoor growers harvest too late or too early. Understanding this timeline helps you align care routines with realistic growth expectations.

    Everyday Organic Styling & Care Routine for Indoor Spinach

    Spinach thrives when care feels effortless and consistent not obsessive.

    Daily (2 Minutes)

    • Check soil moisture with your finger
    • Observe leaf color and posture
    • Rotate container slightly for even light

    Weekly

    • Water deeply if top inch of soil is dry
    • Trim damaged or yellowing leaves
    • Wipe nearby surfaces to reduce dust buildup

    Biweekly

    • Feed lightly with diluted organic fertilizer
    • Thin overcrowded seedlings

    In real homes, this routine blends seamlessly into sustainable home living and keeps spinach productive without stress.

    What You’ll Need to Grow Spinach Indoors Successfully

    Below is a practical, experience-based list of essentials, followed by a clear explanation table.

    Essential Items

    • Shallow container (6–8 inches deep)
    • Organic potting mix
    • Spinach seeds (slow-bolt varieties work best)
    • Natural light or LED grow light
    • Organic liquid fertilizer

    Indoor Spinach Essentials Explained

    ItemWhat It IsWhy It’s UsedOrganic / Health BenefitsSustainability Considerations
    Shallow ContainerWide, low potSupports shallow rootsNo plastic leachingLong-lasting, reusable
    Organic Soil MixChemical-free mediumPrevents residue buildupSafe for indoor airRenewable ingredients
    Spinach SeedsLeafy green seedsFast indoor growthNutrient-dense foodMinimal resource use
    LED Grow LightFull-spectrum lightEnsures consistent growthLow heat, energy efficientLong lifespan
    Organic FertilizerPlant-based nutrientsSupports leaf productionNon-toxic livingReduces chemical runoff

    Each item supports both plant health and eco-friendly home styling.

    How Long Does Spinach Take to Grow Indoors Depending on Light Conditions

    Light is the single most important factor affecting growth speed.

    Bright Window Light

    • South- or east-facing windows
    • 35–45 days to harvest
    • Rotate plants regularly

    Grow Lights

    • 12–14 hours daily
    • 30–35 days to harvest
    • Most consistent results

    Low Light Conditions

    • Growth slows significantly
    • Leaves may stretch or pale
    • Harvest may take 45–55 days

    In apartments with limited natural light, I almost always recommend a simple LED grow light. It shortens growth time and improves leaf quality dramatically.

    Soil, Water, and Temperature: Hidden Factors That Affect Growth Time

    Soil Quality

    Loose, well-draining soil speeds root development. Compacted soil delays growth and increases disease risk.

    Watering Habits

    Spinach prefers evenly moist soil:

    • Too dry = slow growth
    • Too wet = root stress

    Ideal Indoor Temperature

    • Best range: 60–70°F
    • Above 75°F: growth slows, bolting risk increases

    In many U.S. homes, spinach grows best in cooler rooms or near windows during winter months.

    Deep Organic Setup or Seasonal Refresh

    Every few weeks, spinach benefits from a reset especially if grown continuously.

    Seasonal Refresh Steps

    1. Remove spent plants after final harvest
    2. Refresh soil with compost
    3. Clean containers with vinegar and water
    4. Replant in staggered batches

    Reorganizing Indoor Plants

    Group spinach with other cool-season greens. This:

    • Maintains humidity balance
    • Creates cohesive natural interior decoration
    • Simplifies watering routines

    This approach supports long-term plant health and keeps your space visually calm.

    Prevention & Sustainability Tips for Long-Term Success

    • Avoid synthetic fertilizers labeled “fast growth”
    • Use untreated clay or ceramic containers
    • Compost old spinach roots
    • Reuse soil by refreshing with organic matter

    These habits reduce waste and maintain long-lasting organic beauty indoors.

    Common Mistakes That Slow Spinach Growth Indoors

    Falling for Fake “Eco-Friendly” Products

    Many soils and containers labeled eco-friendly contain chemical binders. Always check materials.

    Overcrowding Seedlings

    Too many plants compete for light and nutrients, slowing growth.

    Poor Air Circulation

    Stagnant air encourages fungal issues. A small fan on low helps immensely.

    Overwatering

    Constantly wet soil delays growth and damages roots.

    Each mistake affects not only growth time but overall plant health and indoor air quality.

    Local U.S. Home Context: Real Indoor Growing Scenarios

    Small Apartments

    Spinach thrives in shallow containers on windowsills or shelves with grow lights.

    Rental Homes

    No drilling needed use clamp lights and movable trays.

    Seasonal Climate Variations

    Spinach grows faster indoors during fall and winter when homes are cooler.

    Urban vs Suburban Homes

    Urban growers rely more on artificial light; suburban homes often manage temperature better but face fluctuating sunlight.

    Extra Expert Tips from Real Homes

    • Harvest outer leaves first to extend growth
    • Grow spinach in succession every 2 weeks
    • Use light-colored containers to prevent overheating
    • Choose slow-bolt varieties for indoor consistency

    These strategies reduce effort while maximizing yield especially valuable for busy households.

    FAQ: Indoor Spinach Growth & Care

    1. How long does spinach take to grow indoors from seed?

    Typically 30–45 days, depending on light and temperature.

    2. Can I harvest spinach multiple times indoors?

    Yes. Cut outer leaves and allow inner growth to continue.

    3. Does spinach need full sun indoors?

    Bright light or grow lights are ideal, but direct sun isn’t mandatory.

    4. How long does spinach take to grow indoors during winter?

    Often faster around 30–40 days due to cooler indoor temperatures.

    5. Why is my indoor spinach growing slowly?

    Common causes include low light, overcrowding, or warm temperatures.

    6. Is indoor spinach safe for homes with pets?

    Yes, spinach is non-toxic and safe for most households.

    Conclusion: 

    Understanding how long does spinach take to grow indoors allows you to plan realistically, care confidently, and design your home with intention. In my experience working with real U.S. homes, spinach succeeds indoors when grown organically, given adequate light, and integrated into everyday routines rather than treated as a separate project.

    Indoor spinach isn’t just food it’s a living element of eco-friendly home styling, sustainable home design, and toxin-free living. With the guidance in this article, you can grow fresh greens year-round while creating a calmer, healthier, and more resilient living space.

  • How to take care of a bell pepper plant indoors

    How to take care of a bell pepper plant indoors

    Every product is independently reviewed and selected by our editors. If you buy something through our links, we may earn an affiliate commission at no extra cost to you.

    Growing food inside your home isn’t just a gardening trend it’s a lifestyle choice that supports health, sustainability, and natural interior decoration. How to take care of a bell pepper plant indoors is a question I hear often from homeowners and renters who want productive greenery that also enhances their living space. Bell pepper plants are surprisingly well-suited to indoor environments when cared for correctly, and they fit beautifully into organic home décor ideas that prioritize natural materials and toxin-free living.

    In real homes I’ve worked with small apartments, rentals with limited light, and open-concept houses indoor bell pepper plants consistently provide more than fresh produce. They improve indoor air quality, add visual warmth, and create a calming daily rhythm of care. When grown organically, they also support sustainable home design by reducing reliance on store-bought produce wrapped in plastic and treated with chemicals.

    This guide shares hands-on, experience-driven advice you can apply immediately. No vague tips, no recycled instructions just practical, organic solutions that work in everyday U.S. homes.

    Why Indoor Bell Pepper Plants Matter for a Healthy, Organic Home

    Before diving into care routines, it’s important to understand why bell pepper plants deserve a place in your living space.

    Health & Indoor Air Quality

    Healthy indoor plants contribute to better air circulation and humidity balance. While no plant is a magic air purifier, bell pepper plants help create a fresher indoor environment especially when paired with other indoor plants and natural materials like clay pots and untreated wood.

    Mental Well-Being & Stress Reduction

    In my experience working with homeowners, tending edible plants reduces stress more effectively than decorative-only plants. Watching peppers form, grow, and ripen gives a sense of progress and connection something many people crave in busy indoor lifestyles.

    Sustainability & Environmental Impact

    Growing bell peppers indoors reduces food miles, plastic packaging, and chemical exposure. It aligns naturally with organic gardening practices and eco-friendly home styling.

    A Toxin-Free, Calming Living Space

    Bell pepper plants thrive without synthetic fertilizers or chemical sprays. This makes them ideal for families, pets, and anyone committed to non-toxic living.

    Understanding Bell Pepper Plants Indoors (Before You Start)

    Bell pepper plants (Capsicum annuum) are technically perennials in warm climates but are often grown as annuals. Indoors, they can live and produce for multiple years with proper care.

    Key characteristics to know:

    • They love light and warmth
    • They prefer consistent moisture, not soggy soil
    • They benefit from gentle air circulation
    • They are self-pollinating, but need help indoors

    Understanding these basics helps prevent common frustrations later.

    Everyday Organic Styling & Care Routine

    A successful indoor bell pepper plant depends on simple, repeatable habits not constant fussing.

    Daily Check (2–3 Minutes)

    • Observe leaf color and firmness
    • Check soil moisture with your finger
    • Rotate the pot slightly for even light exposure

    In real homes, this daily visual check prevents 90% of indoor plant issues.

    Weekly Care Routine

    • Water deeply when the top inch of soil feels dry
    • Wipe dust from leaves with a damp cloth
    • Check for pests like aphids or spider mites

    Monthly Care

    • Feed with organic fertilizer or compost tea
    • Prune weak or overcrowded growth
    • Inspect roots if growth seems stalled

    This rhythm fits naturally into sustainable home living low effort, high reward.

    What You’ll Need to Take Care of a Bell Pepper Plant Indoors

    Below is a clear, practical table based on tools I actually recommend in client homes.

    ItemWhat It IsWhy It’s UsedOrganic / Health BenefitsSustainability Considerations
    Clay or Ceramic PotBreathable containerPrevents root rotNo plastic toxinsLong-lasting, reusable
    Organic Potting SoilChemical-free soil mixSupports healthy rootsAvoids synthetic fertilizersRenewable materials
    Grow Light (if needed)Full-spectrum LEDCompensates for low lightSafe, energy-efficientLow electricity use
    Organic FertilizerCompost-based feedSustains fruitingNon-toxic for homesReduces chemical runoff
    Bamboo StakesNatural plant supportKeeps stems uprightPlastic-freeBiodegradable

    Each item supports both plant health and eco-friendly home styling.

    How to Take Care of a Bell Pepper Plant Indoors: Light, Soil, and Placement

    Light Requirements (Most Common Issue)

    Bell pepper plants need 6–8 hours of bright light daily. In U.S. homes:

    • South-facing windows work best
    • East- or west-facing windows may need grow lights
    • North-facing windows almost always require supplemental lighting

    In apartments, I often install a single clamp-style LED grow light simple, renter-friendly, and highly effective.

    Soil That Supports Organic Growth

    Use a loose, well-draining organic mix:

    • Compost
    • Coconut coir or peat alternative
    • Perlite or sand for drainage

    Avoid garden soil it compacts indoors and invites pests.

    Placement & Natural Interior Decoration

    Bell pepper plants double as living décor. Place them:

    • Near kitchen windows for easy harvesting
    • On plant stands made from reclaimed wood
    • Away from heating vents or cold drafts

    This balances beauty with plant health.

    Watering the Right Way (Without Killing the Plant)

    Overwatering is the #1 mistake I see in indoor pepper plants.

    Best Practice

    • Water only when the top inch of soil is dry
    • Water slowly until excess drains out
    • Empty saucers immediately

    Seasonal Adjustments

    • Winter: water less frequently
    • Summer: increase frequency slightly

    Consistent watering supports strong roots and prevents fungal issues especially important in low-ventilation apartments.

    Deep Organic Setup or Seasonal Refresh

    Every 4–6 months, your indoor bell pepper plant benefits from a reset.

    Seasonal Refresh Steps

    1. Remove surface debris
    2. Top-dress soil with compost
    3. Prune leggy or unproductive branches
    4. Clean pot exterior for aesthetics

    This process supports long-term plant health and refreshes your organic home décor visually.

    Reorganizing Indoor Plants

    Group bell peppers with other edible plants like basil or parsley. This:

    • Improves humidity balance
    • Creates a cohesive natural interior decoration theme
    • Encourages consistent care routines

    Pollination Indoors: A Crucial Step Most Articles Skip

    Indoors, there are no bees.

    Simple Pollination Method

    • Gently tap flowering stems daily
    • Use a soft paintbrush to transfer pollen

    In my experience, this single habit can double indoor pepper yields.

    Prevention & Sustainability Tips for Long-Term Success

    • Avoid synthetic pesticides even “mild” ones
    • Use neem oil only if necessary and sparingly
    • Choose reusable containers and tools
    • Compost plant trimmings

    These habits reduce waste and maintain a toxin-free environment.

    Common Mistakes to Avoid (And Why They Matter)

    Believing Fake “Eco-Friendly” Claims

    Many decorative pots and soils labeled “eco” contain chemical coatings. Always verify materials.

    Poor Lighting Placement

    Insufficient light causes:

    • No flowers
    • Dropping buds
    • Weak stems

    Overwatering & Poor Ventilation

    Stagnant air encourages disease. Use:

    • Small fans on low
    • Open windows when weather allows

    Local U.S. Home Context: Realistic Indoor Scenarios

    Small Apartments

    Compact pepper varieties thrive in 10–12 inch pots with grow lights.

    Rental Restrictions

    No drilling? Use clamp lights and freestanding plant stands.

    Seasonal Climate Changes

    Cold winters require light and watering adjustments. Hot summers may need shade from harsh afternoon sun.

    Urban vs Suburban Homes

    Urban apartments often rely on artificial light; suburban homes benefit from larger windows but face temperature swings.

    Extra Expert Tips from Real Homes

    • Use light-colored pots to prevent soil overheating
    • Mulch soil surface with coconut husk
    • Grow peppers as part of edible décor displays
    • Save seeds from successful indoor harvests

    These strategies reduce costs and increase sustainability over time.

    FAQ: Indoor Bell Pepper Plant Care

    1. How long do indoor bell pepper plants live?

    With proper care, 2–3 years is common indoors.

    2. How to take care of a bell pepper plant indoors during winter?

    Reduce watering, increase light exposure, and maintain indoor temperatures above 65°F.

    3. Do bell pepper plants need grow lights indoors?

    Often yes especially in apartments or winter months.

    4. Why are my flowers falling off?

    Usually caused by low light, temperature stress, or lack of pollination.

    5. Are indoor bell peppers safe around pets?

    The plant itself is generally safe, but peppers may irritate curious pets.

    6. Can I grow bell peppers organically indoors year-round?

    Absolutely with consistent light, organic soil, and proper feeding.

    Conclusion: 

    Learning how to take care of a bell pepper plant indoors is about more than gardening it’s about creating a healthier, calmer, more intentional living space. In my experience working with real U.S. homes, indoor bell pepper plants succeed when care routines are simple, organic, and aligned with sustainable home design.

    When grown thoughtfully, bell pepper plants become part of your natural interior decoration offering beauty, nourishment, and a daily reminder that small, eco-friendly choices truly matter. With the guidance in this article, you can confidently grow peppers indoors while supporting non-toxic, sustainable living for years to come.

  • How to grow bell peppers for beginners

    How to grow bell peppers for beginners

    Learning how to grow bell peppers for beginners is one of the most satisfying ways to bring organic gardening practices into everyday American homes. Bell peppers are colorful, nutritious, and surprisingly adaptable making them ideal for balconies, patios, raised beds, and even sunny indoor spaces. In my experience working with homeowners and renters across the U.S., bell peppers often become a “gateway plant”: once people succeed with them, confidence grows quickly.

    Beyond fresh produce, growing bell peppers supports a healthier indoor environment, reduces reliance on chemically treated vegetables, and adds living beauty to your home. Whether you live in a small apartment or a suburban house, bell peppers fit naturally into sustainable home design and eco-friendly home styling when approached correctly.

    This guide is written for real beginners people who want clear steps, honest expectations, and expert advice that actually works in real homes.

    Why Growing Bell Peppers at Home Matters

    Health & Indoor Air Quality

    Bell peppers grown at home are free from synthetic pesticides and post-harvest chemical treatments commonly used in commercial farming. While the plants themselves don’t purify air like large houseplants, they reduce your exposure to toxins through food an often-overlooked aspect of indoor environmental health.

    Mental Well-Being & Stress Reduction

    In real homes I’ve worked in, tending bell pepper plants becomes a calming routine. Checking leaves, watering thoughtfully, and watching fruit develop creates a daily pause that lowers stress especially valuable in busy urban households.

    Sustainability & Environmental Impact

    Growing even a few peppers at home reduces packaging waste, transportation emissions, and food spoilage. It’s a realistic, achievable step toward sustainable home design without requiring major lifestyle changes.

    Creating a Toxin-Free, Calming Living Space

    Bell pepper plants integrate beautifully with natural interior decoration. Their glossy leaves and bright fruit add life and color without introducing synthetic décor or artificial finishes.

    Understanding How to Grow Bell Peppers for Beginners (Before You Start)

    Bell peppers are warm-season plants that thrive with consistency. Beginners often struggle not because peppers are difficult, but because they misunderstand what the plant actually needs.

    In my professional experience, success depends on:

    • Warmth and stable temperatures
    • Adequate light (natural or supplemented)
    • Well-draining soil or containers
    • Patience peppers don’t rush

    Once these basics are respected, bell peppers are remarkably forgiving.

    What You’ll Need to Grow Bell Peppers Successfully

    You don’t need a fully equipped garden shed. Most beginners succeed with simple, thoughtfully chosen tools and materials.

    Essential Supplies Table

    ItemWhat It IsWhy It’s UsedOrganic / Health BenefitsSustainability Considerations
    Bell pepper seeds or seedlingsOrganic preferredStarting the plantNo chemical seed treatmentsSupports organic growers
    Containers or garden bedPots, raised beds, or groundRoot space & drainageAvoids treated woodReusable long-term
    Organic potting mixSoil blendNutrient-rich growing mediumNo synthetic fertilizersImproves soil life
    CompostDecomposed organic matterNatural nutrientsEnhances plant immunityReduces food waste
    MulchStraw or leaf mulchMoisture controlPrevents soil stressBiodegradable
    Watering canControlled wateringPrevents overwateringReduces fungal riskLong-lasting tool

    I always recommend starting smaller than you think. One or two healthy plants outperform many stressed ones.

    Step-by-Step: How to Grow Bell Peppers for Beginners

    Step 1: Choose the Right Location

    Bell peppers need 6–8 hours of sunlight daily. In U.S. homes, this often means:

    • South- or west-facing patios
    • Balconies with open exposure
    • Bright indoor windows supplemented with grow lights if needed

    In limited-light apartments, fewer plants with better placement work best.

    Step 2: Planting Correctly

    • Plant seedlings after all frost risk has passed
    • Space plants 12–18 inches apart
    • Plant slightly deeper than they were in nursery pots

    This encourages strong root development and stability.

    Step 3: Watering With Intention

    Bell peppers dislike extremes.

    • Water deeply, not frequently
    • Allow topsoil to dry slightly between watering
    • Avoid wetting leaves late in the day

    In my experience, inconsistent watering causes more beginner failures than pests.

    Step 4: Feeding Organically

    Use compost or diluted compost tea every 2–3 weeks. Avoid synthetic fertilizers they promote leafy growth at the expense of fruit and compromise long-term soil health.

    Everyday Organic Styling & Care Routine

    Growing bell peppers becomes easier when integrated into daily home habits.

    Daily (2–3 Minutes)

    • Visual leaf check (wilting or discoloration)
    • Light rotation for indoor plants
    • Quick moisture check with finger test

    Weekly

    • Remove damaged leaves
    • Inspect stems for pests
    • Adjust plant ties or supports

    This routine fits naturally into morning or evening home rhythms, especially in kitchens or patios used daily.

    Bell Peppers as Part of Natural Interior Decoration

    Bell pepper plants are functional décor when styled thoughtfully.

    Organic Home Décor Ideas

    • Terracotta pots paired with wooden stands
    • Neutral ceramic containers for open kitchens
    • Grouped with herbs for layered greenery

    Eco-Friendly Home Styling Tip

    Avoid glossy plastic pots. Natural materials breathe better and align with toxin-free living.

    In open-concept homes, pepper plants soften transitions between indoor and outdoor spaces.

    Deep Organic Setup or Seasonal Refresh

    Seasonal Adjustments

    • Spring: Gradual outdoor exposure (hardening off)
    • Summer: Mulch heavily, monitor heat stress
    • Fall: Harvest remaining fruit, compost plants
    • Winter: Clean containers and rest soil

    Long-Term Soil Health

    Rotate crops yearly if planting outdoors. In containers, refresh soil with compost rather than replacing entirely this maintains microbial life and reduces waste.

    Prevention & Sustainability Tips

    From real-world experience, these habits prevent most problems:

    • Choose untreated containers and supports
    • Avoid decorative stones that trap heat
    • Compost pepper scraps and old plants
    • Save seeds from fully ripe peppers

    Sustainability isn’t about perfection it’s about thoughtful consistency.

    Common Mistakes Beginners Should Avoid

    Believing “Decorative” Means Non-Toxic

    Many painted pots leach chemicals when heated. Stick to natural finishes.

    Poor Ventilation Indoors

    Still air encourages disease. Open windows or use gentle airflow.

    Overwatering

    Roots need oxygen. Soggy soil suffocates plants.

    Using Chemically Treated Soil

    Some potting mixes contain slow-release synthetic fertilizers that stress plants over time.

    Each mistake disrupts plant health and undermines the calm, organic environment you’re trying to create.

    Local U.S. Home Context: What Actually Works

    \Small Apartments

    One or two pepper plants near a bright window can thrive with care.

    Rentals

    Container growing avoids permanent changes and soil damage.

    Urban Balconies

    Wind protection matters use screens or strategic placement.

    Suburban Gardens

    Raised beds warm faster and reduce soil compaction.

    Seasonal Climate Variations

    Peppers love heat but struggle in extreme humidity spacing and airflow are key.

    Extra Expert Tips From Hands-On Experience

    • Use light-colored mulch in hot climates to reflect heat
    • Support plants early fruit weight surprises beginners
    • Harvest green peppers early to encourage more fruit
    • Let some peppers fully ripen for seed saving

    In my work, beginners succeed fastest when they focus on observation rather than intervention.

    Frequently Asked Questions

    How long does it take when learning how to grow bell peppers for beginners?

    From transplant to harvest, expect 60–90 days depending on variety and conditions.

    Can bell peppers grow indoors year-round?

    Yes, with sufficient light and airflow. Growth is slower but steady.

    Why are my flowers dropping?

    Usually temperature stress or inconsistent watering.

    Do bell peppers need pollinators?

    They self-pollinate, but gentle air movement helps indoors.

    Is organic fertilizer necessary?

    Compost is usually sufficient for home growers.

    Can I reuse soil next year?

    Yes,refresh with compost and remove old roots.

    Conclusion: Growing Confidence Alongside Your Plants

    Every product is independently reviewed and selected by our editors. If you buy something through our links, we may earn an affiliate commission at no extra cost to you.

    Understanding how to grow bell peppers for beginners is about more than producing vegetables. It’s about creating a healthier, calmer, and more sustainable home environment one plant at a time.

    In real U.S. homes, bell peppers prove that organic gardening practices don’t require acres of land or expensive tools. With patience, observation, and respect for natural processes, anyone can grow vibrant peppers that nourish both body and living space.

    Start small. Grow thoughtfully. Let your home reflect the same care you give your plants and you’ll see lasting rewards.Learning how to grow bell peppers for beginners is one of the most satisfying ways to bring organic gardening practices into everyday American homes. Bell peppers are colorful, nutritious, and surprisingly adaptable making them ideal for balconies, patios, raised beds, and even sunny indoor spaces. In my experience working with homeowners and renters across the U.S., bell peppers often become a “gateway plant”: once people succeed with them, confidence grows quickly.

    Beyond fresh produce, growing bell peppers supports a healthier indoor environment, reduces reliance on chemically treated vegetables, and adds living beauty to your home. Whether you live in a small apartment or a suburban house, bell peppers fit naturally into sustainable home design and eco-friendly home styling when approached correctly.

    This guide is written for real beginners people who want clear steps, honest expectations, and expert advice that actually works in real homes.

    Why Growing Bell Peppers at Home Matters

    Health & Indoor Air Quality

    Bell peppers grown at home are free from synthetic pesticides and post-harvest chemical treatments commonly used in commercial farming. While the plants themselves don’t purify air like large houseplants, they reduce your exposure to toxins through food an often-overlooked aspect of indoor environmental health.

    Mental Well-Being & Stress Reduction

    In real homes I’ve worked in, tending bell pepper plants becomes a calming routine. Checking leaves, watering thoughtfully, and watching fruit develop creates a daily pause that lowers stress especially valuable in busy urban households.

    Sustainability & Environmental Impact

    Growing even a few peppers at home reduces packaging waste, transportation emissions, and food spoilage. It’s a realistic, achievable step toward sustainable home design without requiring major lifestyle changes.

    Creating a Toxin-Free, Calming Living Space

    Bell pepper plants integrate beautifully with natural interior decoration. Their glossy leaves and bright fruit add life and color without introducing synthetic décor or artificial finishes.

    Understanding How to Grow Bell Peppers for Beginners (Before You Start)

    Bell peppers are warm-season plants that thrive with consistency. Beginners often struggle not because peppers are difficult, but because they misunderstand what the plant actually needs.

    In my professional experience, success depends on:

    • Warmth and stable temperatures
    • Adequate light (natural or supplemented)
    • Well-draining soil or containers
    • Patience peppers don’t rush

    Once these basics are respected, bell peppers are remarkably forgiving.

    What You’ll Need to Grow Bell Peppers Successfully

    You don’t need a fully equipped garden shed. Most beginners succeed with simple, thoughtfully chosen tools and materials.

    Essential Supplies Table

    ItemWhat It IsWhy It’s UsedOrganic / Health BenefitsSustainability Considerations
    Bell pepper seeds or seedlingsOrganic preferredStarting the plantNo chemical seed treatmentsSupports organic growers
    Containers or garden bedPots, raised beds, or groundRoot space & drainageAvoids treated woodReusable long-term
    Organic potting mixSoil blendNutrient-rich growing mediumNo synthetic fertilizersImproves soil life
    CompostDecomposed organic matterNatural nutrientsEnhances plant immunityReduces food waste
    MulchStraw or leaf mulchMoisture controlPrevents soil stressBiodegradable
    Watering canControlled wateringPrevents overwateringReduces fungal riskLong-lasting tool

    I always recommend starting smaller than you think. One or two healthy plants outperform many stressed ones.

    Step-by-Step: How to Grow Bell Peppers for Beginners

    Step 1: Choose the Right Location

    Bell peppers need 6–8 hours of sunlight daily. In U.S. homes, this often means:

    • South- or west-facing patios
    • Balconies with open exposure
    • Bright indoor windows supplemented with grow lights if needed

    In limited-light apartments, fewer plants with better placement work best.

    Step 2: Planting Correctly

    • Plant seedlings after all frost risk has passed
    • Space plants 12–18 inches apart
    • Plant slightly deeper than they were in nursery pots

    This encourages strong root development and stability.

    Step 3: Watering With Intention

    Bell peppers dislike extremes.

    • Water deeply, not frequently
    • Allow topsoil to dry slightly between watering
    • Avoid wetting leaves late in the day

    In my experience, inconsistent watering causes more beginner failures than pests.

    Step 4: Feeding Organically

    Use compost or diluted compost tea every 2–3 weeks. Avoid synthetic fertilizers they promote leafy growth at the expense of fruit and compromise long-term soil health.

    Everyday Organic Styling & Care Routine

    Growing bell peppers becomes easier when integrated into daily home habits.

    Daily (2–3 Minutes)

    • Visual leaf check (wilting or discoloration)
    • Light rotation for indoor plants
    • Quick moisture check with finger test

    Weekly

    • Remove damaged leaves
    • Inspect stems for pests
    • Adjust plant ties or supports

    This routine fits naturally into morning or evening home rhythms, especially in kitchens or patios used daily.

    Bell Peppers as Part of Natural Interior Decoration

    Bell pepper plants are functional décor when styled thoughtfully.

    Organic Home Décor Ideas

    • Terracotta pots paired with wooden stands
    • Neutral ceramic containers for open kitchens
    • Grouped with herbs for layered greenery

    Eco-Friendly Home Styling Tip

    Avoid glossy plastic pots. Natural materials breathe better and align with toxin-free living.

    In open-concept homes, pepper plants soften transitions between indoor and outdoor spaces.

    Deep Organic Setup or Seasonal Refresh

    Seasonal Adjustments

    • Spring: Gradual outdoor exposure (hardening off)
    • Summer: Mulch heavily, monitor heat stress
    • Fall: Harvest remaining fruit, compost plants
    • Winter: Clean containers and rest soil

    Long-Term Soil Health

    Rotate crops yearly if planting outdoors. In containers, refresh soil with compost rather than replacing entirely this maintains microbial life and reduces waste.

    Prevention & Sustainability Tips

    From real-world experience, these habits prevent most problems:

    • Choose untreated containers and supports
    • Avoid decorative stones that trap heat
    • Compost pepper scraps and old plants
    • Save seeds from fully ripe peppers

    Sustainability isn’t about perfection it’s about thoughtful consistency.

    Common Mistakes Beginners Should Avoid

    Believing “Decorative” Means Non-Toxic

    Many painted pots leach chemicals when heated. Stick to natural finishes.

    Poor Ventilation Indoors

    Still air encourages disease. Open windows or use gentle airflow.

    Overwatering

    Roots need oxygen. Soggy soil suffocates plants.

    Using Chemically Treated Soil

    Some potting mixes contain slow-release synthetic fertilizers that stress plants over time.

    Each mistake disrupts plant health and undermines the calm, organic environment you’re trying to create.

    Local U.S. Home Context: What Actually Works

    Small Apartments

    One or two pepper plants near a bright window can thrive with care.

    Rentals

    Container growing avoids permanent changes and soil damage.

    Urban Balconies

    Wind protection matters use screens or strategic placement.

    Suburban Gardens

    Raised beds warm faster and reduce soil compaction.

    Seasonal Climate Variations

    Peppers love heat but struggle in extreme humidity spacing and airflow are key.

    Extra Expert Tips From Hands-On Experience

    • Use light-colored mulch in hot climates to reflect heat
    • Support plants early fruit weight surprises beginners
    • Harvest green peppers early to encourage more fruit
    • Let some peppers fully ripen for seed saving

    In my work, beginners succeed fastest when they focus on observation rather than intervention.

    Frequently Asked Questions

    How long does it take when learning how to grow bell peppers for beginners?

    From transplant to harvest, expect 60–90 days depending on variety and conditions.

    Can bell peppers grow indoors year-round?

    Yes, with sufficient light and airflow. Growth is slower but steady.

    Why are my flowers dropping?

    Usually temperature stress or inconsistent watering.

    Do bell peppers need pollinators?

    They self-pollinate, but gentle air movement helps indoors.

    Is organic fertilizer necessary?

    Compost is usually sufficient for home growers.

    Can I reuse soil next year?

    Yes,refresh with compost and remove old roots.

    Conclusion: Growing Confidence Alongside Your Plants

    Understanding how to grow bell peppers for beginners is about more than producing vegetables. It’s about creating a healthier, calmer, and more sustainable home environment one plant at a time.

    In real U.S. homes, bell peppers prove that organic gardening practices don’t require acres of land or expensive tools. With patience, observation, and respect for natural processes, anyone can grow vibrant peppers that nourish both body and living space.

    Start small. Grow thoughtfully. Let your home reflect the same care you give your plants and you’ll see lasting rewards.

  • How to grow cilantro from cuttings in water indoor

    How to grow cilantro from cuttings in water indoor

    Every product is independently reviewed and selected by our editors. If you buy something through our links, we may earn an affiliate commission at no extra cost to you.

    Growing herbs indoors is no longer just a gardening trend it’s part of a larger shift toward healthier, more intentional living. How to grow cilantro from cuttings in water indoor is one of the simplest and most rewarding ways to combine organic gardening practices with natural interior decoration. In real homes I’ve worked in small city apartments, suburban kitchens, and rental spaces with strict rules this method consistently delivers fresh flavor, visual calm, and a genuine sense of sustainability.

    Cilantro grown in water requires no soil, no chemicals, and very little space. It supports indoor air quality, reduces food waste, and creates a living décor element that feels grounded and toxin-free. This guide walks you through the process step by step, while also showing how indoor herb growing fits into a broader eco-friendly home styling philosophy.

    Why Growing Cilantro in Water Indoors Matters More Than You Think

    Cilantro is often treated as a disposable herb bought, used once or twice, then forgotten in the fridge. In my experience helping U.S. homeowners transition toward sustainable home design, cilantro is one of the best entry points into indoor plants and natural materials.

    Health & Indoor Air Quality

    While cilantro itself won’t purify air like a large houseplant, growing herbs indoors reduces your reliance on store-bought produce that may carry pesticide residue. You control the growing environment entirely no synthetic fertilizers, no chemical sprays.

    Mental Well-Being

    Living greenery changes how a space feels. Kitchens with fresh herbs tend to feel calmer and more intentional. Many clients tell me their daily routine of checking roots and changing water becomes a grounding ritual, especially in high-stress urban environments.

    Sustainability & Environmental Impact

    Growing cilantro from cuttings extends the life of what you already buy. It reduces packaging waste and lowers your carbon footprint. This is sustainable home design at a practical, everyday level not perfection, but progress.

    A Toxin-Free, Calming Living Space

    Water-grown herbs pair beautifully with organic home décor ideas: glass jars, wooden trays, natural light. They add life without introducing plastics or synthetic finishes into your space.

    Understanding How to Grow Cilantro From Cuttings in Water Indoor

    Before diving into tools and steps, it’s important to understand what actually works and what doesn’t. Cilantro is not the easiest herb to regrow long-term, but it does root reliably from fresh cuttings when conditions are right.

    In real homes, success depends on:

    • Using fresh, healthy stems
    • Providing consistent light
    • Keeping water clean and oxygenated
    • Accepting that water-grown cilantro is best for short- to medium-term harvests

    This isn’t about forcing plants to perform. It’s about working with their natural growth habits.

    What You’ll Need (Simple, Organic, and Accessible)

    One of the reasons I recommend this method to renters and beginners is its low barrier to entry.

    Essential Supplies Table

    ItemWhat It IsWhy It’s UsedOrganic / Health BenefitsSustainability Considerations
    Fresh cilantro bunchOrganic preferred, stems intactSource of cuttingsNo pesticide residueChoose local or organic
    Clean glass jarMason jar or recycled glassHolds water & rootsNon-toxic, inertReusable, plastic-free
    Filtered waterRoom-temperatureSupports root growthReduces chlorine stressLess plant shock
    Sharp scissorsClean cutting toolPrevents stem damageReduces rot riskLong-lasting tool
    Sunny windowIndirect lightPhotosynthesisNatural light exposureNo energy use

    I avoid recommending specialized products here. If an organic solution requires constant buying, it’s not truly sustainable.

    Step-by-Step: How to Grow Cilantro From Cuttings in Water Indoor

    1. Choose the Right Stems

    In my hands-on work, success starts at the grocery store or farmer’s market. Look for cilantro with:

    • Bright green leaves
    • Firm, unbroken stems
    • No yellowing or slimy bases

    Cut stems that are 4–6 inches long, removing lower leaves so nothing sits below the waterline.

    2. Make a Clean Cut

    Cut stems at a slight angle just below a leaf node. This increases surface area for root development. Avoid crushing the steam clean cuts matter more than most people realize.

    3. Place in Water Correctly

    Fill your jar so only the bottom 1–1.5 inches of stem is submerged. Leaves in water cause rot and cloudiness.

    4. Position for Light

    Place the jar near a bright window with indirect sunlight. Direct midday sun can overheat water and stress stems, especially in south-facing U.S. windows.

    5. Change Water Regularly

    Change water every 1–2 days. This is non-negotiable. Stagnant water is the #1 reason cilantro fails indoors.

    6. Watch for Roots

    Roots typically appear within 5–10 days. Once roots reach about an inch long, you can begin light harvesting.

    Everyday Organic Styling & Care Routine

    Growing herbs indoors works best when it’s part of your daily rhythm, not a separate chore.

    Daily (1–2 Minutes)

    • Check water clarity
    • Remove any yellowing leaves
    • Rotate the jar slightly for even light

    Weekly

    • Deep rinse the jar
    • Trim stems lightly to encourage fresh growth
    • Reposition based on seasonal light changes

    In real homes, this routine fits naturally into morning coffee or evening kitchen cleanup.

    How to Style Water-Grown Cilantro as Natural Interior Decoration

    Indoor herbs shouldn’t feel like an afterthought. When styled intentionally, they enhance eco-friendly home styling.

    Organic Home Décor Ideas

    • Group cilantro with rosemary or mint in matching jars
    • Place jars on reclaimed wood trays
    • Use linen or cotton runners underneath for texture

    Sustainable Home Design Tip

    Avoid painted or metallic containers. Bare glass, ceramic, and untreated wood age better and don’t leach chemicals.

    In open-concept homes, herbs act as subtle dividers between kitchen and living spaces functional and beautiful.

    Deep Organic Setup or Seasonal Refresh

    Seasonal Adjustments

    • Winter: Move closer to windows, rotate more often
    • Summer: Pull back from direct sun, increase water changes
    • Spring/Fall: Ideal balance best growth phase

    Long-Term Plant Health

    Cilantro grown in water has a lifespan. After 3–5 weeks, stems weaken. At this stage:

    • Compost old cuttings
    • Start fresh from new bunches
    • Or transition rooted stems to soil if desired

    This cycle aligns perfectly with organic gardening practices use, renew, return to the earth.

    Prevention & Sustainability Tips

    In real homes, problems usually come from good intentions applied too aggressively.

    • Avoid synthetic “plant food” drops in water
    • Never use antibacterial soap on jars
    • Don’t overcrowd stems
    • Compost spent herbs instead of trashing them

    Sustainability isn’t about adding more it’s about knowing when to stop.

    Common Mistakes to Avoid (And Why They Matter)

    Fake “Eco-Friendly” Containers

    Some bamboo-look plastics still contain resins. Stick to glass or ceramic.

    Poor Lighting

    Too little light causes leggy growth; too much causes bitterness.

    Overconfidence With Water

    More water doesn’t mean better growth. Oxygen matters.

    Chemically Treated Herbs

    Non-organic cilantro may struggle to root due to post-harvest treatments.

    Each of these mistakes stresses plants and undermines the calm, healthy environment you’re trying to create.

    Local U.S. Home Context: What Actually Works

    Small Apartments

    A single windowsill jar is enough. No grow lights required.

    Rentals

    No drilling, no soil spills, no lease issues.

    Low-Light Homes

    Use east-facing windows or reflective surfaces behind jars.

    Urban vs Suburban

    Urban homes benefit most from water-grown herbs due to limited outdoor space. Suburban homes often rotate indoor herbs seasonally.

    Extra Expert Tips From Real Homes

    • Reuse pasta sauce jars—wide mouths help airflow
    • Harvest outer leaves first to extend life
    • Pair cilantro with neutral scents—avoid placing near diffusers
    • If roots brown slightly, rinse and reset—don’t panic

    In my experience, confidence grows alongside the plant. Start simple.

    Frequently Asked Questions

    Can cilantro really grow long-term in water indoors?

    Short to medium term, yes. For ongoing harvests, restart cuttings every few weeks.

    How often should I change the water?

    Every 1–2 days. Clean water is essential.

    Is this method safe for kitchens with pets?

    Yes, but place jars out of reach. Cilantro is non-toxic but curious pets can topple jars.

    Do I need fertilizer when learning how to grow cilantro from cuttings in water indoor?

    No. Added nutrients often cause more harm than good.

    Can I move water-grown cilantro to soil later?

    Yes, gently. Acclimate slowly to avoid shock.

    Why do my stems rot at the base?

    Usually from leaves submerged in water or infrequent water changes.

    Conclusion: A Small Habit With Lasting Impact

    Learning how to grow cilantro from cuttings in water indoor is about more than herbs. It’s a practical expression of organic home décor ideas, natural interior decoration, and sustainable home design all in one simple jar.

    In real homes across the U.S., this method consistently proves that eco-friendly living doesn’t require perfection, expensive tools, or extra space. It requires awareness, consistency, and respect for natural processes.

    Start with one jar. Let it live on your windowsill. Over time, you’ll notice not just fresher meals but a calmer, more intentional home.

  • How to grow peppers from a pepper indoors

    How to grow peppers from a pepper indoors

    Every product is independently reviewed and selected by our editors. If you buy something through our links, we may earn an affiliate commission at no extra cost to you.

    Growing food indoors isn’t just a trend it’s a practical, grounding way to create a healthier, more intentional living space. In my experience working with U.S. homeowners and renters, learning how to grow peppers from a pepper indoors is one of the most rewarding entry points into organic indoor gardening. It combines sustainability, natural home décor, and everyday usefulness in a way few houseplants can.

    When done correctly, indoor pepper growing improves indoor air quality, reduces reliance on store-bought produce wrapped in plastic, and brings a sense of calm and purpose into your home. A fruiting pepper plant whether it’s a bell pepper, jalapeño, or chili adds vibrant color and life, fitting beautifully into natural interior decoration and eco-friendly home styling.

    This guide is written from real-world, hands-on experience. No shortcuts, no vague inspiration just clear, practical steps that work in real American homes, from small apartments to suburban kitchens.

    Everyday Organic Styling & Care Routine

    Growing peppers indoors is not a “set it and forget it” project, but it doesn’t require daily fussing either. A simple, consistent care routine keeps plants healthy and your home looking intentional rather than cluttered.

    Daily habits

    • Check light exposure pepper plants thrive near bright, south-facing windows
    • Rotate pots slightly to ensure even growth
    • Observe leaves for early signs of stress (curling, yellowing)

    Weekly habits

    • Water deeply but only when the top inch of soil is dry
    • Wipe dust from leaves using a damp cotton cloth (this improves photosynthesis and air quality)
    • Open windows briefly, weather permitting, to improve airflow

    In real homes, these small routines also support sustainable home design by reducing plant loss, waste, and unnecessary replacements.

    What You’ll Need to Grow Peppers Indoors (Organically)

    Starting peppers from a pepper itself is simple, but materials matter especially if you care about non-toxic living.

    Essential Supplies Explained

    ItemWhat It IsWhy It’s UsedOrganic / Health BenefitsSustainability Considerations
    Fresh organic pepperFully ripe grocery or garden pepperSource of viable seedsNo chemical seed coatingsReduces need for packaged seeds
    Organic potting soilPeat-free, compost-rich soilSupports root healthFree from synthetic fertilizersChoose renewable, peat-free blends
    Small containersClay or recycled potsSeed startingBreathable and non-toxicReuse or thrifted pots preferred
    Natural light or grow lightSunlight or full-spectrum LEDEssential for fruitingAvoids chemical growth boostersEnergy-efficient LEDs save power
    Spray bottleGentle wateringPrevents soil disturbanceReduces mold and overwateringReusable, plastic-free options exist

    From an organic home décor perspective, unglazed terracotta pots pair beautifully with wood, linen, and other natural materials commonly used in eco-friendly home styling.

    How to Grow Peppers From a Pepper Indoors: Step-by-Step

    This is where most online advice becomes vague. Here’s the process I actually use when helping clients integrate edible plants into their homes.

    Step 1: Choose the Right Pepper

    Use a fully ripe pepper red, yellow, or orange varieties work best. Green peppers are often underripe and less reliable.

    Step 2: Harvest and Dry the Seeds

    • Slice open the pepper
    • Gently remove seeds
    • Lay them on a paper towel for 3–5 days to dry

    Drying prevents rot and improves germination something many guides overlook.

    Step 3: Planting the Seeds

    • Fill containers with lightly moistened organic soil
    • Plant seeds ¼ inch deep
    • Cover loosely and mist

    Step 4: Germination Environment

    • Place in a warm spot (70–80°F)
    • Cover loosely with a breathable dome or cloth
    • Expect sprouts in 7–21 days

    Step 5: Light and Growth

    Once sprouted, move seedlings to bright light immediately. Insufficient light leads to leggy, weak plants a common indoor gardening frustration.

    Deep Organic Setup or Seasonal Refresh

    Indoor pepper plants benefit from occasional reorganization, especially as seasons change.

    Seasonal refresh ideas:

    • Move plants closer to windows during winter
    • Add reflective surfaces (light-colored walls or trays)
    • Refresh topsoil with compost in spring

    In open-concept homes, I often recommend grouping pepper plants with other indoor plants and natural materials to create a cohesive organic décor zone rather than scattering pots randomly.

    Prevention & Sustainability Tips

    Healthy plants start with prevention.

    • Avoid chemically treated soils or glossy decorative pots
    • Use compost tea or diluted worm castings instead of synthetic fertilizers
    • Repurpose kitchen scraps into compost where possible

    Sustainable gardening is about long-term thinking. In my professional experience, households that adopt these habits waste less, spend less, and enjoy better plant success.

    Common Mistakes to Avoid

    1. Believing Any Pepper Will Fruit Indoors

    Some varieties need intense light. Smaller peppers like chili or jalapeño are more reliable indoors.

    2. Overwatering

    This is the #1 killer of indoor pepper plants. Roots need oxygen as much as water.

    3. Falling for “Eco-Friendly” Marketing

    Bamboo labels and green packaging don’t guarantee non-toxic materials. Always check finishes and treatments.

    4. Ignoring Air Circulation

    Stagnant air encourages pests and disease especially in apartments.

    Local U.S. Home Context

    In American apartments with limited window space, compact pepper varieties work best. Renters can grow peppers without permanent changes by using portable grow lights and lightweight containers.

    Urban balconies can extend the growing season, while suburban homes benefit from rotating indoor and outdoor placement during warmer months.

    Seasonal climate shifts especially winter heating require extra humidity attention indoors.

    Extra Expert Tips From Real Homes

    • Use rolling plant stands to chase sunlight throughout the day
    • Pair pepper plants with herbs for a functional kitchen display
    • Choose fabric or cork pot mats instead of plastic saucers
    • Start two plants per household to ensure at least one fruits well

    Budget-friendly tip: Thrifted ceramic bowls with drainage holes added make beautiful, sustainable planters.

    FAQ: Growing Peppers Indoors

    Can you really learn how to grow peppers from a pepper indoors?

    Yes. In my experience, using seeds from organic, ripe peppers is reliable when proper light and warmth are provided.

    How long does it take for indoor peppers to produce fruit?

    Typically 90–150 days from planting, depending on variety and light quality.

    Do pepper plants improve indoor air quality?

    While not air purifiers, healthy plants contribute to humidity balance and psychological well-being.

    What’s the best light for indoor peppers?

    Bright, direct sunlight or a full-spectrum LED grow light for 12–14 hours daily.

    Are indoor peppers safe around pets?

    Pepper plants are generally safe, but spicy varieties can irritate pets if chewed.

    Conclusion: Why Growing Peppers Indoors Is Worth It

    Learning how to grow peppers from a pepper indoors goes beyond gardening. It’s a meaningful step toward sustainable home design, toxin-free living, and a deeper connection to what you consume. In real homes, these plants become living décor functional, beautiful, and deeply satisfying.

    With thoughtful care, organic materials, and realistic expectations, indoor pepper growing is not only achievable it’s transformative. Whether you live in a studio apartment or a family home, this simple practice brings nature, nourishment, and calm directly into your everyday space.

  • How to grow chilli peppers for beginners

    How to grow chilli peppers for beginners

    Every product is independently reviewed and selected by our editors. If you buy something through our links, we may earn an affiliate commission at no extra cost to you.

    If you’ve ever dreamed of adding a touch of spice to your organic home garden, learning how to grow chilli peppers for beginners is the perfect place to start. Chilli peppers (Capsicum spp.) are one of the most rewarding crops for new gardeners they’re compact, colorful, and surprisingly easy to grow in containers or small backyard plots.

    From my years of helping U.S. homeowners and renters design productive organic gardens, I’ve found chilli peppers to be an ideal beginner-friendly crop: they’re resilient, decorative, and deliver big flavor even in limited space. Whether you prefer sweet banana peppers or fiery cayennes, growing your own ensures clean, pesticide-free produce and endless variety at your fingertips.

    In this guide, we’ll cover everything you need to know about starting chilli peppers organically from selecting seeds to watering, lighting, and harvesting. You’ll also learn how to avoid common beginner mistakes and create the perfect indoor or outdoor environment for strong, healthy plants.

    Why Grow Chilli Peppers at Home?

    Growing chilli peppers at home isn’t just about heat it’s about freshness, sustainability, and satisfaction.

    • Flavor: Homegrown chillies taste richer and more vibrant than store-bought ones.
    • Health: Packed with vitamin C, antioxidants, and metabolism-boosting capsaicin.
    • Sustainability: Reduces packaging waste and transportation emissions.
    • Aesthetics: The plants themselves are beautiful lush green leaves topped with bright red, orange, or yellow fruit.
    • Versatility: You can grow them in pots, raised beds, or even sunny balconies.

    For anyone exploring organic home gardening, chilli peppers bring both visual appeal and culinary excitement.

    What You’ll Need

    ItemPurposeOrganic BenefitSustainability Tip
    Chilli pepper seeds or seedlingsStarting point for your gardenChoose organic, non-GMO varietiesBuy from local seed suppliers or seed exchanges
    Containers or garden bedsHold soil and rootsFlexible placement optionsReuse clay pots or wooden boxes with drainage holes
    Organic potting mixNutrient base for root growthFree of synthetic fertilizersUse compost-enriched soil or coco coir blends
    Watering can or spray bottleKeeps soil moistGentle watering prevents root damageRefill using collected rainwater
    Full-spectrum grow light (optional)For indoor growingMimics natural sunlightChoose energy-efficient LED lights
    Compost or worm castingsNatural fertilizerAdds nutrients and beneficial microbesReuse kitchen scraps for composting

    Step-by-Step: How to Grow Chilli Peppers for Beginners

    1. Choose the Right Variety

    For beginners, start with easy-to-grow, moderate-heat varieties such as:

    • Jalapeño (mild to medium heat)
    • Cayenne (slender and productive)
    • Banana pepper (mild and sweet)
    • Thai chilli (compact and prolific indoors)

    Smaller varieties tend to mature faster and perform well in containers.

    2. Start Your Seeds

    Chilli peppers need warmth to germinate.

    • Sow seeds ¼ inch deep in trays or small pots filled with organic seed-starting mix.
    • Keep soil evenly moist, not soggy.
    • Maintain temperatures between 75–85°F (24–29°C) for germination.
    • Seeds typically sprout within 7–14 days.

    If your home is cool, place trays on a seedling heat mat for consistent warmth.

    3. Provide Light and Warmth

    Once seedlings appear, give them 12–14 hours of bright light daily.

    • A sunny south-facing window works well.
    • If natural light is limited, use a full-spectrum LED grow light placed about 6–8 inches above plants.

    Warmth is crucial chillies stop growing below 60°F (15°C). Keep them in a warm, draft-free spot.

    4. Transplant Carefully

    When seedlings are about 4 inches tall and have several true leaves, transplant them into larger containers (at least 10–12 inches deep).

    • Use a well-draining organic potting mix enriched with compost.
    • Space plants 12–18 inches apart in garden beds or one per pot for containers.

    At this stage, gently acclimate plants to outdoor conditions by placing them outside for a few hours daily (“hardening off”) before full transplanting.

    5. Watering the Right Way

    Chilli peppers like consistent but moderate moisture. Overwatering is a common beginner mistake.

    • Water when the top inch of soil feels dry.
    • Deeply soak the soil, then allow it to dry slightly before watering again.
    • Always ensure the container has proper drainage holes.

    Mulching with straw or shredded leaves helps retain moisture naturally.

    6. Feeding Organically

    Feed your chilli plants every 2–3 weeks using:

    • Compost tea (for steady nitrogen)
    • Worm castings (for soil structure and root strength)
    • Seaweed extract (for micronutrients and leaf health)

    Avoid synthetic fertilizers they can produce lush foliage at the expense of fruit.

    7. Flowering and Pollination

    Once your chilli plants start flowering, gently shake or tap the stems to help with pollination if you’re growing indoors. Outdoors, bees and wind will handle it.

    Keep temperatures stable extreme heat or cold can cause flower drop.

    8. Harvesting Your Chillies

    You can harvest chillies when they’re green for mild flavor or wait until they turn red, orange, or yellow for full heat and sweetness.

    Use clean scissors or pruning shears to cut peppers off the plant—never pull, as that can damage stems. After harvest, plants often continue producing for several months.

    Common Mistakes to Avoid

    MistakeWhy It’s a ProblemSolution
    OverwateringRoots suffocate and rotLet topsoil dry slightly between watering
    Insufficient lightWeak, leggy growthProvide 12–14 hours of bright light daily
    Using chemical fertilizersCan burn roots, affect flavorStick to natural compost or worm castings
    Cold draftsStunts growthKeep plants in warm, sheltered spots
    No pollination indoorsFlowers drop without fruitHand-pollinate using a small brush or tapping method

    Pest and Disease Management (Organic Methods)

    • Aphids or whiteflies: Spray plants with diluted neem oil once a week.
    • Spider mites: Maintain humidity and wipe leaves with a damp cloth.
    • Fungal issues: Avoid overhead watering; water at the soil level.
    • Pepper leaf curl: Often caused by temperature stress keep plants consistently warm.

    Companion planting with basil or marigold helps deter pests naturally.

    Ideal U.S. Home Growing Scenarios

    • Apartments: Grow compact varieties in 10-inch pots near sunny windows.
    • Suburban homes: Use raised beds or patio containers for easy care.
    • Cold regions: Start seeds indoors in late winter and move plants outside after frost.
    • Hot southern states: Provide partial shade during peak summer afternoons.
    • Urban balconies: Lightweight containers with drip trays fit perfectly in small sunny corners.

    Expert Tips for Healthy, Productive Plants

    • Pinch early flowers: This encourages stronger root and branch growth before heavy fruiting.
    • Rotate containers: Rotate every few days so all sides get equal light exposure.
    • Prune regularly: Remove yellowing leaves to improve air circulation.
    • Support heavy plants: Use bamboo stakes or small tomato cages for stability.
    • Store seeds: Save seeds from your best peppers for next year’s crop just dry them completely first.

    Frequently Asked Questions

    1. How long do chilli peppers take to grow from seed? Most varieties take 70–100 days from seed to ripe fruit, depending on the type and temperature.

    2. How much sunlight do chilli peppers need? Chillies require 6–8 hours of bright sunlight daily or 12–14 hours under grow lights indoors.

    3. Can I grow chilli peppers indoors year-round? Yes. With sufficient light, warmth, and humidity, chilli peppers can thrive indoors all year.

    4. How often should I water chilli plants? Water when the top inch of soil feels dry usually every 2–3 days, depending on your climate.

    5. Do chilli plants come back every year? In warm climates (zones 9–11), they can be perennial. In colder regions, treat them as annuals or overwinter indoors.

    6. Can I grow chillies in small pots? Yes. Choose compact varieties like Thai chillies or jalapeños, and use containers at least 10 inches deep with good drainage.

    Conclusion

    So, how do you grow chilli peppers for beginners? Start with organic seeds, warm soil, and plenty of light. Keep the soil moist but not soggy, feed gently with compost, and harvest when fruits reach their full color. Within a few months, you’ll enjoy homegrown peppers bursting with flavor, heat, and freshness.

    In my experience, chilli peppers are one of the most rewarding plants for beginner gardeners they’re adaptable, decorative, and productive in almost any U.S. home environment. Whether on a sunny balcony, a kitchen windowsill, or a backyard garden, growing chillies organically connects you with nature’s rhythm and adds a bold, beautiful bite to your cooking.

  • How to grow arugula at home

    How to grow arugula at home

    Every product is independently reviewed and selected by our editors. If you buy something through our links, we may earn an affiliate commission at no extra cost to you.

    If you’re looking for an easy, fast-growing leafy green to add to your organic home garden, learning how to grow arugula at home is a perfect place to start. Arugula (Eruca sativa) also called rocket or roquette is a cool-season green known for its peppery bite and tender leaves. It grows quickly, thrives in containers or garden beds, and doesn’t require much space or complicated equipment.

    In my experience helping U.S. homeowners and renters design organic gardens, arugula consistently ranks as one of the most satisfying crops to grow. You can sow it in early spring or fall outdoors, or even keep it going year-round indoors under lights. Within just 3–4 weeks, you’ll be harvesting fresh, healthy leaves straight from your home garden no grocery store trips, no plastic packaging, and no pesticides.

    This guide covers everything you need to know about growing arugula naturally at home: the best soil and light conditions, watering routines, organic fertilizer options, pest prevention, and harvesting techniques for continuous yields.

    Why Grow Arugula at Home?

    Growing arugula at home offers both environmental and lifestyle benefits:

    • Freshness: You harvest only what you need, so your greens are never wilted or days old.
    • Sustainability: Homegrown arugula reduces food waste and eliminates the carbon footprint of store-bought produce.
    • Flavor: Fresh-picked leaves are far more flavorful and aromatic than packaged greens.
    • Health: You control what goes into your soil no synthetic fertilizers or pesticides.
    • Aesthetics: Those bright, serrated leaves bring a natural, organic look to patios, balconies, and kitchen windowsills.

    Whether you live in an apartment, townhouse, or suburban home, arugula fits beautifully into any sustainable gardening plan.

    What You’ll Need

    ItemPurposeOrganic BenefitSustainability Tip
    Arugula seedsStart your plantsChoose certified organic, non-GMO varietiesBuy from local or regional seed companies
    Container or garden bedHolds plants and soilAllows flexible planting indoors or outdoorsRepurpose wooden boxes, ceramic pots, or raised beds
    Organic potting mix or compost-rich soilGrowing mediumPromotes strong root growth naturallyUse compost from kitchen scraps if available
    Watering can or spray bottleKeeps soil evenly moistMaintains steady growthReuse old glass or metal containers
    Full-spectrum grow light (optional)Provides consistent light indoorsReplaces sunlight for year-round growthUse energy-efficient LEDs

    Step-by-Step: How to Grow Arugula at Home

    1. Choose the Right Location

    Arugula prefers cool, moderate temperatures and 4–6 hours of sunlight per day. Outdoors, choose a spot with morning sun and afternoon shade. Indoors, place containers near a bright window or use a small grow light.

    2. Prepare the Soil

    Use loose, well-draining soil rich in organic matter. Blend compost or aged manure into your soil before planting. Ideal pH: 6.0 to 7.0. Avoid heavy clay soils that trap water.

    3. Sow the Seeds

    You can start arugula directly from seed no need for transplanting.

    • Scatter seeds lightly over the soil surface.
    • Cover with about ¼ inch of soil.
    • Water gently so seeds stay in place.
    • Keep the soil consistently moist until germination (5–7 days).

    4. Water Properly

    Arugula likes moisture but not soggy soil. Water when the top inch feels dry. In warm weather, daily light watering may be needed. Consistent hydration keeps leaves tender and prevents bitterness.

    5. Maintain Ideal Temperatures

    Arugula thrives between 55°F and 70°F. Hot weather causes it to bolt (flower) quickly, which makes leaves bitter. In summer, grow it in partial shade or indoors under controlled conditions.

    6. Thin the Seedlings

    When seedlings reach about 2 inches tall, thin them to 2–3 inches apart. This spacing ensures proper airflow and healthy leaf development.

    7. Feed Organically

    Every 2–3 weeks, feed your plants with diluted compost tea, worm castings, or organic seaweed fertilizer. Avoid chemical fertilizers they can alter the flavor and disrupt soil microbes.

    8. Harvest at the Right Time

    You can start harvesting baby leaves about 3–4 weeks after planting. Use clean scissors to snip the outer leaves, leaving the center to regrow. Regular harvesting encourages continuous growth.

    Growing Arugula Indoors vs Outdoors

    FactorIndoorsOutdoors
    Light12–14 hours under grow lights or bright window4–6 hours of natural sunlight
    TemperatureControlled, ideal for year-round harvestWeather-dependent, best in spring/fall
    PestsFewer, easier to control with neem oilMay attract flea beetles or aphids
    YieldSmaller but consistentLarger harvest in short bursts
    MaintenanceLowModerate

    If you have limited outdoor space, indoor arugula is an excellent year-round option especially for apartment dwellers or cold-climate gardeners.

    Organic Pest Prevention

    Even healthy arugula can attract small pests. Here’s how to manage them naturally:

    • Aphids: Spray leaves with a mix of mild soap and water (1 tsp soap per quart of water).
    • Flea beetles: Cover young plants with lightweight garden fabric outdoors.
    • Slugs: Use copper tape around containers or sprinkle crushed eggshells as a barrier.
    • Mildew: Avoid crowding plants and water early in the day to let leaves dry.

    Keeping your garden clean and maintaining proper airflow are the best long-term defenses.

    Common Mistakes to Avoid

    MistakeImpactSolution
    OverwateringRoot rot, yellow leavesWater only when soil surface feels dry
    Too much sunBitter leaves, boltingProvide afternoon shade
    Not harvesting enoughSlows new growthPick outer leaves regularly
    Crowded plantsPoor airflow and diseaseThin seedlings early
    Chemical fertilizersAlters taste and soil healthStick to organic compost or teas

    Practical U.S. Home Growing Examples

    • Small Apartments: Compact containers on a sunny windowsill work perfectly.
    • Suburban Yards: Mix arugula into raised beds or border gardens for edible landscaping.
    • Urban Balconies: Use railing planters with filtered morning light.
    • Cold Regions: Grow indoors near south-facing windows in winter months.
    • Hot Climates: Grow arugula in the cooler months or indoors with air conditioning.

    Expert Tips for Success

    • Succession planting: Sow new seeds every 10–14 days for continuous harvest.
    • Combine with companion herbs: Basil, parsley, and mint complement arugula’s flavor and pest resistance.
    • Harvest early: Younger leaves taste milder; older leaves are spicier.
    • Regrow from stubs: After harvesting, leave the base intact it may regrow new leaves.
    • Incorporate décor: Small arugula pots integrated with natural wood or terracotta add organic charm to home kitchens.

    Frequently Asked Questions

    1. How long does arugula take to grow at home? Arugula typically takes 3–4 weeks from seed to first harvest, depending on light and temperature.

    2. Can I grow arugula indoors year-round? Yes. With consistent moisture, moderate temperatures, and adequate light, arugula thrives indoors all year.

    3. What type of soil does arugula prefer? Use light, well-draining organic soil rich in compost or aged manure.

    4. How do I keep arugula from becoming bitter? Keep the temperature cool, water consistently, and harvest young leaves before the plant bolts.

    5. Should I use fertilizer for arugula? Only organic, mild nutrients are needed compost tea or worm castings every few weeks are ideal.

    6. Can I regrow arugula after harvesting? Yes. Snip outer leaves and allow the plant to keep its central crown; it will regrow fresh foliage for several weeks.

    Conclusion

    So, how do you grow arugula at home? It’s as simple as choosing organic seeds, planting in rich compost-based soil, keeping the soil evenly moist, and providing moderate sunlight. Within a month, you’ll enjoy your own homegrown, peppery greens.

    From my professional experience working with sustainable home gardeners, arugula is one of the most rewarding crops for beginners. It grows fast, fits into small spaces, and keeps on producing with little effort. Whether you’re cultivating a kitchen windowsill garden or supplementing your backyard beds, growing arugula at home is an easy, eco-friendly way to enjoy fresh, nutritious greens all year long.

  • How do you grow arugula indoors

    How do you grow arugula indoors

    Every product is independently reviewed and selected by our editors. If you buy something through our links, we may earn an affiliate commission at no extra cost to you.

    If you love fresh, peppery greens but have limited outdoor space, learning how to grow arugula indoors is one of the easiest ways to bring a steady supply of flavor into your kitchen. Arugula (Eruca sativa), sometimes called rocket or roquette, is a fast-growing leafy green that thrives in containers, small apartments, and even low-light kitchens when cared for properly.

    From my experience helping homeowners and renters across the U.S. create productive organic indoor gardens, I can say that arugula is surprisingly forgiving. It germinates quickly often within a week and you can harvest tender leaves in just three to four weeks. With the right light, soil, and watering routine, you can enjoy crisp, flavorful greens all year without stepping outside.

    In this guide, I’ll walk you step-by-step through growing arugula indoors organically: from seed to harvest. You’ll learn how much light it needs, what soil works best, how to keep pests away naturally, and how to harvest for continuous regrowth.

    Why Grow Arugula Indoors?

    Growing arugula indoors offers multiple benefits beyond convenience:

    • Freshness: You can harvest exactly when you need it, ensuring the best flavor.
    • Sustainability: Reduces food waste and eliminates plastic packaging from store-bought greens.
    • Health: Indoor-grown arugula avoids chemical sprays and pesticide residue.
    • Beauty: Its bright, serrated leaves add a natural, vibrant touch to kitchen décor.

    For anyone practicing organic home decoration or sustainable living, indoor arugula fits perfectly it’s both functional and aesthetic.

    What You’ll Need

    ItemPurposeOrganic BenefitSustainability Tip
    Arugula seedsStart your cropChoose certified organic, non-GMO varietiesBuy from local seed suppliers to reduce shipping footprint
    Container or tray (3–6 inches deep)Holds soil and rootsReusable and easy to manage indoorsRepurpose ceramic bowls or wooden boxes with drainage holes
    Organic potting mixGrowing mediumFree from synthetic fertilizersChoose compost-based blends with coco coir or perlite
    Light sourceFor photosynthesisNatural sunlight or full-spectrum grow lightUse energy-efficient LED lights
    Watering can or spray bottleTo maintain moistureKeeps soil evenly dampRefill with rainwater if possible

    Step-by-Step: How Do You Grow Arugula Indoors

    1. Choose the Right Container

    Arugula doesn’t need deep soil 3 to 6 inches is enough. Make sure your container has good drainage holes. For apartment dwellers, shallow trays or window boxes work perfectly.

    2. Prepare the Soil

    Use a light, nutrient-rich organic potting mix. I blend my own with equal parts compost, coco coir, and perlite. Avoid heavy garden soil; it compacts easily and limits airflow around roots.

    3. Sow the Seeds

    Sprinkle seeds evenly across the soil surface, leaving about 1 inch between them. Gently press them into the soil or cover lightly with ¼ inch of mix. Water gently with a fine spray.

    4. Provide the Right Light

    Arugula prefers 4–6 hours of bright, indirect sunlight daily. A sunny kitchen window or under a full-spectrum grow light for 12–14 hours works well. If you notice elongated stems (a sign of low light), move the container closer to the window or increase artificial light exposure.

    5. Keep Soil Moist but Not Soggy

    Consistent moisture is key. Water when the top of the soil feels dry to the touch. I recommend bottom watering place the container in a shallow dish of water for 10 minutes to let soil absorb moisture evenly.

    6. Maintain Cool Temperatures

    Arugula prefers cooler conditions between 60°F and 70°F. Avoid placing it near heaters or direct hot air vents. In warmer regions, a light curtain helps diffuse heat from intense sunlight.

    7. Thin Seedlings

    Once seedlings are about 2 inches tall, thin them out by clipping weaker plants. Leave about 2 inches of space between each to ensure proper airflow and leaf development.

    8. Harvest Regularly

    You can start harvesting tender leaves in just 3–4 weeks after sowing. Use clean scissors to snip outer leaves, allowing inner ones to continue growing. With consistent care, your arugula will produce for several weeks before needing replanting.

    Common Mistakes to Avoid

    MistakeWhy It’s a ProblemExpert Fix
    Too little lightLeads to leggy, weak leavesMove closer to a window or add grow light
    OverwateringCauses root rotAllow the top inch of soil to dry between waterings
    High indoor temperatureArugula bolts and turns bitterKeep plants in cooler rooms or shaded from harsh sun
    Crowding seedlingsReduces airflow and promotes mildewThin plants early for better spacing
    Using synthetic fertilizerWeakens soil microbiomeUse diluted compost tea or worm castings instead

    Organic Care and Sustainability Tips

    • Feed naturally: Every few weeks, water with compost tea or diluted organic seaweed fertilizer.
    • Pest prevention: Arugula can attract aphids indoors. A gentle spray of neem oil or soapy water once every two weeks keeps them away naturally.
    • Reuse soil responsibly: After harvest, refresh old soil with compost before replanting.
    • Rotate crops: Change the herb or leafy green grown in the same pot every few cycles to maintain soil health.

    Realistic U.S. Home Scenarios

    • Apartments with low light: Pair arugula with a small LED grow light on a timer.
    • Urban kitchens: Place trays on window ledges for easy access when cooking.
    • Suburban homes: Grow near east-facing windows for cool morning sun.
    • Cold regions: Arugula thrives indoors during winter when outdoor gardening isn’t practical.
    • Hot southern climates: Keep plants inside during summer outdoor heat can cause rapid bolting.

    Extra Expert Tips

    • Successive planting: Sow a new batch every 10–14 days for continuous harvests.
    • Mix varieties: Try ‘Astro’ for fast growth or ‘Rocket’ for extra peppery flavor.
    • Harvest timing: Pick leaves early in the morning for the best texture and taste.
    • Microgreens option: If space is limited, grow arugula as microgreens harvest in just 10 days.
    • Pair with décor: Arugula’s bright leaves complement natural kitchen materials like wood, ceramic, and stone perfect for organic home styling.

    Frequently Asked Questions

    1. How much light does arugula need indoors? Arugula needs at least 4–6 hours of bright, indirect sunlight or 12 hours under a full-spectrum grow light each day.

    2. How often should I water arugula indoors? Water when the soil surface feels dry, usually every 2–3 days depending on humidity and container size.

    3. Can I grow arugula year-round indoors? Yes. With consistent light and cool temperatures, arugula grows indoors in any season.

    4. How long does it take to harvest arugula grown indoors? You can begin harvesting tender leaves in about 3 to 4 weeks after sowing seeds.

    5. Do I need fertilizer for indoor arugula? Only light feeding is necessary. Use compost tea or diluted organic seaweed fertilizer every few weeks.

    6. Why is my arugula turning bitter? Bitterness usually indicates high heat or too much direct sunlight. Keep your plants cooler and harvest leaves early.

    Conclusion

    So, how do you grow arugula indoors? Start with organic seeds, a shallow container, rich compost-based soil, consistent moisture, and 4–6 hours of indirect sunlight daily. Within just a few weeks, you’ll be harvesting crisp, flavorful greens right from your windowsill.

    Arugula is one of the most rewarding herbs to grow indoors it’s quick, space-efficient, and perfectly suited for sustainable, organic living. Whether you live in a city apartment or a suburban home, mastering indoor arugula growing brings fresh, toxin-free produce to your fingertips and a touch of green freshness to your home décor year-round.

  • How much sunlight does mint need to grow indoors

    How much sunlight does mint need to grow indoors

    Every product is independently reviewed and selected by our editors. If you buy something through our links, we may earn an affiliate commission at no extra cost to you.

    Providing the right light is essential for healthy, flavorful mint grown indoors. How to Provide Ideal Sunlight for Mint Indoors depends on light intensity, duration, and placement. Learn how many hours mint needs, where to position it, and how to prevent leggy, weak growth.

    How Many Hours of Sunlight Does Indoor Mint Need

    Here’s exactly how I position and manage mint plants for balanced, consistent light in typical U.S. homes.

    1. Choose the Right Window

    • East-facing windows: Best overall for mint gentle morning sun, cooler in the afternoon.
    • West-facing windows: Good option, but may require sheer curtains to filter stronger afternoon light.
    • South-facing windows: Excellent in winter but can get too intense in summer. Use a light curtain or move the pot slightly back from the glass.
    • North-facing windows: Usually too dim unless supplemented with a grow light.

    2. Rotate the Pot Regularly

    Indoor light comes from one direction, which causes mint to lean toward the source. Rotate your pot a quarter turn every two or three days to keep growth even and upright.

    3. Supplement with Grow Lights

    If your home doesn’t get enough natural light—especially during darker winter months—a small full-spectrum LED grow light is a simple solution.

    Tips for supplemental lighting:

    • Keep the light about 6–8 inches above the plant tops.
    • Run it for 12–14 hours daily.
    • Use a timer to maintain a consistent schedule.
    • Choose full-spectrum lights labeled for herbs or leafy greens; they mimic natural sunlight without excessive heat.

    4. Adjust with the Seasons

    • Winter: Move mint closer to windows or increase artificial light hours.
    • Summer: Pull pots back from strong afternoon sun to prevent leaf scorching.
    • Spring/Fall: These are naturally balanced times mint tends to thrive with little adjustment.

    Why Light Quality Matters for Mint

    Light affects not just growth rate but leaf quality and flavor. Mint’s essential oils develop most when the plant receives steady, moderate light.

    Here’s what I’ve observed across dozens of indoor growing setups:

    • Low light: Pale leaves, weak stems, and mild flavor. The plant stretches toward light sources.
    • Moderate indirect light: Balanced growth, darker green leaves, and strong aroma ideal for fresh use.
    • Excessive direct light: Leaf curl, brown tips, and dry soil between waterings.

    If your mint’s flavor seems dull or it grows too slowly, light is usually the first thing to adjust.

    Troubleshooting Light Problems in Indoor Mint

    ProblemLikely CauseFix
    Leggy, stretched stemsNot enough lightMove closer to a brighter window or add a grow light
    Yellowing leavesLow light or overwateringImprove light access and let soil dry slightly between waterings
    Brown or crisp leaf edgesToo much direct sunlightFilter light with a sheer curtain or move plant back from the window
    Small, pale leavesWeak light intensityIncrease to at least 4 hours of bright light or 12 hours under grow lights
    Weak aromaInconsistent lightingKeep light schedule steady—mint likes predictable rhythms

    Organic Light-Management Practices

    For those practicing organic, sustainable indoor gardening, small adjustments can help your mint thrive without energy waste or toxic materials:

    • Use reflective surfaces. Place a light-colored wall or mirror behind your mint to bounce light evenly.
    • Choose energy-efficient grow lights. LED fixtures consume less power and emit minimal heat ideal for small apartments.
    • Combine natural and artificial light. A few hours of morning sun plus several hours of LED light gives great results.
    • Avoid glossy decorative pots. They can concentrate heat and light, stressing the roots. Use unglazed terracotta or recycled ceramic containers instead.

    Realistic U.S. Home Scenarios

    Mint adapts well to a variety of American living situations:

    • Small apartments: Place mint on an east-facing kitchen window with a small clip-on grow light for supplemental brightness.
    • Suburban homes: A west-facing window in the dining area often gives sufficient indirect light.
    • Urban balconies: Filter sunlight through railing shadows or sheer fabric to avoid scorching.
    • Cool northern regions: Expect longer artificial light hours in winter; natural light alone is often too weak after October.
    • Hot southern regions: Provide afternoon shade direct sunlight behind glass can reach over 100°F and dehydrate the plant quickly.

    Expert Tips for Perfect Indoor Lighting

    • Move mint gradually. Sudden changes in light can shock the plant. Transition it over several days when changing locations.
    • Watch the leaves. Leaf color is your best indicator. Deep green means enough light; pale or yellowish leaves mean it needs more.
    • Group plants. Placing several herbs together creates a microclimate with higher humidity and shared light reflection.
    • Clean windows and light fixtures. Dust reduces light intensity by up to 20%. Keeping them clean ensures consistent exposure.
    • Time your watering to light cycle. Water early in the day so leaves dry before the lights turn off this helps prevent fungal problems.

    Frequently Asked Questions

    1. How much sunlight does mint need to grow indoors? Mint needs about 4–6 hours of bright, indirect sunlight per day or 12–14 hours under full-spectrum grow lights to stay healthy and flavorful.

    2. Can mint grow in low light? It will survive but won’t thrive. Low light results in weak, pale leaves and poor aroma. Supplement with a small LED grow light if your space is dim.

    3. What happens if my mint gets too much sun indoors? Direct, strong sunlight especially through glass can scorch leaves. You’ll see brown edges and dry soil. Move the pot a few inches back from the window.

    4. Do LED grow lights work as well as sunlight? Yes, as long as you use full-spectrum lights made for herbs. In cooler or darker homes, they’re often more reliable than window light.

    5. How do I know if my mint is getting enough light? Healthy mint has upright stems, deep green leaves, and a strong scent. If it’s leaning, pale, or dull in aroma, increase the light exposure.

    6. Can I keep mint under lights year-round? Absolutely. Many indoor gardeners grow mint entirely under lights through winter. Just maintain a regular 12–14 hour light cycle.

    Conclusion

    So, how much sunlight does mint need to grow indoors? Aim for 4–6 hours of bright, indirect natural light, or supplement with 12–14 hours of full-spectrum artificial light. Balance is key too little light makes weak, tasteless leaves, and too much can burn them.

    In my experience working with hundreds of homeowners, mint is one of the most resilient indoor herbs once you match its light to its natural preferences. Whether your home is sun-drenched or softly lit, a bit of observation and adjustment keeps mint lush, aromatic, and endlessly useful in your organic kitchen.

    Growing mint indoors isn’t just convenient it’s a small, daily connection to nature’s rhythm, right from your windowsill.

  • How Much Sunlight Does Mint Need Indoors |  Tips for Faster Growth

    How Much Sunlight Does Mint Need Indoors | Tips for Faster Growth

    Every product is independently reviewed and selected by our editors. If you buy something through our links, we may earn an affiliate commission at no extra cost to you.

    For those beginning their herb gardening journey, understanding how long it takes for mint to germinate indoors is an important first step. Mint is one of the easiest herbs to grow once established, but its seeds can challenge your patience at the start. They’re tiny, slow to sprout, and sensitive to temperature and moisture changes.

    From years of helping homeowners and renters grow fresh herbs on kitchen windowsills and apartment balconies, I can tell you that mint rewards careful attention during germination. With the right warmth, light, and humidity, you’ll see those first green shoots in about 10 to 15 days, though sometimes it takes up to three weeks.

    Let’s look at what happens during this stage, how to create ideal indoor conditions, and how to transition seedlings into strong, productive plants.

    Understanding Mint Germination Indoors

    Mint (Mentha spp.) reproduces easily through cuttings or root division, but starting from seed is a rewarding way to learn about plant growth from scratch. Germination is the process by which the seed absorbs water, breaks dormancy, and begins to form its first leaf structures.

    Indoors, this process can be slightly slower than outdoors because of lower light and humidity fluctuations. The key factors affecting how long it takes include:

    • Temperature: Mint seeds germinate best between 68°F and 75°F (20–24°C).
    • Light exposure: Mint seeds are surface germinators burying them too deep prevents sprouting.
    • Moisture: Consistent, gentle moisture helps the seed coat soften so roots can emerge.
    • Air circulation and humidity: Balanced humidity encourages germination, but stagnant air can invite mold.

    Under the right conditions, you’ll typically see sprouts in 10–15 days, and your seedlings will be ready for transplant in about 4–5 weeks.

    Step-by-Step: How to Germinate Mint Seeds Indoors

    1. Choose the Right Container

    A shallow seed tray or small pots with drainage holes work best. Line the bottom with a thin layer of compost or a bit of coco coir for moisture retention.

    2. Prepare the Soil

    Use a high-quality organic seed-starting mix light, well-draining, and free from synthetic fertilizers. You can blend equal parts compost, coco coir, and perlite.

    3. Sow the Seeds

    Mint seeds are extremely fine. Sprinkle them lightly on the surface and press gently into the soil without covering them. They need light to germinate.

    4. Create a Humid Environment

    Mist the surface until it’s evenly moist, then cover the tray loosely with a clear lid or plastic wrap. This maintains humidity while letting in light.

    5. Provide Warmth and Light

    Keep the tray in a warm spot (around 70°F) with bright, indirect sunlight. If daylight is limited, use a small LED grow light for 12–14 hours a day.

    6. Maintain Moisture

    Mist daily or whenever the top of the soil feels dry. Avoid overwatering—soggy conditions cause seeds to rot before they sprout.

    7. Watch for Sprouts

    You’ll see tiny green shoots in 10 to 15 days. Once seedlings appear, remove the cover to improve air circulation and prevent fungal issues.

    8. Thinning and Transplanting

    When seedlings reach about 2 inches tall and have a few true leaves, thin out weaker ones or transplant them into their own pots. Continue growing them in bright light until the roots are well established.


    Common Issues During Mint Germination

    In real homes, especially during winter or in air-conditioned spaces, germination can take longer. Here’s how to troubleshoot common problems:

    ProblemLikely CauseSolution
    Seeds not sprouting after 3 weeksTemperature too low or seeds buried too deepMove tray to a warmer location (around 70°F) and ensure seeds are on the surface
    Mold on soil or seedsToo much humidity, poor ventilationRemove cover for a few hours daily; use a small fan for gentle airflow
    Uneven germinationOld seed stock or inconsistent moistureAlways use fresh, organic seeds and mist evenly every day
    Seedlings falling overDamping-off disease (fungal)Improve air circulation, avoid overwatering, and use sterile seed-starting mix

    How to Care for Mint Seedlings After Germination

    Once your mint has sprouted, your focus shifts from germination to healthy growth:

    • Light: Keep the pot near a bright east- or south-facing window. Mint needs at least 4 hours of light daily.
    • Water: Maintain lightly moist soil. Mint hates drying out but also dislikes soggy roots.
    • Feeding: After 4 weeks, feed lightly with diluted organic compost tea or seaweed extract.
    • Transplanting: When roots fill the starter pot, move seedlings into larger containers (8–10 inches wide) with fresh organic potting soil.

    A good rule of thumb: the healthier your seedling care, the faster your mint will establish a strong root system and start producing flavorful leaves.

    Realistic U.S. Home Scenarios

    • Small apartments: Start seeds on a sunny kitchen counter or windowsill. Use a humidity dome to maintain moisture in drier indoor air.
    • Cooler northern climates: A seedling heat mat helps jumpstart germination during winter.
    • Homes with limited natural light: A compact grow light (set on a timer) ensures consistent growth.
    • Warm southern regions: Keep the tray out of direct midday sun to prevent overheating.

    The beauty of mint is its adaptability it germinates and grows well in nearly any U.S. climate when given a stable indoor environment.

    Expert Tips for Faster, Healthier Germination

    • Pre-soak seeds: Soak mint seeds in warm water for 4–6 hours before planting to soften the coat and encourage faster germination.
    • Bottom watering: Instead of watering from above, place the seed tray in a shallow dish of water for 10 minutes. The soil will absorb moisture evenly.
    • Use fresh seed: Mint seed viability drops quickly after one year, so buy small packets of fresh, organic seed each season.
    • Label trays: Since mint germinates slowly, labeling helps you track planting dates and know when to expect results.
    • Patience: Even under perfect conditions, not all seeds germinate at once. Wait at least 21 days before re-sowing.

    Frequently Asked Questions

    1. How long does it take for mint to germinate indoors? Under ideal conditions warmth (around 70°F), light moisture, and bright indirect light mint seeds germinate in 10 to 15 days, though it may take up to 3 weeks.

    2. Why are my mint seeds taking longer to sprout? Cool temperatures, low humidity, or old seeds can slow germination. Move your tray to a warmer spot and mist regularly.

    3. Should I cover mint seeds with soil? No. Mint seeds need light to germinate. Press them gently onto the soil surface instead.

    4. Is it easier to grow mint from cuttings than seed? Yes. Cuttings root in water within a week, while seeds take longer. However, growing from seed lets you explore different mint varieties.

    5. What kind of soil works best for mint seeds? Use an organic, loose, well-draining mix rich in compost or coco coir. Avoid synthetic fertilizers they can burn young seedlings.

    6. Do I need a grow light? If your indoor space lacks bright natural light, a small LED grow light helps maintain consistent germination and early growth.

    Conclusion

    So, how long does it take for mint to germinate indoors? Typically around 10 to 15 days, provided you maintain warmth, moisture, and light. Mint may test your patience early on, but once the seeds break through, it quickly becomes one of the most forgiving and rewarding herbs to grow.

    From my own experience maintaining organic indoor gardens, I’ve found that successful mint germination depends more on consistency than special tools. Keep the process natural use organic soil, clean containers, and gentle watering and you’ll soon have fresh, fragrant mint ready to elevate everything from tea to home décor.

    Growing mint indoors isn’t just gardening; it’s cultivating freshness and calm right in your living space.