Author: Adams Charles

  • The Easiest Vegetable to Grow for Beginners And How to Actually Succeed With It

    The Easiest Vegetable to Grow for Beginners And How to Actually Succeed With It

    Every product is independently reviewed and selected by our editors. If you buy something through our links, we may earn an affiliate commission at no extra cost to you.

    If you’re just starting your first home garden whether it’s on a balcony, terrace, or small backyard one of the most common questions is: What’s the easiest vegetable to grow for beginners?

    After years of trial and error in my own garden (including a few wilted tomato seedlings and overwatered herbs), I can confidently say radishes top the list. They’re fast, forgiving, space-efficient, and incredibly satisfying to harvest. But that’s not the whole story there are a few other beginner-safe vegetables worth mentioning too.

    Let’s walk through why radishes are such a reliable starter crop, how to grow them successfully from seed, and what alternatives work just as well depending on your space and climate.

    Why Radishes Are the Easiest Vegetable to Grow

    From hands-on experience, radishes check nearly every “beginner-friendly” box:

    • Fast results: They mature in as little as 25–30 days. That quick reward keeps new gardeners motivated.
    • Minimal space: You can grow them in pots as shallow as 6 inches or directly in garden beds.
    • Low maintenance: They don’t need staking, pruning, or transplanting.
    • Cool-season tolerance: Radishes thrive in mild spring or fall weather, when many summer crops struggle.
    • Pest resistance: They’re rarely attacked by pests if harvested on time.

    The only real trick? Timing and soil texture. In compacted or very hot conditions, radishes can become woody or fail to bulb up but we’ll cover how to avoid that.

    The Horticultural Logic Behind Their Success

    Radishes are root vegetables that prioritize quick growth over long-term leaf production. In cool, moist soil with moderate sunlight (4–6 hours a day), the plant channels most of its energy into forming that crisp, edible root.

    Because they germinate within 3–5 days, you can quickly see whether your soil and watering habits are working. This immediate feedback loop helps beginners understand soil moisture and seed spacing better than any textbook.

    From a biological standpoint:

    • The taproot stores nutrients fast.
    • The short life cycle avoids many common pest life cycles.
    • The shallow root zone means you can grow them almost anywhere raised beds, recycled containers, or fabric grow bags.

    What You’ll Need to Grow Radishes Successfully

    Basic supplies:

    • Radish seeds : Choose quick-growing varieties like Cherry Belle or French Breakfast.
    • Container or garden bed : At least 6 inches deep with good drainage.
    • Loose, fertile soil : A mix of garden soil, compost, and a little sand or cocopeat works well.
    • Watering can with a fine rose : Prevents soil splash and seed displacement.
    • Organic compost or vermicompost : For steady, balanced nutrition.
    • Mulch (optional) : Helps retain moisture in sunny balconies.

    Budget-friendly tip: If you don’t want to buy special potting mix, sieve your existing garden soil to remove clumps and add one part compost to two parts soil.

    Step-by-Step: How to Grow Radishes (Even in a Balcony Pot)

    1. Sow at the Right Time

    • Best season: Early spring or fall when temperatures are between 10–25°C (50–77°F).
    • Avoid peak summer heat it makes radishes bolt (flower early) and turn woody.

    2. Prepare the Soil

    • Loosen it at least 6 inches deep.
    • Mix in well-rotted compost for organic matter.
    • The texture should feel crumbly, not sticky radish roots need space to expand.

    3. Sow the Seeds

    • Scatter seeds about 1 inch apart in rows or circles (depending on your pot).
    • Cover lightly with ½ inch of soil.
    • Water gently to settle the soil.

    4. Keep the Soil Evenly Moist

    • Water lightly every 1–2 days, ensuring soil never dries out or becomes soggy.
    • In containers, check moisture daily especially in wind or full sun.

    5. Thin the Seedlings

    • Once they’re an inch tall, remove every other seedling so roots have room to grow.
    • Crowded plants produce small, misshapen radishes.

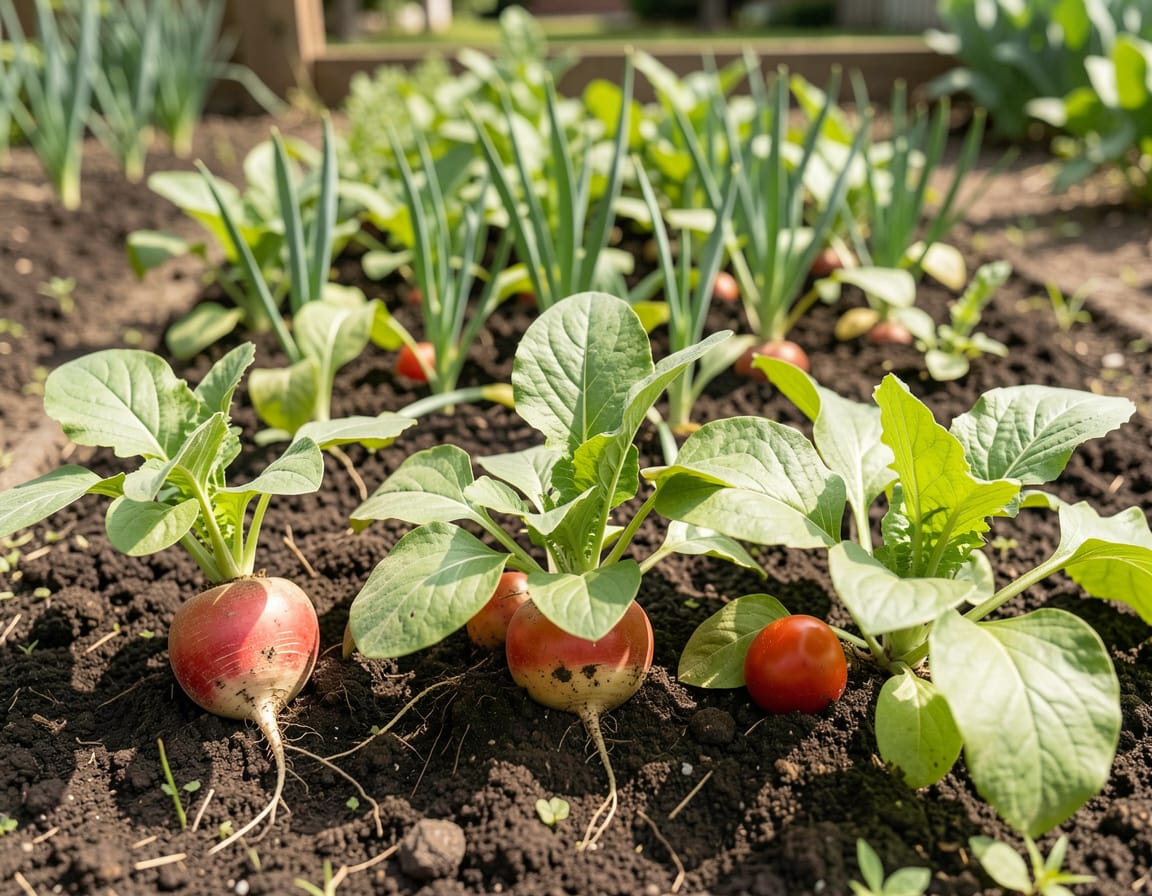
    6. Watch for Harvest Signs

    • After 3–4 weeks, check if the red tops of the roots are visible at the soil surface.
    • Harvest when the roots are 1 inch in diameter. Waiting too long makes them fibrous.

    Pro Tips & Best Practices

    • Don’t over-fertilize. Nitrogen-heavy feeds promote leafy growth instead of roots.
    • Harvest on time. Small radishes are crisp and sweet; oversized ones become spicy and dry.
    • Rotate crops. Don’t grow radishes repeatedly in the same container alternate with leafy greens to prevent soil fatigue.
    • Shade protection: In hot climates, provide partial shade during midday to prevent bolting.
    • Use radish tops: The young greens are edible and full of nutrients perfect for stir-fries or soups.

    Common Questions About Growing Easy Vegetables

    1. Why are my radishes growing only leaves, not roots?

    Too much nitrogen or too little spacing usually causes this. Keep the soil loose and avoid overfeeding.

    2. Can I grow radishes indoors?

    Yes, as long as you provide 4–6 hours of direct sunlight or use a grow light. A sunny balcony windowsill works perfectly.

    3. How often should I water radishes?

    Keep the soil evenly moist not soaked. In warm weather, daily light watering is better than deep weekly watering.

    4. What’s the easiest vegetable to grow in hot climates?

    If your area stays hot most of the year, try okra (lady’s finger) or yardlong beans instead—they handle heat better.

    5. Can I grow radishes in recycled containers?

    Absolutely. Old paint buckets, plastic tubs, or crate boxes with drainage holes all work. Just make sure they’re at least 6 inches deep.

    When Radishes Might Not Be the Best Choice

    • Hot, dry summers: Plants may bolt (flower early) before roots develop.
    • Heavy clay soil: Roots struggle to expand improve texture with compost and sand.
    • Tropical humidity: Radishes can attract fungal spots if air circulation is poor.

    If you live in very warm regions, choose heat-tolerant alternatives like okra, bush beans, or amaranth greens.

    Other Easy Vegetables for Beginners

    VegetableBest SeasonWhy It’s EasyContainer Depth
    LettuceCool seasonsGrows fast, cut-and-come-again harvest6–8 inches
    SpinachCool to mildResilient, minimal pests6–8 inches
    OkraWarmTolerates heat, minimal care10–12 inches
    Cherry TomatoesWarmCompact, very rewarding12–14 inches
    Spring OnionsAll seasonsCan regrow from scraps6 inches

    Each of these crops teaches you a different gardening skill succession sowing, pruning, or organic pest control without overwhelming you.

    Conclusion 

    So, what’s the easiest vegetable to grow for beginners? In most temperate to subtropical home gardens, radishes win hands down for their speed, simplicity, and reliability.

    Start with one pot, follow the simple steps above, and within a month you’ll have your first homegrown harvest. More importantly, you’ll learn how soil, moisture, and sunlight interact lessons that will make every future crop easier.

    Gardening rewards patience and observation. Don’t chase perfection in your first season; focus on building the habit of paying attention to your plants. Before long, you’ll be harvesting not just radishes, but confidence in your green thumb.

  • How to create an indoor succulent garden

    How to create an indoor succulent garden

    Every product is independently reviewed and selected by our editors. If you buy something through our links, we may earn an affiliate commission at no extra cost to you.

    Many people bring home succulents because they’re marketed as “unkillable,” only to watch them slowly stretch, soften, or rot on a windowsill. In real homes, this happens all the time and it’s frustrating. The issue isn’t bad luck or a lack of skill. It’s usually a misunderstanding of how succulents actually behave indoors.

    If you’re searching for how to create an indoor succulent garden that stays compact, healthy, and attractive for years not weeks this guide is designed for you. Everything here comes from hands-on indoor growing experience, not ideal greenhouse conditions. You’ll learn why succulents fail indoors, how to design a garden that fits real living spaces, and how to maintain it with minimal effort.

    Why Indoor Succulent Gardens Often Fail

    From working with apartments, rental homes, and small houses, the most common problems are:

    • Too little light
    • Containers without drainage
    • Overwatering out of habit
    • Grouping incompatible succulents together
    • Decorative containers prioritized over plant health

    Succulents don’t die suddenly. They decline slowly. The goal of a successful indoor succulent garden is preventing stress before it shows.

    Why This Method Works for Indoor Succulents

    Succulents evolved to survive harsh, dry environments by storing water in their leaves and stems. Indoors, they benefit from:

    • Stable temperatures
    • Protection from heavy rain
    • Fewer pests
    • Controlled watering

    However, they struggle with low light and trapped moisture. This method works because it balances plant biology with realistic indoor conditions moderate light, breathable soil, and containers that don’t trap water.

    Instead of forcing succulents to adapt, we design the garden around their natural behavior.

    What You’ll Need to Create an Indoor Succulent Garden

    Essential Supplies

    • Succulent plants (healthy, firm leaves)
    • Containers with drainage holes
    • Succulent or cactus soil mix
    • Grit material (perlite, pumice, coarse sand)
    • Small trowel or spoon
    • Tray or saucer

    Budget-Friendly & Eco-Safe Alternatives

    • Reuse terracotta pots from thrift stores
    • Mix regular potting soil with sand and perlite
    • Use gravel collected outdoors (washed and dried)
    • Repurpose shallow ceramic dishes (drill drainage holes if possible)

    Safety Notes

    • Wash hands after handling soil
    • Avoid decorative stones small enough for pets to swallow
    • Keep toxic succulents (e.g., Euphorbia) out of reach of children

    Choosing the Right Succulents for Indoors

    Not all succulents tolerate indoor life equally.

    Best Succulents for Indoor Gardens

    • Haworthia
    • Gasteria
    • Snake plant (technically succulent-like)
    • Aloe vera
    • Zebra plant
    • Jade plant
    • Echeveria (only with strong light)

    Succulents That Struggle Indoors

    • Most cacti without grow lights
    • Outdoor Sedum varieties
    • Full-sun Agave species

    Beginner tip: Compact, slow-growing succulents adapt best to indoor light.

    Step-by-Step: How to Create an Indoor Succulent Garden

    Step 1: Choose the Right Location

    Light determines success more than anything else.

    Best spots:

    • South- or west-facing windows
    • Bright rooms with indirect light most of the day

    Visual cue:
    Healthy succulents stay compact with tight leaf spacing. Stretching means insufficient light.

    Step 2: Select Containers That Support Roots

    Avoid sealed glass bowls and decorative planters without drainage.

    Why drainage matters:
    Succulent roots suffocate quickly in wet soil.

    Ideal containers:

    • Terracotta pots (breathable)
    • Shallow planters with drainage
    • Unglazed ceramic

    Step 3: Prepare the Soil Mix

    Succulents need fast-draining soil.

    Simple DIY mix:

    • 50% cactus/succulent soil
    • 30% perlite or pumice
    • 20% coarse sand

    Soil test:
    Water should pass through in seconds, not minutes.

    Step 4: Arrange Plants Before Planting

    Before planting, place succulents on the soil surface and adjust spacing.

    What beginners often miss:
    Succulents grow outward, not upward. Leave space between plants.

    Group succulents with similar water and light needs.

    Step 5: Plant Carefully

    • Gently loosen roots
    • Plant at the same depth as the nursery pot
    • Firm soil lightly don’t compact

    Wait 5–7 days before watering to allow roots to settle.

    Step 6: Water Correctly

    This is where most indoor gardens fail.

    Correct method:

    • Water deeply
    • Let soil dry completely
    • Empty saucers after watering

    Frequency:
    Every 2–4 weeks depending on light and temperature.

    Visual cue:
    Wrinkled leaves = thirsty
    Soft, translucent leaves = overwatered

    Expert Tips & Best Practices for Indoor Succulent Gardens

    Lighting Optimization

    • Rotate pots every 1–2 weeks
    • Use grow lights in winter or low-light homes

    Watering Discipline

    • Ignore schedules check soil instead
    • Less is almost always better

    Air Circulation

    • Open windows occasionally
    • Avoid stagnant corners

    Seasonal Adjustments

    • Reduce watering in winter
    • Resume normal care in spring

    Common Beginner Mistakes and How to Avoid Them

    Mistake 1: Overwatering

    Succulents don’t want “even moisture.”

    Fix: Let soil dry completely.

    Mistake 2: Decorative Containers Without Drainage

    Looks nice, kills roots.

    Fix: Always prioritize drainage.

    Mistake 3: Mixing Incompatible Plants

    Different succulents have different needs.

    Fix: Group similar types together.

    Mistake 4: Low-Light Placement

    Succulents cannot survive on vibes alone.

    Fix: Bright windows or grow lights.

    FAQ

    How often should I water my indoor succulent garden?

    Usually every 2–4 weeks, only after soil fully dries.

    Why are my succulents stretching?

    They’re not getting enough light.

    Can I grow succulents indoors without sunlight?

    Yes, but only with grow lights.

    Do succulents improve indoor air quality?

    They contribute modestly but shouldn’t replace ventilation.

    Is misting good for succulents?

    No. Misting increases rot risk.

    When NOT to Use This Method

    This method may struggle if:

    • Your space receives almost no natural light
    • Temperatures drop below 10°C (50°F) regularly
    • You prefer frequent watering routines

    Safer Alternatives

    • Snake plants
    • ZZ plants
    • Pothos

    Alternative Indoor Succulent Garden Approaches

    Grow Light Shelving

    Pros: Consistent growth
    Cons: Electricity use

    Single-Plant Containers

    Pros: Easy care
    Cons: Less visual impact

    Terrarium-Style Displays

    Pros: Decorative
    Cons: High rot risk (not recommended for beginners)

    Conclusion

    Learning how to create an indoor succulent garden isn’t about adding more more water, more decoration, more plants. It’s about knowing when to stop.

    Choose the right succulents, give them light and drainage, water sparingly, and let them grow at their own pace. When designed correctly, an indoor succulent garden becomes one of the lowest-maintenance, most satisfying plant setups you can have perfect for busy homes, apartments, and beginner gardeners who want beauty without constant care.

  • What herbs are good to grow indoors

    What herbs are good to grow indoors

    Every product is independently reviewed and selected by our editors. If you buy something through our links, we may earn an affiliate commission at no extra cost to you.

    Many people start indoor herb gardening with excitement, only to end up with leggy basil, yellow parsley, or herbs that smell weak and never bounce back. In real homes, this usually isn’t because indoor herb gardening is difficult it’s because the wrong herbs are chosen or basic indoor conditions are misunderstood.

    If you’re wondering what herbs are good to grow indoors, this guide will give you clear, experience-based answers. You’ll learn which herbs reliably thrive inside, why they work biologically, and exactly how to grow them using simple, affordable methods that fit apartments, balconies, and small homes.

    This article focuses on practical success, not idealized setups or unrealistic promises.

    Why Indoor Herb Growing Often Fails

    From working with real indoor gardens, most failures come from:

    • Herbs that need intense outdoor sun
    • Overwatering in containers without drainage
    • Expecting slow-growing herbs to act like fast crops
    • Cutting plants incorrectly

    The solution isn’t more effort it’s choosing herbs that naturally adapt to indoor light, stable temperatures, and container life.

    Why This Indoor Herb Method Works

    Indoor-friendly herbs share a few biological traits:

    • Shallow or flexible root systems
    • Ability to regrow after frequent harvesting
    • Tolerance for moderate light
    • Leaves that store aromatic oils rather than large fruits

    In simple terms, herbs grown for their leaves perform better indoors than plants grown for flowers or seeds. When grown correctly, they actually benefit from indoor stability—no wind stress, fewer pests, and consistent moisture.

    What You’ll Need to Grow Herbs Indoors

    Essential Supplies

    • Containers with drainage holes
    • Lightweight potting mix (not garden soil)
    • Herb seeds or healthy nursery plants
    • Bright window or basic grow light
    • Small watering can or spray bottle

    Budget-Friendly & Eco-Safe Options

    • Reuse food containers with drainage holes
    • Organic compost-based potting soil
    • DIY seed trays from recycled cartons
    • Natural fertilizers (worm tea, compost tea)

    Safety Notes

    • Wash hands after soil handling
    • Avoid chemical pesticides indoors
    • Keep herbs out of reach of pets that chew leaves

    What Herbs Are Good to Grow Indoors? (Proven Choices)

    1. Basil

    Why basil works indoors:

    • Fast growth
    • Responds well to pruning
    • Thrives in warm indoor temperatures

    Light needs: Bright indirect light or 6+ hours near a sunny window
    Beginner tip: Pinch the top regularly to prevent legginess.

    2. Mint

    One of the most forgiving indoor herbs.

    Why mint succeeds:

    • Strong root system
    • Tolerates varied light
    • Recovers quickly after harvesting

    Important note:
    Always grow mint in its own container it spreads aggressively.

    3. Chives

    Why chives are ideal indoors:

    • Compact growth
    • Minimal light requirements
    • Continuous harvest

    Cut leaves from the outside, and they’ll regrow steadily.

    4. Parsley

    Parsley grows slower but adapts well indoors.

    Why beginners struggle:
    Parsley takes time to establish roots.

    Success tip:
    Start from healthy transplants instead of seed for faster results.

    5. Cilantro (With Timing Awareness)

    Cilantro can work indoors if harvested young.

    Key reality:
    Cilantro bolts quickly once mature.

    Best approach:
    Grow small batches every few weeks instead of one large plant.

    6. Oregano

    Why oregano thrives indoors:

    • Drought-tolerant
    • Strong aroma even in moderate light
    • Low maintenance

    Let soil dry slightly between waterings.

    7. Thyme

    Thyme is slow growing but durable.

    Why it works indoors:

    • Compact size
    • Woody stems tolerate indoor air

    Avoid overwatering thyme prefers drier soil.

    8. Rosemary (With Conditions)

    Rosemary is possible indoors, but not beginner-easy.

    What beginners often miss:
    Rosemary needs excellent drainage and bright light.

    Best placement:
    Sunny window + airflow.

    Step-by-Step: How to Grow Herbs Indoors Successfully

    Step 1: Choose the Right Location

    • South- or east-facing window
    • Supplemental grow light if sunlight is weak

    Visual cue:
    Herbs should grow compact, not stretched.

    Step 2: Use Proper Soil

    • Loose, well-draining potting mix
    • Avoid dense or outdoor soil

    Soil test:
    Soil should crumble when squeezed, not clump.

    Step 3: Planting & Timing

    • Seeds: Sow shallow and keep moist
    • Transplants: Gently loosen roots before planting

    Indoor herbs can be started year-round, but growth is fastest in spring and summer.

    Step 4: Watering Correctly

    • Water when top 2–3 cm of soil dries
    • Empty saucers to prevent root rot

    Common mistake:
    Daily watering kills more herbs than neglect.

    Step 5: Feeding Herbs

    • Light feeding every 3–4 weeks
    • Use diluted organic fertilizer

    Overfeeding reduces flavor and aroma.

    Professional Tips & Best Practices from Real Indoor Gardens

    • Harvest often to encourage bushy growth
    • Rotate pots weekly for even light exposure
    • Group herbs to raise humidity
    • Remove yellow leaves early

    Common Beginner Mistakes

    • Growing sun-loving herbs in low light
    • Overwatering
    • Harvesting too little or too late
    • Using oversized containers

    FAQ

    Can I grow herbs indoors without sunlight?

    Yes, with grow lights. Leafy herbs perform well under basic LED grow lights.

    Why do my indoor herbs look pale?

    This usually indicates insufficient light or overwatering.

    How often should I harvest indoor herbs?

    Harvest small amounts weekly to keep plants productive.

    Are indoor herbs safe to eat?

    Yes, especially when grown without chemical pesticides.

    Do indoor herbs attract insects?

    Rarely, but fungus gnats can appear if soil stays wet.

    When NOT to Use This Method

    Indoor herb growing may struggle if:

    • Your space has very low light and no grow light
    • Temperatures drop below 10°C (50°F) regularly
    • You expect large outdoor-style yields

    Safer Alternatives

    • Grow microgreens instead
    • Use window boxes
    • Start herbs indoors and finish outdoors

    Alternative Herb Growing Methods

    Hydroponic Herb Systems

    Pros: Fast growth, clean
    Cons: Higher setup cost

    Window Box Soil Growing

    Pros: Simple, low cost
    Cons: Limited light

    Grow Light Shelving

    Pros: Year-round harvest
    Cons: Electricity use

    Conclusion

    From  indoor growing experience, the most reliable choices are basil, mint, chives, parsley, oregano, thyme, and cilantro when harvested young. These herbs adapt naturally to indoor conditions and reward consistent care with steady harvests.

    Start with two or three herbs, learn their rhythms, and expand gradually. Indoor herb gardening isn’t about perfection it’s about fresh flavor, small daily wins, and growing something useful right where you live. With the right herbs and realistic expectations, success comes naturally.

  • What food plants can I grow indoors

    What food plants can I grow indoors

    Every product is independently reviewed and selected by our editors. If you buy something through our links, we may earn an affiliate commission at no extra cost to you.

    Many people start indoor gardening with excitement, only to discover that their plants grow leaves but never produce anything edible or worse, they struggle and die. From real indoor growing experience, this frustration usually comes down to one thing: choosing food plants that aren’t suited to indoor conditions.

    If you’re asking what food plants can I grow indoors, the good news is this: you can grow a surprising amount of fresh, useful food inside your home if you pick the right plants and grow them the right way.

    This guide focuses on reliable, beginner-friendly food plants, explains why they work indoors, and shows you exactly how to grow them step by step using simple tools and realistic expectations.

    Why Growing Food Indoors Often Fails (and How to Avoid It)

    Indoor environments are stable but limited:

    • Light is weaker than outdoors
    • Air circulation is lower
    • Space is restricted
    • Pollinators are absent

    Plants that need:

    • Full sun all day
    • Large root systems
    • Wind, insects, or seasonal changes

    will struggle indoors.

    In real homes, the best indoor food plants are fast-growing, compact, and harvested young. Once beginners understand this, success rates improve dramatically.

    Why This Indoor Food Growing Method Works

    Indoor food gardening works when you focus on:

    • Leafy harvests instead of fruit-heavy crops
    • Plants that regenerate after cutting
    • Short growth cycles
    • Shallow or adaptable root systems

    From hands-on indoor setups, herbs, leafy greens, and compact fruiting plants outperform everything else.

    Simple plant biology explanation:
    Leaves store and produce energy faster than fruits. That’s why leafy crops tolerate lower light and indoor conditions much better.

    What You’ll Need to Grow Food Plants Indoors

    Basic Essentials

    • Containers with drainage holes
    • Lightweight potting mix (not garden soil)
    • Seeds or healthy starter plants
    • Watering can or bottle
    • Bright window or basic grow light

    Budget-Friendly & Eco-Safe Options

    • Reuse food containers (add drainage holes)
    • DIY seed trays from egg cartons
    • Compost-based organic potting mix
    • Natural liquid fertilizers (worm tea, compost tea)

    Safety Notes

    • Wash hands after handling soil
    • Keep plants away from pets that chew leaves
    • Avoid chemical pesticides indoors

    Best Food Plants You Can Grow Indoors (Proven Choices)

    1. Leafy Greens (Most Reliable Indoor Food Plants)

    Best options:

    • Lettuce
    • Spinach
    • Arugula
    • Swiss chard
    • Baby kale

    Why they work indoors:

    • Harvestable in 3–5 weeks
    • Grow well in containers
    • Thrive in moderate light

    Harvest tip:
    Cut outer leaves and let the plant regrow.

    2. Herbs (Perfect for Beginners)

    Top indoor herbs:

    • Basil
    • Mint
    • Parsley
    • Cilantro
    • Chives
    • Oregano

    Real-world insight:
    Herbs forgive missed waterings better than vegetables and show problems early.

    Light needs:
    4–6 hours of bright indirect light or a small grow light.

    3. Green Onions (Scallions)

    One of the easiest indoor food plants.

    Why beginners love them:

    • Grow from kitchen scraps
    • Harvest in 2–3 weeks
    • Minimal care

    How:
    Place root ends in shallow water or soil and keep near a bright window.

    4. Microgreens (Fastest Indoor Food)

    Popular microgreens:

    • Radish
    • Pea shoots
    • Mustard greens
    • Broccoli

    Why they succeed indoors:

    • Harvest in 7–14 days
    • Need very little light
    • Shallow roots

    Great for apartments and winter growing.

    5. Cherry Tomatoes (With Extra Light)

    Best varieties:

    • Dwarf cherry tomatoes
    • Patio or bush types

    Important reality check:
    They can grow indoors, but only with strong light and patience.

    Beginner warning:
    Without enough light, plants grow tall but won’t fruit.

    6. Peppers (Small Varieties)

    Good indoor types:

    • Chili peppers
    • Dwarf bell peppers

    Key requirement:
    Warm temperatures and bright light.

    Peppers perform better on sunny balconies but can work indoors with grow lights.

    7. Radishes (Fast Root Crop)

    Why radishes work indoors:

    • Short growth cycle (25–35 days)
    • Compact roots
    • Tolerate cooler temperatures

    Use deep containers for straight roots.

    Step-by-Step: How to Grow Food Plants Indoors Successfully

    Step 1: Choose the Right Location

    • Bright east or south-facing window
    • Supplemental grow light if sunlight is weak

    Visual cue:
    If shadows are soft, leafy greens will still grow.

    Step 2: Use the Right Soil

    • Loose, airy potting mix
    • Never use outdoor garden soil indoors

    Soil texture test:
    Squeeze soil it should crumble, not clump.

    Step 3: Planting & Timing

    • Sow seeds shallow (most indoor crops need light to germinate)
    • Best indoor growing seasons: fall, winter, early spring

    Indoor growing avoids weather stress, so timing is flexible.

    Step 4: Watering Correctly

    • Water when top 2–3 cm of soil dries
    • Avoid soggy containers

    Beginner mistake:
    Watering small plants daily causes root rot.

    Step 5: Feeding Your Plants

    • Light feeding every 2–4 weeks
    • Organic liquid fertilizer at half strength

    Overfeeding causes leafy growth but weak flavor.

    Best Practices From Real Indoor Gardens

    • Harvest often to encourage regrowth
    • Rotate containers weekly for even growth
    • Group plants to increase humidity
    • Keep leaves dust-free for better photosynthesis

    Common Beginner Mistakes

    • Growing fruit crops without enough light
    • Overwatering
    • Using oversized containers
    • Expecting supermarket-sized harvests

    FAQ

    Can I grow vegetables indoors without sunlight?

    Leafy greens and herbs can grow under grow lights, but fruiting plants need strong light.

    Why are my indoor plants tall but weak?

    This is usually caused by insufficient light.

    How often should I harvest indoor food plants?

    Harvest small amounts regularly to keep plants productive.

    Are indoor-grown vegetables safe to eat?

    Yes, when grown in clean soil without chemical pesticides.

    Do indoor food plants attract pests?

    Less than outdoor plants, but fungus gnats can appear if soil stays too wet.

    When NOT to Use This Method

    Indoor food gardening may struggle if:

    • You have very low light and no grow lights
    • Indoor temperatures are constantly below 15°C (60°F)
    • You want large fruit harvests

    Safer Alternatives

    • Grow microgreens only
    • Use balcony or window box gardening
    • Combine indoor seedlings with outdoor finishing

    Alternative Indoor Food Growing Methods

    Hydroponics

    Pros: Fast growth, no soil
    Cons: Higher setup cost, learning curve

    Window Box Soil Growing

    Pros: Simple, natural
    Cons: Limited light

    Grow Light Shelving

    Pros: Maximum yield indoors
    Cons: Requires electricity

    Conclusion

    From real indoor growing experience, the most successful choices are leafy greens, herbs, microgreens, green onions, and compact vegetables. These plants work with indoor conditions instead of fighting them.

    Start with one or two crops, observe how they respond, and build gradually. Indoor food gardening isn’t about perfection it’s about fresh, reliable harvests from small, manageable spaces. With patience and the right plant choices, your home can produce real, healthy food year-round.

  • What is the easiest flower to grow indoors

    What is the easiest flower to grow indoors

    Every product is independently reviewed and selected by our editors. If you buy something through our links, we may earn an affiliate commission at no extra cost to you.

    Many people try growing flowers indoors and end up disappointed plants stay leafy but never bloom, buds drop early, or flowers fade too fast. From real indoor gardening experience, the problem usually isn’t effort. It’s choosing flowers that are naturally suited to indoor conditions.

    If you’re wondering what is the easiest flower to grow indoors, the short answer is this: flowers that tolerate low to moderate light, stable temperatures, and occasional care mistakes perform best inside homes.

    This guide doesn’t just name a flower it shows why it works, how to grow it step by step, and how to avoid the most common beginner failures.

    Why Growing Flowers Indoors Feels Hard (But Doesn’t Have to Be)

    Indoor environments are very different from gardens:

    • Light is weaker and one-directional
    • Air is drier
    • Pollinators are absent
    • Temperature stays fairly constant

    Many flowering plants evolved outdoors and struggle inside. The easiest indoor flowers are those that:

    • Bloom in indirect light
    • Don’t need cold nights or full sun
    • Can self-bloom without pollination
    • Recover well from small mistakes

    In real homes, peace lily consistently meets all these conditions better than any other flowering plant.

    The Easiest Flower to Grow Indoors: Peace Lily (Spathiphyllum)

    From hands-on indoor gardening, peace lily is the most forgiving, reliable, and beginner-friendly flowering plant for indoor spaces.

    Why Peace Lily Is the Easiest Indoor Flower

    • Blooms in low to medium light
    • Clear visual watering signals
    • Tolerates missed waterings
    • Long-lasting flowers
    • Naturally improves indoor air quality
    • Widely available and affordable

    Unlike fussy flowering plants, peace lilies communicate clearly they tell you when they’re thirsty and recover quickly.

    Why This Method Works for Peace Lily Indoors

    Peace lilies evolved on forest floors where:

    • Light is filtered
    • Soil stays moist but drains well
    • Temperatures are stable
    • Humidity is moderate

    That makes them perfectly adapted to indoor living rooms, bedrooms, and offices.

    Plant biology simplified:
    Peace lilies store water in their leaves and roots, allowing them to survive brief dry periods while still producing flowers when conditions are right.

    What You’ll Need to Grow the Easiest Indoor Flower

    Essentials

    • Peace lily plant (small or medium size)
    • Pot with drainage holes
    • Indoor potting mix (light, well-draining)
    • Watering can

    Budget-Friendly & Eco-Safe Options

    • Reuse plastic nursery pots inside decorative covers
    • Add coco coir or compost for moisture retention
    • Use rainwater or filtered water if possible

    Safety Notes

    • Peace lily is toxic to pets if chewed
    • Place out of reach of children and animals
    • Wash hands after handling soil

    Step-by-Step: How to Grow the Easiest Flower Indoors

    Step 1: Choose the Right Location

    • Bright indirect light is ideal
    • Near east- or north-facing windows works best
    • Avoid harsh direct sunlight

    Visual cue:
    If the room is bright enough to read comfortably during the day, it’s bright enough for peace lily.

    Step 2: Potting the Plant Correctly

    • Use a pot only 2–4 cm wider than the root ball
    • Ensure drainage holes are clear
    • Fill with loose, airy soil

    Soil texture cue:
    Soil should feel springy not compact or muddy.

    Step 3: Watering (The Key to Success)

    • Water when top 2–3 cm of soil feels dry
    • Water thoroughly until excess drains out
    • Empty saucers after 10 minutes

    Visual cue:
    Drooping leaves = thirsty
    Leaves perk up within hours after watering

    What beginners often miss: overwatering causes more damage than underwatering.

    Step 4: Temperature & Humidity

    • Ideal temperature: 18–27°C (65–80°F)
    • Keep away from heaters and AC vents
    • Normal household humidity is usually enough

    Grouping plants together naturally increases humidity.

    Step 5: Encouraging Blooms

    • Consistent light matters more than fertilizer
    • Rotate the plant monthly
    • Use diluted organic liquid fertilizer every 6–8 weeks during active growth

    Blooms usually appear in spring and summer but can occur year-round indoors.

    Pro Tips & Best Practices From Real Indoor Gardens

    • Smaller peace lilies bloom more reliably indoors
    • Yellow leaves usually mean too much water
    • Brown leaf tips often indicate dry air or mineral-heavy water
    • Wipe leaves monthly to improve photosynthesis

    Common Beginner Mistakes to Avoid

    • Placing in dark corners
    • Watering on a strict schedule
    • Using heavy garden soil indoors
    • Repotting too often

    FAQ

    Why is my peace lily not flowering?

    Usually due to insufficient light. Move it closer to a bright window without direct sun.

    Can I grow peace lily in low light?

    Yes, it survives low light but blooms best in medium indirect light.

    How often should I water indoor flowering plants?

    Water based on soil dryness, not calendar days.

    Is peace lily safe for bedrooms?

    Yes, as long as pets can’t access it. It’s often chosen for bedrooms due to low light tolerance.

    Do indoor flowers need pollination?

    Peace lilies do not need pollination to bloom indoors.

    When NOT to Use This Method

    Peace lily may not be ideal if:

    • You have pets that chew plants
    • Your home has extremely low light
    • You prefer colorful blooms over white

    Safer Alternatives

    • Artificial plants mixed with real foliage
    • Grow lights for flowering plants

    Alternative Easy Indoor Flowers for Beginners

    Anthurium

    • Bright, glossy flowers
    • Needs more light than peace lily

    Phalaenopsis Orchid

    • Long-lasting blooms
    • Requires careful watering

    African Violet

    • Compact and colorful
    • Needs consistent light and moisture

    For absolute beginners, peace lily remains the most forgiving option.

    Conclusion

    From real indoor gardening experience, peace lily stands out as the most reliable, forgiving, and rewarding choice for beginners. It tolerates common mistakes, communicates its needs clearly, and rewards patience with graceful blooms.

    Start with one healthy plant, observe it closely, and let success build confidence. Indoor flowers don’t require perfection just understanding, consistency, and the right plant choice.

  • How do I design a small indoor garden

    How do I design a small indoor garden

    Every product is independently reviewed and selected by our editors. If you buy something through our links, we may earn an affiliate commission at no extra cost to you.

    Many people love the idea of an indoor garden but once they try, things feel cramped, plants struggle, and the space looks cluttered instead of calming. From hands-on experience in apartments, rented homes, and compact city spaces, I’ve seen the same issue repeatedly: people start with plants before designing the space.

    If you’re asking how do I design a small indoor garden, the good news is this small spaces actually work better indoors when designed correctly. With the right layout, plant choices, and environmental awareness, even a windowsill or corner can become a thriving indoor garden.

    This guide walks you through a practical, beginner-safe design method that works in real homes not showrooms.

    Why This Method Works for Small Indoor Gardens

    Indoor plants don’t fail because spaces are small. They fail because light, airflow, watering access, and plant spacing aren’t planned together.

    In real indoor gardens:

    • Light is directional and limited
    • Humidity is lower than outdoors
    • Roots stay confined longer
    • Overwatering happens easily

    This design-first method works because it:

    • Matches plants to light before placement
    • Uses vertical and layered spacing efficiently
    • Prevents common mistakes like overcrowding
    • Keeps maintenance realistic and sustainable

    Think of it like furniture planning you wouldn’t buy a sofa before measuring the room.

    What You’ll Need to Design a Small Indoor Garden

    You don’t need expensive décor or special systems. Start simple.

    Essentials

    • Measuring tape or phone measuring app
    • Pots with drainage holes
    • Indoor potting mix (well-draining)
    • A light source (window, balcony door, skylight)

    Budget-Friendly & Eco-Friendly Options

    • Reused containers with drainage added
    • Coco coir or compost-blended soil
    • Natural fiber plant hangers
    • Shelving made from reclaimed wood

    Safety Notes

    • Use stable stands no top-heavy pots
    • Keep toxic plants away from pets and children
    • Avoid chemical fertilizers indoors

    Step-by-Step: How Do I Design a Small Indoor Garden That Actually Works

    Step 1: Observe Your Light (Before Buying Plants)

    Spend one full day observing your space.

    • Morning light = East-facing
    • Strong afternoon light = South/West-facing
    • Soft or shaded light = North-facing

    Visual cues:

    • Bright indirect light casts soft shadows
    • Low light produces no shadows

    What beginners often miss: Most “indoor plants” still need light just not harsh sun.

    Step 2: Choose the Right Garden Style for Your Space

    Pick one main style, not all of them.

    • Windowsill garden: Herbs, compact foliage
    • Corner floor garden: Tall plants + low companions
    • Vertical garden: Trailing plants, wall shelves
    • Tabletop garden: Small pots, slow growers

    Small indoor gardens work best when focused.

    Step 3: Select Plants Based on Function, Not Looks Alone

    Use this simple rule:

    • Top layer: Tall or trailing plants
    • Middle layer: Bushy foliage
    • Bottom layer: Compact, shade-tolerant plants

    Beginner-friendly indoor plants:

    • Snake plant
    • Pothos
    • ZZ plant
    • Philodendron
    • Spider plant
    • Peace lily

    Avoid fast growers or high-light plants early on.

    Step 4: Plan Spacing for Growth, Not Just Today

    Plants grow even indoors.

    • Leave 5–8 cm between small pots
    • Don’t let leaves touch walls constantly
    • Allow airflow between plants

    Visual cue:
    If leaves overlap heavily, airflow is already too limited.

    Step 5: Match Pots, Soil, and Drainage

    Poor drainage ruins more indoor gardens than pests.

    • Always use pots with holes
    • Use light, airy soil mixes
    • Add saucers or trays to protect floors

    Soil texture cue:
    Soil should crumble slightly when dry not stay muddy.

    Step 6: Group Plants by Water Needs

    This single step prevents most beginner mistakes.

    • Group drought-tolerant plants together
    • Group moisture-loving plants together

    Why it works:
    You water zones, not individual plants less confusion, fewer mistakes.

    Step 7: Place for Maintenance Access

    If you can’t reach it easily, it won’t be cared for.

    • Can you water without spilling?
    • Can you rotate the pot monthly?
    • Can you check soil moisture easily?

    In real homes, convenience determines success.

    Pro Tips & Best Practices From Real Indoor Gardens

    • Fewer plants = healthier plants
    • Vertical space beats floor clutter
    • Rotate plants monthly for even growth
    • Clean leaves once a month with plain water
    • Use terracotta pots for overwaterers

    Common Beginner Mistakes to Avoid

    • Overdecorating before plants establish
    • Using decorative pots without drainage
    • Mixing sun-lovers with shade plants
    • Watering on a strict schedule

    Environmental Factors That Matter Indoors

    Temperature

    • Ideal: 18–27°C (65–80°F)
    • Avoid placing plants near heaters or AC vents

    Humidity

    • Bathrooms and kitchens help naturally
    • Grouping plants increases humidity safely

    Airflow

    • Gentle airflow prevents fungal issues
    • Avoid stagnant corners

    FAQ:

    How do I design a small indoor garden with very little light?

    Choose low-light plants like snake plant, ZZ plant, and aglaonema. Use lighter-colored walls to reflect light.

    Why do my indoor plants look crowded even with few pots?

    Usually due to oversized leaves, no vertical spacing, or too many similar-sized plants.

    Can I design a small indoor garden in a rented apartment?

    Yes. Use shelves, floor stands, and hanging planters no drilling required.

    How often should I rearrange my indoor garden?

    Only when plants outgrow their space or seasonal light changes. Constant moving causes stress.

    Is it safe to keep soil indoors?

    Yes, if you use clean potting mix, proper drainage, and avoid overwatering.

    When NOT to Use This Design Method

    This approach may not suit you if:

    • You want fast-growing edible crops
    • You have zero natural light
    • You prefer outdoor-style dense planting

    Safer Alternatives

    • Grow lights for windowless rooms
    • Hydroponic countertop systems
    • Artificial plants mixed with real ones

    Alternative Indoor Garden Design Approaches

    Vertical Indoor Garden

    Pros: Saves floor space, visually striking
    Cons: Needs secure installation

    Hydroponic Indoor Garden

    Pros: Fast growth, clean
    Cons: Higher setup and learning curve

    Minimalist Plant Design

    Pros: Low maintenance, clean look
    Cons: Less variety

    Choose based on time, light, and lifestyle.

    Conclusion

    So, how do I design a small indoor garden that actually thrives?

    You start with light, plan spacing realistically, choose plants that match your environment, and design for maintenance not perfection. Small indoor gardens reward patience, observation, and thoughtful choices.

    You don’t need more space you need smarter design. Start small, let plants teach you, and build confidence one healthy leaf at a time.

  • What Are the Top 10 Indoor Plants |  A Practical Beginner-Friendly Guide

    What Are the Top 10 Indoor Plants | A Practical Beginner-Friendly Guide

    Every product is independently reviewed and selected by our editors. If you buy something through our links, we may earn an affiliate commission at no extra cost to you.

    Many people buy indoor plants with good intentions only to watch them decline within weeks. Leaves yellow, soil stays wet, pests appear, and confidence drops fast. In real homes I’ve worked with, this usually isn’t because people “lack a green thumb.” It’s because they started with the wrong plants for indoor conditions.

    Understanding what are the top 10 indoor plants isn’t about trends or aesthetics alone. It’s about choosing plants that naturally tolerate indoor light, dry air, irregular watering, and modern living spaces. This guide focuses on plants that actually perform well in apartments, houses, balconies, and small indoor corners based on real experience, not marketing claims.

    If you want indoor plants that look good, support a calmer home environment, and don’t demand constant care, start here.

    Why Choosing the Right Indoor Plants Works (Simple Plant Logic)

    Indoor environments are very different from outdoor gardens. Light is weaker, air is drier, and soil dries unevenly. The top indoor plants share a few key traits:

    • Adaptability to indirect or low light
    • Slow to moderate growth rates
    • Tolerance of missed watering
    • Strong leaves and roots that resist stress

    Plants that fail indoors usually need intense sun, constant airflow, or frequent watering conditions most homes can’t provide consistently.

    Choosing plants that match your environment is the fastest way to success.

    What You’ll Need to Succeed With Indoor Plants

    You don’t need expensive tools just the basics.

    Essentials

    • Pots with drainage holes
    • Well-draining indoor potting mix
    • A watering can with a narrow spout
    • Indirect light source (window, balcony door, skylight)

    Budget-Friendly & Eco-Safe Options

    • Reused ceramic or terracotta pots
    • DIY soil mix (potting soil + perlite)
    • Rainwater or filtered water

    Safety Notes

    • Some plants are toxic if chewed by pets or children
    • Wear gloves when repotting
    • Avoid chemical leaf shine products indoors

    The Top 10 Indoor Plants That Actually Thrive Indoors

    1. Snake Plant (Sansevieria / Dracaena trifasciata)

    Why it’s top-tier:
    In real homes, snake plants survive where others fail low light, dry air, and irregular watering.

    • Light: Low to bright indirect
    • Water: Every 2–3 weeks
    • Best for: Bedrooms, offices, beginners

    Beginner warning: Overwatering is the only real risk.

    2. Pothos (Epipremnum aureum)

    A classic for good reason.

    • Light: Low to medium
    • Water: When top soil dries
    • Growth habit: Trailing or climbing

    What beginners often miss:
    Pothos thrives better when slightly neglected.

    3. ZZ Plant (Zamioculcas zamiifolia)

    One of the toughest indoor plants available.

    • Light: Low to bright indirect
    • Water: Infrequent
    • Strength: Thick rhizomes store water

    Perfect for people who travel or forget to water.

    4. Peace Lily (Spathiphyllum)

    Elegant and expressive it tells you when it’s thirsty.

    • Light: Medium to low indirect
    • Water: When leaves droop slightly
    • Bonus: Visual feedback for beginners

    Caution: Toxic to pets.

    5. Spider Plant (Chlorophytum comosum)

    Reliable, fast-growing, and forgiving.

    • Light: Bright indirect
    • Water: Weekly
    • Bonus: Produces baby plants easily

    Great for hanging baskets and shelves.

    6. Rubber Plant (Ficus elastica)

    A bold plant that suits modern interiors.

    • Light: Bright indirect
    • Water: Moderate
    • Growth: Upright and structured

    Tip: Rotate monthly for even growth.

    7. Philodendron (Heartleaf or Upright Types)

    Excellent for beginners who want lush greenery.

    • Light: Low to medium
    • Water: When top soil dries
    • Habit: Trailing or compact

    More forgiving than many people expect.

    8. Aloe Vera

    Practical and low-maintenance.

    • Light: Bright light
    • Water: Every 2–3 weeks
    • Bonus: Useful gel

    Common mistake: Keeping it in shade because it needs light.

    9. Chinese Evergreen (Aglaonema)

    One of the best plants for low-light apartments.

    • Light: Low to medium
    • Water: Moderate
    • Bonus: Decorative foliage

    Excellent for bedrooms and hallways.

    10. Parlor Palm (Chamaedorea elegans)

    A classic indoor palm that stays compact.

    • Light: Medium to low
    • Water: Even moisture
    • Best for: Living rooms

    More tolerant of indoor air than most palms.

    Step-by-Step: How to Keep These Top 10 Indoor Plants Healthy

    Step 1: Place Plants Based on Light

    • Bright indirect: Near windows, filtered light
    • Low light: 6–10 feet from windows

    Step 2: Water by Soil, Not Schedule

    • Stick a finger 1–2 inches deep
    • Water only when soil feels dry

    Step 3: Use Proper Drainage

    Standing water causes root rot faster than underwatering.

    Step 4: Clean Leaves Monthly

    Dust blocks light. Use a damp cloth no chemicals.

    Pro Tips & Best Practices (From Real Homes)

    • Fewer plants cared for well beat many neglected ones
    • Group plants to stabilize humidity
    • Use terracotta for heavy waterers
    • Repot only when roots crowd the pot

    Common Beginner Mistakes

    • Overwatering
    • No drainage holes
    • Placing plants in dark corners
    • Constantly moving plants

    FAQ

    What are the top 10 indoor plants for beginners?

    Snake plant, pothos, ZZ plant, spider plant, and philodendron are the easiest starters.

    Why are my indoor plant leaves turning yellow?

    Most often from overwatering or poor drainage.

    Can indoor plants survive in low light apartments?

    Yes plants like snake plant, ZZ plant, and aglaonema are ideal.

    How often should I repot indoor plants?

    Every 1–2 years, or when roots circle the pot.

    Are indoor plants safe around pets?

    Some are toxic. Research each plant before placement.

    When NOT to Follow This List

    This list may not suit you if:

    • You want flowering plants year-round
    • You have intense direct sunlight all day
    • You want edible plants

    Safer Alternatives

    • Herbs for sunny kitchens
    • Outdoor container plants
    • Artificial plants for dark rooms

    Alternative Approaches to Indoor Greenery

    Live Indoor Plants

    Pros: Real growth, air balance, satisfaction
    Cons: Require care

    Low-Maintenance Succulents

    Pros: Minimal watering
    Cons: High light needs

    Hydroponic Indoor Systems

    Pros: Fast growth, clean
    Cons: Higher setup cost

    Conclusion

    So, what are the top 10 indoor plants worth growing in real homes?

    They’re plants that tolerate imperfect care, adapt to indoor light, and grow steadily without constant attention. Starting with these plants builds confidence, reduces frustration, and creates a healthier, calmer living space.

    Choose plants that fit your environment, observe them closely, and adjust slowly. Indoor gardening isn’t about perfection it’s about consistency, patience, and choosing plants that want to live where you do.

  • What can I grow in a vertical hydroponic garden

    What can I grow in a vertical hydroponic garden

    Every product is independently reviewed and selected by our editors. If you buy something through our links, we may earn an affiliate commission at no extra cost to you.

    Vertical hydroponic gardens promise a lot: more food in less space, cleaner growing, faster harvests, and fewer pests. But after setting one up, many gardeners hit the same wall: what can I realistically grow in a vertical hydroponic garden without wasting time, money, or plants?

    In real apartments, balconies, and small backyards I’ve worked with, vertical hydroponics succeeds or fails based on plant choice more than technology. Some plants are naturally suited to vertical systems. Others struggle with gravity, light distribution, or root space.

    This guide answers what can I grow in a vertical hydroponic garden with clear, experience-based advice. You’ll learn which plants thrive, why they work, what beginners often get wrong, and how to set yourself up for consistent success—even in tight spaces.

    Why Vertical Hydroponic Gardening Works (When Plants Are Chosen Correctly)

    Vertical hydroponic systems work by circulating nutrient-rich water from top to bottom, allowing gravity to do part of the work. Plants that succeed in these systems usually share key traits:

    • Compact or shallow root systems
    • Light to moderate nutrient demands
    • Upright or cascading growth habits
    • Tolerance for frequent moisture at roots

    Plants that struggle vertically often need:

    • Deep, anchoring root zones
    • Heavy fruit support
    • Uneven or directional sunlight
    • Pollination assistance

    Understanding this helps avoid frustration and wasted setups.

    What You’ll Need for a Vertical Hydroponic Garden

    You don’t need an expensive system to grow well.

    Essential Items

    • Vertical hydroponic tower or wall system
    • Full-spectrum LED grow lights (if indoors)
    • Net cups or grow pockets
    • Growing medium (clay pebbles, coco chips, or foam)
    • Hydroponic nutrients (balanced, low-salt)
    • Timer for pump and lights
    • Clean water source

    Budget-Friendly Options

    • DIY PVC or gutter towers
    • Repurposed food-grade containers
    • Manual pump systems for small setups

    Safety Notes

    • Secure towers to prevent tipping
    • Keep nutrient reservoirs covered and away from pets
    • Clean spills promptly to avoid slippery floors

    Best Plants to Grow in a Vertical Hydroponic Garden

    Leafy Greens (Top Choice for Beginners)

    If you’re asking what can I grow in a vertical hydroponic garden, leafy greens should be your starting point.

    Best Leafy Greens

    • Lettuce (loose-leaf, butterhead, romaine)
    • Spinach
    • Arugula
    • Kale (baby varieties)
    • Swiss chard (compact types)

    Why they work:

    • Shallow roots
    • Fast growth cycles
    • Harvest-friendly in vertical systems

    Visual cues of success:

    • Upright leaves
    • Even green color
    • Continuous new growth after cutting

    Herbs (High Yield, Low Space)

    Herbs adapt exceptionally well to vertical hydroponic gardens.

    Best Hydroponic Herbs

    • Basil
    • Mint (best in lower pockets)
    • Parsley
    • Cilantro
    • Chives
    • Thyme
    • Oregano

    What beginners often miss:
    Herbs near the top receive stronger light place sun-loving herbs there and shade-tolerant ones lower down.

    Microgreens & Baby Greens

    Microgreens are ideal for vertical hydroponics when space is limited.

    Popular Choices

    • Radish greens
    • Broccoli greens
    • Mustard greens
    • Pea shoots

    Benefits:

    • Harvest in 7–14 days
    • Minimal nutrient demand
    • Ideal for kitchens and small indoor setups

    Compact Fruiting Plants (Intermediate Level)

    Some fruiting plants grow well vertically but only with strong support and light.

    Best Options

    • Cherry tomatoes (dwarf or determinate)
    • Strawberries
    • Small peppers (mini bell, chili)

    Requirements:

    • Strong grow lights (12–14 hours)
    • Pruning and training
    • Hand pollination indoors
    • Heavier nutrient feed

    Realistic expectation:
    Fewer fruits than outdoor plants, but cleaner harvests and fewer pests.

    Specialty Greens & Asian Greens

    These often outperform traditional vegetables indoors.

    • Bok choy (baby)
    • Tatsoi
    • Mizuna
    • Pak choi
    • Watercress

    They tolerate cooler temperatures and partial shade, making them ideal for middle or lower tower sections.

    Step-by-Step: How to Choose Plants for Your Vertical Hydroponic Garden

    Step 1: Match Plant Weight to Tower Strength

    Light plants up top, heavier plants lower.

    Step 2: Match Light to Plant Needs

    • Top levels: tomatoes, basil
    • Middle levels: lettuce, herbs
    • Lower levels: mint, spinach

    Step 3: Start with One Plant Type

    Mixed nutrient needs cause uneven growth in shared reservoirs.

    Pro Tips & Best Practices (From Real Vertical Gardens)

    • Rotate plants occasionally for even light exposure
    • Prune aggressively to prevent overcrowding
    • Keep water temperature between 65–72°F
    • Clean pump filters weekly
    • Label plants many greens look identical early on

    Common Beginner Mistakes

    • Overloading the tower
    • Growing root vegetables
    • Ignoring airflow
    • Underestimating light needs
    • Skipping system cleaning

    FAQ: Vertical Hydroponic Gardening Questions

    What can I grow in a vertical hydroponic garden year-round?

    Leafy greens, herbs, and many microgreens can grow year-round with stable lighting and temperature.

    Why are plants at the top growing faster than the bottom?

    Light intensity and nutrient access are stronger at the top. Adjust light placement or rotate plants.

    Can I grow root vegetables vertically?

    Most root crops (carrots, beets, potatoes) are impractical in vertical hydroponic systems.

    How often should I clean a vertical hydroponic system?

    Light cleaning weekly; deep cleaning every 2–3 weeks.

    Is vertical hydroponics safe around children and pets?

    Yes, but towers should be secured and nutrient solutions kept inaccessible.

    When NOT to Use a Vertical Hydroponic Garden

    Vertical hydroponics may not be ideal if:

    • You want large fruiting crops
    • You lack sufficient lighting
    • You prefer very low maintenance
    • Power outages are frequent

    Safer Alternatives

    • Horizontal hydroponic trays
    • Soil-based container gardening
    • Raised outdoor beds

    Alternative Growing Methods Compared

    Vertical Hydroponics

    Pros

    • Maximizes space
    • Clean and efficient
    • High yield per square foot

    Cons

    • Requires electricity
    • More maintenance than soil

    Horizontal Hydroponics

    Pros

    • Easier nutrient balance
    • Better for larger plants

    Cons

    • Uses more floor space

    Soil Vertical Gardens

    Pros

    • Lower setup cost
    • No pumps or power

    Cons

    • Slower growth
    • Higher pest risk

    Conclusion

    Focus on leafy greens, herbs, microgreens, and a few compact fruiting plants. These crops match the biology of vertical systems and reward consistency rather than complexity.

    Start simple, observe how plants respond, and scale up gradually. Vertical hydroponic gardening isn’t about growing everything it’s about growing the right plants in the right way, sustainably and successfully, even in the smallest of spaces.

  • What plants can I grow in an indoor hydroponic garden

    What plants can I grow in an indoor hydroponic garden

    Every product is independently reviewed and selected by our editors. If you buy something through our links, we may earn an affiliate commission at no extra cost to you.

    Many home gardeners are drawn to indoor hydroponic gardening because it promises fresh food, faster growth, and fewer pests without soil. But after buying or setting up a system, a common frustration quickly appears: “What plants can I actually grow successfully in an indoor hydroponic garden?”

    In real homes I’ve worked with small apartments, rental kitchens, spare bedrooms, and even laundry rooms the success of hydroponics depends far less on the system itself and far more on choosing the right plants. Some plants thrive in hydroponics. Others struggle, stall, or disappoint beginners.

    This guide answers the question what plants can I grow in an indoor hydroponic garden with clear, experience-based recommendations. You’ll learn which plants grow best, why they work, what to avoid, and how to get reliable results without frustration or wasted money.

    Why This Method Works for Certain Plants (and Not Others)

    Hydroponic gardening works by delivering water, oxygen, and nutrients directly to plant roots. Plants that succeed indoors in hydroponics tend to share a few traits:

    • Shallow or compact root systems
    • Fast growth cycles
    • Moderate nutrient demands
    • Flexible light requirements

    Plants that fail indoors usually need:

    • Deep soil for anchoring
    • Long maturation times
    • Pollination by wind or insects
    • Intense natural sunlight

    Understanding this biology helps you choose plants that want to grow in water-based systems instead of fighting their natural habits.

    What You’ll Need for an Indoor Hydroponic Garden

    You don’t need an expensive setup to grow successfully.

    Basic Essentials

    • Indoor hydroponic system (NFT, DWC, or wick system)
    • Grow light (full spectrum LED)
    • Net cups or grow baskets
    • Growing medium (clay pebbles, coco chips, or rockwool)
    • Hydroponic nutrients (preferably low-salt or organic-compatible)
    • Clean water (filtered if possible)

    Budget-Friendly Alternatives

    • DIY mason jar systems for herbs
    • Food-grade buckets for leafy greens
    • Reusable net cups instead of disposable plastics

    Safety Notes

    • Keep nutrient solutions out of reach of pets and children
    • Avoid mixing nutrients near food prep areas
    • Wash hands after handling water reservoirs

    Best Plants to Grow in an Indoor Hydroponic Garden

    Leafy Greens (Best for Beginners)

    Leafy greens are the easiest and most reliable answer to what plants can I grow in an indoor hydroponic garden.

    Top Choices

    • Lettuce (butterhead, romaine, loose-leaf)
    • Spinach
    • Arugula
    • Kale (baby varieties)
    • Swiss chard (compact types)

    Why they work:

    • Shallow roots
    • Fast harvest (3–5 weeks)
    • Tolerant of lower light

    Visual growth cues:

    • Upright leaves
    • Even green color
    • Rapid leaf replacement after harvest

    Herbs (Low Space, High Reward)

    Herbs thrive in hydroponics and adapt well to indoor conditions.

    Best Indoor Hydroponic Herbs

    • Basil
    • Mint
    • Parsley
    • Cilantro
    • Chives
    • Dill
    • Oregano

    Beginner tip:
    Mint and basil grow aggressively give them their own space or prune regularly.

    What beginners often miss:
    Herbs need airflow. A small fan prevents weak stems and fungal issues.

    Microgreens (Fastest Results Possible)

    If you want quick success, microgreens are unmatched.

    Popular Hydroponic Microgreens

    • Radish
    • Broccoli
    • Pea shoots
    • Sunflower greens
    • Mustard greens

    Why they’re ideal:

    • Harvest in 7–14 days
    • Minimal nutrients required
    • No long-term maintenance

    These are excellent for small kitchens or first-time hydroponic growers.

    Fruit-Bearing Plants (Intermediate Level)

    Some fruiting plants grow well indoors with the right setup.

    Best Options

    • Cherry tomatoes (dwarf or determinate)
    • Peppers (small varieties)
    • Strawberries

    Requirements:

    • Strong grow lights (12–14 hours)
    • Consistent nutrients
    • Hand pollination indoors
    • Larger reservoirs

    Realistic expectation:
    You’ll get smaller yields than outdoors, but higher quality and fewer pests.

    Compact Greens & Specialty Crops

    These plants work well in controlled indoor systems:

    • Bok choy (baby)
    • Tatsoi
    • Mizuna
    • Endive
    • Watercress

    They thrive in cooler indoor temperatures and tolerate partial shade.

    Step-by-Step: Choosing the Right Plants for Your Setup

    Step 1: Match Plant Size to System Size

    • Countertop systems → herbs, greens
    • Vertical systems → leafy greens
    • Bucket systems → tomatoes, peppers

    Step 2: Match Light Strength to Plant Needs

    • Low to medium light → lettuce, herbs
    • High light → tomatoes, peppers, strawberries

    Step 3: Start Small

    Grow 1–2 plant types first. Mixing plants with different nutrient needs causes problems.

    Pro Tips & Best Practices from Real Indoor Gardens

    • Start with seeds, not transplants (better root adaptation)
    • Keep water temperature between 65–72°F
    • Clean reservoirs every 2–3 weeks
    • Label plants many greens look similar early on
    • Harvest outer leaves first to extend plant life

    Common Beginner Mistakes

    • Growing too many plant types at once
    • Ignoring light distance
    • Overfeeding nutrients
    • Letting algae grow in reservoirs
    • Choosing large plants too early

    FAQ: Indoor Hydroponic Gardening Questions

    What plants can I grow in an indoor hydroponic garden year-round?

    Leafy greens, herbs, and microgreens can grow year-round with consistent lighting.

    Why are my hydroponic plants growing slowly?

    Common causes include low light intensity, cold water temperatures, or weak nutrient concentration.

    Can I grow root vegetables hydroponically indoors?

    Most root crops (carrots, potatoes) are impractical indoors. Radishes may work in deep systems but are not beginner-friendly.

    How often should I change hydroponic water?

    Every 2–3 weeks, or sooner if water smells or looks cloudy.

    Are hydroponic plants safe for children and pets?

    Yes, but nutrient solutions should be stored securely. Avoid toxic plants in accessible areas.

    When NOT to Use an Indoor Hydroponic Garden

    Hydroponics may not be ideal if:

    • You want large fruit trees or vines
    • You can’t provide grow lights
    • You prefer low-maintenance setups
    • You have frequent power outages

    Safer Alternatives

    • Soil-based container gardening
    • Windowsill herb pots
    • Outdoor raised beds (seasonally)

    Alternative Growing Methods Compared

    Hydroponics

    Pros

    • Fast growth
    • Clean, soil-free
    • Fewer pests

    Cons

    • Requires electricity
    • Learning curve

    Soil Containers

    Pros

    • Lower setup cost
    • More forgiving

    Cons

    • Slower growth
    • Higher pest risk

    AeroGardens / All-in-One Kits

    Pros

    • Beginner-friendly
    • Compact

    Cons

    • Limited plant size
    • Proprietary parts

    Conclusion

    So, what plants can I grow in an indoor hydroponic garden successfully?

    If you focus on leafy greens, herbs, microgreens, and a few compact fruiting plants, indoor hydroponics becomes one of the most rewarding ways to grow food at home. Success isn’t about growing everything it’s about growing the right plants for your space, light, and experience level.

    Start small, observe carefully, and grow with patience. Hydroponics rewards consistency far more than complexity. When done thoughtfully, it’s one of the cleanest, most efficient, and most confidence-building ways to garden indoors.

  • Can you grow an avocado tree indoors

    Can you grow an avocado tree indoors

    Every product is independently reviewed and selected by our editors. If you buy something through our links, we may earn an affiliate commission at no extra cost to you.

    Many home gardeners start with excitement saving an avocado pit after breakfast only to end up with a moldy seed, a weak stem, or a plant that stops growing altogether. If you’ve tried before and failed, you’re not alone.

    Learning how to grow avocado from seed at home is simple in theory, but success depends on understanding why the seed behaves the way it does and what conditions it truly needs. From hands-on experience growing avocados on balconies, terraces, and near sunny windows, most problems come down to excess moisture, poor light, or rushing the process.

    This guide walks you through a reliable, beginner-friendly method that works in real homes not just in photos. You’ll learn when to use water vs. soil, how to avoid rot, and how to transition your avocado seed into a strong, long-lived plant.

    Why This Method Works (Simple Plant Biology Explained)

    An avocado seed is not dormant in the way many fruit seeds are. Inside the pit is a living embryo that already contains stored energy. What it needs is:

    • Consistent moisture (not soaking)
    • Oxygen around the seed
    • Warm temperatures
    • Gradual access to light once sprouted

    In real gardens, avocado seeds fail because they are either kept too wet, starved of air, or exposed to low light too early. This method balances moisture and airflow while mimicking how avocado seeds sprout naturally in warm climates.

    What You’ll Need (Simple, Budget-Friendly Supplies)

    Essential Items

    • 1 fresh avocado seed (from a ripe fruit)
    • Clean water
    • Glass jar or cup
    • Toothpicks (optional)
    • Small pot with drainage holes
    • Loose, well-draining potting soil
    • Sunny windowsill or bright location

    Eco-Friendly & Low-Cost Options

    • Reused glass jars
    • Homemade compost mixed with garden soil
    • Biodegradable pots for transplanting

    Safety Notes

    • Avocado pits are toxic if chewed by pets
    • Wash hands after handling soil
    • Avoid chemical fertilizers indoors

    Step-by-Step: How to Grow Avocado From Seed at Home

    Step 1: Choose and Clean the Seed (Day 0)

    • Select a fully ripe avocado
    • Remove the pit carefully without cutting it
    • Rinse off all fruit residue (this prevents mold)

    Visual cue:
    The seed should be firm, smooth, and light brown not cracked or shriveled.

    Step 2: Identify the Top and Bottom of the Seed

    This is where beginners often go wrong.

    • Bottom (flat end): roots emerge here
    • Top (pointed end): stem emerges here

    Planting or soaking the seed upside-down will delay or stop growth.

    Step 3: Start the Seed (Two Proven Methods)

    Method 1: Water Sprouting (Best for Beginners)

    1. Insert 3–4 toothpicks around the middle of the seed
    2. Suspend it over a glass so the bottom sits in water
    3. Keep water level constant (change every 2–3 days)
    4. Place in a warm spot (65–80°F)

    What to expect:

    • 2–4 weeks: seed splits
    • Root emerges downward
    • Stem grows upward

    Why this works:
    You can monitor root health and prevent overwatering.

    Method 2: Direct Soil Method (More Natural)

    1. Fill a pot with loose, well-draining soil
    2. Plant seed halfway into soil (top exposed)
    3. Water lightly
    4. Place in bright, indirect light

    Best for:
    Gardeners with good drainage control.

    Step 4: Light & Temperature (Critical for Strong Growth)

    • Bright indirect light at first
    • Gradually introduce direct sun after leaves appear
    • Ideal temperature: 65–85°F
    • Avoid cold drafts and air conditioners

    Visual cues:

    • Healthy leaves = firm, green
    • Pale, floppy leaves = insufficient light

    Step 5: Transition to Soil (If Started in Water)

    When:

    • Stem is 6–8 inches tall
    • Roots are well-formed

    How:

    1. Use a pot with drainage
    2. Keep half of seed above soil
    3. Water thoroughly once, then let soil dry slightly

    Pro Tips & Best Practices (From Real Home Growing)

    • Pinch the stem at 8–10 inches to encourage branching
    • Rotate the pot weekly for balanced growth
    • Less water is better than more
    • Expect slow growth in winter
    • Seed-grown avocados are for learning not fast fruit

    Common Beginner Mistakes

    • Letting the seed rot in stagnant water
    • Overwatering soil
    • Keeping the plant in low light
    • Expecting fruit too soon

    FAQ: Real Questions Home Gardeners Ask

    Why is my avocado seed not sprouting?

    Most often due to:

    • Old or dried seed
    • Cold temperatures
    • Incorrect orientation

    How long does it take to grow an avocado from seed at home?

    • Sprouting: 2–6 weeks
    • Small plant: 2–3 months
    • Tree size: 1–3 years

    Can I grow avocado indoors permanently?

    Yes, as a foliage plant. Fruiting indoors is rare without grafting and strong light.

    How often should I water my avocado plant?

    Water when the top 2 inches of soil are dry. Never leave water sitting in the tray.

    Why are the leaves turning brown?

    Common causes:

    • Low humidity
    • Salt buildup
    • Overwatering

    When NOT to Use This Method

    Avoid seed growing if:

    • You want guaranteed fruit production
    • You live in very cold climates without indoor light
    • You prefer faster results

    Safer Alternatives

    • Buy a grafted avocado sapling
    • Grow herbs or leafy greens indoors

    Alternative Methods Compared

    Seed Method

    Pros

    • Free
    • Educational
    • Great for beginners

    Cons

    • Slow
    • Unpredictable fruit quality

    Grafted Tree

    Pros

    • Fruits sooner
    • Known variety

    Cons

    • Higher cost
    • Requires outdoor space

    Conclusion

    Learning how to grow avocado from seed at home is one of the most rewarding beginner gardening projects when approached with patience and realism. While seed-grown avocados are unlikely to fruit quickly, they make excellent long-term houseplants and teach essential skills like watering control, light management, and root care.

    Treat the process as a slow, sustainable experiment not a shortcut to avocados and you’ll grow a healthier plant and stronger gardening confidence along the way.