Author: Adams Charles

  • What Not to Plant With Cilantro for a Healthier Garden

    Every product is independently reviewed and selected by our editors. If you buy something through our links, we may earn an affiliate commission at no extra cost to you.

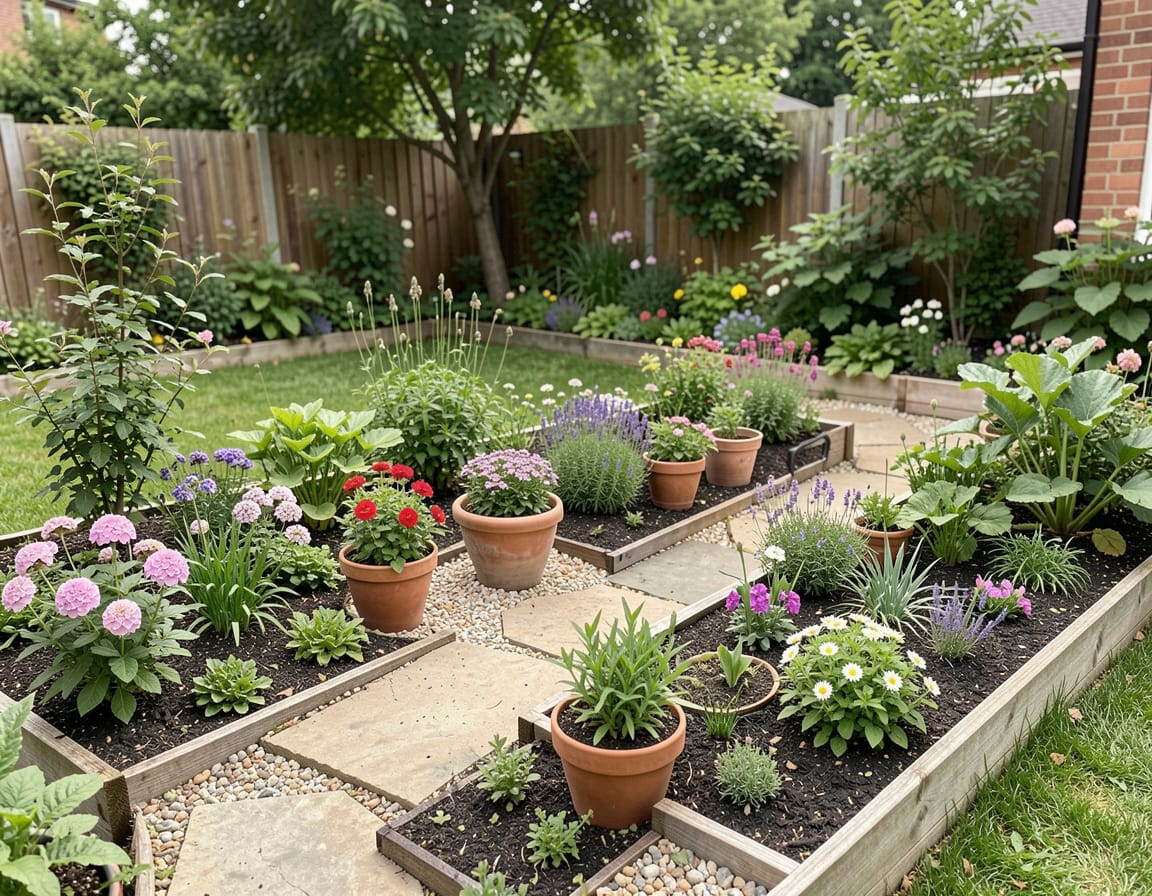
    If you’ve ever tried growing cilantro in a small garden or container setup, you’ve probably noticed how unpredictable it can be. One week it’s lush and fragrant, and the next it’s bolting straight to seed or getting crowded out by stronger neighbors. Through my own years of growing cilantro on balconies, terraces, and small backyard beds, I’ve learned that what you plant near it matters more than most beginners realize.

    This guide explains what not to plant with cilantro, why these combinations fail, and the best alternatives that actually help cilantro stay flavorful and productive.

    Why Some Plants Don’t Belong Near Cilantro

    In real gardens, companion planting isn’t just theory plants really do compete for space, water, nutrients, and even air movement. Cilantro is especially sensitive because:

    • It prefers cooler temperatures • It bolts quickly when stressed • Its shallow roots dislike competition • Its scent and leaf chemistry don’t pair well with certain crops

    When cilantro is planted near the wrong companions, it typically shows:

    • Fast bolting • Thin, leggy growth • Reduced leaf flavor • Yellowing from nutrient imbalance • Pest issues (especially aphids or leaf miners)

    The “bad companions” below are ones I’ve tested directly or seen fail repeatedly in home gardens.

    Plants You Should NOT Plant With Cilantro

    1. Fennel

    Fennel is notorious for being a bad neighbor to almost everything, but it’s especially incompatible with cilantro.

    Why fennel is a problem: • Releases chemicals that inhibit nearby plant growth • Outcompetes cilantro for nutrients • Attracts swallowtail caterpillars, which will also chew on tender cilantro foliage

    In my garden, every cilantro plant within a couple feet of fennel became yellowish and stunted.

    2. Dill

    Dill and cilantro look similar, but they do not get along well in close quarters.

    Problems with dill: • Cross-pollination confuses seed saving • They attract the same pests, making infestations worse • Dill grows taller and shades out cilantro

    I’ve had cilantro bolt prematurely just from being overshadowed by fast-growing dill.

    3. Mint

    Mint grows aggressively and will overtake cilantro in a matter of weeks.

    Why mint is a poor companion: • Spreads by runners and chokes out cilantro • Competes heavily for water • Creates a humid microclimate that encourages fungal disease

    If you absolutely must grow mint, keep it in a pot preferably far away.

    4. Basil

    Basil loves heat. Cilantro hates it. Their environmental needs clash.

    What happens when they’re grown together: • Basil’s preference for full sun warms surrounding soil • Cilantro bolts quickly in the extra heat • Watering needs don’t match (basil wants more consistent warmth and moisture)

    Every time I tried this combo in containers, the cilantro bolted almost instantly.

    5. Lavender and Mediterranean Herbs

    This includes rosemary, thyme, oregano, sage.

    Why they fail near cilantro: • These herbs need dry, lean soil • Cilantro likes slightly richer, evenly moist soil • Watering for one stresses the other

    It’s a classic case of mismatched environments.

    6. Crops With Large Root Systems

    Tomatoes, potatoes, squash, eggplant, and corn are all bad neighbors.

    Issues: • Large plants shade cilantro • Deep roots pull nutrients away from shallow-rooted cilantro • Increased humidity around large crops often leads to mildew

    I once planted cilantro between tomato rows within a month the cilantro was spindly and flavorless.

    What You Should Plant Near Cilantro Instead

    Cilantro does best with plants that share its cool-weather preference and don’t compete aggressively.

    Best companions include: • Leafy greens (lettuce, spinach, arugula) • Carrots • Onions and scallions • Garlic • Chives • Parsley • Radishes

    These combinations help deter pests, maintain soil moisture, and maximize space especially in small gardens.

    What You’ll Need (If You’re Replanning Your Garden)

    • Quality potting mix or compost for raised beds • Separate pots for aggressive spreaders like mint • Mulch for moisture retention • Hand trowel • Labels (very useful when differentiating cilantro and young dill seedlings)

    How to Replant Cilantro Successfully (If You Chose a Bad Companion)

    • Choose a cooler spot morning sun, afternoon shade is best.
    • Loosen the soil and add compost if needed. Cilantro dislikes compaction.
    • Transplant gently. Cilantro seedlings are fragile; disturb roots as little as possible.
    • Give it space. At least 6–8 inches between plants.
    • Mulch lightly to keep soil cool (wood chips or straw work well).
    • Water deeply but infrequently let the top inch dry first.
    • Harvest often to delay bolting.

    Pro Tips & Best Practices From Real Gardens

    • Sow cilantro every 3–4 weeks. It’s the best way to keep steady supply. • Avoid afternoon sun in hot climates. This single adjustment prevents 70% of bolting issues. • Never plant cilantro near heat-reflective surfaces (concrete, metal railings). • Use deep pots (8–12 inches) to keep roots cool on balconies. • Don’t overfeed. Too much nitrogen causes thin, floppy stems.

    One trick I swear by: grow cilantro between rows of onions. It stays cooler, and pests stay away.

    FAQ

    Why does my cilantro bolt so fast? Usually too much heat or sun, but poor companion planting can contribute by stressing the plant.

    Can I plant cilantro next to tomatoes? No. Tomatoes shade cilantro and steal nutrients, causing weak, leggy growth.

    Is it okay to grow dill and cilantro together in a big pot? I don’t recommend it. Dill grows much faster and will overwhelm cilantro.

    Can cilantro grow near peppers? It can, but peppers prefer warmer soil, so cilantro may bolt sooner.

    Why is my cilantro turning yellow? Often lack of nutrients or root competition common when planted near hungry crops like basil or tomatoes.

    Can I grow cilantro and parsley together? Yes one of the best pairings for small garden beds and containers.

    When NOT to Use Companion Planting With Cilantro

    Avoid companion planting if: • You live in a hot climate and can’t control sun exposure • Your soil dries out too quickly • You’re growing in very small pots (6 inches or smaller) • Plants have drastically different watering or sun needs

    Sometimes cilantro does best in its own container, especially on balconies.

    Alternatives if You Made a Bad Planting Choice

    If cilantro is struggling: • Move it to partial shade • Replant in a separate container • Try slow-bolt varieties like ’Delfino’ • Grow cilantro for seeds (coriander) rather than leaves

    Cilantro is forgiving if it bolts, you still get coriander seeds for cooking or replanting.

    Conclusion

    Knowing what not to plant with cilantro is just as important as knowing what helps it thrive. Cilantro is a cool-season, shallow-rooted herb that struggles when planted near aggressive, heat-loving, or chemically incompatible neighbors like fennel, mint, basil, and large vegetable crops.

    Give cilantro the right companions or its own space and it rewards you with fragrant, tender leaves for weeks instead of days. As always with home gardening, small adjustments in placement and plant pairing make a huge difference.

    If you set up your cilantro with the right neighbors now, your plants will stay healthier, bolt later, and produce far better flavor all season long.

  • Cilantro companion plants vegetables

    Every product is independently reviewed and selected by our editors. If you buy something through our links, we may earn an affiliate commission at no extra cost to you.

    If you’ve ever planted cilantro only to watch it bolt early, turn yellow, or get overwhelmed by pests, you’re not alone. Cilantro grows fast, hates heat, and can suddenly collapse if the soil dries out even once. Over the years in my own balcony and small backyard beds, I’ve found that the simplest way to keep cilantro healthier for longer is to plant it with the right companion vegetables.

    These cilantro companion plants (vegetables) help regulate soil moisture, improve flavor, reduce pests, and create a microclimate that keeps cilantro from bolting too soon. The right pairings make a surprising difference especially in small-space gardens where every inch matters.

    Why Cilantro Companion Planting Works

    Cilantro is a cool-season herb with shallow roots and delicate stems. It benefits from vegetables that:

    • Offer light shade during warm afternoons
    • Help maintain consistent soil moisture
    • Attract beneficial insects that keep aphids in check
    • Grow vertically or slowly, leaving room for cilantro’s small footprint
    • Prefer the same moisture-rich, fertile soil

    In my own garden, cilantro behaves noticeably better when tucked between slow-growing or upright vegetables its soil stays cooler, and it bolts much later.

    What Actually You’ll Need

    • Quality compost or organic potting mix
    • Mulch (dry leaves or coconut husk works well in small spaces)
    • Cilantro seeds (it dislikes transplanting)
    • Vegetable seedlings or seeds for your chosen companions
    • A watering can with a fine rose to avoid disturbing seeds
    • Shade cloth (optional for hot climates)

    Organic options: compost, worm castings, neem spray for pest control if needed.

    Best Vegetables to Plant with Cilantro

    1. Tomatoes – The Most Reliable Cilantro Companion

    Tomatoes give just enough afternoon shade to keep cilantro cool. In my raised bed, cilantro lasts almost twice as long when planted on the east side of tomato plants.

    Benefits:

    • Light shade slows bolting
    • Tomato roots go deep, so they don’t compete
    • Attracts beneficial insects

    Best spacing: 8–12 inches from the tomato stem.

    2. Peppers (Bell or Chili)

    Peppers grow upright with a loose canopy, giving cilantro the dappled shade it loves in late spring.

    Benefits:

    • Stabilizes soil moisture
    • Both like similar watering schedules
    • Helps deter aphids

    Works very well in containers of 12 inches or larger.

    3. Onions and Green Onions

    These are one of my favorites for small balconies. Cilantro fills the gaps between thin onion stalks.

    Benefits:

    • Onion smell deters pests
    • Neither competes heavily for space
    • Great for square-foot gardens

    Spacing: plant cilantro in the gaps between onion rows.

    4. Carrots

    Carrots and cilantro grow beautifully together because they enjoy similar cool conditions and light soil.

    Benefits:

    • Both thrive in loose soil
    • Cilantro’s scent helps deter carrot rust flies
    • Carrots don’t shade cilantro

    Note: keep soil consistently moist for even germination.

    5. Lettuce and Leafy Greens

    One of the easiest combinations for beginners.

    Benefits:

    • Lettuce provides living mulch
    • Both enjoy the same cool weather
    • Very space-efficient

    In my winter garden, I alternate a row of cilantro with a row of lettuce and get lush growth from both.

    6. Spinach and Swiss Chard

    These leafy greens help create humidity around the soil surface.

    Benefits:

    • Cool, moist microclimate
    • Slow bolting
    • Minimal root competition

    Swiss chard gives longer-term shade as cilantro finishes.

    7. Broccoli and Cabbage (Brassicas)

    Cilantro attracts parasitic wasps that feed on caterpillars, giving brassicas natural pest protection.

    Benefits:

    • Natural, chemical-free pest control
    • Cilantro grows quickly while brassicas are still small
    • Good for early-spring planting

    Vegetables to Avoid Planting with Cilantro

    1. Fennel

    Fennel inhibits the growth of many herbs including cilantro. Avoid planting them anywhere near each other.

    2. Dill

    Dill is closely related to cilantro and can cross-pollinate or attract the wrong insects. They also compete for space and moisture.

    3. Potatoes

    Potatoes grow aggressively, shading out and crowding cilantro. They also compete for nutrients heavily.

    4. Annual Beans

    Beans can overwhelm cilantro with their dense foliage and aren’t ideal for the moist soil cilantro prefers.

    Step-by-Step Guide to Companion Planting Cilantro with Vegetables

    1. Prepare the Soil

    • Use loose, fertile soil with compost mixed in
    • Aim for soil that stays cool and drains well
    • Add a handful of aged compost or worm castings per square foot

    Cilantro germinates best when soil stays evenly moist.

    2. Direct Sow the Cilantro

    Transplanting rarely works I’ve watched cilantro transplants bolt almost immediately.

    • Sow seeds 1/4 inch deep
    • Keep the top layer of soil damp for 7–10 days
    • Thin to 4–6 inches apart once seedlings are 2 inches tall

    3. Plant the Companion Vegetables

    Timing is key:

    • For tomatoes, peppers, brassicas: plant the seedlings first
    • For carrots, lettuce, and green onions: sow at the same time

    Place cilantro on the east or northeast side of taller vegetables.

    4. Water Consistently

    Cilantro hates drying out. Water deeply but gently.

    Signs you’re watering well:

    • Leaves stay lush and soft
    • Stems remain thick, not spindly
    • Soil feels cool when you press your finger 1 inch down

    5. Mulch Around the Base

    A thin layer of leaves or straw helps keep soil cool and moist.

    6. Maintain Light Shade (If Needed)

    If temperatures rise above 80°F (27°C), use shade cloth or rely on your vegetable canopy.

    7. Harvest Regularly

    Frequent cutting encourages fresh leaves and delays bolting.

    Pro Tips & Best Practices

    • Sow cilantro every 2–3 weeks to maintain a steady supply.
    • If your climate is hot, grow cilantro on the east side of tall peppers or tomatoes.
    • Avoid overfertilizing; excess nitrogen makes cilantro bolt quickly.
    • Keep cilantro away from windy, exposed spots—it dries out fast.
    • If aphids appear, blast with water or use neem oil sparingly.

    Common beginner mistake: letting the soil dry out even once—this almost always triggers bolting.

    FAQ

    1. Why does my cilantro bolt even when companion planted? Usually due to heat or inconsistent watering. Even with companions, cilantro needs cool soil and steady moisture.

    2. Can cilantro grow with tomatoes in containers? Yes, as long as the container is at least 12–14 inches deep and you place cilantro on the side with morning sun.

    3. How far should cilantro be from peppers? About 8–10 inches is ideal so the cilantro gets light shade without being crowded.

    4. Can cilantro grow with cucumbers? It can, but cucumbers spread aggressively. Better to use upright peppers or tomatoes for predictable shade.

    5. Does cilantro attract pests to vegetables? No its scent actually repels some pests and attracts beneficial insects.

    6. Can I grow cilantro year-round with these companions? Only in mild climates. In hot regions, plant in fall, winter, and early spring.

    When NOT to Use This Method

    Avoid cilantro companion planting if:

    • Temperatures are consistently above 85°F (29°C)
    • Soil drains poorly or stays soggy (risk of rot)
    • You’re planting with fennel, dill, or potatoes
    • You have very shallow containers that dry out too quickly

    In hot climates, cilantro is simply seasonal you can’t force it to behave in midsummer.

    Alternative Methods for Growing Better Cilantro

    Shade Cloth Method

    Good for hot climates. Pros: works anywhere; consistent results Cons: requires extra setup

    Succession Sowing

    Plant new cilantro every 2–3 weeks. Pros: simple and reliable Cons: needs regular attention

    Grow Indoors in Bright Light

    Pros: avoids heat stress Cons: cilantro can get leggy indoors without strong sunlight

    Companion planting remains the easiest for small gardens.

    Conclusion

    Using the right cilantro companion plants (vegetables) is one of the simplest ways to get healthier, longer-lasting cilantro in any small home garden. From tomatoes to onions and leafy greens, the right neighbors help keep cilantro cool, moist, and naturally protected from pests. Even beginners can see a clear improvement especially when growing in raised beds, balcony planters, or compact backyard gardens.

    Be patient, keep the soil consistently moist, and don’t hesitate to sow fresh cilantro every couple of weeks. With the right companions, cilantro becomes far easier to grow and much more productive all season long.

  • Tree with heart-shaped leaves and seed pods |  Grow and Care for These Charming Landscape Trees

    Tree with heart-shaped leaves and seed pods | Grow and Care for These Charming Landscape Trees

    Every product is independently reviewed and selected by our editors. If you buy something through our links, we may earn an affiliate commission at no extra cost to you.

    If you’ve ever spotted a tree with heart-shaped leaves and seed pods in a neighbor’s yard or along a street and wondered what it was, you’re not alone. These trees are striking especially in spring and late summer yet many beginner gardeners struggle to identify them or understand how to care for them properly.

    In my own garden, I first planted one (an eastern redbud) thinking it would just give a bit of spring color. Over time, it became one of the most low-maintenance trees I’ve grown. The heart-shaped leaves are a giveaway, but the seed pods tell you even more about the tree’s growth cycle, stress levels, and seasonal conditions.

    This guide helps you identify the most common heart‑leaf trees with pods and explains how to grow them successfully in home gardens, balconies, and small backyards.

    Why These Trees Have Heart-Shaped Leaves and Seed Pods

    Heart-shaped leaves are usually broad, slightly cupped, and excellent at channeling water toward the stem an advantage in regions with irregular rainfall. The seed pods (common in leguminous trees like redbuds) allow the tree to produce many seeds with minimal energy.

    In real gardens, I’ve noticed that: • Healthy trees produce fewer but fuller pods. • Stressed trees (heat, drought, nutrient imbalances) produce many thin pods as a survival response.

    Understanding this makes care easier if your tree suddenly produces a lot more pods, it’s often signaling stress.

    What You’ll Need for planting or caring these trees

    • A sunny to lightly shaded planting spot • Well-draining soil (loam or sandy loam preferred) • Compost or organic matter • Mulch (wood chips, shredded bark, or leaves) • Pruning shears or loppers • Deep-watering hose or watering can • Optional: organic slow‑release fertilizer

    Budget-friendly alternative: Use homemade compost, leaf mold, or grass‑clipping mulch if you prefer low-cost, eco-friendly inputs.

    The 3 Most Common Trees With Heart-Shaped Leaves and Seed Pods

    Below is a quick guide based on what I see most often in home gardens.

    1. Eastern Redbud (Cercis canadensis) – Most Common

    • Heart-shaped leaves • Pink spring flowers • Brown, papery seed pods in late summer • Great for small gardens

    2. Northern Catalpa (Catalpa speciosa)

    • Big heart-shaped leaves • Long, cigar-like seed pods • Fast-growing shade tree • Needs more space

    3. Empress Tree (Paulownia tomentosa)

    • Very large heart-shaped leaves • Greenish-brown woody seed capsules • Extremely fast growth • Can be invasive in some regions

    Step-by-Step Instructions: How to Plant and Care for These Trees

    1. Choose the Right Spot

    • Plant in full sun or part shade. • Avoid low spots where water pools these trees dislike soggy roots. • Give redbuds 8–10 ft of space; catalpas need 20–30 ft.

    2. Prepare the Soil

    • Loosen soil 12–18 inches deep. • Mix in compost for moisture balance. • If soil is heavy clay, add coarse sand or grit to improve drainage.

    In my clay-heavy garden bed, adding leaf mold made a noticeable difference in root establishment.

    3. Plant at the Right Depth

    • Set the tree so the root flare sits level with the soil surface. • Backfill lightly don’t pack the soil hard. • Water deeply right after planting.

    4. Watering Routine

    • Water young trees twice weekly in warm seasons. • Switch to deep, infrequent watering once established. • Allow the top 2–3 inches of soil to dry between waterings.

    5. Pruning Tips

    • Prune in late winter when the tree is dormant. • Remove crossing, damaged, or crowded branches. • Do not prune heavily during active growth these trees can bleed sap.

    6. Managing Seed Pods

    For redbuds and catalpas, pods will naturally brown and drop late summer to fall. • You can remove pods for a tidier appearance. • If you leave them, mulch heavily where pods fall so they decompose naturally. • Avoid letting pods accumulate in gutters and walkways.

    Pro Tips & Best Practices

    • Young redbuds struggle in reflected heat zones avoid planting next to south-facing walls. • Catalpas drop large leaves; plant away from small patios or porches. • If leaves turn yellow early, check drainage; these trees hate wet feet. • Mulch 2–3 inches deep, keeping mulch away from the trunk base.

    One thing beginners often miss: these trees respond better to consistent moisture than frequent fertilizing. Too much nitrogen can cause excessive leaf growth but fewer flowers.

    FAQ

    1. Why does my redbud tree have lots of seed pods this year? Often it’s a stress response to heat or drought. Increase deep watering during summer.

    2. Can I grow a heart-shaped leaf tree in a container? A dwarf redbud can grow in a large pot (minimum 20–24 inches). Catalpa and Paulownia are too big.

    3. Why are my leaves turning brown at the edges? Usually heat or underwatering. Mulch and deeper watering help.

    4. Can I prune off seed pods without harming the tree? Yes. Removing pods does not affect long-term growth.

    5. Is the Catalpa tree messy? Yes large leaves and long pods drop late in the season. Plant with space.

    6. Are these trees safe for pets? Redbuds are generally considered safe; catalpa pods are not commonly eaten by pets but supervise anyway.

    When NOT to Plant These Trees

    Avoid planting if: • Your yard is poorly drained or frequently waterlogged. • You live in very windy, exposed sites heart-shaped leaves tear easily. • You have limited space (catalpa and paulownia grow HUGE). • Invasive species are restricted in your region (especially Paulownia).

    Alternative Trees With Similar Appeal

    If you like the look but want different maintenance levels:

    Serviceberry

    • Edible berries • Smaller, tidier growth

    Dogwood

    • Similar leaf shape • No seed pods

    Linden Tree

    • Small heart-shaped leaves • Fragrant flowers

    Each is beginner-friendly and fits well in small gardens.

    Conclusion

    A tree with heart-shaped leaves and seed pods especially a redbud or catalpa adds charm, shade, and seasonal interest to any home garden. These trees are surprisingly easy to grow once you understand their soil, sunlight, and watering needs. Pay attention to drainage, avoid over‑pruning, and watch how the seed pods form through the season they tell you a lot about the tree’s health.

    With patience and regular care, these trees reward you with beautiful leaves, distinctive pods, and a reliable presence in your garden year after year.

  • How long does a tulip take to grow

    How long does a tulip take to grow

    Every product is independently reviewed and selected by our editors. If you buy something through our links, we may earn an affiliate commission at no extra cost to you.

    If you’ve ever planted tulip bulbs and wondered why nothing seems to happen for months, you’re not alone. Many beginners expect tulips to sprout quickly, but tulip growth is slow, seasonal, and highly temperature‑dependent. In my own small backyard beds and balcony containers, tulips have consistently followed the same pattern: almost nothing above the soil for months, then sudden growth as soon as temperatures warm.

    This article breaks down how long a tulip takes to grow, why the timeline looks the way it does, and what you can do to keep the bulbs healthy while you wait. If you’re planting in a pot, terrace planter, or compact garden, the cues and troubleshooting steps here are especially helpful.

    Why Tulips Take This Long to Grow

    Tulips are cold‑climate bulbs. Their growth depends on three biological processes:

    1. Cold Stratification (Chill Time)

    Tulip bulbs need 12–16 weeks of cold temperatures (35–48°F / 1–9°C) before they can sprout. Without this chill period, they simply sit in the soil.

    In warm climates (or indoors), I’ve seen bulbs refuse to bloom entirely unless pre‑chilled.

    2. Root Establishment

    Once planted in fall, tulips grow roots underground for several weeks. They won’t produce shoots until winter has fully passed.

    3. Spring Temperature Trigger

    As soil warms above 50°F (10°C), the bulb “wakes up,” sending up green shoots almost overnight. This is why tulips seem slow for months, then grow incredibly fast in spring.

    What Materials You’ll Need

    • Healthy tulip bulbs (firm, not soft or moldy)
    • Well‑draining soil (avoid heavy clay)
    • Garden bed or pot with drainage holes
    • Compost or organic bulb fertilizer
    • Mulch (optional but helpful for winter insulation)

    Eco-friendly tip: Use natural compost instead of synthetic fertilizers; tulips do well with gentle nutrition.

    Step-by-Step: How Long Tulips Take to Grow from Planting to Bloom

    1. Planting (Autumn)

    Timeline: Early fall to mid fall

    • Plant bulbs 6–8 inches deep.
    • Water once after planting.
    • No visible growth will occur above the soil.

    Real‑garden note: In containers, I often see root growth faster because pots warm and cool quicker than ground soil.

    2. Root Development (4–8 Weeks After Planting)

    Timeline: Late fall Roots establish during cool weather. You won’t see shoots yet.

    Visual sign: If you gently tug a planted bulb after 3–4 weeks, it should resist—this means roots have formed. (Don’t pull too hard.)

    3. Winter Dormancy (8–16 Weeks After Planting)

    Timeline: Winter Bulbs are underground, fully dormant but alive.

    Environmental requirement: 12–16 weeks of cold temperatures. If you live in a warm climate (zones 8–11), buy pre-chilled bulbs.

    4. Early Growth (Late Winter to Early Spring)

    Timeline: Shoots appear 2–3 weeks after temperatures rise Once the soil warms, tulips emerge quickly.

    Typical speed:

    • 1–2 inches of growth in a few days
    • Full leaves and stems in 2–3 weeks

    My observation: Shoots in pots emerge slightly earlier than those planted in the ground because containers warm faster.

    5. Blooming (Mid to Late Spring)

    Timeline: 14–20+ weeks after planting Most tulips bloom March–May, depending on climate.

    Bloom lasts: 1–3 weeks per flower Wind and heat shorten bloom time; partial shade in the afternoon can extend it.

    Summary Timeline: How Long Tulips Take to Grow

    • Rooting: 4–8 weeks
    • Chill/dormancy: 12–16 weeks
    • Spring growth to bloom: 2–5 weeks Total: 14–20+ weeks from planting to flowering

    Pro Tips & Best Practices

    • Plant early. Tulips planted too late may not bloom the first year.
    • Use well‑draining soil. Tulip bulbs rot easily in soggy spots especially in pots.
    • Mulch lightly. Helps stabilize winter temperatures.
    • Avoid overwatering in winter. The bulb is dormant and doesn’t need moisture.
    • Rotate tulip locations. Soil-borne diseases can accumulate.

    Common Mistakes to Avoid

    • Planting bulbs too shallow (they’ll flop or freeze)
    • Using soil that stays wet
    • Expecting tulips planted in spring to bloom (they almost never do)
    • Digging up bulbs too early, thinking they failed
    • Overfertilizing containers

    FAQ: Real Questions Gardeners Ask

    How long do tulip bulbs take to sprout after planting?

    Usually 4–5 months because they need winter chill first. You won’t see sprouts until spring.

    Why are my tulips not growing after winter?

    Common causes include:

    • Soil too wet and bulbs rotted
    • Not enough winter chill
    • Rodents ate the bulbs
    • Bulbs planted too shallow or too deep

    Can I speed up tulip growth?

    Not significantly. The chill period and spring cues are required, but you can:

    • Use pre-chilled bulbs
    • Plant in full sun
    • Use fast-draining soil

    How long do tulips last once they bloom?

    1–3 weeks depending on temperature. Cool, mild spring weather gives the longest blooms.

    Do tulips grow faster in pots or in the ground?

    In my experience, pots warm up sooner, so shoots appear earlier but potted tulips dry out faster.

    When NOT to Use This Method

    Avoid planting tulips directly in:

    • Zones 8–11 without pre-chilled bulbs
    • Waterlogged soil or heavy clay
    • Locations with full shade
    • Summer heat (bulbs will fail)

    If you live in a warm climate, pre-chill bulbs for 10–12 weeks in the refrigerator.

    Alternative Methods for Faster or More Reliable Tulip Growth

    1. Pre-Chilled Bulbs

    • Best for warm climates
    • Guaranteed sprouting

    2. Forcing Tulips Indoors

    • Faster blooms (8–12 weeks)
    • Requires controlled conditions

    3. Planting in Bulb Crates or Baskets

    • Easier drainage
    • Protects from rodents

    Each method suits different gardeners. Balcony gardeners often prefer pots or baskets because of drainage and mobility.

    Conclusion

    So, how long does a tulip take to grow? From planting to flowering, expect 14–20+ weeks, most of that spent underground developing roots and completing its winter chill.

    Tulips reward patience once the soil warms, they grow rapidly and bloom beautifully. With the right planting depth, good drainage, and proper timing, even a beginner can enjoy reliable tulip blooms in a home garden, small yard, terrace planter, or balcony pot.

    Take it slowly, plant thoughtfully, and let the bulbs follow their natural rhythm. Your spring display will be worth the wait.

  • What do tulips look like after they bloom

    What do tulips look like after they bloom

    Every product is independently reviewed and selected by our editors. If you buy something through our links, we may earn an affiliate commission at no extra cost to you.

    One of the most common questions new bulb gardeners ask is “what do tulips look like after they bloom?” The first time I grew tulips on my small backyard plot, I was surprised by how quickly the flowers faded and how messy the plant looked afterward. Many beginners think they’ve done something wrong but this post-bloom look is completely normal.

    Understanding what tulips should look like after blooming makes the next steps deadheading, leaf care, watering, and letting bulbs recharge much easier. In real gardens, this stage determines whether your tulips return strongly next spring or gradually fade out.

    Why Tulips Look the Way They Do After Blooming

    After tulip flowers fade, the plant shifts its energy underground. Biologically, here’s what’s happening in simple terms:

    • The flower stops being a priority. The petals usually fall or shrivel.
    • The seed pod (the swollen structure where the flower was) may begin forming.
    • The leaves stay green to photosynthesize it’s how the bulb stores energy for next year.
    • Over several weeks, the leaves slowly yellow and collapse as the bulb goes dormant.

    So while the above-ground part looks untidy, the bulb below is busy preparing for next spring.

    What Tulips Look Like After They Bloom

    Based on years of growing tulips in containers, raised beds, and a narrow strip along my fence, here’s the typical sequence:

    • Petals droop or fall off within a few days.
    • Flower stems remain upright but often look stretched or floppy.
    • A green seed pod forms at the top unless removed.
    • Leaves remain green usually broad, smooth, and slightly waxy.
    • Leaves turn yellow gradually from the tips downward.
    • All foliage dies back completely in 4–6 weeks.

    If your tulips look like “sad floppy plants with long leaves,” don’t worry that’s normal.

    What You’ll Need (If You Plan to Care for Post-Bloom Tulips)

    • Clean pruning shears or garden scissors
    • Gloves (bulbs are safe but soil can harbor irritants)
    • A small trowel (optional)
    • Organic compost (if feeding bulbs in-ground)
    • Mesh trays or paper bags (if lifting bulbs)

    Everything listed above is inexpensive and easy to find at garden centers or hardware stores.

    Step-by-Step: What to Do When Tulips Finish Blooming

    1. Deadhead the Spent Flower

    Timing: Immediately after petals fall

    • Snip off the faded flower head just above the top leaf.
    • Leave the stem and leaves intact. This prevents the bulb from wasting energy on seed production.

    2. Keep the Leaves Intact

    Timing: Until leaves yellow completely

    • Do not braid or fold the leaves (this restricts sunlight exposure).
    • Water lightly once a week if soil dries out, especially for container tulips. Healthy green leaves mean your bulb is recharging.

    3. Stop Watering When Leaves Yellow

    Timing: When at least half the leaf surface turns yellow

    • Overwatering at this stage can rot bulbs especially in pots.
    • Let the soil dry out naturally.

    4. Remove Foliage Only When It Pulls Away Easily

    Timing: Usually 4–6 weeks after flowering

    • Don’t cut green leaves they still feed the bulb.
    • When fully brown and papery, pull gently; they should detach cleanly.

    5. Decide Whether You’re Lifting or Leaving Bulbs

    • Leave in ground: Best for climates with cold winters and well-drained soil.
    • Lift bulbs: Useful in hot climates or containers. Store bulbs in a dry, airy place.

    Pro Tips & Best Practices

    • In pots, tulip foliage tends to yellow faster due to heat buildup.
    • Add a thin layer of compost after flowering to strengthen next year’s blooms.
    • Avoid overhead watering it can cause fungal spots on fading leaves.
    • Mark where bulbs are planted so you don’t accidentally dig them up later.
    • If leaves flop early or look mushy, check for waterlogged soil.

    FAQ

    Why are my tulip leaves turning yellow so fast?

    Warm weather speeds up dormancy. Container-grown tulips yellow fastest.

    Can I cut tulip leaves right after they bloom?

    No—cutting early weakens the bulb and reduces next year’s flowers.

    Should I fertilize tulips after they bloom?

    A light layer of organic compost is usually enough. Avoid strong chemical fertilizers.

    What if my tulips never return next year?

    Many varieties are sold as annuals in warm climates. Poor drainage also weakens bulbs.

    Do I need to dig up my tulip bulbs every year?

    Only if you live in a warm climate (zones 8–10) or grow tulips in containers.

    Can I leave seed pods on tulips?

    You can, but the bulb will be weaker next year. Deadheading is better.

    When NOT to Use the Standard Post-Bloom Method

    Avoid leaving tulip bulbs in the ground if:

    • Your soil stays soggy after rain
    • You garden in hot climates where winter is too mild
    • Containers overheat in late spring

    In those cases, lifting bulbs is safer.

    Alternative Approaches

    • Treating tulips as annuals: Simple for beginners; just replant fresh bulbs each fall.
    • Naturalizing tulips: Works best with species tulips in well-drained soil; they return reliably.
    • Chilling bulbs in the fridge for warm climates: Mimics winter, allowing reblooming.

    Each method works depending on climate, soil, and how much effort you want to invest.

    Conclusion

    Now you know what tulips look like after they bloom drooping petals, developing seed pods, and long leaves that slowly yellow as the plant recharges. This stage may look messy, but it’s essential for healthy bulbs and strong blooms next spring.

    Give the foliage time, avoid overwatering, and treat your bulbs gently. With a bit of patience, tulips become one of the most reliable and rewarding spring flowers for home gardeners.

    If you’d like a version optimized for a specific keyword variation, just tell me the phrase.

  • How long do tulips bloom in pots

    How long do tulips bloom in pots

    Every product is independently reviewed and selected by our editors. If you buy something through our links, we may earn an affiliate commission at no extra cost to you.

    If you’ve ever grown tulips in pots, you’ve probably had the same surprise most beginners face: the flowers look incredible… but the show feels short. Many gardeners expect potted tulips to bloom for weeks, only to watch petals fade much sooner.

    After growing potted tulips on my terrace and balcony for more than a decade, I’ve learned that how long tulips bloom in pots depends heavily on temperature, sunlight, bulb quality, and simple day‑to‑day care.

    The good news: with the right conditions, you can extend the bloom time and enjoy fuller, longer-lasting displays even in small spaces.

    Why Tulips Bloom for a Short Time (and Why It’s Normal)

    Tulips naturally have a short bloom period. In pots, it’s even shorter because containers heat up faster and dry out more quickly. That extra stress speeds up the bloom cycle.

    Here’s what’s happening biologically:

    • Tulips store all their energy in the bulb during winter.
    • As spring warms up, they push out leaves and a single bloom stalk.
    • Once the flower opens, rising temperatures cause petals to mature and fade quickly.

    Think of tulip blooms as a slow-release spring firework brief but spectacular. The goal in containers is to delay the fade through temperature, moisture, and placement control.

    What Things You’ll Need

    • Quality pre-chilled tulip bulbs (or bulbs you chilled yourself)
    • A pot at least 10–12 inches deep
    • Well-draining potting mix (not garden soil)
    • Light fertilizer (bulb food or balanced slow-release)
    • Mulch (optional, helps regulate temperature)
    • Watering can with a gentle spout

    Eco-safe choices:

    • Coconut coir instead of peat
    • Organic bulb fertilizer
    • Terracotta pots (breathable and reusable for years)

    How Long Do Tulips Bloom in Pots?

    Most tulips bloom 5–14 days in containers. Here’s the realistic breakdown from hands-on observation:

    • Cool, cloudy weather: 10–14 days
    • Mild spring weather: 7–10 days
    • Warm, sunny weather: 3–5 days (the most common reason blooms feel short)

    But you can stretch the bloom time toward the longer range with the steps below.

    Step-by-Step Tips to Maximize Bloom Time

    1. Start With the Right Bulbs

    Plant mid- or late-season varieties if you’re in a warm climate they tolerate heat better and hold their blooms longer.

    2. Use the Deepest Pot You Can

    Deeper soil:

    • Insulates bulbs from temperature swings
    • Keeps moisture levels steadier
    • Reduces bloom stress

    A 12-inch pot consistently holds blooms longer in my tests than an 8-inch pot.

    3. Place Pots Where Mornings Are Bright but Afternoons Are Cool

    Direct midday sun heats pots quickly. Ideal placement:

    • Morning sun
    • Light afternoon shade
    • Shelter from reflected heat (brick walls, metal railings)

    Shade in the heat of the day can add 2–4 extra bloom days.

    4. Water Before Soil Dries Out

    Dry soil shortens bloom duration. Water when:

    • The top 1 inch feels dry
    • Leaves start to wrinkle slightly
    • Soil pulls away from the pot edges

    Avoid overwatering tulips hate soggy roots.

    5. Keep Temperatures Down (as much as possible)

    Warmth is the #1 bloom killer in pots. Easy tricks:

    • Mulch the soil surface
    • Use light-colored pots
    • Move pots indoors on hot days (cool room, indirect light)

    6. Deadhead As Soon As Petals Drop

    Removing the spent flower prevents the bulb from wasting energy on seed production. This doesn’t extend the current bloom, but it protects bulb health for next year’s display.

    7. Fertilize Only After Flowering

    Fertilizing during bloom can push soft new growth which stresses the plant. Apply bulb fertilizer right after blooms fade.

    Pro Tips & Best Practices

    • Plant bulbs shoulder-to-shoulder for a fuller display.
    • Keep pots slightly sheltered from wind gusts strip petals fast.
    • If your balcony gets very warm, choose species tulips, which bloom longer.
    • Rotate the pot every few days so flowers receive even light and don’t stretch.
    • Don’t reuse potting mix without refreshing it old mix dries too fast.

    Common Beginner Mistakes

    • Placing tulips in full midday sun
    • Using pots that are too small or shallow
    • Overwatering (leads to bulb rot before blooming)
    • Expecting tulips to bloom again the same year in pots they won’t

    FAQ

    How long do tulips bloom in pots in warm climates? Usually only 3–7 days unless you give them afternoon shade and cool soil.

    Why did my tulip blooms fade in just a few days? Heat is the most common reason. Move pots to morning sun and cooler afternoon shade.

    Can I make potted tulips bloom longer indoors? Yes, if you keep them in a cool room (around 60°F/15°C) with bright indirect light.

    Do tulips bloom longer in pots or in the ground? In the ground. Soil stays cooler and moist longer, which slows bloom fade.

    How often should I water tulips in pots while blooming? Every few days in cool weather; every 1–2 days in warm conditions keep soil lightly moist.

    When NOT to Rely on Potted Tulips for Long Bloom Time

    Avoid potted tulips if:

    • Your climate is consistently above 75°F/24°C in early spring
    • You want weeks of continuous bloom
    • You have south-facing balconies with strong heat reflection

    In these cases, ground-planted tulips or heat-tolerant spring bulbs (freesias, ranunculus) perform better.

    Alternative Methods for Longer Tulip Color

    • Successive potting: Plant pots of early, mid, and late tulips for extended color.
    • Refrigerated forcing: Provides earlier blooms but shorter duration.
    • Species tulips: Smaller blooms but often last longer in pots and can rebloom next year.

    Conclusion

    So, how long do tulips bloom in pots? Expect 5–14 days, depending on temperature, sunlight, and care.

    While the bloom window is short, a few smart adjustments cool placement, steady moisture, deep pots, and heat control can noticeably extend your display.

    Growing tulips in containers is one of those gardening experiences where managing expectations and microclimates makes all the difference. With a little attention, your potted tulips can put on a beautiful, longer-lasting show every spring.

  • Very small garden ideas on a budget | Stylish And Practical Design

    Very small garden ideas on a budget | Stylish And Practical Design

    Every product is independently reviewed and selected by our editors. If you buy something through our links, we may earn an affiliate commission at no extra cost to you.

    Modern gardens are known for clean lines, simple planting, and clever use of space but many gardeners assume this style is expensive. After working on several small gardens over the years (including my own tiny courtyard), I’ve learned that you can create a sleek, modern look on a tight budget with smart material choices and thoughtful layout, not big spending.

    Small spaces actually work in your favour. You need fewer materials, fewer plants, and just a few well-placed features to completely transform the garden.

    Why These Budget-Friendly Modern Ideas Work

    Modern small gardens are about simplicity, structure, and functionality meaning:

    • You spend less because you buy fewer items
    • Clean lines make even tight spaces feel bigger
    • Durable, low-maintenance materials reduce long-term costs
    • A minimal number of plants keeps upkeep and watering light
    • Symmetry and repetition provide style without clutter

    In real gardens, this approach almost always looks more expensive than it is.

    What Materials You’ll Need

    Most modern budget gardens can be built with:

    • Gravel or budget-friendly slate chippings
    • A few strong containers (plastic or resin works fine)
    • Simple paints (for fences, walls, or old furniture)
    • Two or three architectural plants
    • Mulch to cover soil and suppress weeds
    • Solar lights
    • Basic tools (trowel, pruners, paintbrush, watering can)

    Eco-friendly tip: choose recycled materials where possible modern design loves clean, minimal aesthetics.

    Modern Small Garden Ideas on a Budget

    1. Paint the Fences a Dark Colour

    This is the cheapest high-impact trick I’ve ever used in a small garden. Dark colours charcoal, black, deep green instantly make the space feel modern and hide uneven fence panels.

    Why it works:

    • Plants pop against dark backgrounds
    • The garden feels deeper and larger
    • It unifies the entire space

    2. Use Gravel Instead of Paving

    Gravel is one of the most budget-friendly, modern-looking surfaces.

    Steps:

    • Lay down weed membrane.
    • Add inexpensive gravel (choose 10–20 mm).
    • Create simple edges using bricks, timber, or metal.

    Pair with:

    • Black pots
    • Evergreen grasses
    • Simple stepping stones

    3. Add a Few Large, Modern Pots (Not Lots of Small Ones)

    You only need two or three good-sized containers to achieve a modern look.

    Budget tip: plastic pots sprayed with stone-effect or matte black paint look surprisingly high-end.

    Plant ideas:

    • Dwarf bamboo (clumping type)
    • Phormium
    • Compact grasses
    • Olive or bay in small form

    4. Create a Simple Seating Zone

    Even the smallest garden benefits from a seating nook.

    On a budget:

    • Use a wooden bench painted black
    • Try pallet furniture with outdoor cushions
    • Add a gravel “patio” instead of expensive paving

    Keep the shape simple square or rectangle for a modern feel.

    5. Build a DIY Raised Bed From Timber

    Raised beds instantly modernize small gardens because they add structure.

    Budget version:

    • Use pressure-treated timber boards
    • Paint or stain them charcoal or soft grey
    • Fill with peat-free compost and a few architectural plants

    Raised beds double as seating if built at the right height.

    6. Use Repetition for a Designer Look

    Repeating the same plant or pot shape creates a modern aesthetic without extra cost.

    Examples:

    • Three matching black pots in a row
    • A border planted with one type of ornamental grass
    • Repeated stepping stones

    This trick makes a budget garden look curated and intentional.

    7. Choose Architectural Plants That Don’t Need Many Companions

    Modern gardens work best with bold shapes.

    Affordable, modern plants:

    • Feather reed grass (Calamagrostis)
    • New Zealand flax (Phormium)
    • Yucca or agave (depending on climate)
    • Miscanthus
    • Bamboo (only clumping types)
    • Hebe “Green Globe”
    • Box alternatives like Ilex crenata

    These plants stand proudly on their own, meaning you need fewer overall.

    8. Add Simple Solar Lighting

    Even inexpensive solar lights look sleek when placed thoughtfully.

    Ideas:

    • Line a pathway with spike lights
    • Put warm white lights under architectural plants
    • Use a single spotlight to highlight a feature pot

    Lighting makes even a small, simple garden look designed.

    9. Create a Focal Point

    You don’t need a sculpture just one eye-catching feature.

    Budget options:

    • A single tall pot
    • A painted cinder-block side table
    • A small water bowl with pebbles
    • A DIY vertical planter

    A focal point draws the eye and makes the garden feel organised.

    Expert Tips to Maximise a Small Budget

    • Keep your colour palette limited two or three colours feel modern.
    • Choose larger plants over many small ones.
    • Look for end-of-season plant sales.
    • Use mulch or gravel to hide patchy soil cheaply.
    • Keep lines straight no curvy borders, which are harder and pricier to build.

    Common Beginner Mistakes

    • Using too many decorations or mismatched pots
    • Mixing plant styles (modern gardens rely on cohesion)
    • Choosing fast-growing plants that quickly overwhelm the small space
    • Leaving fences or walls unpainted they dominate small gardens
    • Overplanting, leading to higher watering and maintenance costs

    FAQ

    1. Can I make a modern garden without replacing paving? Yes you can paint old paving, add gravel borders, or place modern pots to disguise worn areas.

    2. What’s the cheapest way to modernise a tiny garden? Painting fences dark, adding gravel, and using two or three large pots creates an immediate modern look.

    3. What colours work best in modern small gardens? Charcoal, black, grey, white, and natural wood tones.

    4. Are modern gardens low maintenance? Usually yes. They rely on fewer, simpler plants and clean lines.

    5. What kind of plants should I avoid? Fast spreaders, large shrubs, or anything requiring frequent pruning.

    When NOT to Use These Ideas

    • Avoid dark paint if your garden already feels very enclosed or gloomy.
    • Skip gravel if your garden is extremely windy stones can scatter.
    • Don’t choose highly reflective surfaces in full-sun courtyards they get uncomfortably hot.

    Alternative Approaches

    • Scandinavian-inspired minimalism (very light colours)
    • Mediterranean style with terracotta and drought-resistant plants
    • Japanese-inspired moss and stone layout
    • Wildlife-friendly modern gardens using native grasses and simple structures

    Conclusion

    A modern small garden on a budget isn’t just possible it’s one of the easiest styles to achieve. With smart use of gravel, dark paint, repeated plants, and a few strong pots, even the tiniest space can feel fresh, clean, and stylish. Start with the basics fence colour, one seating area, and a few architectural plants and build slowly. Modern design rewards simplicity, so your budget goes further and the garden stays easy to maintain all year.

  • Modern small garden ideas on a budget

    Modern small garden ideas on a budget

    Every product is independently reviewed and selected by our editors. If you buy something through our links, we may earn an affiliate commission at no extra cost to you.

    Modern gardens are known for clean lines, simple planting, and clever use of space but many gardeners assume this style is expensive. After working on several small gardens over the years (including my own tiny courtyard), I’ve learned that you can create a sleek, modern look on a tight budget with smart material choices and thoughtful layout, not big spending.

    Small spaces actually work in your favour. You need fewer materials, fewer plants, and just a few well-placed features to completely transform the garden.

    Why These Budget-Friendly Modern Ideas Work

    Modern small gardens are about simplicity, structure, and functionality meaning:

    • You spend less because you buy fewer items
    • Clean lines make even tight spaces feel bigger
    • Durable, low-maintenance materials reduce long-term costs
    • A minimal number of plants keeps upkeep and watering light
    • Symmetry and repetition provide style without clutter

    In real gardens, this approach almost always looks more expensive than it is.

    What Materials You’ll Need

    Most modern budget gardens can be built with:

    • Gravel or budget-friendly slate chippings
    • A few strong containers (plastic or resin works fine)
    • Simple paints (for fences, walls, or old furniture)
    • Two or three architectural plants
    • Mulch to cover soil and suppress weeds
    • Solar lights
    • Basic tools (trowel, pruners, paintbrush, watering can)

    Eco-friendly tip: choose recycled materials where possible modern design loves clean, minimal aesthetics.

    Modern Small Garden Ideas on a Budget

    1. Paint the Fences a Dark Colour

    This is the cheapest high-impact trick I’ve ever used in a small garden. Dark colours charcoal, black, deep green instantly make the space feel modern and hide uneven fence panels.

    Why it works:

    • Plants pop against dark backgrounds
    • The garden feels deeper and larger
    • It unifies the entire space

    2. Use Gravel Instead of Paving

    Gravel is one of the most budget-friendly, modern-looking surfaces.

    Steps:

    • Lay down weed membrane.
    • Add inexpensive gravel (choose 10–20 mm).
    • Create simple edges using bricks, timber, or metal.

    Pair with:

    • Black pots
    • Evergreen grasses
    • Simple stepping stones

    3. Add a Few Large, Modern Pots (Not Lots of Small Ones)

    You only need two or three good-sized containers to achieve a modern look.

    Budget tip: plastic pots sprayed with stone-effect or matte black paint look surprisingly high-end.

    Plant ideas:

    • Dwarf bamboo (clumping type)
    • Phormium
    • Compact grasses
    • Olive or bay in small form

    4. Create a Simple Seating Zone

    Even the smallest garden benefits from a seating nook.

    On a budget:

    • Use a wooden bench painted black
    • Try pallet furniture with outdoor cushions
    • Add a gravel “patio” instead of expensive paving

    Keep the shape simple square or rectangle for a modern feel.

    5. Build a DIY Raised Bed From Timber

    Raised beds instantly modernize small gardens because they add structure.

    Budget version:

    • Use pressure-treated timber boards
    • Paint or stain them charcoal or soft grey
    • Fill with peat-free compost and a few architectural plants

    Raised beds double as seating if built at the right height.

    6. Use Repetition for a Designer Look

    Repeating the same plant or pot shape creates a modern aesthetic without extra cost.

    Examples:

    • Three matching black pots in a row
    • A border planted with one type of ornamental grass
    • Repeated stepping stones

    This trick makes a budget garden look curated and intentional.

    7. Choose Architectural Plants That Don’t Need Many Companions

    Modern gardens work best with bold shapes.

    Affordable, modern plants:

    • Feather reed grass (Calamagrostis)
    • New Zealand flax (Phormium)
    • Yucca or agave (depending on climate)
    • Miscanthus
    • Bamboo (only clumping types)
    • Hebe “Green Globe”
    • Box alternatives like Ilex crenata

    These plants stand proudly on their own, meaning you need fewer overall.

    8. Add Simple Solar Lighting

    Even inexpensive solar lights look sleek when placed thoughtfully.

    Ideas:

    • Line a pathway with spike lights
    • Put warm white lights under architectural plants
    • Use a single spotlight to highlight a feature pot

    Lighting makes even a small, simple garden look designed.

    9. Create a Focal Point

    You don’t need a sculpture just one eye-catching feature.

    Budget options:

    • A single tall pot
    • A painted cinder-block side table
    • A small water bowl with pebbles
    • A DIY vertical planter

    A focal point draws the eye and makes the garden feel organised.

    Pro Tips to Maximise a Small Budget

    • Keep your colour palette limited two or three colours feel modern.
    • Choose larger plants over many small ones.
    • Look for end-of-season plant sales.
    • Use mulch or gravel to hide patchy soil cheaply.
    • Keep lines straight no curvy borders, which are harder and pricier to build.

    Common Beginner Mistakes

    • Using too many decorations or mismatched pots
    • Mixing plant styles (modern gardens rely on cohesion)
    • Choosing fast-growing plants that quickly overwhelm the small space
    • Leaving fences or walls unpainted they dominate small gardens
    • Overplanting, leading to higher watering and maintenance costs

    FAQ

    1. Can I make a modern garden without replacing paving? Yes paint old paving, add gravel borders, or place modern pots to disguise worn areas.

    2. What’s the cheapest way to modernise a tiny garden? Painting fences dark, adding gravel, and using two or three large pots creates an immediate modern look.

    3. What colours work best in modern small gardens? Charcoal, black, grey, white, and natural wood tones.

    4. Are modern gardens low maintenance? Usually yes. They rely on fewer, simpler plants and clean lines.

    5. What kind of plants should I avoid? Fast spreaders, large shrubs, or anything requiring frequent pruning.

    When NOT to Use These Ideas

    • Avoid dark paint if your garden already feels very enclosed or gloomy.
    • Skip gravel if your garden is extremely windy stones can scatter.
    • Don’t choose highly reflective surfaces in full-sun courtyards they get uncomfortably hot.

    Alternative Approaches

    • Scandinavian-inspired minimalism (very light colours)
    • Mediterranean style with terracotta and drought-resistant plants
    • Japanese-inspired moss and stone layout
    • Wildlife-friendly modern gardens using native grasses and simple structures

    Conclusion

    A modern small garden on a budget isn’t just possible it’s one of the easiest styles to achieve. With smart use of gravel, dark paint, repeated plants, and a few strong pots, even the tiniest space can feel fresh, clean, and stylish. Start with the basics fence colour, one seating area, and a few architectural plants and build slowly. Modern design rewards simplicity, so your budget goes further and the garden stays easy to maintain all year.

  • Tiny front garden ideas

    Tiny front garden ideas

    Every product is independently reviewed and selected by our editors. If you buy something through our links, we may earn an affiliate commission at no extra cost to you.

    Tiny front gardens often feel impossible to design there’s barely any space, the soil is usually poor, and every plant or object has to earn its place. I’ve gardened in everything from narrow townhouse entrances to pocket‑sized terraces, and I’ve learned that tiny front gardens respond best to simple, intentional design with plants chosen for structure and reliability.

    If your front garden is just a sliver of soil, a tiny paved area, or a narrow strip along a path, don’t worry. With the right layout and plant choices, you can turn even the smallest entrance into a tidy, green, welcoming space.

    Why These Tiny Front Garden Ideas Work

    Tiny gardens succeed when you:

    • Use vertical space instead of relying on limited ground area
    • Focus on structure (form, shapes, height) over quantity
    • Choose plants that don’t outgrow the space
    • Keep pathways and entrances clear for movement
    • Work with the site’s light, drainage, and heat, not against them

    In my own small-space gardens, less always becomes more. A few well‑chosen elements outperform clutter every time.

    What Materials You’ll Need

    • Compact shrubs or small architectural plants
    • A couple of good-quality pots or raised containers
    • Trellis or wall-mounted planters
    • Gravel, mulch, or slate chips for tidy, low-maintenance surfaces
    • Basic tools (trowel, pruners, watering can)
    • Optional: solar lights, narrow edging, small boulders

    Sustainable tip: use peat-free compost and drought-tolerant plants to reduce watering needs.

    Tiny Front Garden Ideas (Practical & Beginner-Friendly)

    1. Use One Great Container as a Focal Point

    In tiny spaces, a single statement pot can transform the whole entrance.

    Best plants for this:

    • Dwarf olives
    • Bay trees
    • Compact conifers
    • Small ornamental grasses
    • Hebe or pittosporum mini varieties

    Place the pot where it doesn’t block movement typically beside the door or at a corner.

    2. Add Vertical Interest With Wall Planters or Trellis

    When ground space is limited, go up.

    You can:

    • Train star jasmine or clematis on a trellis
    • Use wall pockets for herbs and flowers
    • Hang three matching planters for symmetry

    This works incredibly well in narrow townhouse entrances.

    3. Create a Small Gravel Garden With Just a Few Plants

    Gravel keeps things tidy and low maintenance.

    Steps:

    • Lay a weed membrane.
    • Add edging.
    • Spread gravel or slate.
    • Plant only three to five structural plants.

    Great choices: lavender, dwarf grasses, small yuccas, sedum, rosemary.

    4. Add Ornaments or Boulders for Instant Structure

    In small spaces, stones or ornaments can create depth without crowding.

    Try:

    • One medium boulder with a few low plants around it
    • A small birdbath
    • A sculptural pot with nothing planted nearby

    This keeps the garden visually balanced.

    5. Plant a Mini Hedge for Privacy

    Even a tiny strip of soil can hold a compact hedge.

    Good small-space hedges:

    • Box (or box alternatives like Ilex crenata)
    • Lonicera nitida
    • Dwarf pittosporum
    • Lavender (a fragrant “hedge” option)

    Keep them regularly trimmed to maintain shape.

    6. Use Groundcover Plants Instead of Multiple Pots

    These soften harsh edges and make the space look bigger.

    Reliable options:

    • Creeping thyme
    • Erigeron (Mexican fleabane)
    • Stonecrop sedums
    • Snow-in-summer

    Once established, they need very little care.

    7. Add a Simple Stepping-Stone Path

    Even two or three stepping stones give direction and prevent muddy shoes.

    Use contrasting gravel around the stones to make them pop.

    Pro Tips & Best Practices

    • Choose compact or slow-growing plants tiny gardens cannot handle rapid spreaders.
    • Avoid too many small pots; one or two larger ones look cleaner.
    • Keep sightlines open don’t block windows or door visibility.
    • Use evergreen plants for year-round appeal.
    • Test sunlight patterns before planting; tiny spaces can shift from shade to full sun quickly.

    Common Beginner Mistakes

    • Overcrowding the space with lots of small plants
    • Choosing plants that grow too big within one season
    • Using mismatched pots (creates visual clutter)
    • Forgetting to mulch soil dries out fast in small exposed areas
    • Ignoring shade levels (front gardens often get reflected heat from walls)

    FAQ

    1. How do I make a tiny front garden look bigger? Use vertical elements, limit your color palette, and choose one strong focal point instead of many small items.

    2. What plants are best for very small front gardens? Lavender, dwarf grasses, compact hebes, rosemary, small pittosporum, and sedum all do well.

    3. Can I use gravel in a tiny front garden? Yes gravel is perfect for small spaces because it’s tidy, permeable, and low-maintenance.

    4. How do I maintain privacy in a tiny front garden? Use a narrow hedge, tall ornamental grasses, or a trellis with evergreen climbers.

    5. What if my front garden gets no sun? Choose shade lovers like ferns, heuchera, ivy, or small evergreen shrubs adapted to low light.

    When NOT to Use Certain Ideas

    • Avoid tall plants if your doorway is narrow or you need clear sightlines.
    • Don’t use thirsty plants in hot, south-facing entrances they’ll struggle in small soil pockets.
    • Skip mixed stone types if the area is tiny it can look messy instantly.

    Alternative Approaches

    • A potted-only garden (easiest for renters)
    • A simple evergreen planting strip with mulch
    • A minimal Japanese-inspired gravel entrance
    • A modern look with concrete planters and architectural plants

    Choose the style that suits the house exterior and your maintenance level.

    Conclusion

    A tiny front garden doesn’t limit your creativity it simply asks you to be intentional. With a few smart choices like a strong focal pot, vertical planting, simple gravel, and compact shrubs you can create a clean, stylish entrance that stays low‑maintenance and welcoming all year. Tiny spaces thrive on restraint, good structure, and plants that behave. Start small, observe how the space feels through the seasons, and refine as you go.

  • Small front garden ideas with stone

    Small front garden ideas with stone

    Every product is independently reviewed and selected by our editors. If you buy something through our links, we may earn an affiliate commission at no extra cost to you.

    Most small front gardens struggle with the same issues: poor soil, awkward shapes, limited planting space, and the constant battle to keep things tidy. I’ve worked on several tight front plots some barely wider than a front door step and I’ve found that using stone is one of the simplest ways to create structure, cut maintenance, and make plants stand out.

    Stone doesn’t just look good. It solves real problems: drainage improves, weeds drop dramatically, and the space feels cleaner and more intentional. Whether you’re working with a tiny strip along the path or a compact square near the entrance, stone gives you options that plants alone can’t.

    Why Stone Works So Well in Small Front Gardens

    Stone is effective in small spaces because it:

    • Makes the garden look larger through clean, uncluttered surfaces
    • Helps manage compacted or poor-quality soil (common near front doors and paths)
    • Reduces watering needs by keeping soil temperatures stable
    • Minimizes maintenance—no mowing, less weeding, no mud splashing
    • Adds contrast and texture that enhances even the simplest plants
    • Handles sun, shade, and urban pollution far better than traditional lawns

    In real gardens, especially small ones, stone acts like a foundation. Once it’s in place, the rest of the design becomes easier.

    What Materials You’ll Need

    • Decorative gravel, slate chippings, cobbles, or stepping stones
    • Weed membrane
    • Strong edging (metal, stone setts, timber)
    • A rake, bucket, hand trowel, gloves
    • A few structural, low‑maintenance plants
    • Optional: feature pots, solar lights, boulders, or raised planters

    Eco‑friendly tip: choose local stone where possible it reduces transport impact and blends naturally with your region’s landscape.

    Step‑by‑Step Small Front Garden Ideas With Stone

    1. Create a Simple Gravel Garden With Drought‑Tolerant Plants

    This is one of the easiest designs for beginners and works brilliantly in sunny spots.

    Steps:

    1. Clear the area and level the soil.
    2. Lay edging to contain the gravel (important in small spaces).
    3. Spread a weed membrane.
    4. Cut holes only where you plan to plant.
    5. Add gravel (10–20 mm is ideal).
    6. Plant lavender, rosemary, dwarf grasses, or sedum.

    This combination looks modern, drains beautifully, and needs very little upkeep.

    2. Build a Mini Rockery for Texture and Height

    If your front garden has an awkward slope or an uneven patch, a rockery makes the problem look intentional.

    How to do it:

    • Position two or three medium stones or boulders as focal points.
    • Add gritty compost around them.
    • Plant alpines like creeping thyme, aubrieta, heather, or saxifrage.
    • Cover remaining soil with gravel or slate.

    The mix of height and texture gives a small garden depth without clutter.

    3. Use Stone to Frame a Statement Pot

    In tiny gardens, one good pot often looks better than five small ones.

    Try:

    • A tall glazed pot surrounded by pale gravel
    • A concrete planter paired with dark slate chips
    • A terracotta pot framed by warm-toned stones

    Plant ideas: dwarf olives, bay, small conifers, or evergreen grasses.

    4. Add a Stepping‑Stone Path Through Gravel

    A few well‑spaced stepping stones instantly make a front garden feel more designed.

    Tips from real installations:

    • Set stones at a natural walking stride.
    • Ensure they sit slightly above the gravel so they don’t wobble.
    • Use a contrasting stone color so the path stands out.

    5. Choose Slate Chips for Modern Shaded Gardens

    If your front garden sits in partial shade, slate is your friend it stays cool, holds moisture better, and looks sleek.

    Plant combinations I’ve used successfully:

    • Heuchera (many colors to choose from)
    • Ferns
    • Hakonechloa (Japanese forest grass)
    • Dwarf pittosporum
    • Hebes

    Slate + evergreen plants = a tidy, year‑round look.

    6. Create a Cobble Border Along the Path or Driveway

    A cobble strip makes edges look sharp and helps manage drainage.

    How to use it:

    • Lay cobbles in a neat single or double line
    • Plant low shrubs behind the cobbles (lavender, boxwood, hebe)
    • Cover the soil with gravel for a seamless finish

    7. Use Stone with Groundcovers for a Softer Look

    If you want stone without the “too dry” appearance, mix in groundcovers that weave through the gaps.

    Good options:

    • Creeping thyme
    • Erigeron (Mexican fleabane)
    • Snow‑in‑summer
    • Low-growing sedums

    These plants thrive with almost no care once established.

    Pro Tips & Best Practices

    • Choose one main stone type for a small space too many makes it look busy.
    • Match the stone color to your home: warm tones for brick, cool tones for grey render.
    • Use a weed membrane unless you enjoy regular weeding.
    • Add generous soil pockets for each plant; gravel dries quickly.
    • Water deeply for the first few months—stone gardens fool beginners into under‑watering.

    Common Beginner Mistakes

    • Using gravel that’s too fine (it compacts and vanishes into the soil).
    • Skipping edging—gravel spreads everywhere without it.
    • Overfilling with plants; stone gardens look best with breathing room.
    • Placing thirsty plants in full sun next to reflective stone (hostas and hydrangeas struggle).

    FAQ

    1. What stone is best for a small front garden? Gravel (10–20 mm), slate chips, and cobbles are the most practical and low-maintenance options.

    2. Will weeds grow through gravel? A few might, but a good membrane and 3–5 cm of gravel keep weed growth very low.

    3. Which plants thrive in stone gardens? Lavender, grasses, rosemary, sedum, thyme, and compact evergreens all do exceptionally well.

    4. Is a stone front garden eco‑friendly? It can be—especially if you use permeable gravel, local stone, and drought-tolerant plants that support pollinators.

    5. Can I use stone in a shady front garden? Yes. Slate and cobbles work beautifully in shade, especially with ferns and heuchera.

    6. Does stone make a garden hotter? In sunny spots, yes—stone reflects heat. That’s why drought-resistant plants are the safest choice.

    When NOT to Use Stone

    • If your front garden has drainage problems—stone won’t fix standing water
    • In extremely windy areas where lightweight gravel may blow around
    • If you have toddlers or pets that scatter stones onto pavements
    • If your area regulates impermeable materials (check local guidelines)

    Alternative Ideas

    • Mulched borders (softer, more wildlife-friendly, but more upkeep)
    • Groundcover-only front gardens (lush but require patience while plants spread)
    • Paved courtyards with a few big pots (clean look, minimal planting)
    • Mini front lawns (traditional but highest maintenance)

    Each approach has strengths, but stone remains the most beginner-friendly and adaptable.

    Conclusion

    You don’t need much space to create a stylish, low-maintenance entrance. With the right combination of gravel, slate, cobbles, or boulders, even the tiniest front garden can look structured, modern, and welcoming. Start with one idea—a gravel bed with a few architectural plants or a simple stepping‑stone path—and build from there. Stone is forgiving, long‑lasting, and incredibly effective in small gardens, making it one of the easiest ways to instantly transform your front entrance.