Every product is independently reviewed and selected by our editors. If you buy something through our links, we may earn an affiliate commission at no extra cost to you.
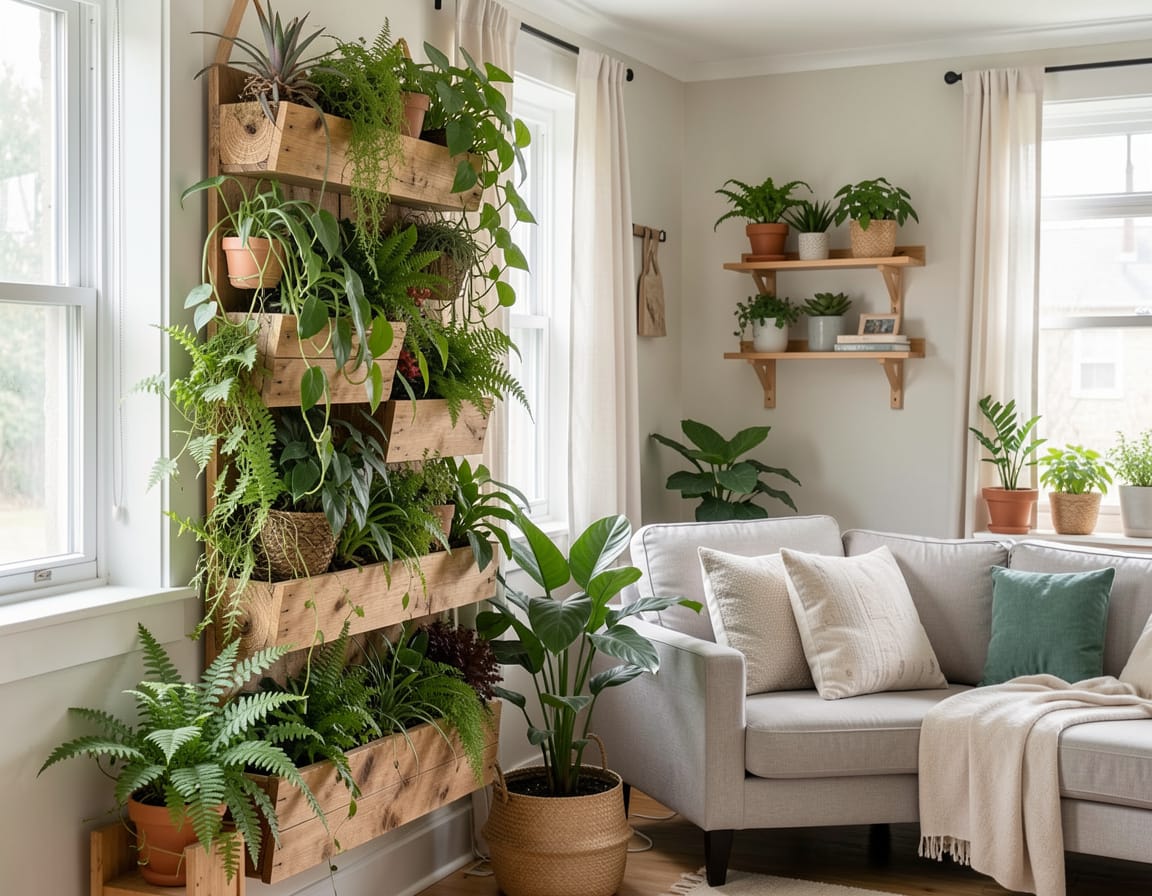
If you’ve ever wished for more greenery but felt limited by space, learning how to make a vertical garden at home can completely change how you think about indoor nature. A vertical garden turns a plain wall, balcony, or fence into a living piece of art that purifies air, improves mood, and supports a healthier environment.
In my work designing organic home spaces for U.S. homeowners and renters, vertical gardens have become one of the most requested features not only for their beauty but also for their health and sustainability benefits. They allow even small apartments or shaded patios to enjoy thriving greenery without cluttering valuable floor area.
Why a Vertical Garden Matters
- Health and air quality: Plants act as natural filters, absorbing carbon dioxide and VOCs (volatile organic compounds) from paints and furniture.
- Mental well-being: Greenery reduces stress, promotes calm, and supports focus a noticeable benefit in high-stress households or home offices.
- Sustainability: Vertical gardens can use repurposed materials, conserve water, and rely on organic fertilizers instead of synthetics.
- Aesthetic and comfort: Living walls soften harsh interiors, reduce noise, and give even small spaces a sense of calm vitality.
Everyday Organic Styling & Care Routine
A vertical garden isn’t something you “install and forget.” It thrives with steady, simple care a few minutes a week keeps it lush year-round.
Weekly Habits
- Check moisture: Stick your finger one inch into the soil. If dry, water gently from the top down.
- Mist foliage: Indoor plants benefit from humidity; mist with filtered or rainwater once a week.
- Prune and compost: Remove yellowing leaves to prevent fungi. Compost the trimmings.
- Inspect for pests: Check undersides of leaves; treat early with diluted neem oil or insecticidal soap.
- Rotate or reposition: Even lighting helps balanced growth rotate plants every few weeks if one side receives stronger light.
What You’ll Need
| Item | Why It’s Used | Organic / Health Benefits | Sustainability Notes |
| Vertical frame or structure | Holds containers or pockets | Keeps plants upright and organized | Use untreated wood, bamboo, or recycled metal |
| Plant containers or fabric pockets | Houses root systems | Allows airflow and drainage | Choose natural fibers like jute or recycled felt |
| Organic potting mix | Medium for healthy roots | Free of synthetic fertilizers | Look for OMRI-certified or peat-free mixes |
| Compost or worm castings | Fertilizer and soil booster | Adds beneficial microbes | Diverts food waste from landfill |
| Watering system (manual or drip) | Ensures consistent moisture | Reduces overwatering | Drip systems conserve water |
| Lighting (if indoors) | Supports photosynthesis | Improves plant resilience | Use energy-efficient LED grow lights |
| Suitable plants | Main visual element | Cleans air, adds texture | Choose low-maintenance, native, or adaptive varieties |
Step-by-Step: How to Make a Vertical Garden at Home
Step 1: Choose the Right Location
Select a wall or railing that gets at least 4 hours of natural light daily. East- or west-facing walls are ideal. If your home lacks sunlight, use full-spectrum grow lights.
Step 2: Build or Install the Frame
You can buy modular systems or build your own using reclaimed wood or metal mesh. Securely mount it or use a freestanding structure if you rent. Always place a waterproof backing behind indoor installations to protect the wall.
Step 3: Prepare the Soil
Use a mix of:
- 1 part organic potting mix
- 1 part compost or worm castings
- 1 part coconut coir or perlite (for drainage)
Avoid heavy garden soil it compacts and suffocates roots.
Step 4: Choose the Right Plants
Group plants by water and light needs:
- High light: herbs (basil, thyme), succulents
- Medium light: ferns, philodendrons, pothos
- Low light: snake plant, ZZ plant, peace lily
In outdoor setups, you can mix edibles like strawberries, lettuces, or peppers with flowering pollinator plants.
Step 5: Plant and Water
Place taller or sun-loving plants near the top and shade-tolerant ones near the bottom. Water slowly from the top down until moisture runs through lower pockets.
Step 6: Maintain and Refresh Seasonally
Every 3–4 months, refresh the soil surface with compost, trim overgrowth, and replace any struggling plants. Rotate panels to even out light exposure.
Prevention & Sustainability Tips
- Don’t overwater: Root rot is the most common failure point. Good drainage and moderation are key.
- Avoid synthetic fertilizers: They cause salt buildup and disrupt beneficial microbes.
- Reuse materials: Old wooden pallets, ceramic pots, or glass jars make excellent planters.
- Compost spent soil: When replacing plants, recycle the old soil in your compost bin.
- Harvest rainwater: It’s chlorine-free and ideal for watering.
Common Mistakes to Avoid
- Using treated lumber: Pressure-treated wood can leach toxins; use cedar, redwood, or sealed untreated pine.
- Ignoring drainage: Fabric pockets and containers need holes or air gaps.
- Poor wall protection: Indoors, always use waterproof barriers to prevent mold or stains.
- Too little light: Plants in dim corners won’t thrive without supplemental lighting.
- Overcrowding: Give roots room; crowding leads to poor airflow and disease.
Local Adaptations for U.S. Homes
- Apartments or rentals: Freestanding frames or hanging pocket systems avoid drilling walls.
- Urban balconies: Go for wind-tolerant plants like rosemary, jade, or sedum.
- Suburban homes: Mix edibles (spinach, lettuce, basil) and ornamentals for dual use.
- Dry climates (Southwest): Use drought-tolerant natives like agave, yucca, and echeveria.
- Humid regions (Southeast): Ferns, philodendrons, and mosses thrive naturally.
Advanced Expert Tips
- Add a timer to drip irrigation for precise watering and water savings.
- Layer textures trailing vines, upright herbs, and flowering species create depth.
- Use edible vertical gardens near kitchens or patios for fresh herbs year-round.
- Install grow lights on smart plugs to automate photoperiods.
- Winterize outdoor setups by mulching roots or moving portable panels indoors.
- Budget idea: Propagate your own cuttings pothos, philodendron, and spider plants root easily in water.
FAQs: How to Make a Vertical Garden at Home
Q1. Can I make a vertical garden indoors? Yes. Use LED grow lights and choose adaptable indoor species like pothos, ferns, and philodendrons.
Q2. How often should I water a vertical garden? Usually every 3–5 days indoors, depending on humidity and temperature. Always check soil moisture before watering.
Q3. What’s the best soil for a vertical garden at home? A light, organic mix of compost, potting soil, and coconut coir provides nutrients, aeration, and water retention.
Q4. How do I prevent pests naturally? Keep leaves clean, avoid overwatering, and spray neem oil solution monthly as a preventive measure.
Q5. Can I grow vegetables in a vertical garden? Yes lettuce, spinach, strawberries, and cherry tomatoes do well with adequate light and spacing.
Q6. What’s the easiest plant to start with? Pothos or philodendron they’re forgiving, grow well in varying light, and adapt easily to vertical conditions.
Q7. How can I make it renter-friendly? Use free-standing racks or modular wall pockets attached with removable hooks to avoid drilling.
Conclusion: A Living Wall for a Healthier Home
When you understand how to make a vertical garden at home, you’re really learning how to harmonize design, health, and ecology in your living space. Whether your goal is fresh herbs in the kitchen or a lush living wall as a statement piece, the process is simple, satisfying, and deeply rewarding.
Start small, observe how your plants respond, and build from there. Within a few weeks, you’ll notice cleaner air, calmer energy, and a tangible connection to nature right where you live sustainably and beautifully.