Every product is independently reviewed and selected by our editors. If you buy something through our links, we may earn an affiliate commission at no extra cost to you.
If you love fresh, peppery greens but have limited outdoor space, learning how to grow arugula indoors is one of the easiest ways to bring a steady supply of flavor into your kitchen. Arugula (Eruca sativa), sometimes called rocket or roquette, is a fast-growing leafy green that thrives in containers, small apartments, and even low-light kitchens when cared for properly.
From my experience helping homeowners and renters across the U.S. create productive organic indoor gardens, I can say that arugula is surprisingly forgiving. It germinates quickly often within a week and you can harvest tender leaves in just three to four weeks. With the right light, soil, and watering routine, you can enjoy crisp, flavorful greens all year without stepping outside.
In this guide, I’ll walk you step-by-step through growing arugula indoors organically: from seed to harvest. You’ll learn how much light it needs, what soil works best, how to keep pests away naturally, and how to harvest for continuous regrowth.
Why Grow Arugula Indoors?
Growing arugula indoors offers multiple benefits beyond convenience:
- Freshness: You can harvest exactly when you need it, ensuring the best flavor.
- Sustainability: Reduces food waste and eliminates plastic packaging from store-bought greens.
- Health: Indoor-grown arugula avoids chemical sprays and pesticide residue.
- Beauty: Its bright, serrated leaves add a natural, vibrant touch to kitchen décor.
For anyone practicing organic home decoration or sustainable living, indoor arugula fits perfectly it’s both functional and aesthetic.
What You’ll Need
| Item | Purpose | Organic Benefit | Sustainability Tip |
| Arugula seeds | Start your crop | Choose certified organic, non-GMO varieties | Buy from local seed suppliers to reduce shipping footprint |
| Container or tray (3–6 inches deep) | Holds soil and roots | Reusable and easy to manage indoors | Repurpose ceramic bowls or wooden boxes with drainage holes |
| Organic potting mix | Growing medium | Free from synthetic fertilizers | Choose compost-based blends with coco coir or perlite |
| Light source | For photosynthesis | Natural sunlight or full-spectrum grow light | Use energy-efficient LED lights |
| Watering can or spray bottle | To maintain moisture | Keeps soil evenly damp | Refill with rainwater if possible |
Step-by-Step: How Do You Grow Arugula Indoors
1. Choose the Right Container
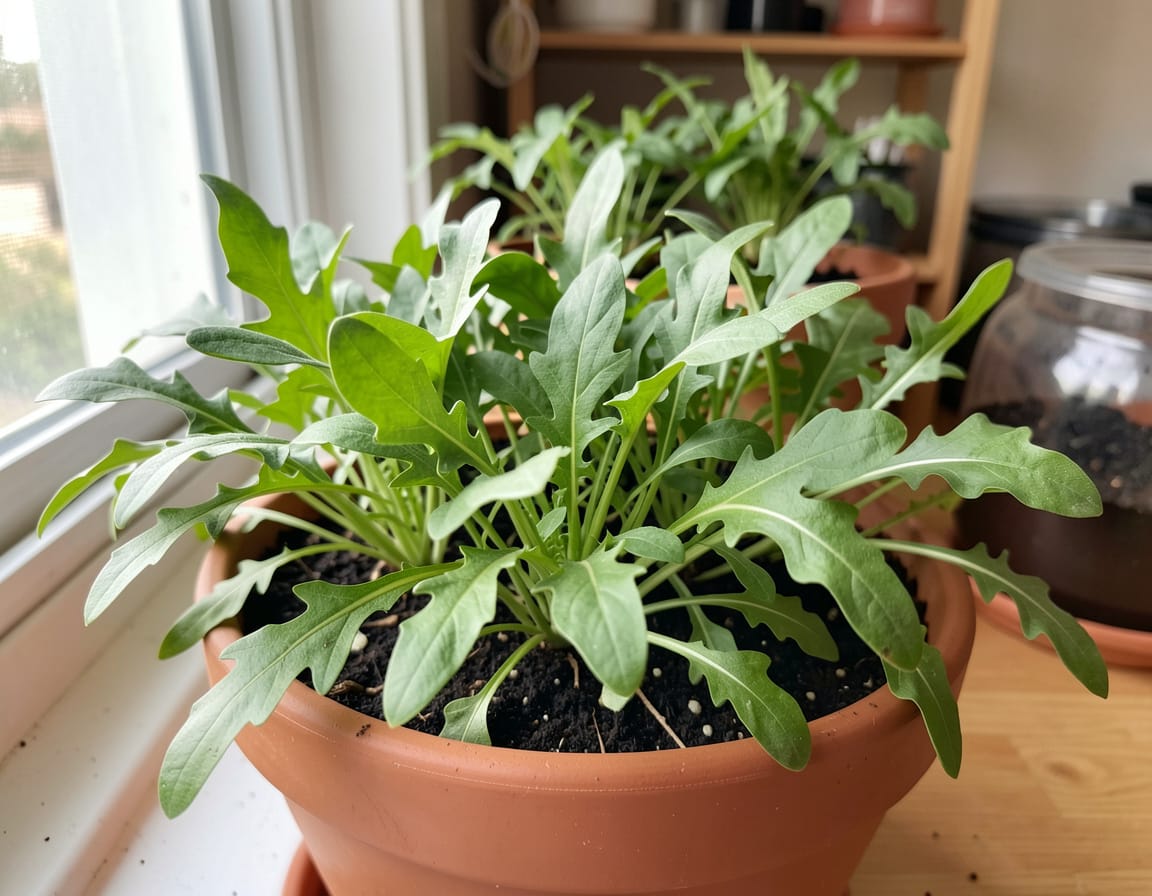
Arugula doesn’t need deep soil 3 to 6 inches is enough. Make sure your container has good drainage holes. For apartment dwellers, shallow trays or window boxes work perfectly.
2. Prepare the Soil
Use a light, nutrient-rich organic potting mix. I blend my own with equal parts compost, coco coir, and perlite. Avoid heavy garden soil; it compacts easily and limits airflow around roots.
3. Sow the Seeds
Sprinkle seeds evenly across the soil surface, leaving about 1 inch between them. Gently press them into the soil or cover lightly with ¼ inch of mix. Water gently with a fine spray.
4. Provide the Right Light
Arugula prefers 4–6 hours of bright, indirect sunlight daily. A sunny kitchen window or under a full-spectrum grow light for 12–14 hours works well. If you notice elongated stems (a sign of low light), move the container closer to the window or increase artificial light exposure.
5. Keep Soil Moist but Not Soggy
Consistent moisture is key. Water when the top of the soil feels dry to the touch. I recommend bottom watering place the container in a shallow dish of water for 10 minutes to let soil absorb moisture evenly.
6. Maintain Cool Temperatures
Arugula prefers cooler conditions between 60°F and 70°F. Avoid placing it near heaters or direct hot air vents. In warmer regions, a light curtain helps diffuse heat from intense sunlight.
7. Thin Seedlings
Once seedlings are about 2 inches tall, thin them out by clipping weaker plants. Leave about 2 inches of space between each to ensure proper airflow and leaf development.
8. Harvest Regularly
You can start harvesting tender leaves in just 3–4 weeks after sowing. Use clean scissors to snip outer leaves, allowing inner ones to continue growing. With consistent care, your arugula will produce for several weeks before needing replanting.
Common Mistakes to Avoid
| Mistake | Why It’s a Problem | Expert Fix |
| Too little light | Leads to leggy, weak leaves | Move closer to a window or add grow light |
| Overwatering | Causes root rot | Allow the top inch of soil to dry between waterings |
| High indoor temperature | Arugula bolts and turns bitter | Keep plants in cooler rooms or shaded from harsh sun |
| Crowding seedlings | Reduces airflow and promotes mildew | Thin plants early for better spacing |
| Using synthetic fertilizer | Weakens soil microbiome | Use diluted compost tea or worm castings instead |
Organic Care and Sustainability Tips
- Feed naturally: Every few weeks, water with compost tea or diluted organic seaweed fertilizer.
- Pest prevention: Arugula can attract aphids indoors. A gentle spray of neem oil or soapy water once every two weeks keeps them away naturally.
- Reuse soil responsibly: After harvest, refresh old soil with compost before replanting.
- Rotate crops: Change the herb or leafy green grown in the same pot every few cycles to maintain soil health.
Realistic U.S. Home Scenarios
- Apartments with low light: Pair arugula with a small LED grow light on a timer.
- Urban kitchens: Place trays on window ledges for easy access when cooking.
- Suburban homes: Grow near east-facing windows for cool morning sun.
- Cold regions: Arugula thrives indoors during winter when outdoor gardening isn’t practical.
- Hot southern climates: Keep plants inside during summer outdoor heat can cause rapid bolting.
Extra Expert Tips
- Successive planting: Sow a new batch every 10–14 days for continuous harvests.
- Mix varieties: Try ‘Astro’ for fast growth or ‘Rocket’ for extra peppery flavor.
- Harvest timing: Pick leaves early in the morning for the best texture and taste.
- Microgreens option: If space is limited, grow arugula as microgreens harvest in just 10 days.
- Pair with décor: Arugula’s bright leaves complement natural kitchen materials like wood, ceramic, and stone perfect for organic home styling.
Frequently Asked Questions
1. How much light does arugula need indoors? Arugula needs at least 4–6 hours of bright, indirect sunlight or 12 hours under a full-spectrum grow light each day.
2. How often should I water arugula indoors? Water when the soil surface feels dry, usually every 2–3 days depending on humidity and container size.
3. Can I grow arugula year-round indoors? Yes. With consistent light and cool temperatures, arugula grows indoors in any season.
4. How long does it take to harvest arugula grown indoors? You can begin harvesting tender leaves in about 3 to 4 weeks after sowing seeds.
5. Do I need fertilizer for indoor arugula? Only light feeding is necessary. Use compost tea or diluted organic seaweed fertilizer every few weeks.
6. Why is my arugula turning bitter? Bitterness usually indicates high heat or too much direct sunlight. Keep your plants cooler and harvest leaves early.
Conclusion
So, how do you grow arugula indoors? Start with organic seeds, a shallow container, rich compost-based soil, consistent moisture, and 4–6 hours of indirect sunlight daily. Within just a few weeks, you’ll be harvesting crisp, flavorful greens right from your windowsill.
Arugula is one of the most rewarding herbs to grow indoors it’s quick, space-efficient, and perfectly suited for sustainable, organic living. Whether you live in a city apartment or a suburban home, mastering indoor arugula growing brings fresh, toxin-free produce to your fingertips and a touch of green freshness to your home décor year-round.