Category: Low Maintenance Plants

  • Can plant roots grow sideways | Real‑World Guide for Home and Balcony

    Can plant roots grow sideways | Real‑World Guide for Home and Balcony

    Every product is independently reviewed and selected by our editors. If you buy something through our links, we may earn an affiliate commission at no extra cost to you.

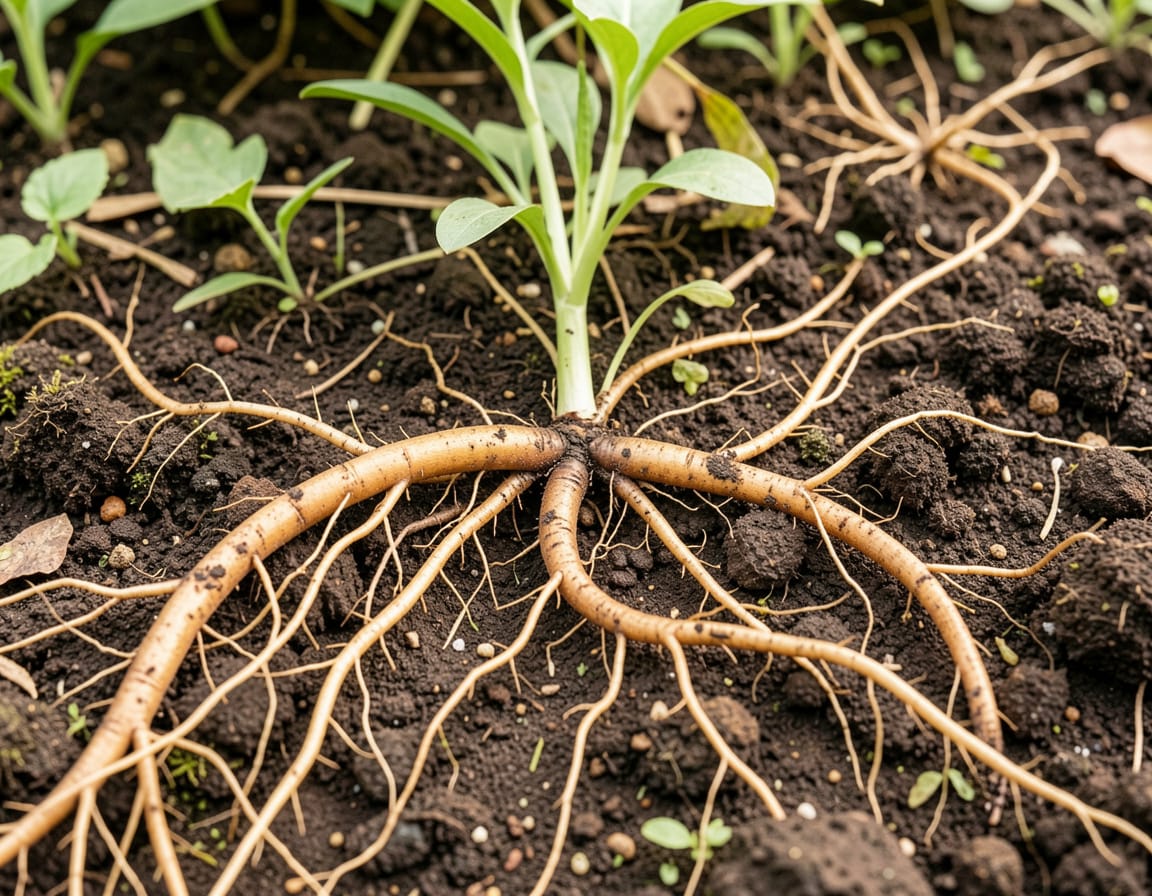
    If you’ve ever pulled up a pot-bound plant or dug around a raised bed, you may have noticed roots spreading in all directions sometimes even circling the container. Many beginners wonder: can plant roots grow sideways, or are they supposed to grow straight down?

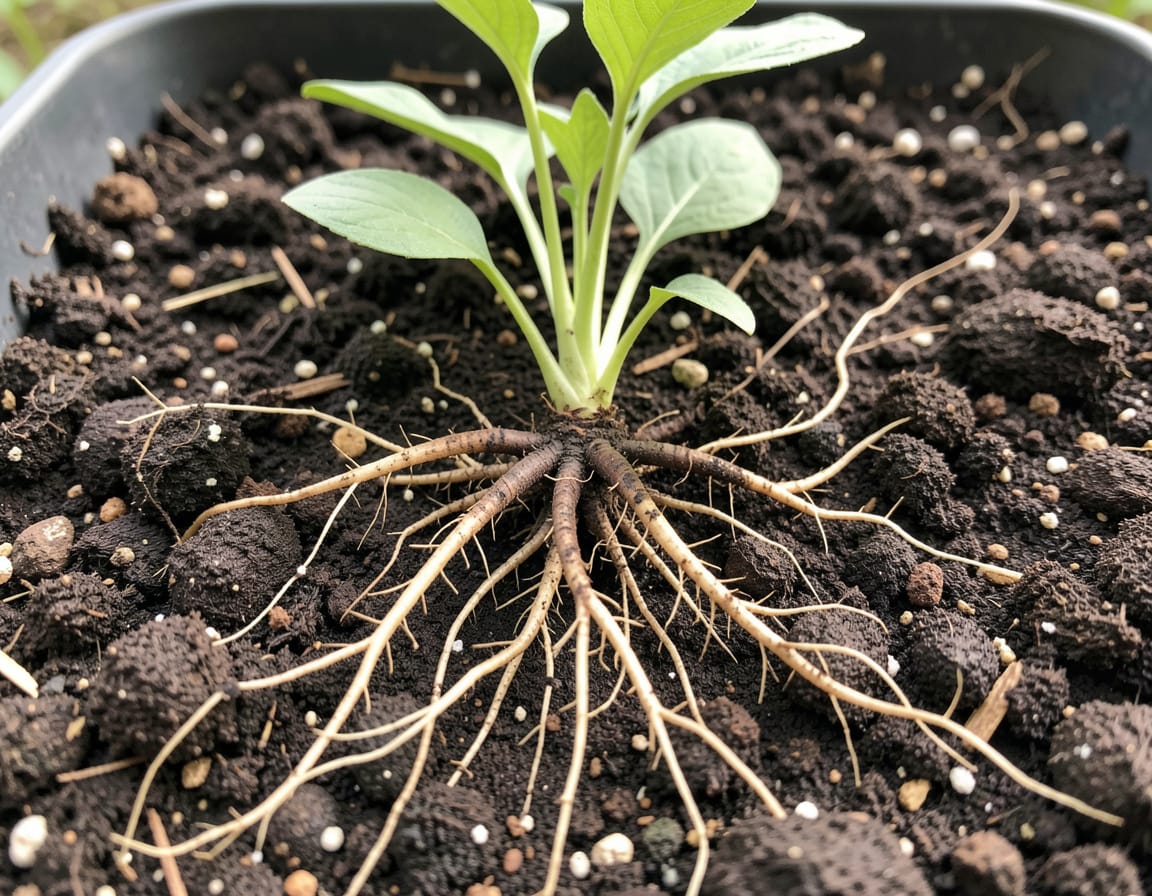
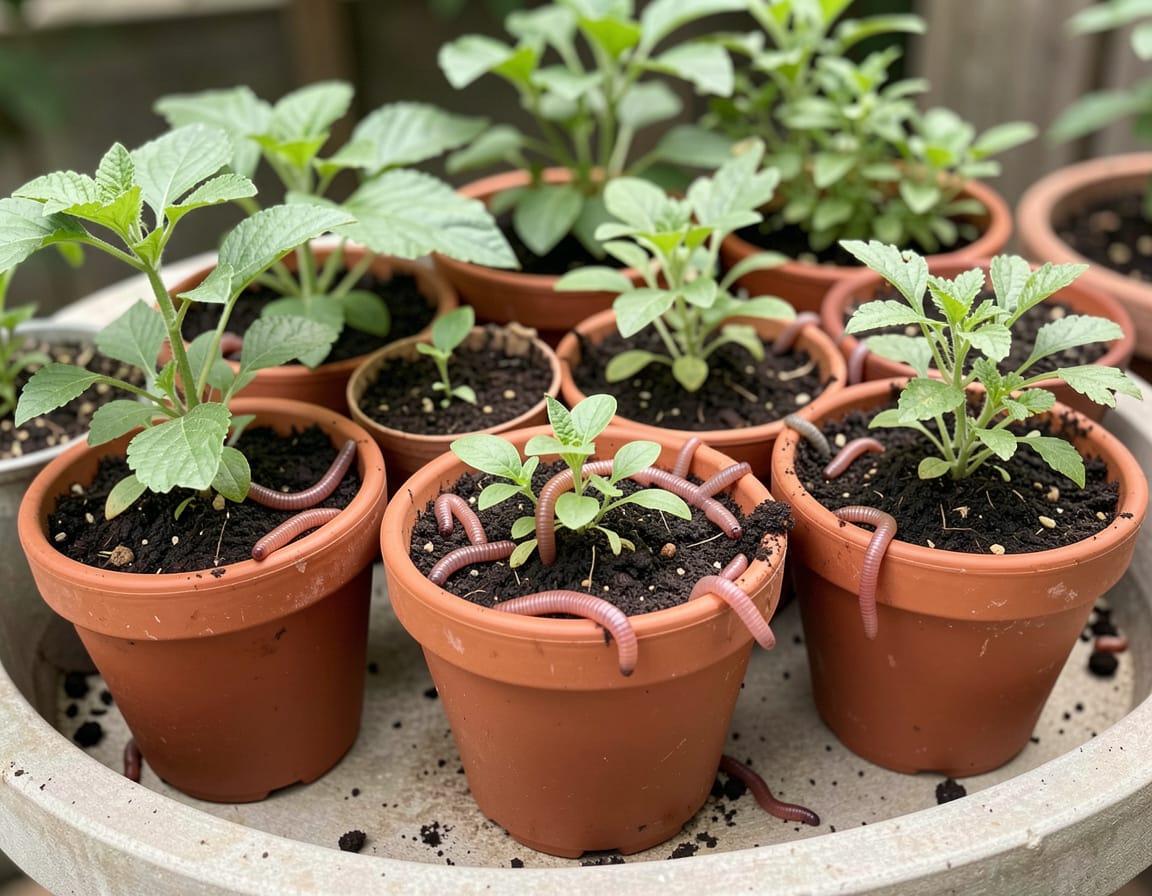
    In real home gardens especially containers, balcony pots, and small beds roots grow sideways all the time. They often need to. When I first started container gardening on a small terrace, I assumed deep pots meant deep roots. But over time, I found roots spreading horizontally because that’s where the moisture, nutrients, and oxygen were.

    Understanding why roots grow sideways helps you choose better pots, improve soil mixes, and avoid issues like pot-bound plants or poor drainage.

    Why This Happens: The Biology Behind Sideways Root Growth

    Plant roots follow simple survival rules:

    • They grow where water and oxygen are available. In compacted or wet soil, roots shift sideways to find air pockets.
    • They avoid obstacles. Rocks, pot edges, and heavy clay push roots outward.
    • They search horizontally for nutrients. Most nutrients accumulate in the top 6–12 inches of soil, especially in garden beds.
    • Container walls redirect growth. In pots, roots hit the sides and then travel sideways or circle.

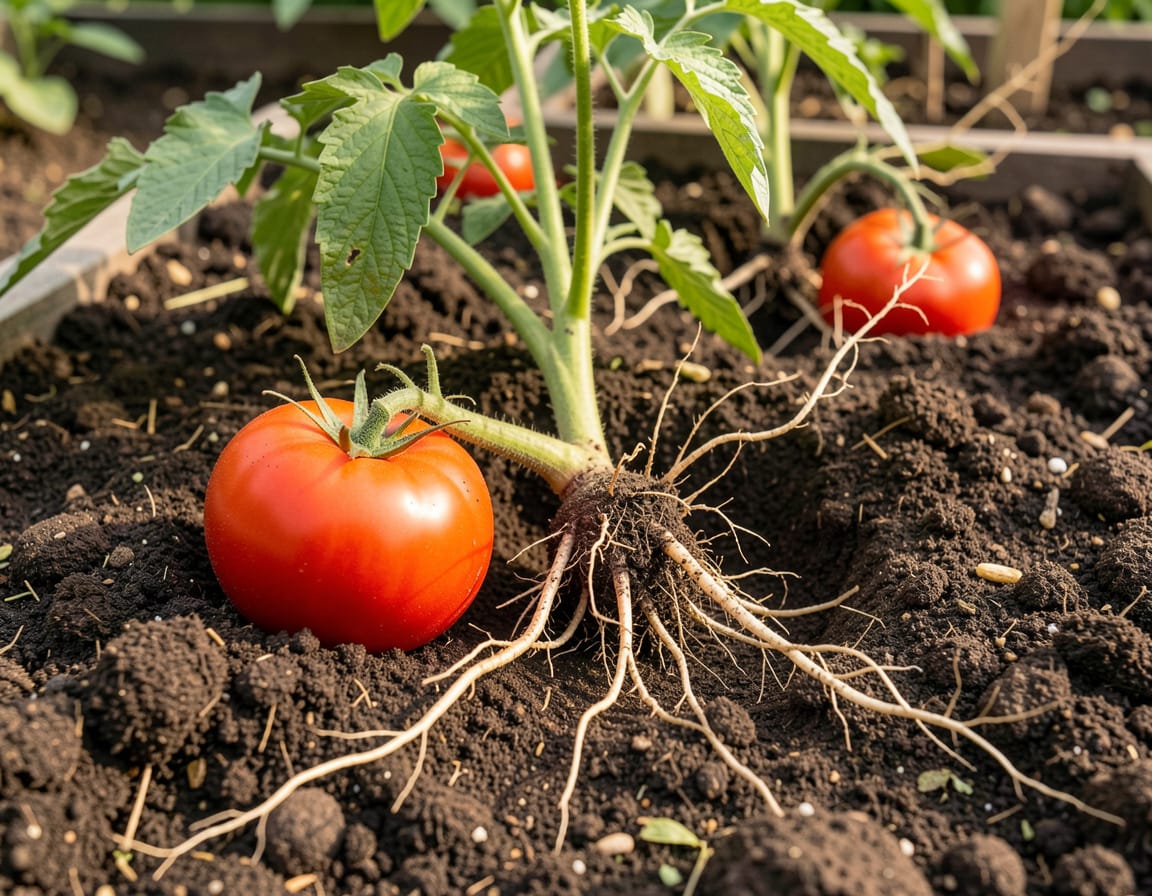
    In my containers, I’ve often seen tomatoes, peppers, and even lettuce spreading roots outwards far more than downward especially in shallow, wide pots.

    What You’ll Need

    (Only if you’re planning to check or improve root growth)

    • A hand trowel or transplanter
    • Well-draining potting mix (coco coir + compost + perlite works well)
    • A wide container if you’re repotting
    • Gloves (especially when handling compost)
    • Watering can with a fine rose
    • Optional: organic fertilizer or worm castings

    Budget-friendly alternatives: recycle nursery pots or use homemade compost to improve soil texture.

    How to Support Healthy Sideways Root Growth

    1. Choose the Right Container Shape

    For most crops, wide pots are more useful than deep pots.

    • Herbs, lettuce, peppers, strawberries do best in shallow, broad containers.
    • Only a few plants (carrots, potatoes, taproot herbs) require depth.

    If roots can spread sideways without circling, plants grow faster and stay healthier.

    2. Use Loose, Airy Potting Mix

    Roots naturally spread sideways in loose soil. Mix:

    • 40% compost
    • 40% coco coir or peat
    • 20% perlite or coarse sand

    Heavy garden soil in pots causes horizontal root growth for the wrong reasons because roots are suffocating.

    3. Water Evenly Across the Soil Surface

    Inconsistent watering forces roots to chase moisture sideways instead of forming a stable structure.

    Water until:

    • The entire surface is moist,
    • Water drains from the bottom of the pot.

    In outdoor beds, drip lines encourage even sideways root spread.

    4. Gently Loosen Roots When Repotting

    If container roots have begun circling sideways, tease them apart so they can grow outward into fresh soil.

    5. Avoid Over-Compaction

    Pressing soil too tightly reduces oxygen and pushes roots sideways.

    In my garden, I lightly tap pots to settle mix and avoid heavy hand-packing.

    Pro Tips & Best Practices

    • Root mats on the soil surface often mean the plant is searching for oxygen improve aeration.
    • Sideways roots near pot edges can indicate the container is too small.
    • Horizontal spread in raised beds is normal; most feeder roots live in the top 6–12 inches.
    • Fabric pots allow air-pruning, preventing circling roots.
    • Water deeply but not excessively. Constantly wet soil forces shallow, sideways rooting.

    Common Beginner Mistakes

    • Using garden soil in pots (too dense)
    • Choosing tall, narrow pots for shallow-rooted plants
    • Ignoring circling roots during repotting
    • Overwatering, which pushes roots to oxygen pockets near edges

    FAQ

    1. Why are my plant’s roots growing sideways instead of down? Usually because they’re searching for oxygen or hitting obstacles like pot walls or compacted soil.

    2. Is sideways root growth bad for my plants? Not always. Sideways roots are normal in pots and raised beds. It’s only a problem when roots start circling tightly.

    3. Can I fix circling roots? Yes. Tease them apart gently when repotting, or prune lightly if they’re very dense.

    4. Do certain plants naturally grow more sideways? Yes herbs, strawberries, lettuces, and most annual vegetables have shallow, spreading root systems.

    5. Will deeper pots encourage downward growth? Only if the soil is airy and consistently moist. Depth alone does not guarantee deeper rooting.

    When NOT to Encourage Sideways Root Growth

    • Root vegetables like carrots, radishes, and beets need depth. Sideways growth causes deformities.
    • In very narrow balconies or railing planters, excessive sideways roots can compact soil faster.
    • Poor drainage conditions cause sideways rooting from stress, not healthy development.

    If soil is constantly wet, fix drainage first.

    Alternative Methods or Solutions

    If sideways growth becomes a problem:

    • Air-pruning containers prevent circling roots.
    • Raised beds offer natural horizontal space and prevent compaction.
    • Soil amendments like perlite or pine bark create better downward aeration.

    Each method works well for different garden setups; beginners often prefer fabric pots for effortless root management.

    Conclusion

    So, can plant roots grow sideways? Absolutely and in real home gardens, they do it all the time. Sideways root growth is natural, especially in containers, raised beds, and loose soil mixes. With the right pot size, proper watering, and breathable soil, sideways growth leads to stronger, healthier plants.

    Support natural root behavior, stay observant, and adjust your soil or container choice as your plants “tell” you what they need. Sustainable gardening isn’t about forcing roots downward it’s about giving them room to grow in the direction that keeps them thriving.

  • Do i need to loosen roots before planting

    Do i need to loosen roots before planting

    Every product is independently reviewed and selected by our editors. If you buy something through our links, we may earn an affiliate commission at no extra cost to you.

    Planting up a vibrant garden is always exciting whether you’re filling balcony pots, tending a small backyard, or expanding your terrace beds. But one question stumps many beginners: Do I need to loosen roots before planting?

    From hands-on experience in my own varied home garden setups, I’ve learned that how you handle those roots can have a real, visible impact on your plants’ health and growth. Let’s look at when (and how) to loosen roots before planting, why it works, and what to watch out for so you can plant with confidence and see strong results, starting day one.

    Why Loosening Roots Works: The Science and Common-Sense Reality

    When plants are grown in containers whether they’re nursery transplants, seedling trays, or leftovers from your last garden they tend to develop roots that circle around the edges or bottom of the pot. This results in what’s called being “root-bound” or “pot-bound.”

    Why is this a problem? From direct experience, root-bound plants often:

    • Struggle to absorb water or nutrients once transplanted
    • Remain stunted, produce fewer flowers/fruits
    • Are more likely to flop over or dry out

    Loosening the roots gently teasing or untangling them encourages the plant to expand its root system into the surrounding soil. This is especially true for robust home-garden staples like tomatoes, peppers, herbs, and perennials.

    But not every plant or situation needs root loosening. That’s why knowing what to look for is crucial for happy, thriving plants.

    What You’ll Need

    • Your transplants or seedlings
    • Gloves (optional, but keeps your hands clean)
    • Small trowel
    • Watering can or spray bottle
    • Clean garden shears (only if trimming dead or rotten roots)
    • Compost or quality potting soil

    Eco-friendly tip: Homemade compost or worm castings can help roots recover from handling.

    Step-by-Step: How to Loosen Roots Before Planting

    1. Timing & Conditions

    Best timing:

    • Transplant in the morning/evening to avoid midday heat.
    • Soil should be moist, not soggy or bone-dry.

    2. Remove the Plant Carefully

    • Gently slide the plant (with its root ball) out of its pot.
    • Tap or squeeze the pot if roots are stuck.

    3. Inspect the Roots

    • Are roots circling thickly? Long white strands coiled around the bottom or sides?
    • Are roots sparse and loose, just barely holding the soil together?
    • Any signs of rot? (Brown, mushy roots)

    4. Loosen If Needed

    If roots are tightly circling (“root-bound”):

    • Use your fingers to lightly tease roots outward all around.
    • For very thick mats, use a garden fork or make 2-3 shallow vertical cuts with clean shears don’t overdo it!
    • Try to splay the bottom roots out, even if a few break (most garden plants recover well).

    If roots are not circling/mycelium is visible:

    • Minimal or no loosening needed. Just place as-is and plant gently.

    5. Plant and Water In

    • Plant at the correct depth for your plant species.
    • Backfill with compost/soil, press gently, and water thoroughly.

    Pro Tips & Best Practices

    • Don’t be scared by minor root damage. In real gardens, small breaks rarely kill healthy plants.
    • For very young or delicate seedlings: Avoid rough handling. Only loosen if roots have started to circle.
    • Compost in the planting hole: Helps roots recover and encourages fast new growth.
    • Mulch after planting to conserve moisture and reduce transplant stress.
    • Check the plant tag: Some species dislike root disturbance (see exceptions below).

    FAQ

    Why is my transplant wilting or not growing?

    If you didn’t loosen circling or tangled roots, they may never “take off” into the new soil. Roots that stay balled up can limit the plant’s ability to absorb water and nutrients.

    Can I skip loosening for perennial or shrub plants?

    Most strong nursery plants benefit from at least gentle loosening unless the label suggests otherwise. For fragile or tap-rooted species (like poppies or some wildflowers), minimal disturbance is better.

    How gentle should I be? What if roots break?

    Be firm enough to untangle don’t shred the root ball, but don’t be afraid of breaking a few fine roots. Most home garden plants, especially tomatoes, peppers, and annuals, recover quickly.

    Is it safe for container or raised bed gardening?

    Absolutely. In fact, root binding is more common in containers, so this step is often even more important there.

    Can loosening roots hurt my plant?

    For most common garden vegetables and ornamentals, gentle loosening helps more than it harms. Avoid rough treatment on seedlings with very fine or underdeveloped roots.

    When NOT to Loosen Roots

    • Very young plugs or seedlings: If roots just hold the soil together and aren’t circling, don’t disturb them.
    • Plants with taproots: Some plants (e.g., carrots, poppies, lupines) dislike root disturbance and can fail if handled roughly.
    • Unpotting in extreme heat or wind: Delay handling if possible, or provide some shade and extra water after transplanting.
    • Sick or weak plants: Focus on recovery in the pot before disturbing further.

    Alternative Methods

    1. Bare-rooting (washing away all soil):

    • Useful for some trees or roses but risky for most annual veggies can cause more shock.

    2. Leave as-is, water heavily:

    • Easiest, but not effective for tightly bound roots.

    3. Scoring with a knife:

    • Fast, but can be overdone. Use only if roots are truly matted.

    Best method for beginners: Gently teasing/tickling roots with fingers gives the most successful results and minimal risk.

    Conclusion

    So, do you need to loosen roots before planting? Yes if your transplant is root-bound or heavily circled, gently loosen before planting. For seedlings with normal, loose root balls, you can plant them directly.

    From years of trial and error in real gardens:

    • Loosening roots is one of the simplest ways to help your new plants “hit the ground running,” especially in pots, balcony planters, or heavy backyard soils.
    • Treat roots like you’d treat the plant itself firm, but gentle and you’ll be rewarded with sturdier, more flourishing growth.

    Take it slow, observe your plants, and adjust as needed. Healthy roots lead to happy plants, and with a little hands-on care at planting time, you’ll set up your garden for a season packed with color, produce, and satisfaction.

    Plant with confidence knowing your roots are truly ready to grow!

  • Should you break up roots when planting tomatoes

    Should you break up roots when planting tomatoes

    Every product is independently reviewed and selected by our editors. If you buy something through our links, we may earn an affiliate commission at no extra cost to you.

    Growing tomatoes at home whether it’s on a small balcony, a modest terrace, or in your backyard can be incredibly satisfying. But even experienced gardeners occasionally wrestle with a common dilemma: should you break up roots when planting tomatoes? After years of planting tomatoes in containers, raised beds, and directly in native soil, I know first-hand how root treatment at planting time can make or break your crop.

    Let’s dig into a practical, experience-based guide so you plant tomatoes with more confidence and get healthier, more productive plants from day one.

    How to Prevent Stunted Growth in Tomatoes by Fixing Root-Bound Roots

    One of the most frequent rookie mistakes I see (and, honestly, made myself early on) is planting tomato seedlings straight from their nursery pots roots tightly circling and pot-bound without adjusting or inspecting them. The result? Stunted growth, yellowing leaves, reduced fruiting, or even dead plants.

    This happens because tomato roots are resilient, but when left in dense, tangled mats, they struggle to expand and access nutrients or water in their new home. The solution is both simple and slightly nerve-wracking: breaking up, loosening, or “teasing” those roots before planting.

    Over the years, I’ve had the best luck when I gently address the roots, but I know it can be intimidating for beginners. Here’s exactly how (and when) to do it, mistakes to avoid, and expert tips that’ll make your tomato planting much more successful.

    Why This Method Works

    Healthy tomato roots need to spread outward and downward quickly once transplanted. In cramped nursery pots, roots often circle the bottom or sides, becoming what’s called “root bound.” If you transplant without breaking up those dense mats:

    • Roots may keep circling, failing to explore surrounding soil
    • Nutrient and water uptake is sharply limited
    • Plants often look leggy, droopy, or pale and may drop flowers/fruit

    By gently breaking up or untangling these roots, you “wake them up” encouraging them to branch out into new soil. Tomatoes, unlike some plants, are famously robust about root disturbance and can even root from their buried stem. This makes them perfect candidates for root loosening at planting time.

    In my own garden on everything from compact balcony pots to larger backyard beds tomatoes planted with loosened roots always bounced back faster compared to those left pot-bound. The difference is day-and-night when it comes to long-term health and yields.

    What You’ll Need

    You don’t need fancy gear. Here’s what will help:

    • Tomato seedlings (seed tray or store-bought)
    • A clean trowel
    • Gloves (if you prefer)
    • Small bucket of water
    • Garden scissors (only if you spot dead, blackened, or mushy roots)
    • Eco-friendly soil amendments (like worm castings or compost)
    • Well-draining potting mix or garden soil

    Budget-friendly tips:

    • Reuse nursery pots for seed starting.
    • Homemade compost or leaf mold are excellent organic amendments.

    Step-by-Step Instructions: Breaking Up Tomato Roots Before Planting

    1. Timing & Prepping Your Seedlings

    • Best planting season: Early to mid-spring, after frost danger has passed.
    • Best time of day: Early morning or late afternoon avoid the midday sun, which stresses seedlings.

    Water your seedlings an hour before transplanting. Hydrated roots are more flexible and less prone to breakage.

    2. Gently Remove the Plant

    • Squeeze the pot sides or tap gently to loosen the root ball.
    • Hold the seedling by its true leaves (not the stem) and ease it out.

    3. Inspect The Root Ball

    • Is it a dense mat of white roots circling the bottom and sides?
    • Are roots brown, soft, or mushy? Trim these off.

    4. Break Up Or “Tease” The Roots

    • For slightly circling roots: Use your fingers to gently loosen the bottom and sides, “tickling” roots outward.
    • For severely pot-bound roots: Use your fingers or a clean knife to make 2–3 shallow vertical cuts on the bottom and sides of the root ball. Don’t be afraid tomatoes can take it!
    • For barely rooted seedlings: No need to disturb plant as-is.

    Key sign: You want roots a bit splayed out, not stuck together in a thick ring.

    5. Plant Deeply

    Tomatoes thrive when planted deep:

    • Place the seedling so that 2/3 of the stem is buried.
    • Remove lower leaves those nodes in contact with soil will sprout new roots.

    Backfill lightly, water thoroughly, and mulch if possible.

    Pro Tips & Best Practices

    • Don’t panic if some small roots break. Tomatoes recover fast.
    • Always water in after transplanting. Settles soil and reduces transplant shock.
    • Avoid slippery wet or dry root balls. Slightly damp is perfect for “teasing.”
    • If using organic amendments, mix them into the planting hole—compost, worm castings, or aged manure help roots establish.
    • Mulch after planting to conserve moisture and prevent soil splash.
    • Don’t skip root inspection: Some pests (fungus gnats, root aphids) can hide inside root balls. Trim any damaged parts.

    FAQ

    Why is my tomato plant not growing after transplanting?

    If you didn’t break up a pot-bound root ball, roots may not colonize new soil. The plant may stall (“transplant shock”). Loosening roots boosts recovery.

    Can I do this if my seedling is very young or thin?

    If the plant is very fragile with a small root system, minimal disturbance is best. Just tickle the bottom lightly or leave roots alone if they’re not circling.

    How often should I water after transplanting?

    For the first week, keep soil barely moist water lightly every 1–2 days if weather is hot/dry, less if cool. Avoid soggy soil.

    Is it safe to break up roots if I’m planting in a container?

    Absolutely! In fact, container tomatoes are especially prone to root bind. Always inspect before potting up.

    What if roots break or snap when separating?

    Tomatoes are tough. Unless you destroy the whole root ball, they’ll recover. Water well and keep shaded for a day if it’s hot.

    Do I have to use expensive tools or amendments?

    No. Clean hands and regular garden soil/compost work well. Focus on root health and proper planting depth.

    When NOT to Break Up Roots

    • Very young seedlings with barely developed roots: Leave them alone roots are too delicate.
    • Sickly plants with very few healthy roots: Excess disturbance will stress them. Trim only mushy parts.
    • Highly clay or compacted soil: Instead, focus on soil quality first; breaking roots alone won’t help.

    If your environment is particularly windy or hot, extra care is needed to minimize shock after root disturbance.

    Alternative Methods or Solutions

    Other methods some gardeners use:

    1. Soaking root balls:

    • Pros: Hydrates roots, easy for beginners.
    • Cons: Doesn’t fix severe root binding.

    2. Planting as-is (no disturbance):

    • Pros: Minimal transplant shock, safe for fragile seedlings.
    • Cons: Risk of circling roots, stunted growth if already pot-bound.

    3. Complete root washing (“bare-root” technique):

    • Pros: Reveals hidden pests or rot.
    • Cons: More stress to the plant; not needed for tomatoes in most home situations.

    Best for beginners: Gently teasing roots is least risky and most effective for healthy, robust tomato plants.

    Conclusion

    So, should you break up roots when planting tomatoes? Based on years of home and balcony gardening, the answer is a confident yes for most garden-center or homegrown tomato transplants showing dense, circling roots. Gently loosening those roots jumpstarts growth, improves nutrient uptake, and leads to bigger, healthier plants.

    Always adapt your technique to the plant’s age and condition. Be gentle, don’t panic about minor root breaks, and focus on a healthy soil environment with organic matter.

    Remember: Patient, careful handling and observation beats rushing every time. May your next tomato crop bring baskets of juicy fruit and vibrant, pest-resistant plants all from a well-prepared start.

    Happy gardening, and trust in real, hands-on experience for planting success one rootball a

  • How to mulch a gravel garden

    How to mulch a gravel garden

    Every product is independently reviewed and selected by our editors. If you buy something through our links, we may earn an affiliate commission at no extra cost to you.

    Most gardeners add gravel to reduce maintenance then discover weeds pushing through, soil drying out too fast, or plants struggling in compacted, exposed ground. I’ve run into all three problems in my own gravel areas.

    The issue is simple: gravel alone doesn’t function as mulch. Sunlight can still penetrate, weed seeds easily settle between stones, and water evaporates quickly from open gaps.

    Mulching a gravel garden works because:

    • it blocks light where weeds germinate
    • it protects plant roots from heat
    • it keeps moisture in the soil
    • it fills the gaps gravel alone can’t protect

    With a few small adjustments, a gravel garden becomes far easier to manage especially for beginners.

    Why This Method Works

    Plants in gravel gardens often sit in shallow, fast-draining soil. The stones reflect heat, making the top layer even warmer and drier. Mulch solves this by creating a buffer between soil and sun.

    What I’ve consistently observed:

    • Organic mulches (bark, compost, leaf mold) insulate roots and gradually improve soil texture.
    • Mineral mulches (fine gravel, decomposed granite) suppress weeds without breaking down quickly.
    • A hybrid approach organic mulch beneath, gravel on top provides long-term moisture control without changing the garden’s clean, modern look.

    Healthy microbial life also increases under mulch, even in gravel beds, improving plant resilience.

    What You’ll Need

    • Rake or hand cultivator
    • Wheelbarrow, bucket, or large tub
    • Landscape fabric (optional use sparingly)
    • Organic mulch: compost, shredded bark, leaf mold
    • Additional gravel (if topping up)
    • Gloves and dust mask (important for dusty gravel)

    Budget-friendly alternatives:

    • Homemade leaf mold
    • Partially composted garden waste
    • Reused gravel from other areas

    Eco-friendly options:

    • Untreated bark chips
    • Composted green waste
    • Local quarried gravel instead of imported stones

    Step-by-Step: How to Mulch a Gravel Garden

    1. Start on a dry day

    Wet gravel compacts and is harder to move. Dry conditions help you see contour and coverage clearly.

    2. Weed thoroughly

    Remove weeds by the roots. In my experience, even tiny taproot remnants regrow quickly in gravel.

    3. Loosen the topsoil lightly

    Use a hand fork to open compacted patches. Plants in gravel often suffer from oxygen-poor soil underneath.

    4. Add a thin layer of organic mulch (optional but strongly recommended)

    Spread 1–2 cm of compost or leaf mold around plants. This improves moisture retention without smothering roots. Don’t use thick bark here too chunky to stay hidden under gravel.

    5. Replace or top up the gravel

    Spread gravel back over the area until the organic mulch is fully concealed. Ideal depth: 4–5 cm. This keeps the garden looking neat while the hidden mulch works quietly underneath.

    6. Water deeply

    Water helps settle the layers. I’ve found plants bounce back faster when mulching is followed by a thorough soak.

    7. Add finishing touches

    Check for:

    • exposed soil (cover it)
    • gravel piled against stems (brush it away)
    • uneven areas where water might pool

    Pro Tips & Best Practices

    • Choose gravel size wisely 10–20 mm stones suppress weeds better than pea gravel, which shifts easily.
    • Avoid thick layers of bark chips on top They blow away and look messy in windy areas.
    • Mulch annually before the heat arrives Late spring is ideal; early autumn works if summers are harsh.
    • Don’t bury plant crowns Many gravel-garden favorites (lavender, rosemary) rot if crowns stay damp.
    • Top up gravel every 1–2 years Wind, foot traffic, and decomposition reduce coverage over time.
    • If you have heavy rain Use crushed stone or decomposed granite round stones wash away more easily.

    Frequently Asked Questions

    1. Can I mulch a gravel garden with compost only? Yes, but it won’t look like a gravel garden anymore. Compost works beautifully for plant health but must be topped with gravel if you want a clean, decorative finish.

    2. Why do weeds keep growing in my gravel garden? Usually because the gravel layer is too thin (below 4 cm), or sunlight is reaching the soil surface. Adding mulch beneath the gravel fixes this.

    3. Can I mulch around drought-tolerant plants like lavender? Yes just keep organic mulch away from the crown to avoid rot. I usually leave a small ring of open gravel right at the base.

    4. How often should I refresh mulch in a gravel garden? Organic mulch decomposes every 12–18 months. Gravel generally needs topping up every one to two seasons depending on weather and foot traffic.

    5. Is landscape fabric recommended under gravel? Only in high-traffic areas. In planted beds, it restricts root expansion and makes planting difficult later.

    6. Can I mulch a gravel garden in a rainy climate? Yes just use mineral mulch (gravel, crushed stone) on top and keep organic mulch very thin to avoid waterlogging.

    When NOT to Use This Method

    • Very clay-heavy soil Organic mulch under gravel can trap moisture. Improve soil first or rely mainly on mineral mulch.
    • Alpine or rock-garden species Some plants prefer lean, unamended soil and dislike compost beneath gravel.
    • Areas with flooding or poor drainage Mulch may worsen water retention. Use raised beds or sharp sand instead.
    • If gravel is used purely decoratively For paths or seating areas, skip the organic mulch layer.

    Alternative Methods

    1. Pure gravel mulch Best for drought-loving plants and extremely wet climates. Pros: long-lasting, low maintenance. Cons: poor moisture retention, weeds still possible.

    2. Pure organic mulch Great for lush, moisture-loving plants. Pros: improves soil quickly. Cons: loses the clean gravel aesthetic, decomposes faster.

    3. Landscape fabric + gravel Useful for paths or weed-prone areas. Pros: excellent weed suppression. Cons: not suitable for planted beds roots suffer over time.

    Choose based on plant type and local rainfall.

    Conclusion

    Mulching a gravel garden is a simple upgrade that dramatically improves plant health, moisture retention, and weed suppression. By laying a thin organic layer beneath gravel, you get the nutrient benefits of compost with the clean, low-maintenance look of stone.

    This method has worked reliably in my own small garden areas from hot balcony beds to dry, south-facing corners of the yard and it’s beginner-friendly once you understand the basics.

    Take your time, observe how your plants respond, and adjust the mulch depth as the seasons change. Your gravel garden will thank you with

  • How to get rid of worms in potted plants naturally | Practical Container-Gardener Guide

    How to get rid of worms in potted plants naturally | Practical Container-Gardener Guide

    Every product is independently reviewed and selected by our editors. If you buy something through our links, we may earn an affiliate commission at no extra cost to you.

    Adding earthworms to potted plants sounds like a no-brainer worms improve soil in garden beds, so they must be great in containers too, right? In real balcony and terrace gardens, it’s not that simple. I’ve tested worms in large tubs and watched friends drop a handful into small indoor pots… and the results ranged from “no difference” to soggy soil, fungus gnats, and worms crawling out after watering.

    This guide explains when adding earthworms to potted plants helps, when it backfires, and what to do instead for the same benefits especially if you’re gardening in pots, grow bags, or small raised planters.

    Why Adding Earthworms to Potted Plants Is Tricky (Simple Biology, Real Container Problems)

    Earthworms do three main jobs in the ground:

    • Aerate soil by creating tunnels
    • Break down organic matter into plant-available nutrients
    • Improve soil structure by mixing minerals + organic matter (their castings help aggregation)

    In garden beds, worms can move deeper when it’s hot, dry, or flooded. In a pot, they can’t escape bad conditions. That’s the key difference.

    In containers, problems usually come from:

    • Too little food (potting mixes often don’t have enough decaying material)
    • Moisture extremes (pots swing from dry to soaked)
    • Heat stress (balcony pots can overheat fast)
    • Low oxygen (waterlogged mix + small volume)

    So yes worms are “good,” but pots are an unnatural environment unless you set them up to behave more like a mini soil ecosystem.

    Why This Method Works (When It Works)

    Adding earthworms to potted plants can help only if the container is large enough and the potting mix has the right structure and food supply.

    What you can realistically gain

    • Faster breakdown of organic top-dressings (leaf mold, compost, aged manure)
    • More stable soil structure over time (less crusting/compaction)
    • A gentle boost from castings (worm poop = slow-release nutrients)

    What worms won’t fix

    • Poor light
    • Overwatering habits
    • A compacted, peat-heavy mix with no air space
    • Lack of fertilizer for heavy feeders (tomatoes, citrus, hibiscus)

    From hands-on use: the best results I’ve seen were in very large containers (15–30+ gallons) with mulch on top and regular additions of compost. In small 6–10 inch pots, worms rarely “improve” anything and often create management issues.

    What You’ll Need

    If you’re going to try adding earthworms to potted plants, set the pot up for worm survival first.

    • A large container (ideally 40+ liters / 10+ gallons) with drainage holes
      • Bigger is safer and more stable
    • A chunky, well-draining potting mix
      • Good base: potting soil + compost + perlite/pumice + bark/coco chips
    • Organic matter to feed worms
      • Finished compost, leaf mold, aged manure, chopped dry leaves
    • Mulch layer (2–5 cm / 1–2 in)
      • Dry leaves, coco husk chips, straw (indoors: coco chips are cleaner)
    • Earthworms (choose wisely see below)
    • Gloves + handwashing setup
      • Safety for soil handling (especially with kids)

    Which “worms” are actually suitable?

    • Best for containers: Red wigglers (Eisenia fetida) / compost worms They prefer rich organic matter and do well in confined systems.
    • Sometimes okay in very large tubs: European nightcrawlers
    • Not recommended for pots: random “garden earthworms” dug from the ground Many of these are deep soil burrowers and don’t thrive in potting mix.

    Eco note: avoid releasing non-native worms into natural areas. Keep container worms contained.

    Step-by-Step: Adding Earthworms to Potted Plants (Beginner-Safe Method)

    Step 1: Pick the Right Pot (Size and Location)

    Minimum recommendation: 10 gallons (40L). Ideal: 15–30 gallons for the easiest success.

    • Outdoor pots or airy balconies work better than stuffy indoor corners.
    • Avoid pots that bake in direct afternoon sun if your climate is hot.

    Visual cue: if your pot dries bone-dry in a single day in summer, it’s usually too harsh for worms unless you heavily mulch and shade the container.

    Step 2: Fix the Potting Mix First (Drainage + Oxygen)

    Before adding worms, make sure the mix drains well.

    A practical container blend for worm-friendly pots:

    • 50–60% quality potting mix
    • 20–30% finished compost
    • 10–20% perlite/pumice
    • Optional: a handful of bark/coco chips for air space

    Important: do not add worms into a pot that stays wet for days. Worms need moisture, but they also need oxygen.

    Step 3: Add a Worm Food Layer (Lightly)

    Worms need something to eat besides “soil.”

    Top-dress with:

    • 1–2 cm (½–¾ in) finished compost or
    • a thin layer of chopped dry leaves + a sprinkle of compost

    Avoid adding fresh kitchen scraps directly into a plant pot. In real containers, scraps often cause:

    • sour smells
    • fungus gnats/fruit flies
    • moldy pockets
    • uneven decomposition

    Step 4: Add Worms (Less Than You Think)

    For a 10–15 gallon pot:

    • Start with 10–30 red wigglers, not hundreds.

    Gently place them under the top layer of compost/mulch (2–5 cm down). Water lightly afterward.

    Beginner mistake: dumping a big clump of worms into a small pot. Overcrowding + not enough food = worms try to escape.

    Step 5: Mulch and Maintain Moisture (The “Worm Comfort Zone”)

    Add a 2–5 cm mulch layer to buffer moisture and temperature.

    Watering rule that works in pots:

    • Keep soil evenly moist like a wrung-out sponge, not swampy and not dusty.

    Timing tip: water in the morning when possible. Pots stay cooler and fungus issues are reduced.

    Step 6: Feed Small Amounts Regularly (Optional but Helpful)

    Every 2–4 weeks (growing season), top-dress with:

    • a small handful of finished compost, or
    • leaf mold, or
    • a light sprinkle of worm castings

    If you’re using synthetic fertilizers, keep them moderate high salt levels can stress worms.

    Step 7: Observe for 2–4 Weeks (Worm “Check-in”)

    Healthy signs:

    • worms stay in the pot
    • soil surface doesn’t crust as much
    • top-dressings disappear gradually
    • plant growth is steady (not necessarily dramatic)

    Warning signs:

    • worms on the surface after watering (too wet or too hot)
    • foul smell (anaerobic pockets)
    • sudden fungus gnat explosion (too much moist organic matter on top)

    Pro Tips & Best Practices (From Real Container Gardens)

    Use worms only where the pot behaves like a mini raised bed

    Worms shine in:

    • large fabric grow bags
    • half barrels
    • big planters with thick mulch
    • long-term “soil” pots that you amend each season

    They’re usually not worth it in:

    • small decorative indoor pots
    • shallow planters
    • cactus/succulent mixes

    Shade the pot, not the plant

    On hot terraces, the pot itself overheats. Simple fixes:

    • wrap the pot with jute/burlap
    • double-pot (nursery pot inside a larger decorative pot with an air gap)
    • shade the container side with another plant or board

    Don’t confuse worms with “instant fertilizer”

    Worms need time and food. For quick nutrition, use:

    • compost
    • worm castings
    • balanced organic fertilizer

    Watch drainage like a hawk

    If water pools on top or the pot feels heavy for days:

    • stop adding worms
    • fix the mix (more aeration ingredients)
    • reduce watering frequency

    FAQ

    1) Will adding earthworms to potted plants help my plant grow faster?

    Sometimes, but the effect is usually indirect and gradual better soil structure and slow nutrient release. For noticeable growth improvement, light, watering, and proper feeding matter more.

    2) Why are worms coming out of my pot?

    Common causes:

    • soil is too wet (low oxygen)
    • pot is overheating
    • not enough food
    • the “worms” are not compost worms (wrong species) Fix drainage, add mulch, reduce watering, and use red wigglers if you try again.

    3) Can I add earthworms to indoor houseplants?

    I don’t recommend it for most indoor pots. Indoor conditions often mean:

    • inconsistent moisture
    • limited airflow
    • higher risk of gnats and mess A safer indoor option is top-dressing with worm castings instead of live worms.

    4) How many worms should I put in a pot?

    Start small. For a 10–15 gallon pot: 10–30 red wigglers is plenty. Overcrowding causes escape attempts and poor results.

    5) Do earthworms damage plant roots?

    Healthy worms generally don’t eat living roots. Problems happen when the pot turns anaerobic or sour then roots suffer from the soil conditions, not the worms “attacking” them.

    6) Is it better to use worm castings than live worms?

    For most container gardeners: yes. Castings give the benefits (microbes + nutrients) without the risk of overheating, drowning, or escape.

    When NOT to Use This Method (Important)

    Avoid adding earthworms to potted plants if:

    • The pot is small (under ~10 gallons/40L)
    • You grow succulents/cacti (they need drier, leaner media)
    • Your potting mix stays wet or compacted (risk of anaerobic rot)
    • The container gets extreme heat (full-sun terrace + dark pot)
    • You regularly use strong chemical drenches or high-salt fertilizers
    • You have fungus gnat problems already
    • You can’t commit to consistent moisture monitoring

    Safer alternatives in these cases

    • Worm castings top-dress (1–2 cm)
    • Compost top-dress + mulch
    • Liquid seaweed/fish hydrolysate (smell note: best outdoors)

    Alternative Methods or Solutions (Beginner-Friendly Comparisons)

    1) Worm Castings (Best “Worm Benefit” Without Live Worms)

    Pros: clean, predictable, great for pots, low risk Cons: can be pricey if used heavily How to use: top-dress 1–2 cm every 4–8 weeks, or mix 10–20% into potting mix.

    2) Compost + Mulch System (Closest to Natural Soil)

    Pros: improves soil life and moisture stability; sustainable Cons: takes time; needs good compost Best for: balcony planters, terrace tubs, vegetable grow bags

    3) DIY Vermicompost Bin (Best Long-Term Upgrade)

    Pros: you control the worms + castings; cost-effective over time Cons: requires a small routine; needs airflow management Best for: gardeners with steady kitchen scraps and a shaded corner

    4) Aeration + Feeding Fix (Often the Real Solution)

    If plants struggle, the fastest improvements usually come from:

    • repotting into a chunkier mix
    • correcting watering
    • using a balanced fertilizer Pros: immediate impact Cons: not as “ecosystem-building” as composting

    Conclusion

    Adding earthworms to potted plants can work mainly in large containers with a well-aerated mix, steady moisture, and a regular supply of compost-like food. In small indoor pots or heat-stressed balcony planters, it often causes more trouble than benefit.

    If you want the upsides with fewer risks, the most reliable container-gardener approach is:

    • worm castings + compost top-dressing + mulch, and
    • focus on drainage, light, and watering consistency.
  • Adding Earthworms to Potted Plants

    Adding Earthworms to Potted Plants

    Every product is independently reviewed and selected by our editors. If you buy something through our links, we may earn an affiliate commission at no extra cost to you.

    Adding earthworms to potted plants sounds like a no-brainer worms improve soil in garden beds, so they must be great in containers too, right? In real balcony and terrace gardens, it’s not that simple. I’ve tested worms in large tubs and watched friends drop a handful into small indoor pots… and the results ranged from “no difference” to soggy soil, fungus gnats, and worms crawling out after watering.

    This guide explains when adding earthworms to potted plants helps, when it backfires, and what to do instead for the same benefits especially if you’re gardening in pots, grow bags, or small raised planters.

    Why Adding Earthworms to Potted Plants Is Tricky (Simple Biology, Real Container Problems)

    Earthworms do three main jobs in the ground:

    • Aerate soil by creating tunnels
    • Break down organic matter into plant-available nutrients
    • Improve soil structure by mixing minerals + organic matter (their castings help aggregation)

    In garden beds, worms can move deeper when it’s hot, dry, or flooded. In a pot, they can’t escape bad conditions. That’s the key difference.

    In containers, problems usually come from:

    • Too little food (potting mixes often don’t have enough decaying material)
    • Moisture extremes (pots swing from dry to soaked)
    • Heat stress (balcony pots can overheat fast)
    • Low oxygen (waterlogged mix + small volume)

    So yes worms are “good,” but pots are an unnatural environment unless you set them up to behave more like a mini soil ecosystem.

    Why This Method Works (When It Works)

    Adding earthworms to potted plants can help only if the container is large enough and the potting mix has the right structure and food supply.

    What you can realistically gain

    • Faster breakdown of organic top-dressings (leaf mold, compost, aged manure)
    • More stable soil structure over time (less crusting/compaction)
    • A gentle boost from castings (worm poop = slow-release nutrients)

    What worms won’t fix

    • Poor light
    • Overwatering habits
    • A compacted, peat-heavy mix with no air space
    • Lack of fertilizer for heavy feeders (tomatoes, citrus, hibiscus)

    From hands-on use: the best results I’ve seen were in very large containers (15–30+ gallons) with mulch on top and regular additions of compost. In small 6–10 inch pots, worms rarely “improve” anything and often create management issues.

    What You’ll Need

    If you’re going to try adding earthworms to potted plants, set the pot up for worm survival first.

    • A large container (ideally 40+ liters / 10+ gallons) with drainage holes
      • Bigger is safer and more stable
    • A chunky, well-draining potting mix
      • Good base: potting soil + compost + perlite/pumice + bark/coco chips
    • Organic matter to feed worms
      • Finished compost, leaf mold, aged manure, chopped dry leaves
    • Mulch layer (2–5 cm / 1–2 in)
      • Dry leaves, coco husk chips, straw (indoors: coco chips are cleaner)
    • Earthworms (choose wisely see below)
    • Gloves + handwashing setup
      • Safety for soil handling (especially with kids)

    Which “worms” are actually suitable?

    • Best for containers: Red wigglers (Eisenia fetida) / compost worms They prefer rich organic matter and do well in confined systems.
    • Sometimes okay in very large tubs: European nightcrawlers
    • Not recommended for pots: random “garden earthworms” dug from the ground Many of these are deep soil burrowers and don’t thrive in potting mix.

    Eco note: avoid releasing non-native worms into natural areas. Keep container worms contained.

    Step-by-Step: Adding Earthworms to Potted Plants (Beginner-Safe Method)

    Step 1: Pick the Right Pot (Size and Location)

    Minimum recommendation: 10 gallons (40L). Ideal: 15–30 gallons for the easiest success.

    • Outdoor pots or airy balconies work better than stuffy indoor corners.
    • Avoid pots that bake in direct afternoon sun if your climate is hot.

    Visual cue: if your pot dries bone-dry in a single day in summer, it’s usually too harsh for worms unless you heavily mulch and shade the container.

    Step 2: Fix the Potting Mix First (Drainage + Oxygen)

    Before adding worms, make sure the mix drains well.

    A practical container blend for worm-friendly pots:

    • 50–60% quality potting mix
    • 20–30% finished compost
    • 10–20% perlite/pumice
    • Optional: a handful of bark/coco chips for air space

    Important: do not add worms into a pot that stays wet for days. Worms need moisture, but they also need oxygen.

    Step 3: Add a Worm Food Layer (Lightly)

    Worms need something to eat besides “soil.”

    Top-dress with:

    • 1–2 cm (½–¾ in) finished compost or
    • a thin layer of chopped dry leaves + a sprinkle of compost

    Avoid adding fresh kitchen scraps directly into a plant pot. In real containers, scraps often cause:

    • sour smells
    • fungus gnats/fruit flies
    • moldy pockets
    • uneven decomposition

    Step 4: Add Worms (Less Than You Think)

    For a 10–15 gallon pot:

    • Start with 10–30 red wigglers, not hundreds.

    Gently place them under the top layer of compost/mulch (2–5 cm down). Water lightly afterward.

    Beginner mistake: dumping a big clump of worms into a small pot. Overcrowding + not enough food = worms try to escape.

    Step 5: Mulch and Maintain Moisture (The “Worm Comfort Zone”)

    Add a 2–5 cm mulch layer to buffer moisture and temperature.

    Watering rule that works in pots:

    • Keep soil evenly moist like a wrung-out sponge, not swampy and not dusty.

    Timing tip: water in the morning when possible. Pots stay cooler and fungus issues are reduced.

    Step 6: Feed Small Amounts Regularly (Optional but Helpful)

    Every 2–4 weeks (growing season), top-dress with:

    • a small handful of finished compost, or
    • leaf mold, or
    • a light sprinkle of worm castings

    If you’re using synthetic fertilizers, keep them moderate high salt levels can stress worms.

    Step 7: Observe for 2–4 Weeks (Worm “Check-in”)

    Healthy signs:

    • worms stay in the pot
    • soil surface doesn’t crust as much
    • top-dressings disappear gradually
    • plant growth is steady (not necessarily dramatic)

    Warning signs:

    • worms on the surface after watering (too wet or too hot)
    • foul smell (anaerobic pockets)
    • sudden fungus gnat explosion (too much moist organic matter on top)

    Pro Tips & Best Practices (From Real Container Gardens)

    Use worms only where the pot behaves like a mini raised bed

    Worms shine in:

    • large fabric grow bags
    • half barrels
    • big planters with thick mulch
    • long-term “soil” pots that you amend each season

    They’re usually not worth it in:

    • small decorative indoor pots
    • shallow planters
    • cactus/succulent mixes

    Shade the pot, not the plant

    On hot terraces, the pot itself overheats. Simple fixes:

    • wrap the pot with jute/burlap
    • double-pot (nursery pot inside a larger decorative pot with an air gap)
    • shade the container side with another plant or board

    Don’t confuse worms with “instant fertilizer”

    Worms need time and food. For quick nutrition, use:

    • compost
    • worm castings
    • balanced organic fertilizer

    Watch drainage like a hawk

    If water pools on top or the pot feels heavy for days:

    • stop adding worms
    • fix the mix (more aeration ingredients)
    • reduce watering frequency

    FAQ

    1) Will adding earthworms to potted plants help my plant grow faster?

    Sometimes, but the effect is usually indirect and gradual better soil structure and slow nutrient release. For noticeable growth improvement, light, watering, and proper feeding matter more.

    2) Why are worms coming out of my pot?

    Common causes:

    • soil is too wet (low oxygen)
    • pot is overheating
    • not enough food
    • the “worms” are not compost worms (wrong species) Fix drainage, add mulch, reduce watering, and use red wigglers if you try again.

    3) Can I add earthworms to indoor houseplants?

    I don’t recommend it for most indoor pots. Indoor conditions often mean:

    • inconsistent moisture
    • limited airflow
    • higher risk of gnats and mess A safer indoor option is top-dressing with worm castings instead of live worms.

    4) How many worms should I put in a pot?

    Start small. For a 10–15 gallon pot: 10–30 red wigglers is plenty. Overcrowding causes escape attempts and poor results.

    5) Do earthworms damage plant roots?

    Healthy worms generally don’t eat living roots. Problems happen when the pot turns anaerobic or sour then roots suffer from the soil conditions, not the worms “attacking” them.

    6) Is it better to use worm castings than live worms?

    For most container gardeners: yes. Castings give the benefits (microbes + nutrients) without the risk of overheating, drowning, or escape.

    When NOT to Use This Method (Important)

    Avoid adding earthworms to potted plants if:

    • The pot is small (under ~10 gallons/40L)
    • You grow succulents/cacti (they need drier, leaner media)
    • Your potting mix stays wet or compacted (risk of anaerobic rot)
    • The container gets extreme heat (full-sun terrace + dark pot)
    • You regularly use strong chemical drenches or high-salt fertilizers
    • You have fungus gnat problems already
    • You can’t commit to consistent moisture monitoring

    Safer alternatives in these cases

    • Worm castings top-dress (1–2 cm)
    • Compost top-dress + mulch
    • Liquid seaweed/fish hydrolysate (smell note: best outdoors)

    Alternative Methods or Solutions (Beginner-Friendly Comparisons)

    1) Worm Castings (Best “Worm Benefit” Without Live Worms)

    Pros: clean, predictable, great for pots, low risk Cons: can be pricey if used heavily How to use: top-dress 1–2 cm every 4–8 weeks, or mix 10–20% into potting mix.

    2) Compost + Mulch System (Closest to Natural Soil)

    Pros: improves soil life and moisture stability; sustainable Cons: takes time; needs good compost Best for: balcony planters, terrace tubs, vegetable grow bags

    3) DIY Vermicompost Bin (Best Long-Term Upgrade)

    Pros: you control the worms + castings; cost-effective over time Cons: requires a small routine; needs airflow management Best for: gardeners with steady kitchen scraps and a shaded corner

    4) Aeration + Feeding Fix (Often the Real Solution)

    If plants struggle, the fastest improvements usually come from:

    • repotting into a chunkier mix
    • correcting watering
    • using a balanced fertilizer Pros: immediate impact Cons: not as “ecosystem-building” as composting

    Conclusion

    Adding earthworms to potted plants can work mainly in large containers with a well-aerated mix, steady moisture, and a regular supply of compost-like food. In small indoor pots or heat-stressed balcony planters, it often causes more trouble than benefit.

    If you want the upsides with fewer risks, the most reliable container-gardener approach is:

    • worm castings + compost top-dressing + mulch, and
    • focus on drainage, light, and watering consistency.
  • How to use moss stick for plants

    How to use moss stick for plants

    Every product is independently reviewed and selected by our editors. If you buy something through our links, we may earn an affiliate commission at no extra cost to you.

    If you’ve got a pothos, monstera, philodendron, or any climbing aroid that keeps flopping sideways, a moss stick is one of the simplest upgrades you can make. In real balcony and indoor pot setups, I’ve found it does two things that a plain stake doesn’t: it supports the vine and creates a humid surface roots can grab, which usually leads to bigger leaves, sturdier stems, and tidier growth as long as you install and maintain it correctly.

    Below is a practical, step-by-step guide you can apply immediately.

    Why a Moss Stick Works (Simple Plant Logic)

    Many popular houseplants are climbers by nature. In the wild, they grow up trees. Along the stem they produce aerial roots little nubs that want to cling to something slightly damp and textured.

    A moss stick helps because it:

    • Mimics a tree trunk (vertical support = upright growth)
    • Gives aerial roots something grippy
    • Holds some moisture, encouraging the plant to “lock on”
    • Keeps the plant’s weight supported so stems don’t crease or snap

    What beginners often miss: a moss stick isn’t magic if it stays bone-dry all the time. For plants that truly size up (monstera, mature philodendrons), the pole’s moisture + texture is part of the benefit.

    What You’ll Need

    • Moss stick / moss pole
      • Options: coco coir pole, sphagnum moss pole, DIY mesh + moss pole
    • Soft plant ties
      • Best: Velcro plant tape, soft twine, fabric strips
      • Avoid: thin wire directly on stems (it cuts in)
    • A sturdy pot with drainage
    • Fresh potting mix (if repotting)
      • Aroids do well in a chunkier mix: potting soil + orchid bark + perlite
    • Scissors/pruners (clean)

    Eco note: Coco coir poles are often more sustainable and lower-maintenance than pure sphagnum poles. Sphagnum works great, but it’s worth sourcing responsibly because it can be harvested from sensitive ecosystems.

    Step-by-Step: How to Use a Moss Stick Properly

    1) Choose the Right Pole Height

    • Pick a pole that’s at least as tall as your plant now.
    • Ideally, choose one that gives 30–60 cm (1–2 ft) extra growth room.

    Practical tip: Too-short poles lead to constant “upgrading,” which usually means disturbing roots repeatedly.

    2) Decide: Install Without Repotting vs. While Repotting

    Best time: when you’re repotting anyway (spring/summer growth season).

    • If repotting: easiest and most stable.
    • If not repotting: you can still add a pole, but you must place it carefully to avoid spearing major roots.

    Timing: do this in the morning or early day so the plant has time to recover with good light.

    3) Position the Moss Stick Correctly (This Matters)

    Place the pole close to the main stem base, usually 1–3 cm away, on the side where the plant naturally leans or where aerial roots face.

    • Push the pole down until it hits the bottom of the pot (or as deep as possible).
    • Aim for stability: wobble is your enemy.

    Hands-on warning: if the pole is only buried a little, the first time you water or the plant gets top-heavy, the whole thing tilts stressing roots and snapping stems.

    4) Secure the Pole So It Doesn’t Move

    If the plant is tall or the pole is heavy:

    • Use a heavier pot (terracotta helps)
    • Add a support stake beside the pole if needed
    • Some poles have a base spike; still, check wobble

    Balcony/gusty window tip: wind will rock tall poles. If your plant sits outdoors, stabilize the pot (corner placement) or use a heavier container.

    5) Tie the Plant to the Moss Stick (Gently)

    • Start at the lowest part of the vine.
    • Use soft ties in a loose “figure 8”:
      • one loop around the pole
      • one loop around the stem
    • Tie at intervals of 10–15 cm (4–6 in).

    Where to tie: support the stem between nodes, not directly on a node or aerial root nub.

    Beginner mistake: tying too tight. Stems thicken and the tie can girdle (strangle) them. Check ties monthly.

    6) Train New Growth Upward

    As new leaves emerge:

    • Keep guiding the vine upward.
    • Attach new sections every few weeks.

    Visual cue you’re doing it right: aerial roots begin pressing into the pole and the plant looks “stacked” rather than sprawling.

    7) Keep the Pole Slightly Moist (Only If Your Plant Benefits)

    This depends on the pole type and your plant.

    • Sphagnum moss pole: mist or water it 2–4 times a week (more in dry indoor air).
    • Coco coir pole: usually doesn’t hold much moisture; it’s mostly a climbing texture. You can still mist occasionally, but don’t obsess.

    Simple method that works: when you water the pot, pour a small amount down the top of the moss pole so moisture moves downward.

    Humidity caution: constantly soaking the pole in a low-airflow room can encourage fungus gnats or stem rot. Moist is good; soggy is not.

    Pro Tips & Best Practices (From Real Use)

    Match the Pole to the Plant

    • Monstera deliciosa: benefits from a sturdy pole; aerial roots will anchor well.
    • Pothos (Epipremnum): climbs easily; coco poles work fine.
    • Philodendron hederaceum / micans: climbs well, appreciates some moisture.
    • Self-heading philos (Birkin, Rojo Congo): don’t need a moss pole; a stake is enough.

    Don’t Force the Stem

    If a vine has hardened in a sideways shape, don’t bend it sharply upright it can crease.

    • Instead, tie it gradually over 2–3 weeks, adjusting tension slowly.

    Upgrade Before It’s a Jungle

    Once the plant is huge and tangled, installing a pole becomes stressful.

    • Add a pole when the plant is still manageable.

    Consider Pruning + Propagating

    If your plant is leggy:

    • Cut back and root cuttings.
    • Replant cuttings around the pole for a fuller “column” look.

    FAQ

    1) Why isn’t my plant attaching to the moss stick?

    Common causes:

    • Pole is too dry and smooth (especially coir poles)
    • Not enough contact between nodes/aerial roots and the pole
    • Plant is getting low light, so it’s not growing actively Try tying nodes closer to the pole and lightly moistening a sphagnum pole.

    2) How often should I water or mist a moss pole?

    • Sphagnum pole: usually 2–4 times a week, depending on heat and humidity.
    • Coir pole: mist occasionally; focus more on plant care than pole moisture.

    3) Can I use a moss stick for pothos?

    Yes. Pothos climbs very well. With a pole and brighter light, leaves often get noticeably larger.

    4) Will a moss stick cause pests like fungus gnats?

    It can if the pole stays wet constantly, especially indoors with low airflow. Keep it damp, not dripping, and let the top layer dry slightly between wettings.

    5) Do I need to repot when adding a moss stick?

    Not always. Repotting is ideal for stability, but you can add one to an existing pot if you insert carefully and stabilize it well.

    When NOT to Use a Moss Stick (And Better Options)

    A moss stick isn’t necessary if:

    • Your plant is naturally bushy/self-supporting (many upright philodendrons, rubber plant, jade)
    • You prefer trailing growth (pothos cascading from a shelf)
    • Your space is very low light (the plant may stretch even on a pole)

    Alternatives:

    • Trellis (great for hoya, jasmine indoors, some vines)
    • Simple bamboo stake (for light support)
    • Wall clips (for training vines along a wall watch for paint damage)

    Conclusion

    To use a moss stick for plants successfully: install it deep and stable, place it close to the stem, tie vines gently at intervals, and keep the pole appropriately moist (especially sphagnum). The payoff when conditions are right is a climbing plant that grows upright, stronger, and often with larger leaves, instead of sprawling and snapping under its own weight.

    If you tell me what plant you have (pothos/monstera/philo?), whether it’s indoors or balcony, and your light (hours of sun or window direction), I can recommend the best pole type and a simple maintenance routine.

  • How long does lemon tree take to grow from seed

    How long does lemon tree take to grow from seed

    Every product is independently reviewed and selected by our editors. If you buy something through our links, we may earn an affiliate commission at no extra cost to you.

    Growing a lemon tree from seed is one of those projects that feels like it should be quick because the seed sprouts fast then surprises beginners with how long the “tree” part takes. In real home gardens (pots on balconies, terrace planters, sunny windowsills), the biggest frustration is this: you get a cute seedling in weeks, but fruit can take years and sometimes never matches the lemon you ate.

    This guide gives you a realistic, practical timeline for how long a lemon tree takes to grow from seed, plus the exact steps and tricks that help seedlings grow stronger and reach flowering sooner (without unrealistic promises).

    Why Growing Lemon From Seed Takes So Long (And Why It Still Works)

    Lemon seeds sprout quickly because they’re programmed to germinate as soon as conditions are warm and moist. But fruiting is a separate phase. Citrus trees need time to:

    • Build enough roots and wood (branches) to support flowers and fruit
    • Mature physiologically (think “teenager to adult,” not just “bigger”)
    • Experience the right light intensity and seasonal cues

    In containers typical for balcony/terrace gardeners growth is slower because:

    • Roots are confined
    • Potting mixes dry out faster
    • Light indoors is rarely strong enough long-term

    Hands-on observation: seedlings grown on a bright windowsill often look fine for months, then stall thin stems, long internodes, pale leaves. It’s nearly always light intensity + nutrition + pot size timing.

    How Long Does a Lemon Tree Take to Grow From Seed? (Timeline You Can Expect)

    Here’s the realistic timeline most home gardeners see:

    Stage 1: Germination

    2–6 weeks

    • Faster (often 10–21 days) in warm conditions (24–30°C / 75–86°F)
    • Slower in cool rooms or if the seed dries out

    Visual cue: a white root appears first, then a green shoot.

    Stage 2: Seedling Establishment

    2–6 months

    • Expect 2–6 true leaves and a thin stem
    • Growth is steady if kept warm, bright, and evenly moist

    Visual cue: leaves become thicker, darker green, and less “floppy.”

    Stage 3: Young Tree (Potted Sapling)

    6 months–2 years

    • Can reach 30–90 cm (1–3 ft) depending on sun, feeding, and pot upgrades
    • Branching starts if you pinch/prune correctly

    Visual cue: stem begins to look woody; side shoots form.

    Stage 4: First Flowers (If Everything Goes Right)

    3–5 years (best-case) More commonly: 5–7 years in container culture.

    Stage 5: Fruit From a Seed-Grown Lemon

    5–10 years is common And some seed-grown lemons:

    • flower very late
    • flower but drop blooms
    • produce fruit that’s different from the parent (more sour, more bitter, thicker rind, lots of seeds)

    Important reality check: lemons grown from seed are not always “true to type.” For reliable fruit sooner, a grafted lemon tree wins every time.

    What You’ll Need (Beginner-Friendly + Budget Alternatives)

    • Fresh lemon seeds (from a ripe lemon)
    • Small pots (7–10 cm / 3–4 in) with drainage holes
      • Alternative: recycled yogurt cups (poke holes)
    • Seed-starting mix (light, fast-draining)
      • Eco option: coco coir + perlite instead of peat-heavy mixes
    • Perlite/pumice/sand (for drainage)
    • Clear plastic bag or humidity dome (optional but helpful)
    • Warm spot (top of fridge, warm shelf) not hot direct sun
    • Bright light after sprouting
      • Best: outdoor sun (when warm enough)
      • Indoor backup: grow light (a real one, not a dim “plant lamp”)
    • Balanced citrus fertilizer (or a balanced liquid feed)
    • Gloves + clean scissors for pruning

    Safety note: wash hands after handling soil and compost (especially with kids around). Keep fertilizers and soil amendments away from pets; some citrus essential oils and plant parts can irritate sensitive animals.

    Step-by-Step: How to Grow Lemon From Seed Successfully (And Not Stall Out)

    1) Start With the Right Seeds (Day 1)

    • Use fresh seeds from a ripe lemon (older, dried seeds germinate less reliably).
    • Rinse off pulp thoroughly (pulp encourages mold).

    Optional but useful: soak seeds 4–12 hours in water to hydrate.

    2) Plant Shallow in a Light Mix (Day 1)

    • Fill pot with moist (not soggy) seed mix.
    • Plant seed 1–1.5 cm (½ inch) deep.
    • Firm gently.

    Visual cue: the mix should clump if squeezed, but no water should drip out.

    3) Warmth + Even Moisture (Weeks 1–6)

    • Keep at 24–30°C (75–86°F) if possible.
    • Cover with a clear bag/dome to hold humidity (vent daily to prevent mold).
    • Water lightly when the surface begins to dry.

    Beginner mistake I see a lot: keeping soil constantly wet “so it doesn’t dry out.” Citrus seeds rot easily. Moist is good; wet is trouble.

    4) Give Strong Light Immediately After Sprouting

    Once you see green:

    • Move to the brightest spot you have.
    • Outdoors is best once nights stay above ~12–15°C (54–59°F).
    • Indoors: aim for 12–14 hours under a proper grow light.

    Visual cue of not enough light: thin stem, leaning, big gaps between leaves.

    5) Pot Up at the Right Time (Months 2–12)

    Don’t rush into a huge pot, but don’t leave it root-bound either.

    • First pot-up when roots circle the bottom or growth slows despite good care.
    • Move up one size at a time (e.g., from 4″ to 6″, then 8–10″).

    Container soil tip from real pots: use a chunky, free-draining mix so roots get oxygen. Lemon roots hate staying waterlogged.

    6) Feed Lightly but Consistently (After 6–8 Weeks)

    • Use a balanced liquid fertilizer at ½ strength every 2–4 weeks in the growing season.
    • If leaves go pale or yellow between veins, you may need micronutrients (iron/magnesium), common in pots and hard-water areas.

    Visual cue of good nutrition: new leaves emerge smaller at first, then expand glossy and medium-dark green.

    7) Pinch for Branching (Year 1–2)

    If your seedling becomes a single stick:

    • When it’s 20–30 cm (8–12 in) tall, pinch the top growth tip.
    • This encourages side branches (which later carry flowers).

    Practical warning: don’t prune heavily in winter or when the plant is stressed/dry citrus sulks.

    8) Manage Winter (Cold Climates)

    If you can’t keep it outdoors year-round:

    • Bring inside before cold nights.
    • Put it in the brightest window + supplemental light if possible.
    • Water less in winter, but don’t let it bone-dry.

    Indoor reality: most slow growth indoors comes from low light, not “bad luck.”

    Pro Tips & Best Practices (What Beginners Often Miss)

    Give it “real sun,” not just “bright room”

    A lemon seedling might survive indoors, but it won’t thrive. For fast growth:

    • Aim for 6–8+ hours of direct sun outdoors in warm months.

    Use drainage like it’s non-negotiable

    In small pots, one soggy week can set citrus back months.

    • Always use pots with drainage holes.
    • Avoid saucers full of standing water.

    Don’t chase fruit too early

    In years 1–2, focus on:

    • roots
    • branching
    • leaf health Fruit comes later.

    Watch for pests early (especially indoors)

    Common: spider mites, scale, fungus gnats.

    • Rinse leaves in the shower.
    • Use insecticidal soap if needed (test on a few leaves first).

    If you want fruit sooner: consider grafting

    Seed-grown lemon takes longer because it’s juvenile. Grafting a piece of mature lemon wood (scion) onto a healthy seedling rootstock can dramatically shorten time to flowering often to 2–3 years depending on conditions and skill.

    FAQ

    1) How long does a lemon tree take to grow from seed and produce lemons?

    Typically 5–10 years for fruit in home container conditions. Some may fruit in 3–5 years if grown hard (strong sun, proper feeding, ideal warmth), but many take longer.

    2) Why is my lemon seedling growing tall and thin?

    Almost always insufficient light. Move it to stronger sun or use a real grow light. Rotate the pot weekly so it doesn’t lean.

    3) Can I grow a lemon tree from seed indoors year-round?

    You can grow it as foliage, but for strong growth you usually need:

    • a bright south-facing window plus grow light
    • careful watering (indoor soils dry unevenly) Fruit indoors is possible but harder due to low light and low humidity.

    4) Do I need to dry the lemon seeds before planting?

    No. Fresh seeds generally germinate better. Drying can reduce viability.

    5) Why are the leaves turning yellow on my young lemon tree?

    Common causes in pots:

    • overwatering (roots lose oxygen)
    • underfeeding (nitrogen + micronutrients)
    • hard water/high pH causing iron lockout Fix by improving drainage, feeding lightly, and checking watering rhythm.

    6) Will my seed-grown lemon tree be the same as the lemon I ate?

    Not guaranteed. Seed-grown citrus can vary in fruit quality. If you want predictable fruit, buy a grafted named variety.

    When NOT to Use This Method And What to Do Instead

    Growing from seed is great for learning and for a decorative citrus plant, but skip it if:

    • You want lemons quickly (within 1–3 years)
    • You have very low light indoors and no grow light
    • You live in a cold climate and can’t overwinter citrus properly
    • You want a specific variety (Meyer, Lisbon, Eureka, etc.) with reliable fruit

    Safer alternative for beginners: buy a small grafted lemon tree suited to containers. You’ll get earlier fruit and fewer surprises.

    Alternative Methods (Faster or More Reliable Than Seed)

    1) Buy a Grafted Lemon Tree (Best for Fruit)

    Pros: fruits sooner (often 1–3 years), true-to-type, predictable Cons: costs more upfront, needs careful acclimation

    2) Root a Cutting (Sometimes Works, Not Always Easy)

    Pros: clone of the parent plant Cons: citrus cuttings can be slow and finicky; rooting success varies by variety and conditions

    3) Air Layering (Good Skill-Building Method)

    Pros: higher success than cuttings for some gardeners, clone of parent Cons: takes time and patience; not as beginner-simple as buying grafted

    4) Grow From Seed + Graft Later (Best “Hybrid” Approach)

    Pros: you get a strong root system and can add a fruiting variety later Cons: requires grafting skills and access to scion wood

    Conclusion

    If you’re asking how long a lemon tree takes to grow from seed, here’s the practical takeaway:

    • Sprout: 2–6 weeks
    • Look like a small tree: 1–2 years (in a pot)
    • Flower: often 3–7 years
    • Fruit: commonly 5–10 years

    Growing lemon from seed is absolutely worth doing if you enjoy the process and want a hardy, home-grown plant to learn with. Just treat it like a long-term project: prioritize sunlight, drainage, steady feeding, and gradual pot upgrades and consider grafting or buying a grafted plant if your main goal is harvesting lemons sooner.

    If you tell me your climate (approx. winter lows), whether it’ll live outdoors or indoors, and how much sun you get, I can give you a more accurate timeline and a simple care plan for your setup.

  • What are the little black flying bugs on my tomato plants

    What are the little black flying bugs on my tomato plants

    Every product is independently reviewed and selected by our editors. If you buy something through our links, we may earn an affiliate commission at no extra cost to you.

    If you’ve walked out to check your tomato patch and spotted tiny black flying insects hovering around the leaves, you’re not alone. In my own home garden, I’ve battled these pests almost every summer usually right when the plants start looking strong. These bugs may seem harmless at first, but they can quickly weaken tomato plants, stunt growth, and attract secondary problems like mold.

    The good news: once you identify them correctly and act early, they’re easy to control even in small balcony or terrace gardens.

    This guide explains exactly what the little black flying bugs on your tomato plants are, why they show up, and how to get rid of them using methods I’ve personally tested in real gardens.

    Why These Little Black Flying Bugs Appear on Tomato Plants

    In most home gardens, the “little black flying bugs” on tomatoes are one of the following:

    • Fungus gnats
    • Aphids (black aphids in particular)
    • Whiteflies that appear dark when backlit
    • Thrips (some species appear dark and small)

    These insects show up when conditions are warm, slightly humid, and when the potting soil stays damp for too long. Tomato plants are vigorous growers, and pests love the tender new growth and moist soil that often surrounds container-grown tomatoes.

    The method below works because it disrupts their breeding cycle, removes food sources, and strengthens the tomato plant so it can recover quickly.

    Why This Method Works

    In real gardens, most infestations happen because:

    • Soil stays constantly moist, attracting fungus gnats.
    • Tender tomato growth releases more sap, attracting aphids and thrips.
    • Over-fertilizing creates soft, weak growth, which pests exploit.
    • Low airflow in balconies or patios allows flying bugs to multiply.

    The solution focuses on three things I’ve learned from hands-on experience:

    • Drying the topsoil breaks the life cycle of soil-dwelling pests like fungus gnats.
    • Removing soft, damaged, or infested leaves deprives sap-feeding pests of food.
    • Using light, natural sprays knocks down active pests without burning tomato foliage.

    Most gardeners try to treat the bugs directly, but the real fix is correcting the environment the pests thrive in.

    What You’ll Need

    You probably already have most of these:

    • Sticky yellow traps (budget-friendly and very effective)
    • Neem oil or insecticidal soap (organic-safe)
    • A small spray bottle
    • Fresh, well-draining potting mix (if repotting is needed)
    • A small fan (for balconies or patios with poor airflow)
    • Diatomaceous earth (optional but helpful)
    • Clean pruning scissors

    Eco-friendly options:

    • Neem oil
    • Castile soap spray (½ teaspoon per liter of water)
    • Sticky traps made from recycled plastic + homemade glue (resin + oil)

    Step-by-Step: How to Identify and Remove the Little Black Flying Bugs on Tomato Plants

    Step 1: Identify the Bug

    Check these signs:

    Fungus gnats

    • Tiny black flies hovering around soil
    • They scatter when you water
    • Topsoil looks constantly damp
    • Larvae visible in soil if you look closely

    Black aphids

    • Clustered under leaves or around stems
    • Sticky residue (honeydew) on leaves
    • Curling or distorted new growth

    Thrips

    • Extremely tiny, fast-moving, slender dark bugs
    • Silvery scratches or streaks on leaves
    • Flowers look damaged

    Whiteflies (sometimes appear dark while flying)

    • Cloud of tiny insects when you touch the plant
    • White powdery adults but dark immature stages

    Correct identification helps, but the treatment below works safely for all four.

    Step 2: Dry Out the Soil Surface

    Time: Morning or evening Why: Fungus gnats lay eggs in moist soil

    Let the top inch of soil dry completely before watering again. In my container tomatoes, simply switching to deeper, less frequent watering made the gnats disappear within a week.

    If the soil stays wet too long, check drainage holes or add aeration (perlite or coarse sand).

    Step 3: Set Sticky Yellow Traps

    Hang or place 1–2 per tomato plant.

    In small balcony gardens, these traps catch:

    • Adult fungus gnats
    • Winged aphids
    • Thrips
    • Whiteflies

    They help you monitor progress too. You’ll know it’s working when the number of new insects decreases after 2–3 days.

    Step 4: Spray with Neem Oil or Insecticidal Soap

    Time: Early evening (to avoid leaf burn) Frequency: Every 4–5 days for 2 weeks

    Spray:

    • Undersides of leaves
    • New growth
    • Stems
    • Top layer of soil

    From experience, light, repeated sprays are better than one strong spray. Strong soap can burn tomato leaves.

    If using neem:

    • Mix 1 teaspoon neem oil + a few drops mild soap + 1 liter water.

    Shake well and apply immediately.

    Step 5: Prune Infested Leaves

    Remove:

    • Curled leaves
    • Sticky leaves
    • Leaves with clusters of black aphids

    Pruning improves airflow and removes the bugs’ hiding spots.

    Important: Do not compost severely infested leaves dispose of them in sealed bags.

    Step 6: Improve Airflow

    Especially for balcony and terrace gardeners.

    A small fan running for a few hours a day:

    • Disrupts flying insects
    • Keeps leaves dry
    • Strengthens tomato stems naturally

    I’ve seen huge reductions in whiteflies and gnats just by increasing airflow.

    Pro Tips & Best Practices

    • Water deeply but less often tomatoes hate constantly damp soil.
    • Avoid splashing water on leaves, which attracts pests.
    • Use mulch sparingly on potted tomatoes; too much keeps soil too moist.
    • Don’t over-fertilize soft growth attracts aphids instantly.
    • Check the underside of leaves weekly; early detection saves huge headaches.
    • If pots stay wet, lift them slightly using pot feet or bricks.

    Common Mistakes to Avoid

    • Using strong soap that burns tomato leaves
    • Watering every day “just because”
    • Ignoring airflow in enclosed balconies
    • Spraying during midday sun
    • Using chemical pesticides in small home gardens (they cause more harm than good)

    FAQ

    Why are there so many tiny black flies in my tomato soil?

    You likely have fungus gnats. They breed in moist potting soil, and tomatoes grown in containers are especially prone when watering is too frequent.

    Can these black bugs kill my tomato plants?

    Usually not immediately, but they weaken the plant, slow growth, and open the door to fungal problems. Heavy aphid or thrip infestations can damage fruiting if ignored.

    Is neem oil safe for tomato plants?

    Yes,if applied in the evening and mixed correctly. Midday spraying can cause leaf burn.

    Why do these bugs keep coming back?

    Most gardeners treat the insects but not the environment. Consistently wet soil, low airflow, and excess fertilizer invite pests back.

    Can I still eat the tomatoes after treating the plants?

    Yes. Neem oil and insecticidal soap are safe when used correctly. Rinse tomatoes before eating.

    When NOT to Use This Method

    • During extreme heatwaves (above 32°C), neem oil can burn foliage.
    • On newly transplanted seedlings use milder soap sprays first.
    • If soil is already extremely dry and hydrophobic; fix watering issues before treating pests.

    For very heavy infestations, you may need to repot with fresh soil.

    Alternative Methods

    Beneficial insects

    Ladybugs and lacewings help with aphids and whiteflies, but they’re harder to use in small balconies.

    Hydrogen peroxide soil drench (for gnats)

    Works well but must be diluted correctly (1 part 3% peroxide to 4 parts water). Best for severe infestations only.

    Sticky traps alone

    Good for monitoring but not enough as a standalone treatment.

    For most home gardeners, the neem + airflow + soil drying method is easiest and safest.

    Conclusion

    If you’re wondering “what are the little black flying bugs on my tomato plants?”, the answer is usually fungus gnats, black aphids, thrips, or whitefliesall common in warm, container-based gardens. With early action and the simple steps above, you can clear them out quickly and keep your tomatoes healthy without harsh chemicals.

    Focus on:

    • Dry soil cycles
    • Gentle but repeated sprays
    • Good airflow
    • Regular leaf checks

    With a little patience and consistency, your tomato plants will bounce back fast and you’ll be better prepared the next time these pests show up.

  • What are the little black bugs on my indoor plants |  Simple Fixes That Actually Work

    What are the little black bugs on my indoor plants | Simple Fixes That Actually Work

    Every product is independently reviewed and selected by our editors. If you buy something through our links, we may earn an affiliate commission at no extra cost to you.

    If you’ve suddenly noticed little black bugs on your indoor plants especially hovering around the soil or crawling on leaves you’re not alone. I’ve dealt with this many times in my own home and balcony garden, and the good news is that most black bugs on houseplants are easy to identify and get rid of once you know what you’re dealing with.

    This guide breaks everything down in simple, practical steps you can use immediately.

    Why You’re Seeing Little Black Bugs on Indoor Plants

    In most real-world indoor setups (windowsills, grow shelves, balcony corners), these tiny black insects show up because the soil stays damp for too long, or there’s decaying organic matter in the pot. Indoors, where air movement is low, moisture doesn’t evaporate quickly making the perfect environment for pests.

    The most common culprits are:

    • Fungus gnats (tiny black flies hovering around the soil)
    • Aphids (pear-shaped black insects clustered under leaves)
    • Thrips (slender black insects that move quickly)
    • Spider mites (dark forms) (tiny dots that leave webbing)

    Most gardeners mistake them all for “gnats,” but identifying them correctly saves a lot of frustration.

    I’ve managed these pests dozens of times in my own home garden, and the solutions below are the ones that reliably work in real living spaces not just theory.

    Why These Methods Work

    Indoor plant bugs follow a simple pattern:

    • Fungus gnats breed in constantly moist potting soil.
    • Aphids and thrips thrive on soft new growth and overfertilized plants.
    • Spider mites explode in dry, dusty indoor conditions.

    When you interrupt their environment by drying soil, improving airflow, cleaning leaves, or using the right organic controls the pests can’t reproduce.

    These aren’t complicated fixes. They just require consistency.

    What You’ll Need

    You don’t need expensive pesticides. Most indoor gardeners already have these:

    • Sticky traps (yellow or blue)
    • Neem oil or insecticidal soap
    • Hydrogen peroxide (3%)
    • A spray bottle
    • Fresh potting mix (well-draining)
    • Bottom-watering tray
    • Small fan (optional but very helpful)

    Eco-safe options:

    • Cinnamon powder (soil fungus reducer)
    • Mosquito bits (Bti) for fungus gnat larvae
    • Diatomaceous earth (food-grade)

    Most of these are safe for homes with pets/children when used correctly avoid airborne dust and store inputs securely.

    Step-by-Step: How to Identify and Remove Little Black Bugs

    1. Identify the Bug (1 minute)

    Check these signs:

    Fungus gnats

    • Tiny black flies
    • Hovering around soil
    • Larvae are tiny white worms in soil

    Aphids

    • Pear-shaped black or dark insects
    • Usually clustered on stems/new leaves
    • Leaves become sticky

    Thrips

    • Thin, black, fast-moving insects
    • Leaves get silver streaks

    Spider mites

    • Black dots on leaves
    • Webbing between stems
    • Leaves look dusty or speckled

    Once you identify the bug, use the appropriate steps below.

    2. How to Get Rid of Fungus Gnats (Most Common Indoor Pest)

    From real hands-on experience, this is the combo that works fastest:

    Step 1: Let the Soil Dry Out

    Allow the top 2–3 cm of soil to dry before watering again. Gnats cannot breed in dry soil.

    Step 2: Use Hydrogen Peroxide Soil Drench

    Mix:

    • 1 part 3% hydrogen peroxide
    • 4 parts water

    Pour over soil once. This kills larvae safely without harming the plant.

    Step 3: Add Sticky Traps

    Place a few yellow sticky traps near the soil surface. They catch adult gnats within hours.

    Step 4: Add a Top Layer

    Add one of these:

    • Fine gravel
    • Coarse sand
    • Diatomaceous earth

    This prevents adults from laying eggs.

    Step 5: Improve Airflow

    Set a small fan on low for a few hours daily. Gnats hate moving air.

    3. How to Get Rid of Aphids

    Step 1: Wash Them Off

    Use lukewarm water and gently rinse leaves (especially undersides).

    Step 2: Spray Neem Oil or Insecticidal Soap

    Apply every 3–4 days for two weeks.

    Step 3: Cut Back Leggy, Soft Growth

    Aphids love tender new leaves.

    4. How to Get Rid of Thrips

    Step 1: Prune Affected Leaves

    Dispose of them securely.

    Step 2: Use Blue Sticky Traps

    Thrips are more attracted to blue than yellow.

    Step 3: Apply Neem or Soap

    Spray leaves and stems thoroughly, especially crevices.

    5. How to Get Rid of Spider Mites

    Step 1: Rinse the Plant

    Focus on undersides of leaves.

    Step 2: Increase Humidity

    Mist daily or place a pebble tray with water. Spider mites slow down drastically in humid environments.

    Step 3: Use an Oil Spray

    Neem or horticultural oils suffocate mites and eggs. Spray weekly for 3 weeks.

    Pro Tips & Best Practices

    • Always check under leaves that’s where most pests hide.
    • Bottom water your plants to keep the topsoil dryer.
    • Quarantine any new plant for 7–10 days.
    • Overfertilizing causes soft growth that attracts pests go easy on nitrogen.
    • If you see flies when you water, it’s almost always fungus gnats.
    • Replace old, compacted potting mix yearly; pests love stale soil.

    FAQ

    Why do I keep getting little black bugs in my plant soil?

    Usually because the soil stays damp too long or has decayed organic matter.

    Are fungus gnats harmful to my plants?

    Adult gnats are harmless, but larvae can damage roots in large numbers.

    Can I use cinnamon to kill fungus gnats?

    Cinnamon helps reduce soil fungus (their food source), but it doesn’t kill larvae completely.

    How often should I apply neem oil?

    Every 7 days, or every 3 days for heavy infestations.

    Are these bugs dangerous to pets?

    Most are harmless, but avoid letting pets ingest soil drenched with hydrogen peroxide or neem.

    Will repotting remove bugs?

    Repotting helps if the soil is heavily infested, but always combine with other methods.

    When NOT to Use These Methods

    • Avoid hydrogen peroxide drenches on very young seedlings.
    • Do not use neem oil in direct hot sunlight (leaf burn).
    • Don’t use diatomaceous earth where pets may inhale dust.
    • Do not over-dry moisture-loving plants (calatheas, ferns).

    Alternative Methods You Can Try

    Different approaches work better depending on your setup:

    Bti (Mosquito Bits)

    • Highly effective on fungus gnat larvae
    • Safe and organic
    • Works slowly (1–2 weeks)

    Soil Replacement

    • Best for severe infestations
    • Instant reset for the plant
    • Messy but effective

    Sticky Traps Alone

    • Helps monitor pests
    • Won’t solve larvae problems

    Biological Controls (beneficial nematodes)

    • Organic and powerful
    • Overkill for small houseplant collections

    Conclusion

    The little black bugs on your indoor plants whether fungus gnats, aphids, thrips, or mites are annoying but very fixable. By identifying the pest correctly, adjusting watering habits, and using gentle, proven treatments, you can clear the infestation within a couple of weeks.

    Practical indoor gardening is all about balance: not too much water, enough airflow, and regular leaf checks. Once you build those habits, pest problems become rare and easy to manage.

    If you’d like, I can also help you identify the bugs you have just send a photo.