Category: Low Maintenance Plants

  • How to grow mint for beginners

    How to grow mint for beginners

    Every product is independently reviewed and selected by our editors. If you buy something through our links, we may earn an affiliate commission at no extra cost to you.

    Introduction

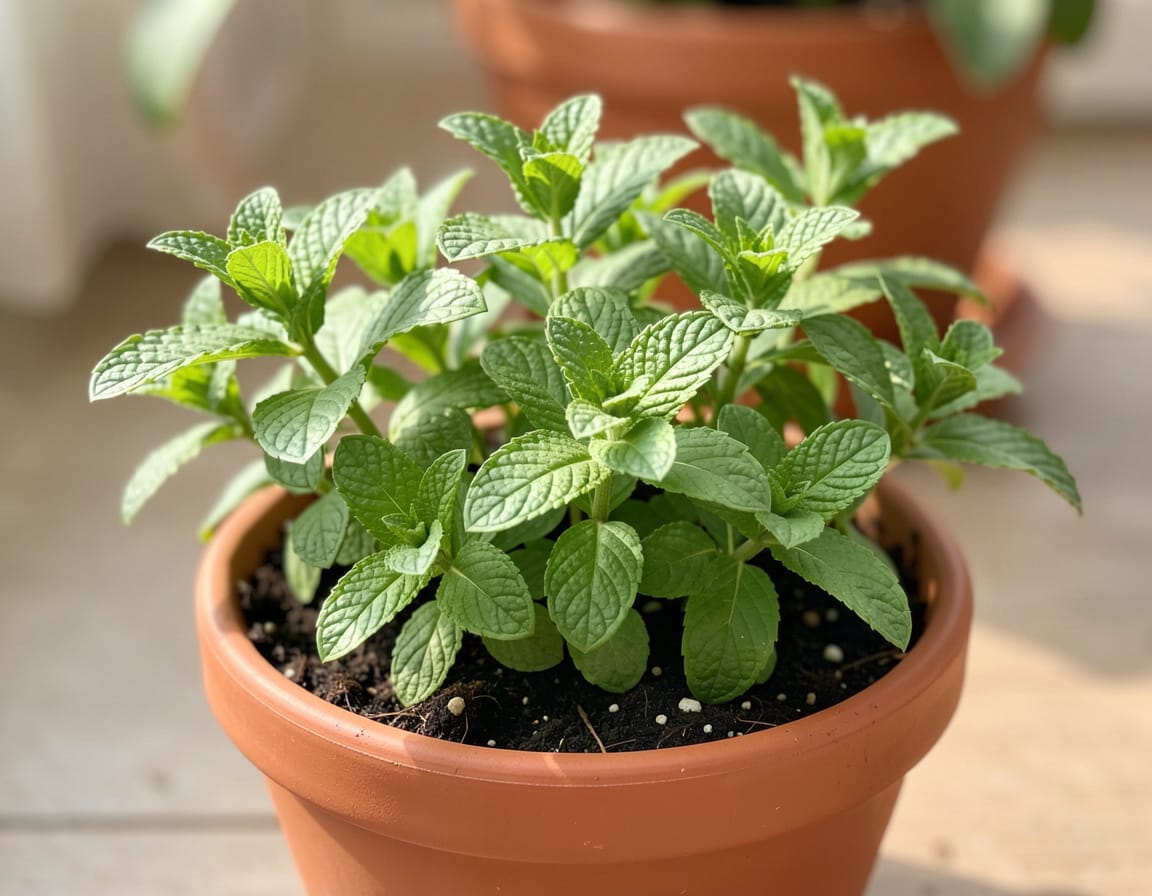
    Learning how to grow mint for beginners is one of the most rewarding ways to start your journey into organic gardening. Mint (Mentha spp.) is a hardy, aromatic perennial herb that thrives indoors or outdoors with minimal fuss. It’s also one of the best plants for improving indoor air quality, reducing kitchen waste (since you can snip fresh leaves anytime), and bringing a sense of calm to your space through its clean, refreshing scent.

    From a sustainable home perspective, mint offers three major benefits:

    • Health and indoor air quality: Fresh mint naturally purifies air and adds a mild antimicrobial effect to your home.
    • Mental well-being: The scent of mint has been shown to ease stress and improve concentration.
    • Environmental impact: Growing herbs like mint at home reduces packaging waste and transportation emissions associated with store-bought herbs.

    Whether you have a sunny kitchen windowsill, a shaded patio, or a small balcony, this guide will walk you through exactly how to grow mint organically from setup to harvest using methods I’ve refined through years of hands-on work with U.S. homeowners and renters.

    Everyday Organic Styling & Care Routine

    Mint grows fast and adapts well, but it does best when you establish a simple, consistent care routine. Here’s what I recommend to my clients who want a steady supply of lush, fragrant leaves:

    Daily

    • Check moisture: Mint loves evenly moist (not soggy) soil. Press your finger ½ inch into the soil if it feels dry, water it lightly.
    • Rotate pots: If your mint is indoors, rotate the container every few days for balanced light exposure.
    • Snip leaves regularly: Frequent harvesting encourages bushier growth and keeps the plant from becoming leggy.

    Weekly

    • Inspect for pests: Look under leaves for aphids or spider mites. Wipe them off with a damp cloth or spray with a mild organic neem oil solution if needed.
    • Trim for shape: Use clean scissors to cut back woody stems or overgrown runners. Compost the trimmings it’s a great way to close the sustainability loop.
    • Check drainage: Make sure water isn’t sitting in saucers or trays; mint roots dislike being waterlogged.

    What You’ll Need

    ItemWhy It’s UsedOrganic / Health BenefitsSustainability Considerations
    Mint plant or cuttingStarting point for your herb gardenProvides fresh, chemical-free leavesChoose locally grown or pesticide-free plants
    Pot (8–10 inches wide, minimum)Contains roots and prevents spreadingHelps control growth naturallyUse terracotta or recycled ceramic pots instead of plastic
    Organic potting soilBase for healthy growthFree from synthetic fertilizersLook for mixes with compost, coco coir, and perlite
    Compost or worm castingsAdds nutrients and beneficial microbesNaturally enriches soil healthReduces food waste through composting
    Scissors or pruning shearsFor trimming and harvestingKeeps plant disease-freeChoose a durable, long-lasting metal pair
    Watering can with fine spoutEnsures gentle wateringPrevents soil compactionReuse glass or metal containers instead of plastic

    Deep Organic Setup or Seasonal Refresh

    Even though mint is easy to maintain, I recommend doing a deeper reset every few months especially at the start of each growing season. Here’s how I handle this process in clients’ homes:

    Step 1: Divide and Replant

    Mint’s roots, called rhizomes, spread aggressively. Every spring or when the pot feels crowded, remove the plant, gently loosen the roots, and divide into smaller sections. Replant one section in fresh organic soil and share or compost the rest. This prevents overcrowding and maintains strong growth.

    Step 2: Refresh the Soil

    Old potting soil loses nutrients and structure over time. Mix in 25–30% fresh compost or new organic potting mix every few months. This keeps nutrients balanced and soil microbes active.

    Step 3: Adjust Lighting Seasonally

    • Spring/Summer: Mint loves partial sun. Outdoor growers should give it morning light and afternoon shade.
    • Fall/Winter: Move indoor pots near a bright window. If natural light is limited, a small full-spectrum LED grow light for 8–10 hours daily works well.

    Step 4: Control Humidity

    Indoor heating can dry out air. Place the pot on a tray filled with pebbles and water just enough to increase humidity without soaking roots.

    Prevention & Sustainability Tips

    Most mint-growing problems come from overwatering, poor soil, or synthetic fertilizers. My approach centers on prevention through organic care:

    • Avoid chemical fertilizers: They often promote fast but weak growth and can degrade soil health long-term. Compost and diluted fish emulsion feed mint steadily and organically.
    • Water smartly: Mint roots rot easily if soil stays too wet. Ensure drainage holes are open and water only when the surface feels slightly dry.
    • Keep pests away naturally: Companion plants like basil or marigold deter insects. Indoors, a quick mist of diluted peppermint oil every two weeks discourages pests and makes your kitchen smell great.
    • Reuse and recycle: Old mint stems can be composted or rooted in water to start new plants. Zero waste, endless mint.

    Common Mistakes to Avoid

    After years of helping homeowners troubleshoot herb gardens, these are the most common mint mistakes I see and how to fix them.

    • Planting mint directly in the ground without barriers Mint spreads aggressively. If you plant it in garden soil, use a root barrier (at least 10 inches deep) or plant it in a sunken pot to contain it.
    • Overwatering Consistently soggy soil suffocates roots and causes yellow leaves. Water thoroughly, then allow the top inch to dry before watering again.
    • Using chemically treated potting mix or decorative stones Many commercial mixes contain synthetic fertilizers or fungicides that disrupt soil microbes. Always choose certified organic soil and natural gravel or pebbles for drainage.
    • Ignoring light variations Mint tolerates partial shade but needs at least 3–4 hours of indirect sunlight daily. Weak light leads to weak flavor.
    • Believing “eco-friendly” labels without verification Many décor pots marketed as “sustainable” are coated with synthetic resin finishes. Look for unglazed terracotta, bamboo fiber, or reclaimed ceramics instead.

    Local U.S. Home Context

    Mint adapts beautifully across U.S. regions, but local conditions matter.

    • Small apartments: Place your mint on a bright kitchen windowsill or a bathroom shelf with indirect light. Keep a small saucer under the pot but empty it after watering.
    • Rental homes: Since mint spreads, container planting is best you can easily move it when you relocate.
    • Open-concept homes: Cluster mint with other aromatic herbs like rosemary or thyme near cooking areas for natural air purification.
    • Urban balconies: Mint tolerates pollution better than many herbs. Just rinse leaves before eating.
    • Suburban gardens: Grow mint along paths or in raised beds with barriers to prevent spreading.
    • Cold climates (Northeast, Midwest): Bring potted mint indoors before frost; it’ll go dormant but regrow in spring.
    • Hot climates (Southwest, Texas): Provide afternoon shade and keep humidity up with a small tray or misting.

    Extra Expert Tips

    Here are a few advanced but practical insights I’ve learned from maintaining healthy mint for over a decade in real homes:

    • Bottom-watering method: Instead of pouring water from above, set the pot in a shallow dish of water for 10 minutes. This encourages deep, even root hydration without compacting the soil.
    • Quick root propagation: Snip a healthy stem below a leaf node, place it in a glass of water, and wait for roots (5–7 days). Then transplant into soil. This is ideal for new renters who want free plants.
    • Natural fertilizer tea: Steep a handful of compost or worm castings in a bucket of water for 24 hours. Strain and use that liquid every 3–4 weeks for gentle feeding.
    • Harvest timing: Pick mint leaves early in the morning when essential oils are most concentrated. That’s when flavor and aroma peak.
    • Budget-friendly décor pairing: Mint pairs beautifully with natural jute mats, unglazed clay pots, and recycled glass jars. These materials absorb humidity and maintain a truly organic aesthetic.
    • Long-term sustainability: Rotate pots every season, replenish compost, and prune regularly. With this rhythm, your mint can stay productive for 5+ years.

    FAQ: How to Grow Mint for Beginners

    1. Can I grow mint indoors year-round? Yes. Mint grows happily indoors as long as it gets bright indirect light and stays evenly moist. Use organic soil and compost-based feeding for best results.

    2. How often should I water mint? Typically every 2–3 days in summer and once a week in winter. Always check soil moisture with your finger mint prefers damp, not soaked.

    3. What’s the best container for growing mint? Terracotta or ceramic pots with drainage holes. These materials “breathe,” preventing root rot and giving a natural, earthy feel to your décor.

    4. What’s the easiest way for beginners to propagate mint? Take a 4–6 inch stem cutting, remove the lower leaves, and place it in water until roots form. Then plant it in fresh organic soil.

    5. Does mint need fertilizer? Very little. Compost or diluted organic seaweed extract every few weeks keeps the plant healthy without chemical buildup.

    6. Can I grow mint next to other herbs? Yes, but keep it in its own pot. Mint spreads quickly and can overtake neighboring herbs if planted together in the same container.

    7. Why does my mint look leggy or weak? Usually it’s from inadequate sunlight or infrequent pruning. Move it to a brighter spot and trim stems regularly to encourage bushy growth.

    Conclusion

    Mastering how to grow mint for beginners is about balance light, water, and mindful care. Once you develop a simple routine, mint repays you endlessly with fresh leaves, clean fragrance, and a touch of green vitality that brightens any space.

    In my experience, mint thrives best when treated as part of a living home ecosystem: nourished with compost, contained in natural materials, and shared generously. Whether you’re in a downtown apartment or a suburban kitchen, a single pot of mint can anchor your organic home décor and remind you daily that sustainability starts with small, living choices.

  • How to grow mint plants indoors

    How to grow mint plants indoors

    Every product is independently reviewed and selected by our editors. If you buy something through our links, we may earn an affiliate commission at no extra cost to you.

    Growing mint plants indoors is one of the easiest and most rewarding ways to bring fresh, fragrant greenery into your home. As a sustainable home decoration and organic gardening consultant, I’ve helped many U.S. homeowners and renters set up thriving indoor herb gardens  and mint is often the first success story. With the right setup, you can enjoy year-round mint for cooking, tea, and natural air purification, even in a small apartment kitchen or shaded living room window.

    Why Growing Mint Plants Indoors Matters

    Mint plants are more than just a culinary herb. When grown indoors organically, they contribute to:

    • Healthier air quality: Mint leaves release subtle essential oils that can help neutralize odors and refresh stagnant indoor air.
    • Mental well-being: The scent of mint has calming, restorative effects that can reduce fatigue and improve focus a natural boost for home offices or study spaces.
    • Sustainability: Growing herbs at home reduces packaging waste and transportation emissions tied to store-bought herbs.
    • Toxin-free living: Indoor-grown mint can thrive without synthetic fertilizers or pesticides, helping you maintain an organic, chemical-free living environment.

    Everyday Organic Styling & Care Routine

    Keeping mint healthy indoors comes down to consistent, simple habits. I usually recommend the following daily and weekly routine for my clients:

    Daily:

    • Check the soil moisture by touch. Mint prefers evenly moist but not soggy soil. Water lightly when the top inch feels dry.
    • Rotate the pot every few days to encourage even growth and prevent leggy stems.
    • Pinch off leaves from the top to encourage bushier growth and prevent flowering, which can make leaves taste bitter.

    Weekly:

    • Wipe the leaves gently with a damp cloth to remove dust and improve photosynthesis.
    • Feed lightly with organic liquid fertilizer (like fish emulsion or compost tea) every two to three weeks during active growth.
    • Trim back any weak or yellowing stems to keep the plant compact and vibrant.

    What You’ll Need for Growing Mint Plants Indoors

    ItemWhy It’s UsedOrganic / Health BenefitsSustainability Considerations
    Wide pot (8–10 inches)Mint spreads by runners, so space encourages healthy root growth.Prevents overcrowding and fungal stress.Use terracotta or recycled ceramic pots — long-lasting and breathable.
    Organic potting soilProvides structure, aeration, and nutrients.Avoids chemical fertilizer residues.Choose peat-free mixes with composted bark or coconut coir.
    Drainage saucerPrevents overwatering and protects indoor surfaces.Reduces root rot risk.Durable clay or glazed ceramic options last years.
    Full-spectrum grow light (if needed)Supplements low natural light.Ensures steady, pesticide-free indoor growth.LED lights use low energy and last 10+ years.
    Organic fertilizerBoosts nutrient levels naturally.Supports healthy leaf production without chemical buildup.Compost tea or worm castings are renewable and biodegradable.
    Sharp scissors or pruning shearsFor clean harvesting and maintenance.Reduces plant stress and disease spread.Stainless steel tools last decades with proper care.

    Deep Organic Setup or Seasonal Refresh

    Even though mint is a hardy perennial, it benefits from occasional rejuvenation. Here’s how to refresh your indoor mint garden seasonally:

    1. Repot Every Spring or When Roots Become Dense

    Mint can get root-bound quickly. If you notice roots circling the bottom of the pot, transfer it to a slightly larger container with fresh organic soil. This refresh boosts nutrient content and airflow around the roots.

    2. Prune Aggressively Before Winter

    Before indoor heating season dries the air, trim mint back to about one-third of its height. This helps the plant conserve energy and encourages denser regrowth.

    3. Divide and Propagate

    Indoor mint can easily be divided. Gently remove the root ball, separate runners with 2–3 stems each, and replant in new pots. This not only prevents overcrowding but also gives you fresh plants to share or relocate to different rooms.

    Prevention & Sustainability Tips

    Avoid Synthetic Décor and Chemicals

    Never line herb pots with plastic or use chemical leaf shine products. These trap moisture and block natural transpiration. Instead, use unglazed terracotta or ceramic containers that regulate soil moisture naturally.

    Prevent Plant Stress

    Mint tolerates partial shade but dislikes dry air. Place pots away from heating vents or drafty windows. A shallow tray of pebbles filled with water under the pot can gently raise humidity without causing soggy roots.

    Reduce Waste

    Instead of discarding older mint stems, root them in water (they sprout quickly within a week) and replant. Compost any trimmings you can’t use in cooking.

    Long-lasting Organic Beauty

    To keep that lush, fresh look, regularly harvest mint leaves the plant thrives on pruning. Frequent harvesting encourages new growth and keeps your indoor garden looking full and inviting.

    Common Mistakes to Avoid

    • Using chemically treated store-bought mint starters: Many supermarket herbs are treated with growth inhibitors. Always start with organically grown seedlings or propagate from a trusted organic source.
    • Overwatering: Mint likes moisture but suffers quickly from root rot if soil stays soggy. Use well-draining soil and a pot with holes.
    • Poor lighting: Mint needs at least 4–6 hours of bright indirect light or grow-light exposure daily. Without it, stems become thin and weak.
    • Ignoring humidity: Indoor heat and air conditioning can dry the leaves. Mist occasionally or use a humidity tray.
    • Crowding different herbs together: Mint is aggressive if you plant it with other herbs, it can overtake them. Keep mint in its own container.

    Local U.S. Home Context

    One of the benefits of growing mint indoors is how adaptable it is to different American home layouts and climates.

    • Apartments: Place your mint on a bright kitchen windowsill or balcony rail. Even LED grow lights can sustain it through winter.
    • Rental homes: Since mint is container-based, it’s fully portable and doesn’t damage flooring or window sills.
    • Suburban houses: You can easily move pots outdoors in summer, then bring them back inside when temperatures drop below 50°F.
    • Low-light homes: Choose peppermint or chocolate mint, which tolerate lower light better than spearmint.
    • Humid regions (Southeast, Pacific Northwest): Focus on airflow small fans or open windows help prevent mildew.
    • Dry climates (Southwest, Mountain states): Regular misting or pebble trays keep leaves lush and prevent browning edges.

    Extra Expert Tips

    • Budget-Friendly Organic Upgrades: Mix a spoonful of homemade compost or used coffee grounds into your potting mix every few months for a nutrient boost.
    • Low-Maintenance Strategy: Use self-watering planters with organic soil. Mint will regulate its own moisture uptake remarkably well.
    • Long-Term Sustainability Hack: Once a year, cut back your mint, root new stems, and refresh the soil. This keeps the same lineage thriving indefinitely I’ve seen families keep the same mint line alive for over a decade.
    • Aesthetic Integration: Use mint pots as part of your natural interior decoration their bright green leaves complement wood, stone, and linen textures beautifully, adding a calming organic touch to kitchens and entryways.

    FAQ: Growing Mint Plants Indoors

    1. What’s the best lighting setup for mint plants indoors? Mint grows best with 4–6 hours of bright, indirect sunlight or under full-spectrum LED grow lights. In north-facing or shaded apartments, I recommend a small, energy-efficient grow light on a 12-hour timer.

    2. Can I grow mint plants indoors year-round? Yes with consistent moisture, moderate temperatures (60–75°F), and light, mint thrives indoors year-round. It may slow down slightly in winter, but pruning and supplemental lighting keep it vigorous.

    3. How often should I water indoor mint plants? Check the top inch of soil daily. Water when it feels dry but never let the pot sit in standing water. Consistent hydration keeps mint leaves tender and flavorful.

    4. Do I need to fertilize mint grown indoors? Yes, but lightly. A diluted organic fertilizer every 2–3 weeks during spring and summer is plenty. Overfertilizing can reduce flavor intensity.

    5. Why are my indoor mint leaves turning yellow? Yellowing usually signals overwatering or nutrient imbalance. Improve drainage, let the soil dry slightly between waterings, and refresh the soil if compacted.

    6. What is the best organic soil mix for growing mint plants indoors? Use a blend of organic potting soil, compost, and perlite or coarse sand for drainage. Avoid heavy, clay-based soils that retain too much water.

    7. Can I grow other herbs next to my mint plants indoors? I don’t recommend it. Mint’s roots are vigorous and can crowd out other herbs. Keep it separate it’ll reward you with more robust growth and easier care.

    Conclusion: Bringing Fresh, Organic Energy Into Your Home

    When you grow mint plants indoors, you’re doing more than cultivating a herb you’re nurturing a living, organic element that enhances your home’s air, beauty, and vitality. With just a bit of attention to light, water, and soil quality, mint becomes one of the most forgiving and rewarding indoor plants you can grow.

    Whether you’re a renter with a small kitchen windowsill or a homeowner creating a full indoor herb wall, mint offers a simple gateway into sustainable, toxin-free living and a daily reminder that organic beauty thrives best when it’s cared for naturally.

  • How long do carrots take to grow at home

    How long do carrots take to grow at home

    Every product is independently reviewed and selected by our editors. If you buy something through our links, we may earn an affiliate commission at no extra cost to you.

    Growing your own carrots sounds simple until you actually plant them and start wondering when anything is supposed to happen. If you’ve ever stared at a patch of soil asking how long do carrots take to grow at home, you’re definitely not alone. The answer isn’t just a number of days; it depends on variety, weather, soil, and a bit of patience. In this post, we’ll break down the carrot growing timeline so you know what to expect from seed to harvest without the guesswork

    How to Grow Carrots at Home (Expert Organic Gardening Guide)

    Growing carrots at home is one of the most satisfying organic gardening projects, especially for anyone who values fresh flavor and chemical-free produce. Carrots don’t need much space, but they do need the right soil structure, consistent moisture, and patience. Over the past decade, I’ve helped many homeowners and renters from suburban gardeners to apartment dwellers with balcony planters grow crisp, sweet carrots without synthetic inputs or complicated setups.

    Let’s walk through how to do it right, step by step.

    Why Grow Carrots at Home?

    Carrots grown in healthy, living soil taste remarkably different from store-bought ones. When you grow them yourself:

    • You control what goes into the soil no synthetic fertilizers or chemical residues.
    • You can choose heirloom or organic varieties with real flavor.
    • You reduce packaging waste and transport emissions.
    • You reconnect with the growing process something deeply grounding for both adults and kids.

    And because carrots store well, they’re a practical addition to any home garden rotation.

    Step 1: Choose the Right Carrot Variety

    Different carrot types suit different spaces:

    TypeDescriptionBest For
    NantesCylindrical, tender, sweet flavorRaised beds, deep containers
    ChantenayShorter, broad-ended rootsHeavy or clay soils
    DanversClassic tapered carrotIn-ground gardens with loose soil
    Paris Market / ThumbelinaSmall, round rootsShallow containers, balconies

    If you’re growing in containers or clay-heavy soil, short or round varieties are easier and more reliable.

    Step 2: Prepare the Soil (or Container Mix)

    Carrots need loose, stone-free, well-draining soil. Compacted or rocky soil causes forked or twisted roots. In my experience, the most common mistake is planting carrots in soil that’s too heavy or rich in undecomposed compost.

    For in-ground beds:

    • Loosen soil at least 10–12 inches deep.
    • Mix in fine compost and a bit of sand if your soil tends to clump.
    • Avoid adding high-nitrogen fertilizer it promotes leafy growth, not roots.

    For containers:

    • Use a deep pot (at least 10–12 inches).
    • Fill with an organic potting mix: equal parts compost, peat-free coir, and sand or perlite.
    • Make sure the container has good drainage.

    Step 3: Sow Seeds Properly

    Carrot seeds are tiny and slow to germinate. Patience is key.

    How to sow:

    • Moisten the soil evenly before sowing.
    • Sow seeds thinly, about ¼ inch deep, in rows 6–8 inches apart.
    • Cover lightly with fine soil or compost.
    • Mist gently with a spray bottle don’t flood the area.
    • Keep soil consistently moist until seeds sprout (10–21 days).

    Pro tip: Mix carrot seeds with sand before sowing. This helps distribute them evenly and reduces overcrowding later.

    Step 4: Thin and Maintain Growth

    Once seedlings reach 2 inches tall:

    • Thin them to about 2 inches apart (more for larger varieties).
    • Mulch lightly with straw or shredded leaves to keep moisture consistent.
    • Water evenly never let the soil dry out completely or stay soggy.

    Carrots prefer cooler weather, ideally between 55°F–75°F. In hot regions, I often advise homeowners to plant in early spring or late summer for a fall harvest.

    Step 5: Watering and Feeding

    Carrots need steady moisture but not saturation.

    • Water deeply about 1 inch per week.
    • Use a soaker hose or drip irrigation to avoid disturbing the soil surface.
    • Avoid high-nitrogen organic fertilizers (like fresh manure). Instead, use a mild compost tea or seaweed emulsion once or twice during growth.

    Step 6: Pest and Disease Prevention

    Common issues and organic solutions:

    ProblemLikely CauseOrganic Solution
    Carrot rust flyLays eggs near rootsCover with floating row covers; rotate crops yearly
    Forked rootsRocks, clay, fresh manureUse loose, stone-free soil
    Poor germinationDry or crusted soilKeep soil surface moist; cover with burlap until sprouting
    Cracked rootsUneven wateringMaintain consistent moisture

    Encourage beneficial insects like ladybugs and lacewings by planting nearby herbs (dill, cilantro, or chives).

    Step 7: Harvesting

    Carrots are ready 60–80 days after sowing, depending on variety.

    How to harvest:

    • Loosen the soil gently with a fork (don’t pull hard).
    • Pull by the base of the greens once the crown is about ¾ inch wide.
    • Twist off tops right after harvesting to prevent moisture loss.

    Store in a cool, dark place or in the refrigerator, layered in damp sand or sawdust.

    Step 8: Seasonal Tips for U.S. Climates

    • Northern states: Sow in early spring and again in mid-summer for fall harvest.
    • Southern states: Best planted in fall and winter when temperatures are mild.
    • Western regions: Use shade cloth during hot spells.
    • Urban apartments: Grow in deep containers on sunny balconies or patios (at least 6 hours of light).

    If you’re in a rental, carrots are excellent for portable gardens you can move containers as light shifts seasonally.

    Bonus Tips from Experience

    • Seed tape can help if you have trouble spacing seeds evenly.
    • Companion planting: Grow carrots alongside onions or leeks to deter pests.
    • Intercropping: Plant radishes between carrot rows. They sprout quickly, mark the rows, and loosen soil as they grow.
    • Soil reuse: After harvest, refresh the soil by mixing in aged compost and letting it rest a few weeks before replanting.

    Common Mistakes to Avoid

    • Overwatering: Leads to rot and cracking.
    • Hard soil: Causes deformed roots.
    • Too much fertilizer: Promotes leafy tops, not roots.
    • Neglecting thinning: Crowded carrots stay stunted.
    • Planting too late: Carrots dislike hot midsummer soil.

    Frequently Asked Questions

    1. Can I grow carrots indoors? Yes, if you have a sunny window or grow light. Use a deep pot (10–12 inches) and maintain cool temperatures. Indoor-grown carrots are smaller but flavorful.

    2. How long does it take to grow carrots at home? Most varieties take about 2 to 2½ months from seed to harvest. Baby carrots can be harvested sooner.

    3. What’s the best organic fertilizer for carrots? A balanced, low-nitrogen organic fertilizer (like composted leaf mold or seaweed extract). Avoid manure\ it causes forked roots.

    4. How much sunlight do carrots need? Ideally 6–8 hours of direct light daily. In hotter regions, partial afternoon shade can prevent stress.

    5. Are homegrown carrots really more nutritious? Yes freshly harvested carrots retain more nutrients and natural sweetness, without chemical residues or long storage times.

    6. Can I reuse soil after growing carrots? Yes, but mix in fresh compost and rotate with non-root crops to maintain soil balance

    Final Takeaway

    Learning how to grow carrots at home isn’t complicated it’s about starting with good soil, staying consistent, and letting nature do most of the work. Whether you’re gardening in a backyard bed or a balcony container, carrots reward patience with honest flavor and freshness no store can match.

    In every U.S. climate and home size, there’s a way to grow them organically and once you taste your first harvest, you’ll understand why so many of my clients make them a yearly tradition.

  • How do you grow carrots at home

    How do you grow carrots at home

    Every product is independently reviewed and selected by our editors. If you buy something through our links, we may earn an affiliate commission at no extra cost to you.

    Growing carrots at home is an easy and rewarding way to enjoy fresh, chemical-free vegetables. Many beginners often ask, how do you grow carrots at home? With the right soil, proper containers or garden space, adequate sunlight, and regular watering, carrots can thrive in most home environments. Understanding basic planting techniques and care requirements helps ensure healthy root development, faster growth, and a successful harvest throughout the growing season.

    How to Grow Carrots at Home (Expert Organic Gardening Guide)

    Growing carrots at home is one of the most satisfying organic gardening projects, especially for anyone who values fresh flavor and chemical-free produce. Carrots don’t need much space, but they do need the right soil structure, consistent moisture, and patience. Over the past decade, I’ve helped many homeowners and renters from suburban gardeners to apartment dwellers with balcony planters grow crisp, sweet carrots without synthetic inputs or complicated setups.

    Let’s walk through how to do it right, step by step.

    Why Grow Carrots at Home?

    Carrots grown in healthy, living soil taste remarkably different from store-bought ones. When you grow them yourself:

    • You control what goes into the soil—no synthetic fertilizers or chemical residues.
    • You can choose heirloom or organic varieties with real flavor.
    • You reduce packaging waste and transport emissions.
    • You reconnect with the growing process—something deeply grounding for both adults and kids.

    And because carrots store well, they’re a practical addition to any home garden rotation.

    Step 1: Choose the Right Carrot Variety

    Different carrot types suit different spaces:

    TypeDescriptionBest For
    NantesCylindrical, tender, sweet flavorRaised beds, deep containers
    ChantenayShorter, broad-ended rootsHeavy or clay soils
    DanversClassic tapered carrotIn-ground gardens with loose soil
    Paris Market / ThumbelinaSmall, round rootsShallow containers, balconies

    If you’re growing in containers or clay-heavy soil, short or round varieties are easier and more reliable.

    Step 2: Prepare the Soil (or Container Mix)

    Carrots need loose, stone-free, well-draining soil. Compacted or rocky soil causes forked or twisted roots. In my experience, the most common mistake is planting carrots in soil that’s too heavy or rich in undecomposed compost.

    For in-ground beds:

    • Loosen soil at least 10–12 inches deep.
    • Mix in fine compost and a bit of sand if your soil tends to clump.
    • Avoid adding high-nitrogen fertilizer it promotes leafy growth, not roots.

    For containers:

    • Use a deep pot (at least 10–12 inches).
    • Fill with an organic potting mix: equal parts compost, peat-free coir, and sand or perlite.
    • Make sure the container has good drainage.

    Step 3: Sow Seeds Properly

    Carrot seeds are tiny and slow to germinate. Patience is key.

    How to sow:

    • Moisten the soil evenly before sowing.
    • Sow seeds thinly, about ¼ inch deep, in rows 6–8 inches apart.
    • Cover lightly with fine soil or compost.
    • Mist gently with a spray bottle—don’t flood the area.
    • Keep soil consistently moist until seeds sprout (10–21 days).

    Pro tip: Mix carrot seeds with sand before sowing. This helps distribute them evenly and reduces overcrowding later.

    Step 4: Thin and Maintain Growth

    Once seedlings reach 2 inches tall:

    • Thin them to about 2 inches apart (more for larger varieties).
    • Mulch lightly with straw or shredded leaves to keep moisture consistent.
    • Water evenly never let the soil dry out completely or stay soggy.

    Carrots prefer cooler weather, ideally between 55°F–75°F. In hot regions, I often advise homeowners to plant in early spring or late summer for a fall harvest.

    Step 5: Watering and Feeding

    Carrots need steady moisture but not saturation.

    • Water deeply about 1 inch per week.
    • Use a soaker hose or drip irrigation to avoid disturbing the soil surface.
    • Avoid high-nitrogen organic fertilizers (like fresh manure). Instead, use a mild compost tea or seaweed emulsion once or twice during growth.

    Step 6: Pest and Disease Prevention

    Common issues and organic solutions:

    ProblemLikely CauseOrganic Solution
    Carrot rust flyLays eggs near rootsCover with floating row covers; rotate crops yearly
    Forked rootsRocks, clay, fresh manureUse loose, stone-free soil
    Poor germinationDry or crusted soilKeep soil surface moist; cover with burlap until sprouting
    Cracked rootsUneven wateringMaintain consistent moisture

    Encourage beneficial insects like ladybugs and lacewings by planting nearby herbs (dill, cilantro, or chives).

    Step 7: Harvesting

    Carrots are ready 60–80 days after sowing, depending on variety.

    How to harvest:

    • Loosen the soil gently with a fork (don’t pull hard).
    • Pull by the base of the greens once the crown is about ¾ inch wide.
    • Twist off tops right after harvesting to prevent moisture loss.

    Store in a cool, dark place or in the refrigerator, layered in damp sand or sawdust.

    Step 8: Seasonal Tips for U.S. Climates

    • Northern states: Sow in early spring and again in mid-summer for fall harvest.
    • Southern states: Best planted in fall and winter when temperatures are mild.
    • Western regions: Use shade cloth during hot spells.
    • Urban apartments: Grow in deep containers on sunny balconies or patios (at least 6 hours of light).

    If you’re in a rental, carrots are excellent for portable gardens you can move containers as light shifts seasonally.

    Bonus Tips from Experience

    • Seed tape can help if you have trouble spacing seeds evenly.
    • Companion planting: Grow carrots alongside onions or leeks to deter pests.
    • Intercropping: Plant radishes between carrot rows. They sprout quickly, mark the rows, and loosen soil as they grow.
    • Soil reuse: After harvest, refresh the soil by mixing in aged compost and letting it rest a few weeks before replanting.

    Common Mistakes to Avoid

    • Overwatering: Leads to rot and cracking.
    • Hard soil: Causes deformed roots.
    • Too much fertilizer: Promotes leafy tops, not roots.
    • Neglecting thinning: Crowded carrots stay stunted.
    • Planting too late: Carrots dislike hot midsummer soil.

    Frequently Asked Questions

    1. Can I grow carrots indoors? Yes, if you have a sunny window or grow light. Use a deep pot (10–12 inches) and maintain cool temperatures. Indoor-grown carrots are smaller but flavorful.

    2. How long does it take to grow carrots at home? Most varieties take about 2 to 2½ months from seed to harvest. Baby carrots can be harvested sooner.

    3. What’s the best organic fertilizer for carrots? A balanced, low-nitrogen organic fertilizer (like composted leaf mold or seaweed extract). Avoid manure\ it causes forked roots.

    4. How much sunlight do carrots need? Ideally 6–8 hours of direct light daily. In hotter regions, partial afternoon shade can prevent stress.

    5. Are homegrown carrots really more nutritious? Yes freshly harvested carrots retain more nutrients and natural sweetness, without chemical residues or long storage times.

    6. Can I reuse soil after growing carrots? Yes, but mix in fresh compost and rotate with non-root crops to maintain soil balance

    Final Takeaway

    Learning how to grow carrots at home isn’t complicated it’s about starting with good soil, staying consistent, and letting nature do most of the work. Whether you’re gardening in a backyard bed or a balcony container, carrots reward patience with honest flavor and freshness no store can match.

    In every U.S. climate and home size, there’s a way to grow them organically and once you taste your first harvest, you’ll understand why so many of my clients make them a yearly tradition.

  • How long does it take carrots to grow indoors

    How long does it take carrots to grow indoors

    Every product is independently reviewed and selected by our editors. If you buy something through our links, we may earn an affiliate commission at no extra cost to you.

    Typically 65–80 days from seed to harvest, depending on the carrot variety, indoor growing conditions, and care consistency.

    But let’s unpack that with real-world, experience-based detail because growing carrots indoors successfully takes more than just counting days.

    Carrot Growing Time Indoors: What to Expect

    Growing carrots indoors is a smart choice for home gardeners who want fresh vegetables in a small space. Many people often ask, how long does it take carrots to grow indoors? Typically, indoor carrots take about 60 to 80 days to reach harvest, depending on the variety, light exposure, and care routine. With proper containers, sufficient sunlight or grow lights, and regular watering, you can enjoy healthy, homegrown carrots year-round from the comfort of your home.

    Understanding Indoor Carrot Growth Timelines

    In my experience helping homeowners set up indoor organic gardening systems, carrots need about 2½ months under ideal indoor conditions to reach full maturity. Here’s a breakdown by stage:

    Growth StageTime (Approx.)What HappensCare Tips
    Germination7–14 daysSeeds sprout and tiny seedlings appearKeep soil evenly moist, not soaked. Carrot seeds need consistent humidity and warmth (around 70°F).
    Early Growth2–3 weeksFoliage establishes while roots start formingProvide 12–14 hours of bright light daily, ideally with a full-spectrum LED grow light.
    Root Development4–6 weeksThe taproot thickens and takes shapeThin seedlings to 2 inches apart to allow root expansion. Maintain steady moisture.
    Maturity65–80 days totalRoots reach full size, ready to harvestCheck by gently brushing soil aside to see the carrot shoulders.

    Factors That Affect Indoor Carrot Growth Time

    • Variety – Short or “baby” carrot types (like ‘Paris Market’ or ‘Little Finger’) mature in 55–65 days, while full-size varieties (like ‘Danvers 126’ or ‘Nantes’) may take 75–85 days indoors.
    • Container Depth – Carrots need at least 8–12 inches of soil depth for normal root development. Shallow pots slow growth and cause stunted roots.
    • Light Quality – Indoor setups rarely provide enough natural sunlight, so supplementing with grow lights drastically improves growth rate and root size.
    • Temperature and Humidity – Carrots grow best between 60–75°F. Cooler temperatures slow root development; excessive warmth can cause bitter flavor.
    • Soil Composition – Use a light, loose, organic potting mix (a 50/50 blend of compost and coconut coir or peat-free mix). Heavy soil restricts root formation and delays maturity.

    Practical Example

    In one client’s Denver apartment, we grew ‘Little Finger’ carrots in 10-inch-deep ceramic planters near a south-facing window, supplemented with a 12-hour grow light cycle.

    • Germination took 10 days.
    • By week 9, we were harvesting crisp, sweet roots about 3 inches long.
    • The total time: 68 days from seed to harvest — a realistic indoor timeline.

     Pro Tips for Faster, Healthier Indoor Carrots

    • Pre-sprout seeds on damp paper towels for 5 days before planting to speed up germination.
    • Bottom-water containers to avoid displacing seeds.
    • Trim greens lightly once mature to encourage root energy.
    • Rotate containers weekly if using window light to ensure even growth.

    Quick Reference Summary

    Carrot TypeIndoor Growth TimeContainer Depth
    Baby Carrots55–65 days8 inches
    Nantes / Danvers70–80 days10–12 inches
    Mini Varieties50–60 days6–8 inches

    Key Takeaway

    Carrots take about 2 to 2½ months to grow indoors under good light, consistent moisture, and healthy soil conditions. For renters or homeowners without outdoor space, this is one of the most rewarding root crops you can grow organically indoors compact, chemical-free, and surprisingly low-maintenance.

  • How to Make a Vertical Garden at Home | Expert Guide

    How to Make a Vertical Garden at Home | Expert Guide

    Every product is independently reviewed and selected by our editors. If you buy something through our links, we may earn an affiliate commission at no extra cost to you.

    If you’ve ever wished for more greenery but felt limited by space, learning how to make a vertical garden at home can completely change how you think about indoor nature. A vertical garden turns a plain wall, balcony, or fence into a living piece of art that purifies air, improves mood, and supports a healthier environment.

    In my work designing organic home spaces for U.S. homeowners and renters, vertical gardens have become one of the most requested features not only for their beauty but also for their health and sustainability benefits. They allow even small apartments or shaded patios to enjoy thriving greenery without cluttering valuable floor area.

    Why a Vertical Garden Matters

    • Health and air quality: Plants act as natural filters, absorbing carbon dioxide and VOCs (volatile organic compounds) from paints and furniture.
    • Mental well-being: Greenery reduces stress, promotes calm, and supports focus a noticeable benefit in high-stress households or home offices.
    • Sustainability: Vertical gardens can use repurposed materials, conserve water, and rely on organic fertilizers instead of synthetics.
    • Aesthetic and comfort: Living walls soften harsh interiors, reduce noise, and give even small spaces a sense of calm vitality.

    Everyday Organic Styling & Care Routine

    A vertical garden isn’t something you “install and forget.” It thrives with steady, simple care a few minutes a week keeps it lush year-round.

    Weekly Habits

    • Check moisture: Stick your finger one inch into the soil. If dry, water gently from the top down.
    • Mist foliage: Indoor plants benefit from humidity; mist with filtered or rainwater once a week.
    • Prune and compost: Remove yellowing leaves to prevent fungi. Compost the trimmings.
    • Inspect for pests: Check undersides of leaves; treat early with diluted neem oil or insecticidal soap.
    • Rotate or reposition: Even lighting helps balanced growth rotate plants every few weeks if one side receives stronger light.

    What You’ll Need

    ItemWhy It’s UsedOrganic / Health BenefitsSustainability Notes
    Vertical frame or structureHolds containers or pocketsKeeps plants upright and organizedUse untreated wood, bamboo, or recycled metal
    Plant containers or fabric pocketsHouses root systemsAllows airflow and drainageChoose natural fibers like jute or recycled felt
    Organic potting mixMedium for healthy rootsFree of synthetic fertilizersLook for OMRI-certified or peat-free mixes
    Compost or worm castingsFertilizer and soil boosterAdds beneficial microbesDiverts food waste from landfill
    Watering system (manual or drip)Ensures consistent moistureReduces overwateringDrip systems conserve water
    Lighting (if indoors)Supports photosynthesisImproves plant resilienceUse energy-efficient LED grow lights
    Suitable plantsMain visual elementCleans air, adds textureChoose low-maintenance, native, or adaptive varieties

    Step-by-Step: How to Make a Vertical Garden at Home

    Step 1: Choose the Right Location

    Select a wall or railing that gets at least 4 hours of natural light daily. East- or west-facing walls are ideal. If your home lacks sunlight, use full-spectrum grow lights.

    Step 2: Build or Install the Frame

    You can buy modular systems or build your own using reclaimed wood or metal mesh. Securely mount it or use a freestanding structure if you rent. Always place a waterproof backing behind indoor installations to protect the wall.

    Step 3: Prepare the Soil

    Use a mix of:

    • 1 part organic potting mix
    • 1 part compost or worm castings
    • 1 part coconut coir or perlite (for drainage)

    Avoid heavy garden soil it compacts and suffocates roots.

    Step 4: Choose the Right Plants

    Group plants by water and light needs:

    • High light: herbs (basil, thyme), succulents
    • Medium light: ferns, philodendrons, pothos
    • Low light: snake plant, ZZ plant, peace lily

    In outdoor setups, you can mix edibles like strawberries, lettuces, or peppers with flowering pollinator plants.

    Step 5: Plant and Water

    Place taller or sun-loving plants near the top and shade-tolerant ones near the bottom. Water slowly from the top down until moisture runs through lower pockets.

    Step 6: Maintain and Refresh Seasonally

    Every 3–4 months, refresh the soil surface with compost, trim overgrowth, and replace any struggling plants. Rotate panels to even out light exposure.

    Prevention & Sustainability Tips

    • Don’t overwater: Root rot is the most common failure point. Good drainage and moderation are key.
    • Avoid synthetic fertilizers: They cause salt buildup and disrupt beneficial microbes.
    • Reuse materials: Old wooden pallets, ceramic pots, or glass jars make excellent planters.
    • Compost spent soil: When replacing plants, recycle the old soil in your compost bin.
    • Harvest rainwater: It’s chlorine-free and ideal for watering.

    Common Mistakes to Avoid

    • Using treated lumber: Pressure-treated wood can leach toxins; use cedar, redwood, or sealed untreated pine.
    • Ignoring drainage: Fabric pockets and containers need holes or air gaps.
    • Poor wall protection: Indoors, always use waterproof barriers to prevent mold or stains.
    • Too little light: Plants in dim corners won’t thrive without supplemental lighting.
    • Overcrowding: Give roots room; crowding leads to poor airflow and disease.

    Local Adaptations for U.S. Homes

    • Apartments or rentals: Freestanding frames or hanging pocket systems avoid drilling walls.
    • Urban balconies: Go for wind-tolerant plants like rosemary, jade, or sedum.
    • Suburban homes: Mix edibles (spinach, lettuce, basil) and ornamentals for dual use.
    • Dry climates (Southwest): Use drought-tolerant natives like agave, yucca, and echeveria.
    • Humid regions (Southeast): Ferns, philodendrons, and mosses thrive naturally.

    Advanced Expert Tips

    • Add a timer to drip irrigation for precise watering and water savings.
    • Layer textures trailing vines, upright herbs, and flowering species create depth.
    • Use edible vertical gardens near kitchens or patios for fresh herbs year-round.
    • Install grow lights on smart plugs to automate photoperiods.
    • Winterize outdoor setups by mulching roots or moving portable panels indoors.
    • Budget idea: Propagate your own cuttings  pothos, philodendron, and spider plants root easily in water.

    FAQs: How to Make a Vertical Garden at Home

    Q1. Can I make a vertical garden indoors? Yes. Use LED grow lights and choose adaptable indoor species like pothos, ferns, and philodendrons.

    Q2. How often should I water a vertical garden? Usually every 3–5 days indoors, depending on humidity and temperature. Always check soil moisture before watering.

    Q3. What’s the best soil for a vertical garden at home? A light, organic mix of compost, potting soil, and coconut coir provides nutrients, aeration, and water retention.

    Q4. How do I prevent pests naturally? Keep leaves clean, avoid overwatering, and spray neem oil solution monthly as a preventive measure.

    Q5. Can I grow vegetables in a vertical garden? Yes lettuce, spinach, strawberries, and cherry tomatoes do well with adequate light and spacing.

    Q6. What’s the easiest plant to start with? Pothos or philodendron they’re forgiving, grow well in varying light, and adapt easily to vertical conditions.

    Q7. How can I make it renter-friendly? Use free-standing racks or modular wall pockets attached with removable hooks to avoid drilling.

    Conclusion: A Living Wall for a Healthier Home

    When you understand how to make a vertical garden at home, you’re really learning how to harmonize design, health, and ecology in your living space. Whether your goal is fresh herbs in the kitchen or a lush living wall as a statement piece, the process is simple, satisfying, and deeply rewarding.

    Start small, observe how your plants respond, and build from there. Within a few weeks, you’ll notice cleaner air, calmer energy, and a tangible connection to nature right where you live sustainably and beautifully.

  • What Are the Best DIY Vertical Garden Options for Indoor and Outdoor Spaces

    What Are the Best DIY Vertical Garden Options for Indoor and Outdoor Spaces

    Every product is independently reviewed and selected by our editors. If you buy something through our links, we may earn an affiliate commission at no extra cost to you.

    Introduction: Why DIY Vertical Garden Options Matter

    Over the past decade, DIY vertical garden options have become one of the most practical and beautiful solutions for U.S. homeowners and renters looking to bring more greenery into their living spaces. A vertical garden whether a simple wall-mounted herb rack or a full living wall installation allows you to grow plants upward instead of outward, making it ideal for small patios, balconies, or apartments with limited floor space.

    From an organic home decorating perspective, vertical gardens do far more than save space. They improve indoor air quality, reduce stress, and enhance the natural aesthetic of your home. The plants act as living décor, filtering toxins while adding texture and life to your walls. And when you design and build them sustainably using reclaimed wood, untreated metal, or organic fibers you’re also reducing your environmental footprint and avoiding the off-gassing common with synthetic materials.

    In my work helping families across the U.S. transform their homes naturally, I’ve found that the most successful vertical gardens are those built with realistic maintenance in mind and matched to the home’s light, humidity, and lifestyle. Below, I’ll walk you through the best DIY vertical garden options, how to build and care for them, and how to keep them healthy and sustainable year-round.

    Everyday Organic Styling & Care Routine

    Regardless of which vertical garden setup you choose, consistency is key. Plants thrive on small, regular acts of care rather than sporadic attention. Here’s a weekly rhythm I recommend to my clients:

    • Check moisture levels – Stick your finger about an inch into the soil. If it’s dry, water gently until moisture begins to seep through the drainage holes.
    • Rotate plants – Every few weeks, rotate or swap plants between sections to ensure even light distribution.
    • Wipe leaves – Dust blocks light absorption; gently wipe leaves with a damp, organic cotton cloth.
    • Inspect for pests – Look for tiny webs or sticky residue. Neem oil or insecticidal soap (OMRI-approved) are safe, non-toxic remedies.
    • Feed organically – Once a month during the growing season, use a diluted liquid seaweed or compost tea fertilizer.

    These habits keep your vertical garden vibrant without relying on chemical fertilizers or plastic-based décor.

    What You’ll Need

    When choosing among DIY vertical garden options, materials matter as much as design. The goal is to create a structure that’s both sustainable and healthy for your indoor environment.

    ItemWhy It’s UsedOrganic / Health BenefitsSustainability Considerations
    Reclaimed wood panelsBase frame or wall backingFree of chemical finishes, adds warm textureDiverts wood from landfills, reduces demand for new lumber
    Terracotta or ceramic potsIndividual plant holdersBreathable, prevents root rotLong-lasting and natural
    Organic potting mixGrowing mediumNo synthetic fertilizers or pesticidesSupports soil biodiversity
    Coconut coir or sphagnum mossMoisture retentionNatural alternative to peatRenewable and compostable
    Stainless steel or jute wall hooksMounting structureNon-toxic alternative to plasticDurable, recyclable
    Drip irrigation kit (optional)Controlled wateringReduces water waste and overwateringConserves water and energy

    Deep Organic Setup or Seasonal Refresh

    I encourage homeowners to treat their vertical gardens as living art installations that evolve with the seasons. Here’s how to refresh your setup sustainably:

    Spring & Summer

    • Replant herbs and fast growers: Basil, mint, parsley, and strawberries love the longer days.
    • Top-dress the soil: Add a thin layer of compost or worm castings to replenish nutrients.
    • Check irrigation: Warmer months evaporate moisture faster; consider adding a drip line or self-watering reservoir.

    Fall & Winter

    • Bring tender plants indoors: Many herbs and succulents will continue growing on a sunny kitchen wall.
    • Switch to evergreens or ferns: They thrive in cooler, lower-light conditions.
    • Clean and seal wooden frames: Use a plant-safe, natural oil such as tung or linseed oil.

    This rotation keeps your design fresh and ensures your plants remain healthy through seasonal changes in temperature and daylight.

    The Best DIY Vertical Garden Options

    Below are the most functional and attractive vertical garden ideas I’ve successfully implemented in real U.S. homes. Each comes with practical notes on where it works best and how to keep it organic.

    1. Wall-Mounted Pocket Planters

    Fabric or felt wall pockets (made of recycled materials) are affordable and easy to install. They work well for herbs, small ferns, and trailing pothos.

    • Best for: Apartments, kitchen walls, or patios.
    • Tip: Choose pockets made from recycled PET felt or organic jute not synthetic felt, which can off-gas.
    • Care: Water from the top row and let gravity do the rest, ensuring even distribution.

    2. Reclaimed Wood Pallet Garden

    Reclaimed pallets sanded and sealed with organic oil make excellent rustic vertical planters.

    • Best for: Balconies or backyard fences.
    • Tip: Always confirm the pallet is heat-treated (marked “HT”), not chemically treated (“MB”).
    • Care: Lined pockets prevent soil loss and keep moisture even.

    3. Hanging Mason Jar Garden

    Mount a row of mason jars to a plank using hose clamps for a simple, modern look.

    • Best for: Kitchen herbs or succulents near a window.
    • Tip: Add drainage pebbles at the bottom of each jar.
    • Care: Mist lightly; jars trap moisture easily.

    4. Ladder-Style Vertical Planter

    A repurposed wooden ladder makes a beautiful vertical plant stand for mixed greenery.

    • Best for: Living rooms or patios with partial sunlight.
    • Tip: Style with layers taller plants on top, cascading species below.
    • Care: Check for wood stability and reseal annually with natural oil.

    5. Fence-Mounted Modular Boxes

    Great for suburban homes, these square wooden boxes can be rearranged seasonally.

    • Best for: Outdoor herbs or pollinator-friendly flowers.
    • Tip: Use cedar it resists rot naturally and needs no synthetic sealants.
    • Care: Replace or refresh soil annually to avoid compaction.

    6. Hydroponic Vertical Tower (Organic-Compatible)

    For those who want a more advanced system, hydroponic towers can be organic if you use mineral-based nutrients and natural pest prevention.

    • Best for: Sunrooms or patios with strong light.
    • Tip: Clean reservoirs monthly to prevent algae.

    Prevention & Sustainability Tips

    • Avoid synthetics: Skip plastic planters and vinyl-coated materials. These can leach chemicals over time.
    • Mind the weight: Always check your wall load-bearing capacity before mounting.
    • Reuse water: Collect excess water from the bottom tray and reuse it for outdoor plants.
    • Compost trimmings: Dead leaves and stems make great compost.
    • Encourage biodiversity: Mix flowering plants with edibles to attract pollinators and beneficial insects.

    Common Mistakes to Avoid

    • Using chemically treated pallets or lumber – “MB” stamped pallets are treated with methyl bromide, a toxic pesticide. Always choose “HT” or untreated wood.
    • Overwatering – Especially in closed systems like mason jars, roots can suffocate easily.
    • Ignoring light conditions – A north-facing wall won’t sustain sun-loving herbs. Choose shade-tolerant species instead.
    • Neglecting ventilation – Plants need airflow to prevent mold. Avoid sealing vertical gardens against walls without gaps.
    • Falling for “eco-friendly” marketing – Many so-called green products still contain synthetic adhesives or finishes. Look for third-party certifications (FSC, Greenguard, or OEKO-TEX).

    Local U.S. Home Context

    Whether you live in a Brooklyn apartment with a single sunny window or a Phoenix patio with intense sunlight, every environment has its own vertical gardening rhythm:

    • Apartments: Go for lightweight felt planters or wall-mounted racks that don’t require drilling (use Command hooks).
    • Urban balconies: Use compact vertical structures with drip trays to keep water from dripping onto neighbors.
    • Suburban yards: Fence-mounted boxes or standing ladder gardens thrive year-round.
    • Cold climates: Keep frost-sensitive plants portable for easy indoor transition.
    • Low-light homes: Use low-light plants like pothos, philodendron, or ZZ plants with LED grow lights (warm-spectrum, low-energy).

    Extra Expert Tips

    • Budget-friendly upgrades: Reuse old picture frames to create “living frames” for small succulents.
    • Low-maintenance approach: Stick to hardy, slow-growing varieties like snake plants or ferns if you travel frequently.
    • Long-term sustainability: Rotate plants to maintain soil health and prevent nutrient depletion.
    • Water-smart design: Add a thin layer of biochar in containers it improves moisture retention naturally.
    • Plant pairing: Combine herbs that share similar light and moisture needs (e.g., basil, parsley, and thyme together).

    Frequently Asked Questions (FAQ)

    1. What’s the easiest DIY vertical garden option for beginners? Fabric wall pockets are by far the easiest. They’re lightweight, affordable, and simple to mount. Just be sure to choose recycled or organic materials and place them where they’ll receive bright, indirect light.

    2. Can I build a DIY vertical garden indoors without damaging my walls? Yes. Use freestanding ladder-style planters or wall racks mounted with removable adhesive hooks. Always protect your wall with a moisture-resistant backing like cork or bamboo.

    3. Which plants grow best in a DIY vertical garden? Herbs (basil, mint, parsley), trailing plants (pothos, ivy), and compact greens (lettuce, spinach) do exceptionally well. Match the plants to your light conditions this is the most common success factor.

    4. How do I keep my DIY vertical garden organic? Use untreated, natural materials; organic potting mix; and avoid synthetic fertilizers or pest sprays. Compost trimmings and reuse materials whenever possible.

    5. What should I do if my wall garden starts developing mold or mildew? Improve airflow by spacing plants further apart or adding a small fan. Wipe affected areas with a mix of water and a few drops of tea tree oil, which naturally inhibits mildew.

    6. Can a vertical garden improve indoor air quality? Absolutely. Certain plants like peace lilies, spider plants, and ferns help remove common VOCs from the air, making them excellent choices for an indoor vertical setup.

    7. Are vertical gardens suitable for renters? Yes. Freestanding options or modular hanging racks are renter-friendly and removable. I often recommend them for clients who want greenery without making permanent wall changes.

    Conclusion: Building a Sustainable Future, One Wall at a Time

    A well-planned DIY vertical garden isn’t just an aesthetic trend it’s a practical, health-focused, and environmentally conscious approach to home living. By using natural materials, organic soil, and mindful maintenance, you transform blank walls into thriving ecosystems that purify your air, calm your mind, and root your home in sustainability.

    Whether you’re working with a sunny balcony or a shaded kitchen corner, the principles remain the same: start small, stay organic, and let your plants lead the way. With the right approach, your vertical garden will grow not only upward but with you, season by season, toward a more peaceful and natural home.

  • Choosing the Best Bush to Put in the Front of the House: Style Meets Simplicity

    Choosing the Best Bush to Put in the Front of the House: Style Meets Simplicity

    Every product is independently reviewed and selected by our editors. If you buy something through our links, we may earn an affiliate commission at no extra cost to you.

    The “best” bush for the front of a house really depends on your region, sunlight, soil type, and how much upkeep you’re comfortable with, but I can share what consistently works well in real U.S. home settings.

    Best Bush Options to Put in the Front of the House Without Constant Care

    Choosing the best bush to put in the front of the house is all about balancing visual appeal with easy care. The right bush enhances curb appeal, complements your home’s style, and thrives with minimal maintenance. From evergreen shrubs to flowering bushes, smart choices create a welcoming, polished look year-round.

    1. Start with the right goal

    Before picking a plant, decide what you need it to do:

    • Frame the entryway? Choose a structured, evergreen shrub.
    • Add seasonal color? Go with a flowering or deciduous option.
    • Provide privacy or soften hard edges? Use fuller, layered shrubs.

    I always encourage clients to think beyond looks the healthiest landscapes use native or well‑adapted species that thrive without synthetic fertilizers or pesticides.

    2. Top organic, sustainable choices by region

    Here are some of my tried‑and‑true shrubs that work beautifully in front‑yard designs across the U.S.:

    Region / ConditionRecommended ShrubWhy It WorksSustainable Benefits
    Most of U.S. (Full Sun)Boxwood (Buxus microphylla)Dense, evergreen form ideal for foundation planting; easy to shapeLong‑lived, minimal pest issues, pairs well with organic mulch
    Southeast / Humid AreasGardenia (Gardenia jasminoides)Glossy leaves and fragrant white bloomsAttracts pollinators; thrives in acidic, organic soil
    Southwest / Hot, Dry ClimatesTexas Sage (Leucophyllum frutescens)Silver foliage, purple blooms, drought‑tolerantNeeds no chemical fertilizers; supports native pollinators
    Northern States / Cold WintersInkberry Holly (Ilex glabra)Native evergreen alternative to boxwoodHandles cold and wet soil; supports native bees
    Partial Shade / Woodland EdgesOakleaf Hydrangea (Hydrangea quercifolia)Four‑season interest, large leaves, summer bloomsNative to the U.S.; great for soil health and wildlife
    Small Urban Yards / ContainersDwarf Nandina or Dwarf Yaupon HollyCompact, colorful foliageLow‑water needs, adaptable to pots and tight spaces

    3. Expert planting and care tips

    • Use organic compost at planting time to build soil structure.
    • Mulch with shredded bark or leaf mold to retain moisture naturally.
    • Water deeply but infrequently to encourage strong root systems.
    • Avoid chemical fertilizers organic slow‑release blends or compost tea are safer for soil microbes and groundwater.
    • Prune lightly to maintain shape and air flow; don’t over‑shear.

    4. Design considerations from real homes

    • In suburban front yards, I often layer 2–3 shrub types: taller evergreens behind, flowering natives in front.
    • For townhomes and rentals, dwarf varieties in large terracotta or stone planters provide flexibility and can move with you.
    • In open, sunny façades, mix textures a soft, billowy shrub next to a clipped form feels more natural and welcoming.

    5. Shrubs to avoid (if you want a truly organic home landscape)

    • Heavily hybridized ornamental varieties that need constant chemical feeding or pest sprays.
    • Invasive species like burning bush (Euonymus alatus) or Japanese barberry they escape cultivation and harm native ecosystems.
    • Chemically treated nursery plants (look for organic or neonicotinoid‑free labels instead).

    6. My professional shortlist: easy, organic “front of house” winners

    If I had to narrow it down:

    • Inkberry Holly (for most of the East and Midwest)
    • Boxwood or Dwarf Yaupon Holly (for structured, evergreen appeal)
    • Oakleaf Hydrangea (for seasonal interest and native habitat value)
    • Texas Sage (for dry, sunny, southern properties)

    Each of these handles moderate neglect, keeps a neat form, and flourishes with organic care methods.

    Quick checklist before you plant

    •  Choose a shrub suited to your USDA hardiness zone.
    •  Confirm sunlight full sun vs. afternoon shade.
    •  Prep soil with compost and organic matter.
    •  Water regularly until established, then taper off.
    •  Add native mulch and refresh yearly.
  • Best Low Maintenance Bush for Busy Homeowners

    Best Low Maintenance Bush for Busy Homeowners

    Every product is independently reviewed and selected by our editors. If you buy something through our links, we may earn an affiliate commission at no extra cost to you.

    When homeowners or renters ask me about the best low-maintenance bush, I always start by clarifying what kind of maintenance you’re hoping to avoid watering, pruning, pest control, or general fussiness. The right answer depends on your region, light exposure, and whether you want evergreen structure or seasonal blooms. That said, there are several tried-and-true shrubs that perform beautifully across most U.S. climates with minimal care.

    Best Low Maintenance Bush That Thrives with Minimal Care

    The best low maintenance bush that thrives with minimal care is ideal for easy gardening. These bushes grow well with little watering or pruning, making them perfect for busy homeowners. They add lasting beauty to your garden without needing constant care.

    Below are some of the most reliable options I recommend, based on years of designing sustainable landscapes and organic home gardens:

    1. Boxwood (Buxus spp.) Classic Evergreen Structure

    Best for: Formal or naturalistic landscapes, foundation plantings, containers Why it’s low-maintenance: Once established, boxwoods tolerate drought, need pruning only once or twice a year, and thrive in partial sun. Organic care tip: Use compost-based mulch around the base instead of synthetic fertilizers. It maintains moisture and supports soil microbes that keep roots healthy. Caution: Avoid chemical leaf shine or pesticide sprays boxwoods are sensitive to buildup.

    2. Spirea (Spiraea japonica or S. bumalda) Reliable Bloomer

    Best for: Sunny front yards, pollinator-friendly gardens Why it’s low-maintenance: Spirea shrubs flower abundantly in late spring and require only a light trim after blooming. They handle heat, drought, and poor soil. Organic care tip: Add a layer of leaf mold or aged compost in spring to boost flowering naturally without synthetic feed.

    3. Inkberry Holly (Ilex glabra) Native and Evergreen

    Best for: Wet or clay soils, privacy hedges, native landscapes Why it’s low-maintenance: Native to the eastern U.S., Inkberry tolerates a wide range of conditions and resists most pests. Sustainability bonus: Provides berries for birds and year-round structure without needing heavy pruning or chemical inputs.

    4. Potentilla (Dasiphora fruticosa) Hardy and Sun-Loving

    Best for: Sunny borders, Western climates, foundation plantings Why it’s low-maintenance: Drought-tolerant once established, blooms from spring through fall, and rarely has pest or disease issues. Organic care tip: Cut back by one-third in early spring and top-dress with compost. The shrub will respond with dense, healthy new growth.

    5. Nandina domestica (Heavenly Bamboo) Low Care, but Use Responsibly

    Best for: Partial shade, decorative berries, structural foliage Why it’s low-maintenance: Needs little pruning and stays colorful year-round. Sustainability caution: In warmer regions (Southeast, Southwest), choose sterile cultivars like ‘Firepower’ or ‘Gulf Stream’ to avoid invasiveness.

    6. Winterberry (Ilex verticillata) Seasonal Color with Minimal Work

    Best for: Cold climates, naturalized or rain gardens Why it’s low-maintenance: Native deciduous holly that tolerates wet soil and cold winters. Organic care tip: Plant both male and female shrubs for berries no fertilizers needed if grown in healthy, compost-rich soil.

    7. Dwarf Hydrangea (Hydrangea paniculata ‘Bobo’ or ‘Little Lime’)

    Best for: Mixed borders, small gardens, partial sun Why it’s low-maintenance: Compact form, minimal pruning, reliable bloom from summer to fall. Organic care tip: Use rainwater when possible hydrangeas are sensitive to chlorine and fluoride in tap water.

    My Shortlist: Regionally Reliable, Truly Low Maintenance

    If I had to pick just one for general U.S. homeowners:

    • For sunny, dry areas: Potentilla
    • For humid or coastal regions: Inkberry Holly
    • For shady spots: Nandina ‘Gulf Stream’ or Boxwood
    • For four-season beauty: Dwarf Hydrangea ‘Little Lime’

    A Few Professional Maintenance Rules of Thumb

    • Plant once, water deeply until established, then leave it alone. Overwatering is the #1 killer of “low-maintenance” shrubs.
    • Mulch organically. Two inches of wood chips or shredded leaves prevent weeds, conserve moisture, and feed soil microbes.
    • Skip synthetic fertilizers. Compost or worm castings once a year are plenty for most shrubs.
    • Prune lightly and purposefully. Remove dead wood in early spring; avoid constant shearing that stresses plants.

    Final Thought

    In my experience maintaining sustainable gardens across different U.S. climates, the best low-maintenance bush is the one that fits your local conditions and lifestyle not just the one labeled “easy.” Start with native or regionally adapted species, feed the soil naturally, and give your shrubs room to grow. The less you interfere, the healthier and more beautiful your landscape becomes over time.

  • The Best Plant for a Front Yard: Beautiful, Low-Maintenance Options

    The Best Plant for a Front Yard: Beautiful, Low-Maintenance Options

    Every product is independently reviewed and selected by our editors. If you buy something through our links, we may earn an affiliate commission at no extra cost to you.

    That depends on your region, sunlight, soil type, and how much time you want to spend maintaining the space but there are some reliable, environmentally responsible plants that perform beautifully in most U.S. front yards. I’ll share what I recommend most often to homeowners and renters who want a natural-looking, low-maintenance, and sustainable landscape that boosts curb appeal without relying on synthetic fertilizers or heavy irrigation.

    The Best Plants for a Front Yard (Organic & Sustainable Choices)

    When I design front yards, I focus on three things:

    • Climate suitability Plants must thrive in your USDA hardiness zone.
    • Low resource use Native or drought-tolerant plants reduce water and fertilizer needs.
    • Visual structure Mix evergreen anchors with seasonal color and texture.

    Below are dependable categories and examples that work across typical U.S. home settings.

    1. Native Evergreen Shrubs (Foundation Plants)

    These form the structure around your entryway or along the house foundation.

    PlantWhy It WorksBest For
    Inkberry Holly (Ilex glabra)Native to the East Coast; dense, glossy foliage; easy to shape.Shady or partly sunny yards, Zones 5–9
    Winter Gem Boxwood (organic grown)Classic, formal look; holds shape year-round.Traditional homes, Zones 5–9
    Dwarf Yaupon HollyNative to the South, drought-tolerant, compact.Hot, dry climates, Zones 7–10
    Pacific Wax MyrtleFragrant leaves; wildlife-friendly.Coastal or mild West Coast yards, Zones 7–10

    Expert tip: Choose organically grown nursery stock. Many conventional shrubs are treated with neonicotinoid pesticides that linger in the soil and harm pollinators.

    2. Pollinator-Friendly Perennials

    These bring color, attract beneficial insects, and require little care once established.

    PlantBloom TimeNotes
    Black-Eyed Susan (Rudbeckia hirta)Summer–fallNative to most U.S. states, bright yellow flowers, drought-tolerant.
    Coneflower (Echinacea purpurea)SummerStrong pollinator magnet; reseeds naturally.
    Lavender (Lavandula angustifolia)Late spring–summerFragrant, deer-resistant, thrives in poor soil.
    Bee Balm (Monarda didyma)SummerAttracts hummingbirds and butterflies.
    California PoppySpring–summerPerfect for dry western climates; reseeds easily.

    Mix 3–5 varieties for continuous color through the seasons, keeping about 12–18″ spacing between plants.

    3. Low-Water Grasses and Groundcovers

    For sustainable lawns or borders, replace thirsty turf with decorative or native grasses.

    PlantGrowth HabitNatural Benefit
    Little Bluestem (Schizachyrium scoparium)Upright blue-green blades; rust-orange fall color.Native prairie species; supports pollinators.
    Purple Fountain Grass (Pennisetum setaceum ‘Rubrum’)Graceful plumes; annual in cold zones.Adds movement and texture.
    Creeping ThymeLow, fragrant groundcover.Suppresses weeds, tolerates light foot traffic.
    Buffalo Grass (Bouteloua dactyloides)Fine-textured lawn alternative.Needs little mowing or water.

    4. Small Ornamental Trees for Structure

    A front yard benefits from one signature tree that provides scale and shade.

    TreeHeight / SpreadHighlights
    Serviceberry (Amelanchier canadensis)15–25 ftNative, four-season interest, edible berries.
    Crape Myrtle10–20 ftSummer blooms, smooth bark, drought-tolerant.
    Japanese Maple (Acer palmatum)10–15 ftElegant foliage; prefers partial shade.
    Desert Willow (Chilopsis linearis)15–25 ftHardy in dry regions; attracts hummingbirds.

    When planting trees near a home, keep them at least 8–10 feet from the foundation. Always mulch with 2–3 inches of natural shredded bark or leaf mold, not dyed or rubber mulch.

    5. Edible and Decorative Options

    If you like the idea of mixing beauty with function:

    • Blueberry bushes make excellent front-yard shrubs with spring flowers and fall color.
    • Herb borders of rosemary, sage, and oregano provide texture and fragrance.
    • Dwarf citrus trees (in pots) can be moved seasonally and double as conversation pieces.

    These can all be grown organically without synthetic fertilizers compost, occasional fish emulsion, and mulch are enough.

    My Simple Front Yard Formula

    When I design a small front yard, here’s the layout that works again and again:

    • Evergreen structure: 2–3 medium shrubs near house foundation.
    • Accent tree: One small ornamental tree for height.
    • Perennial layer: Groupings of 3–5 pollinator perennials along the walkway.
    • Groundcover edge: Low herbs or native grasses to frame the space.
    • Mulch: Natural bark or leaf mulch to conserve moisture and suppress weeds.

    This mix gives year-round interest, supports pollinators, and keeps upkeep minimal.

    Sustainability & Maintenance Tips

    • Water deeply, not frequently. Once roots are established, most natives need less than 1 inch per week.
    • Feed soil, not plants. Every spring, top-dress beds with 1–2 inches of finished compost.
    • Avoid synthetic herbicides and pesticides. Hand-pull weeds or use organic vinegar-based sprays sparingly.
    • Leave some leaves. A thin layer in fall provides habitat for beneficial insects.

    Matching Plants to U.S. Regions

    Here’s a quick reference based on general climate:

    RegionReliable Choices
    Northeast / Great LakesServiceberry, Black-eyed Susan, Coneflower, Inkberry Holly
    SoutheastYaupon Holly, Crape Myrtle, Bee Balm, Blueberries
    Southwest / CaliforniaLavender, Desert Willow, California Poppy, Rosemary
    Pacific NorthwestEvergreen Huckleberry, Sword Fern, Serviceberry, Ornamental Grasses
    Midwest / PlainsLittle Bluestem, Coneflower, Rudbeckia, Buffalo Grass

    Expert Insight

    In my experience, the best front yard plant isn’t a single species it’s a balanced mix of native shrubs, perennials, and one focal tree suited to your local climate. That approach keeps your yard green and lively through all seasons with minimal intervention.

    If you want something specific say, low-water plants for a sunny yard in Texas or deer-resistant options for upstate New York. I can tailor a short list for your zone and soil type.

    Would you like me to create a region-specific front yard planting plan with organic soil prep and spacing guidelines for your area?