Category: Low Maintenance Plants

  • How to grow baby carrots indoors

    How to grow baby carrots indoors

    Every product is independently reviewed and selected by our editors. If you buy something through our links, we may earn an affiliate commission at no extra cost to you.

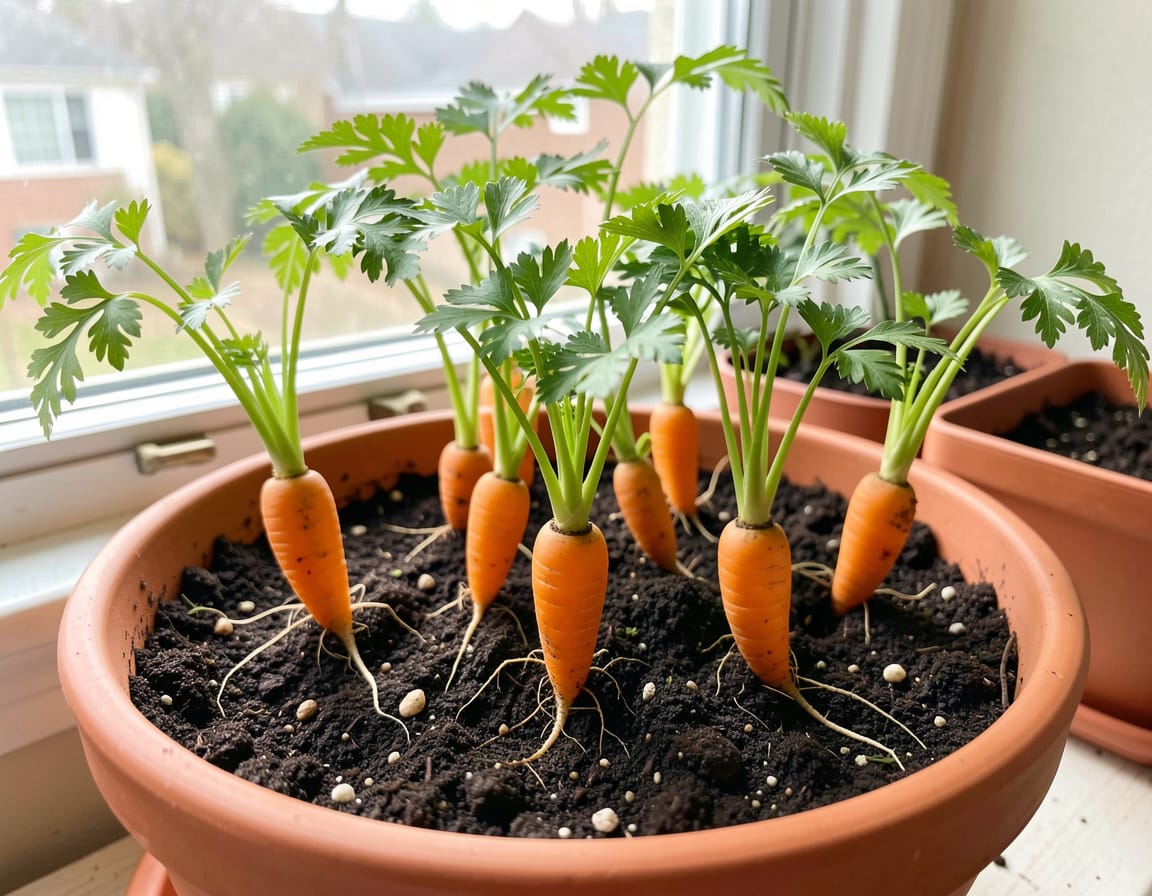
    Growing baby carrots indoors is one of the easiest ways to enjoy fresh, crunchy roots without needing a big garden. I’ve grown them on a sunny kitchen windowsill, under a cheap grow light in winter, and even in a shallow wooden tray on my balcony. When you understand what carrots actually need consistent moisture, loose soil, and steady light they grow reliably indoors with very little fuss.

    Below is a practical, experience-based guide you can follow immediately.

    Why Growing Baby Carrots Indoors Works

    Baby carrots aren’t a different plant they’re simply harvested young. Because they stay small (often 3–5 inches), they don’t need deep containers, and they mature faster than full-size varieties. Indoors, you control moisture, temperature, and pests, which solves the biggest carrot problems I’ve seen outdoors: uneven watering, compacted soil, and carrot fly.

    The result: straighter, sweeter, more tender carrots.

    What You’ll Need

    • A shallow pot or tray at least 6–8 inches deep
    • Loose, fine-textured potting mix (peat-free if possible)
    • Slow-release organic fertilizer or compost
    • Baby carrot seeds (varieties like ‘Adelaide’, ‘Parmex’, ‘Little Finger’)
    • Spray bottle or fine-rose watering can
    • Sunny window (south-facing) or a basic LED grow light
    • A small fan (optional but helpful for airflow)

    Budget alternatives: recycled salad containers with drainage holes, homemade compost mix, or an inexpensive clamp-on grow light.

    How to Grow Baby Carrots Indoors (Step-by-Step)

    1. Prepare the Container

    Use a clean pot at least 6 inches deep. Carrots fork easily if the soil is compacted, so fill the container loosely don’t press the soil down too hard.

    Good soil cues:

    • Feels fluffy when squeezed
    • No clumps or wood chunks
    • Moist but not soggy

    2. Wet the Soil Before Sowing

    Carrot seeds germinate best in evenly moist soil. Water the soil lightly until it feels like a wrung-out sponge.

    In my experience, pre-moistened soil prevents the seeds from shifting around during watering.

    3. Sow the Seeds Thinly

    Scatter seeds across the surface, aiming for about one seed every half-inch. Baby carrots don’t need much thinning if you sow lightly.

    Lightly cover with a thin layer of soil (no more than ¼ inch).

    4. Keep the Surface Moist

    Carrot seeds are slow to sprout 7 to 14 days indoors. Mist daily or cover the container with a breathable lid until the first sprouts appear.

    Avoid heavy watering during this stage; it displaces seeds and creates patchy rows.

    5. Provide Strong Light

    Place the container where it gets 6–8 hours of direct sunlight. If your indoor light is weak, use a simple LED grow light set 6–8 inches above the seedlings.

    Visual cue: Seedlings should stay short and upright. Tall, pale, stretched seedlings indicate too little light.

    6. Thin Seedlings (If Needed)

    Once the seedlings are 2 inches tall, thin them to 1–1.5 inches apart. Crowded carrots stay small and warped.

    7. Water Consistently

    Carrots need steady moisture to form crispy, tender roots. Indoors, I water lightly every 2–3 days, adjusting based on conditions.

    Signs you’re watering correctly:

    • Soil stays slightly damp
    • No standing water
    • Green tops remain firm, not floppy

    8. Harvest in 30–50 Days

    Baby carrots mature quickly. Gently brush back soil to check their size. If they’re finger-length, they’re ready.

    Harvest by grasping the greens at the base and pulling straight up. If they resist, loosen soil around them with your fingers.

    Pro Tips & Best Practices

    • Use fresh seeds; old carrot seeds germinate poorly.
    • Keep soil consistently moist dry spells cause woody, cracked roots.
    • Don’t add too much nitrogen (e.g., too much compost); it causes hairy roots and leafy tops.
    • Rotate your container slightly each week to prevent tilted growth toward the light.
    • If growing near a window in winter, cold drafts can stunt the roots use a small barrier if needed.

    Common beginner mistake: pressing soil down too firmly. Carrots need soft soil to grow straight.

    FAQ

    Why are my indoor baby carrots thin or tiny? Usually overcrowding or not enough light. Thin them out and move the container to a brighter spot.

    Can I grow baby carrots indoors without sunlight? Yes, but you’ll need a grow light. Even a cheap LED bar works well.

    How often should I water carrots indoors? Lightly every 2–3 days, or whenever the top inch feels dry.

    Why are my carrot leaves turning yellow? Overwatering or poor drainage is the usual cause. Let the soil dry slightly and ensure the pot has holes.

    Can I reuse soil for the next round? Only if it’s still loose and pest-free. I usually mix in a bit of fresh compost before replanting.

    When Not to Grow Baby Carrots Indoors

    • Extremely low-light homes without access to a grow light
    • Very hot indoor environments (above 80°F), which can turn carrots bitter
    • Containers shallower than 6 inches
    • Soil mixes with bark chunks or clay, which cause forked roots

    If any of these apply, grow microgreens or leafy herbs instead they tolerate poor indoor conditions better.

    Alternative Methods

    Hydroponic Baby Carrots

    Pros: clean roots, fast growth Cons: higher setup cost, more monitoring

    Fabric Grow Bags

    Pros: great drainage, lightweight Cons: need a drip tray; dries faster

    Deep Window Boxes

    Pros: perfect for balconies Cons: may need more frequent watering

    For beginners, a simple 6–8 inch pot with loose potting mix is the easiest and most forgiving method.

    Conclusion

    Growing baby carrots indoors is simple once you understand their needs: loose soil, bright light, and steady moisture. With a shallow pot and a sunny windowsill (or a basic grow light), you can harvest tender, sweet carrots in just a few weeks. Start small, water consistently, and adjust the light as needed these are the habits that always give me the best indoor harvests.

    You’ll be surprised how much flavor such a small garden project can produce.

  • Common problems with salvias in pots

    Common problems with salvias in pots

    Every product is independently reviewed and selected by our editors. If you buy something through our links, we may earn an affiliate commission at no extra cost to you.

    Salvias are some of the most rewarding container plants you can grow long blooms, pollinator-friendly, and surprisingly drought‑tolerant once established. But in pots, they behave differently than they do in garden beds, and several issues show up more quickly.

    Below is a practical, experience‑based guide to the most common problems with salvias in pots, why they happen, and exactly how to fix them. Everything here comes from real container growing on sunny balconies, terraces, and small patios.

    Why Salvias Act Differently in Pots

    Potted salvias experience: • Faster soil drying • Temperature swings (pots heat up far more than ground soil) • Limited root space • Salt and fertilizer buildup • Water stress from inconsistent watering

    Because salvias respond strongly to root conditions, most problems originate below the soil line.

    1. Wilting or Drooping (Even After Watering)

    What causes it

    • Heat stress • Very dry soil • Compacted potting mix • Rootbound plant • Overwatering leading to root rot (the trickiest one to spot)

    From experience: Salvias droop dramatically when thirsty but perk up again quickly with water. If yours stays wilted even after watering, it’s likely rootbound or waterlogged.

    How to fix it

    • Water deeply until water reaches all of the root ball • If soil stays wet for too long, repot into a looser mix • Move the plant to morning sun + light afternoon shade • Check drainage holes to make sure they’re not blocked

    2. Yellowing Leaves at the Bottom

    What causes it

    • Overwatering • Poor drainage • Old foliage naturally dying back (normal) • Fertilizer imbalance

    In pots, yellowing almost always ties back to moisture levels.

    How to fix it

    • Let soil dry between waterings • Add perlite to improve drainage at the next repotting • Remove old yellow leaves to improve airflow • Use a diluted, balanced fertilizer once a month

    3. Leggy, Sparse, or Floppy Growth

    What causes it

    • Too little sunlight • Too much nitrogen fertilizer • Lack of pruning • Pot too small for root development

    How to fix it

    • Provide 6+ hours of direct sunlight • Pinch tips regularly to encourage branching • Use slow‑release fertilizer • Move the plant into a slightly larger pot if roots circle the bottom

    Real‑world note: Salvias grown in less than 6 hours of sun get floppy no matter how well you water or feed them.

    4. Brown, Crispy Leaf Edges

    What causes it

    • Heat stress • Pot overheating on concrete or metal surfaces • Underwatering • Hot, drying winds (very common on balconies)

    How to fix it

    • Water deeply but not too frequently • Mulch lightly with bark or compost to stabilize moisture • Move pots off hot surfaces use a plant stand • Give afternoon shade in very hot climates

    5. Powdery Mildew

    What causes it

    • Crowded plants • High humidity + poor airflow • Watering late in the day • Shade + damp conditions

    Even drought-tolerant salvias can get mildew if airflow is poor.

    How to fix it

    • Remove affected leaves • Increase airflow around the pot • Water only in the morning • Apply neem oil weekly until new growth is clean

    6. Stunted Growth or No Blooms

    What causes it

    • Not enough sunlight • Pot too small • Excessive nitrogen (too leafy, no flowers) • Poor soil quality • Lack of deadheading

    How to fix it

    • Move to full sun • Upgrade to a pot at least 12–14 inches wide • Use a bloom‑boosting fertilizer (low nitrogen) • Deadhead regularly to trigger more flowers

    7. Root Rot

    What causes it

    • Overwatering • Heavy or compacted potting mix • Pot without drainage holes • Saucers that stay full of water

    Signs: wilting, black stems at the base, soil that never dries, sour smell.

    How to fix it

    • Remove the plant from the pot and trim black mushy roots • Repot into fresh, well‑drained potting mix • Water only when the top 2–3 inches are dry • Elevate the pot so excess water drains freely

    8. Pests (Aphids, Spider Mites, Whiteflies)

    What causes pest outbreaks

    • Plants kept too dry or stressed • Low humidity • Nearby infested plants • Overfertilized, tender new growth

    Real experience: Spider mites show up on my terrace salvias during very hot, dry weeks. Mist the air (not leaves) around plants and water adequately to discourage them.

    How to fix it

    • Rinse the plant thoroughly with water • Spray neem oil every 4–7 days for 3 cycles • Increase watering consistency • Keep salvias away from severely infested plants

    9. Soil Drying Out Too Fast

    Why it happens

    • Terracotta pots • Small containers • Full sun on balconies • Potting mix with too much bark or sand

    How to fix it

    • Move to a slightly larger pot • Mix in compost to improve moisture retention • Add 1–2 inches of mulch • Water early in the morning

    Pro Tips for Growing Salvias in Pots (From Hands-On Use)

    • Salvias prefer deep watering less often, not light daily watering. • Container salvias need more pruning than garden salvias. • Deadheading every week keeps them blooming nonstop. • In windy areas, choose heavier pots so tall varieties don’t topple. • Most salvias do best when pots warm in the morning sun and cool in afternoon shade.

    FAQ (Beginner-Friendly Answers)

    Why is my potted salvia wilting even though I watered it?

    If it doesn’t bounce back within a few hours, the plant is either rootbound or the soil is staying too wet.

    How often should I water salvias in pots?

    Usually every 2–4 days in warm weather, but only when the top few inches are dry.

    Why are my salvia leaves turning brown at the tips?

    Heat stress or underwatering. Container salvias dry out quickly, especially in terracotta pots.

    Do salvias need full sun?

    Yes at least 5–6 hours. Less light causes leggy growth and fewer blooms.

    Should you cut back salvias in pots?

    Yes. Cutting back by one-third encourages fuller, healthier growth.

    Conclusion

    Most common problems with salvias in pots come down to light, water, and root space. Salvias are tough plants, and once you stabilize the basics sunlight, well‑drained soil, and consistent watering they usually bounce back quickly and bloom for months.

    If you’d like, I can help you diagnose your specific salvia just tell me which variety you’re growing or send a photo.

  • Hydrangea leaves turning brown on edges

    Hydrangea leaves turning brown on edges

    Every product is independently reviewed and selected by our editors. If you buy something through our links, we may earn an affiliate commission at no extra cost to you.

    When you notice hydrangea leaves turning brown on the edges, it’s almost always a sign that the plant is stressed not dying. I’ve seen this countless times in my own garden, especially during hot spells or when a new hydrangea hasn’t settled into the soil yet. Edge browning is your plant’s early warning system, and if you respond quickly, the fix is usually simple.

    Below is a practical, experience-driven guide written specifically for beginner and early‑intermediate home gardeners.

    Why Hydrangea Leaves Turn Brown on the Edges

    Edge browning happens when the leaf tips dry out faster than the plant can replace moisture. Hydrangeas are shallow-rooted, moisture-sensitive shrubs, so any fluctuation (too hot, too dry, too windy, too much sun, or uneven watering) shows up on the leaf edges first.

    Most common reasons: • Heat or sunburn • Underwatering or inconsistent watering • Low humidity or excessive wind • High mineral/salt buildup in soil (common in pots) • Root stress after planting or repotting • Fertilizer burn • Mild fungal issues

    This guide walks through each fix step-by-step.

    Why These Fixes Work

    Hydrangeas regulate moisture mainly through their large, thin leaves. Because they transpire heavily, anything that disrupts water uptake dry soil, excessive sunlight, root damage causes the leaf margins to dry out first.

    Correcting soil moisture, light exposure, and root environment quickly restores healthy growth.

    In my experience, once conditions stabilize, new leaves grow clean and green within 2–3 weeks.

    What You’ll Need

    • Watering can or hose with gentle spray • Organic compost • Mulch (shredded leaves, pine bark, composted wood chips) • pH-neutral potting soil if repotting • Pruning shears • Optional: shade cloth for hot areas • Optional: rainwater (reduces salt/buildup in pots)

    Budget-friendly alternatives: • Homemade leaf mulch • Use rainwater collected in a bucket • Simple compost + perlite mix works well for pots

    Step-by-Step Guide to Fix Brown Leaf Edges on Hydrangeas

    1. Check soil moisture (the #1 cause)

    Hydrangeas hate “wet-dry-wet-dry” cycles.

    How soil should feel: • Damp like a wrung-out sponge • Never bone-dry • Never muddy or swampy

    Fix: • If dry → water deeply until water reaches the root ball. • If soggy → hold off watering and improve drainage (see step 3).

    In my garden, a single deep watering every few days works better than daily light watering.

    2. Protect from harsh afternoon sun

    Hydrangeas tolerate morning sun but often burn in afternoon heat.

    Signs of sunburn: • Brown, crispy edges on the sun-facing side • Drooping during midday • Soil drying quickly

    Fix: • Move potted hydrangeas to morning sun + afternoon shade. • For in-ground plants, add temporary shade cloth during heatwaves.

    Even a few hours of harsh afternoon light can scorch leaves in summer.

    3. Improve soil drainage

    Compacted soil or poor drainage suffocates roots and leads to brown edges.

    Fix for in-ground plants: • Loosen top 1–2 inches of soil gently. • Add 1–2 inches of compost around the dripline.

    Fix for containers: • Ensure drainage holes are open. • Add 20–30% perlite or pine bark fines during the next repotting.

    Hydrangea roots are surprisingly shallow good top-layer drainage is crucial.

    4. Add mulch to stabilize soil moisture

    Mulching is one of the main things that stopped edge browning in my own hydrangeas.

    Use: • Shredded leaves • Pine bark • Compost

    Apply a 2–3 inch layer, but keep it 2 inches away from the stem.

    Mulch prevents moisture swings and protects roots from temperature stress.

    5. Check for fertilizer burn or mineral buildup

    Too much fertilizer—especially high-nitrogen types—can burn leaf edges.

    Signs: • Brown, crispy tips • Leaves curl slightly • Browning appears after fertilizing

    Fix: • Flush soil with clean water to dilute salts. • Switch to a gentle, slow-release, organic fertilizer.

    If you use tap water in pots, mineral salts can accumulate. Rainwater is much gentler for hydrangeas.

    6. Improve humidity and airflow

    Hydrangeas dry out faster in windy balconies, terraces, and rooftops.

    Fix: • Move pots closer together to create a microclimate. • Keep plants out of strong, direct wind. • Water early morning so the plant starts the day fully hydrated.

    7. Remove badly damaged leaves

    Snip off crispy, fully brown leaves. Partially browned leaves can stay they still photosynthesize.

    Removing damaged leaves helps the plant redirect energy to new growth.

    Pro Tips & Best Practices (Based on Hands-On Experience)

    • Hydrangeas wilt easily but recover quickly once soil moisture is corrected. • Container hydrangeas are far more prone to brown edges than in-ground ones. • Brown edges are often the first sign of stress catching it early prevents leaf drop. • Overwatering and underwatering look similar; always check soil moisture before reacting. • Leach potted hydrangeas every few months to prevent salt buildup.

    Common beginner mistakes: • Watering lightly every day instead of deeply • Leaving hydrangeas in full afternoon sun • Overfertilizing to “fix” brown edges • Planting too close to walls where sun reflects heat

    FAQ:

    Why are my hydrangea leaves turning brown on the edges but not falling off?

    This usually means mild stress often sunburn, drought, or minor root stress. The plant can still recover easily.

    Is edge browning a sign of disease?

    Usually no. Diseases typically cause spots, not clean edge burn.

    Should I cut off the brown edges?

    No need, unless the entire leaf is dry. Partial browning doesn’t harm the plant.

    Do hydrangeas get brown edges when repotted?

    Yes, especially in the first week. It’s part of transplant shock and resolves with consistent watering.

    Can too much sun cause only edge browning?

    Absolutely. Light sunburn commonly starts at the margins.

    How long until new healthy leaves appear?

    2–4 weeks in warm weather.

    When NOT to Use These Fixes

    Avoid heavy watering or mulching if: • The soil already stays wet for days • You’re in a cool, damp climate • Leaves also show dark brown spots (could be fungal)

    In these cases, focus on airflow and fungal prevention rather than moisture.

    Alternative Solutions If Browning Continues

    Relocate the plant

    Hydrangeas often stop browning immediately when moved to better light conditions.

    Repot with fresh soil

    If the soil is compacted or salty, fresh mix works wonders.

    Use shade cloth during peak heat

    Even 30% shade can prevent browning during summer.

    Conclusion: Hydrangea Leaves Turning Brown on the Edges Are Fixable

    When you see hydrangea leaves turning brown on edges, it almost always means the plant is stressed by sun, heat, or uneven watering not dying. With steadier watering, gentle morning light, and well-drained, mulched soil, hydrangeas bounce back quickly.

    In my own garden, consistent moisture + partial shade has been the most reliable fix.

  • Hydrangea leaves turning brown and falling off

    Hydrangea leaves turning brown and falling off

    Every product is independently reviewed and selected by our editors. If you buy something through our links, we may earn an affiliate commission at no extra cost to you.

    When you notice hydrangea leaves turning brown and falling off, it can feel like the whole plant is declining overnight. I’ve dealt with this many times in my own home garden especially during hot summers and after unexpected watering swings. The good news is that hydrangeas are resilient, and once you understand why the browning happens, recovery is usually straightforward.

    This guide gives you clear, practical steps you can apply immediately, even if you’re new to gardening. Everything here comes from hands-on experience growing hydrangeas in small backyards, containers, and semi-shaded terraces.

    Why Hydrangea Leaves Turn Brown and Fall Off

    Hydrangeas shed leaves as a stress response. Browning usually starts at the edges or tips because that’s where moisture loss is highest. Once the plant feels overwhelmed by heat, drought, root issues, or fungal infection it drops leaves to protect itself.

    Most cases come down to:

    • Heat stress
    • Inconsistent watering
    • Poor soil drainage
    • Fungal disease
    • Sunburn
    • Normal seasonal leaf drop (often misinterpreted as a problem)

    Below, we break down the science in simple terms and show you exactly how to fix each cause.

    Why This Method Works

    The steps in this guide focus on:

    • Stabilizing soil moisture without overwatering
    • Improving drainage and airflow
    • Identifying stress signs before they escalate
    • Adjusting sunlight exposure based on hydrangea type
    • Preventing fungal problems, which hydrangeas are prone to in humid or crowded spaces

    Most hydrangeas bounce back quickly when their root zone is corrected. From experience, once the soil environment improves, you’ll see new healthy leaves within 2–4 weeks in warm weather.

    What You’ll Need

    • Garden trowel
    • Mulch (compost, shredded leaves, or pine bark)
    • pH-neutral potting soil or compost
    • Pruning shears (clean and sharp)
    • Watering can with a narrow spout
    • Optional: neem oil or organic fungicide
    • Optional: shade cloth for extreme heat

    Budget alternatives:

    • Use homemade leaf mulch
    • Use diluted dish soap (1–2 drops per liter) as a gentle leaf wash for dust or minor pests
    • Reuse cocopeat/compost mix from old containers after refreshing it

    Step-by-Step: How to Fix Hydrangea Leaves Turning Brown and Falling Off

    1. Check the soil moisture (the most common cause)

    Hydrangeas want consistently moist not soggy soil.

    How to check: Insert your finger 2–3 inches into the soil.

    • Feels dry → underwatering
    • Feels muddy or cool and heavy → overwatering
    • Feels evenly damp → moisture is fine

    Fix:

    • If dry: Water deeply until the soil is moist throughout the root zone.
    • If soggy: Stop watering for a few days and improve drainage (steps below).

    2. Improve soil drainage

    Hydrangeas sitting in waterlogged soil develop brown, dropping leaves very quickly.

    What to do:

    • For ground planting:
      • Lightly aerate soil around the plant with a trowel.
      • Add compost around the base to loosen clay-heavy soil.
    • For containers:
      • Make sure the pot has drainage holes.
      • Add 20–30% perlite or coarse sand to the soil mix next time you repot.

    3. Look for heat or sunburn stress

    Container hydrangeas suffer the worst. On hot terraces, the soil heats up like an oven.

    Signs:

    • Brown, crispy edges
    • Leaves folding or drooping during the afternoon
    • Browning on the side facing the sun

    Fix:

    • Move potted hydrangeas to morning sun + afternoon shade.
    • For in-ground plants, install temporary shade cloth during heatwaves.

    4. Mulch properly

    Mulch maintains even soil moisture and stops heat stress.

    Apply a 2–3 inch layer of:

    • Shredded leaves
    • Compost
    • Pine bark

    Leave a 2-inch gap around the stem to prevent rot.

    5. Inspect for fungal diseases

    Hydrangeas commonly get:

    • Leaf spot
    • Anthracnose
    • Powdery mildew

    Signs:

    • Spots that turn brown or tan
    • Premature leaf drop
    • Brown patches spreading inward

    Fix:

    • Remove affected leaves (don’t compost them).
    • Improve airflow don’t crowd the plant.
    • Spray with neem oil weekly for 2–3 weeks (evening only).

    6. Fix watering timing

    Water early in the morning so leaves dry quickly.

    Evening watering can encourage fungal issues.

    7. Prune only what’s necessary

    Snip:

    • Dead leaves
    • Blackened stems
    • Very weak branches

    Do not prune heavily during mid-summer stress.

    Pro Tips & Best Practices (From Real-World Gardening)

    • Hydrangeas in pots dry out far faster than those in the ground sometimes twice a day in summer.
    • Brown leaf edges often improve simply by adding mulch and consistent watering.
    • If your hydrangea is in full afternoon sun in warm climates (zones 7–9), expect browning unless shaded.
    • Avoid constantly “moisture-checking” the plant; too much disturbance can damage shallow roots.
    • Hydrangeas hate sudden changes move pots gradually to a new spot over 3–5 days.

    Common Beginner Mistakes

    • Watering frequently but too shallowly
    • Planting hydrangeas in clay soil without amending it
    • Leaving wet leaves during evening watering
    • Assuming browning means you must fertilize (it usually doesn’t!)

    FAQ:

    1. Why are my hydrangea leaves turning brown around the edges?

    Most likely heat or drought stress. Edge browning is the first sign that the plant is losing water faster than it can take it up.

    2. Why are my hydrangea leaves turning brown in pots but not in the garden?

    Pots heat up and dry out much faster. Move the plant to partial shade and increase watering depth.

    3. Can hydrangeas recover from brown, falling leaves?

    Yes. As long as stems are green and firm, new leaves will grow once watering and soil conditions stabilize.

    4. Should I remove brown hydrangea leaves?

    Yes, if they are crispy, diseased, or fully dead. Gently remove them to improve airflow.

    5. Why are only the bottom leaves turning brown and falling off?

    This usually means the plant is redirecting energy to new top growth or coping with uneven watering.

    6. Do hydrangeas lose leaves naturally?

    Yes late summer to fall leaf drop is normal. But sudden mid-season browning is usually a stress issue.

    When NOT to Use These Fixes

    Avoid heavy watering or mulching if:

    • Your soil is staying wet for days
    • You’re in a cool, wet climate
    • The plant is in full shade and airflow is low

    In these cases, the issue is almost always fungal. Focus instead on:

    • Airflow
    • Pruning for space
    • Using a fungicide

    Don’t add more water or mulch it will make the problem worse.

    Alternative Solutions If Browning Continues

    1. Repotting (for container hydrangeas)

    Use a mix of:

    • 50% quality potting soil
    • 25% compost
    • 25% perlite

    Repot only in early spring or fall.

    2. Relocating

    Hydrangeas often perk up dramatically when moved to:

    • Morning sun
    • Light afternoon shade
    • Breeze-friendly spots

    3. Controlled Deep Watering

    Water slowly for 15–20 minutes to saturate the root ball without causing runoff.

    Conclusion:

    When you see hydrangea leaves turning brown and falling off, it’s almost always a fixable stress reaction. Start by adjusting water, improving drainage, adding mulch, and giving the plant gentler light. In my garden, these simple changes revive stressed hydrangeas far more reliably than fertilizers or complicated treatments.

    Hydrangeas are forgiving once you stabilize their growing environment. With steady care and a little patience you’ll see healthy, fresh growth returning in just a few weeks.

    If you want, I can help you diagnose the issue from a photo of your hydrangea.

  • Hydrangea leaves turning brown causes and remedies for the issue

    Every product is independently reviewed and selected by our editors. If you buy something through our links, we may earn an affiliate commission at no extra cost to you.

    When hydrangea leaves start turning brown whether at the edges, in spots, or across entire leaves it’s usually a sign that something in the plant’s environment is off. In my own backyard and terrace containers, browning leaves have almost always traced back to a handful of predictable issues: too much sun, inconsistent watering, poor drainage, or fungal stress.

    The good news is that hydrangeas are forgiving once you identify the cause early. The steps below come directly from real garden troubleshooting, not theory, so you can fix the problem quickly and prevent it from returning.

    Why Hydrangea Leaves Turn Brown

    Hydrangeas prefer moderate sunlight, consistently moist but well‑drained soil, and stable humidity. When any of these swing too far too much heat, too little water, too much water, or lingering moisture browning begins. Addressing the underlying imbalance is what brings the plant back.

    What You’ll Need

    • Clean pruning shears • Watering can with gentle spout • Mulch (leaf mulch, straw, composted bark) • Well‑draining soil or compost mix • Neem oil or baking-soda fungicide (optional) • Shade cloth (for strong summer sun)

    Budget-friendly alternatives: • Use homemade compost instead of bagged mixes • Reuse leaves/grass clippings as mulch • A thin cotton cloth can substitute for shade cloth temporarily

    Causes of Hydrangea Leaves Turning Brown (and How to Fix Each One)

    1. Sunburn (Most Common in Home Gardens)

    Hydrangeas scorch easily, especially in hot, dry climates. Brown, crispy edges or large tan patches often mean too much direct afternoon sun.

    Signs

    • Browning only on the topmost or outer leaves • Crisp texture • Occurs suddenly during heatwaves

    Remedy

    • Move potted hydrangeas to morning sun + afternoon shade. • For in-ground plants, use a shade cloth or plant a taller companion nearby. • Water early in the morning not mid‑day.

    In my west-facing garden, hydrangeas only stopped browning once I shifted them to where the house blocked the 3–6 p.m. sun.

    2. Underwatering or Irregular Watering

    Hydrangeas need consistently moist soil. Browning from dryness begins at the edges and moves inward.

    Signs

    • Soil pulls away from pot edges • Leaves wilt before browning • Brown edges with curling

    Remedy

    • Water deeply until soil is moist 6 inches down. • Add 2–3 inches of mulch to stabilize soil moisture. • Water when the top 1–2 inches of soil feel dry not on a strict schedule.

    Hydrangeas in containers dry out faster; expect to water them more often in summer.

    3. Overwatering or Poor Drainage (Root Stress)

    Too much water can mimic underwatering symptoms, but the leaves feel soft instead of crispy.

    Signs

    • Lower leaves brown first • Wet soil for more than two days • Wilting even though soil is damp • Sour smell or blackened roots

    Remedy

    • Improve drainage by mixing the soil with compost and perlite. • Make sure pots have multiple drainage holes. • Reduce watering frequency. • If roots are rotted, trim off dark mushy sections and repot in fresh soil.

    From experience, hydrangeas are happiest when soil is moist but airy, not soggy.

    4. Fungal Leaf Spot (Cercospora or Anthracnose)

    Brown or purple spots with defined edges usually indicate fungal disease.

    Signs

    • Circular or irregular brown/purple spots • Spots enlarge during humid weather • Leaves eventually yellow and fall

    Remedy

    • Remove spotted leaves and discard (don’t compost). • Water at the base only never overhead. • Improve airflow by thinning crowded stems. • Treat with neem oil or a mild organic fungicide weekly until resolved.

    Humidity-heavy areas often require occasional preventive spraying.

    5. Fertilizer Burn

    Hydrangeas are sensitive to overfeeding, especially high-nitrogen fertilizers.

    Signs

    • Brown, crispy leaf edges • White crust on soil surface • Rapid browning after recent feeding

    Remedy

    • Flush soil with water to dilute excess fertilizer. • Switch to a balanced, slow-release formula. • Feed hydrangeas lightly—usually once in spring is enough.

    I’ve seen more harm from “extra fertilizer” than from too little.

    6. Incorrect Soil pH or Nutrient Deficiencies

    While pH affects bloom color, extreme pH imbalance can stress leaves.

    Signs

    • Browning along with yellowing between veins • Poor new growth • Soil is very acidic or alkaline

    Remedy

    • Use a simple soil test kit. • Add garden lime (to raise pH) or sulfur (to lower pH) only if necessary. • Top-dress with compost to stabilize nutrients.

    Hydrangeas are not heavy feeders stability matters more than richness.

    7. Winter Damage or Frost Burn

    New spring leaves often brown after a late frost.

    Signs

    • Soft, blackened or browned young leaves • Damage after cold nights

    Remedy

    • Remove only fully dead tissue; leave partially damaged leaves until new growth forms. • Cover hydrangeas with cloths during late spring cold snaps.

    In my climate, protecting hydrangeas just one night often prevents weeks of stress.

    Pro Tips and Best Practices

    • Morning sun + afternoon shade is the safest lighting for most hydrangeas. • Mulch is your friend browning often decreases once soil moisture stabilizes. • Avoid overhead watering entirely; hydrangeas prefer water at soil level. • In pots, go up only one pot size when repotting to avoid excess moisture retention. • Always prune with clean tools to prevent spreading fungal issues. • Most hydrangeas dislike strong winds windburn can look similar to sunburn.

    Frequently Asked Questions

    Why are my hydrangea leaves turning brown at the edges?

    Most likely sunburn or inconsistent watering. Check soil moisture and adjust light exposure.

    Why are only the lower leaves turning brown?

    Often a drainage or overwatering issue. Lower leaves suffocate first when roots sit in water.

    Can a hydrangea recover from brown leaves?

    Yes. Remove the damaged leaves and fix the cause. New growth usually appears within a few weeks.

    Should I cut off all browned leaves?

    Remove fully brown or mushy leaves. Partially brown leaves can stay until new growth emerges.

    Why are my hydrangea leaves turning brown after repotting?

    The plant is stressed from root disturbance or the new soil retains too much water. Improve drainage and keep the soil evenly moist.

    Do hydrangeas need shade or sun to stop browning?

    They need morning sun and light afternoon shade. Full-day sun often causes browning.

    When NOT to Use These Remedies

    Avoid heavy watering or fungicides if: • Soil is already wet • Temperature is below 10°C (50°F) • The plant is entering winter dormancy

    In these cases, wait for warmer weather or let the soil dry before intervening.

    Alternative Approaches (When Problems Are Persistent)

    • Move the plant to a more controlled location (partial shade, sheltered from wind). • Grow heat-tolerant hydrangea varieties like ‘Limelight’ if your climate is very hot. • Consider drip irrigation for even moisture without wetting the leaves.

    These alternatives help if your garden conditions naturally lean toward extremes.

    Conclusion

    Hydrangea leaves turning brown is usually a sign of environmental stress sun, water, soil, or humidity. Once you identify what’s causing the browning and adjust the plant’s growing conditions, hydrangeas bounce back quickly. Focus on consistent moisture, partial shade, good airflow, and clean pruning practices. With a few simple changes, you’ll see healthier leaves and stronger growth across the season.

  • How to save a lavender plant from dying

    How to save a lavender plant from dying

    Every product is independently reviewed and selected by our editors. If you buy something through our links, we may earn an affiliate commission at no extra cost to you.

    If your lavender plant is turning brown, going limp, or dropping stems, you’re not alone. Lavender is one of the most common “why is this dying?” plants I see in home gardens usually because it likes conditions very different from what most beginners naturally give it.

    Lavender thrives in dryness, sun, and lean soil. Most struggling lavender plants suffer from the opposite: heavy watering, rich potting mixes, shade, or pots that hold too much moisture. The good news is that lavender is surprisingly resilient when corrected early. I’ve revived many half-dead lavenders in my own balcony and backyard garden, and the steps below consistently work.

    This guide explains exactly how to save a lavender plant from dying using simple, real-world methods that beginners can apply immediately.

    Why This Method Works

    Lavender is native to dry Mediterranean climates. Its roots need air pockets and fast drainage. When soil stays damp for too long:

    • The roots suffocate • Fungal rot takes hold • Stems turn mushy or brown

    By recreating lavender’s natural growing conditions—more sun, less water, and sharply draining soil—you remove the stress triggers and allow new growth to return.

    In my own garden, I learned that lavender usually “dies” from the soil up, not the top down. Fixing the root environment almost always brings it back.

    What You’ll Need

    • Pruning shears (clean and sharp) • Gritty soil mix (cactus mix, sandy soil, or a mix you amend yourself) • Perlite, pumice, or coarse sand • A pot with several drainage holes (if container-grown) • A sunny outdoor space (6+ hours direct sunlight) • Optional: cinnamon powder (natural antifungal)

    Budget-friendly alternatives: • Use crushed gravel or small stones if you don’t have perlite • Reuse old terracotta pots they stay drier than plastic • Compost tea is NOT recommended here (too rich for lavender)

    Step-by-Step: How to Save a Lavender Plant From Dying

    1. Move the plant into bright, direct sunlight

    Lavender needs full sun at least 6 hours a day, and more is better. If your lavender is indoors, move it outside immediately. Indoors, lavender almost always declines due to lack of direct sun.

    Sign it’s improving: leaves become firmer and color brightens within a week.

    2. Check the soil moisture and stop watering

    Gently place a finger 2 inches into the soil. • If it feels damp or cool → it’s overwatered. • If it’s bone dry and dusty → water deeply, then let it dry again.

    Most dying lavender plants are overwatered. Healthy lavender soil should be dry more often than not.

    3. Improve drainage urgently (critical step)

    If the soil stays wet for more than one day, you must fix the drainage—this is usually what saves the plant.

    For potted lavender:

    1. Remove the plant from its pot.
    2. Check the roots—trim any black, mushy ones.
    3. Repot in a mix like: • 60% cactus or sandy soil • 30% perlite/pumice • 10% compost (optional; lavender prefers lean soil)

    Terracotta pots are best they help keep roots dry.

    For in-ground lavender: • Mix in coarse sand or gravel around the root zone • Create a mound or raised bed to lift the plant above soggy soil

    4. Trim off dead or rotten parts

    Cut away any of the following: • Mushy stems • Brown woody stems with no green inside • Dead flower spikes

    Do not cut into old woody growth unless it is rotted—it rarely regrows.

    Trimming allows the plant to focus energy on healthy new shoots.

    5. Water only when the soil is completely dry

    A revived lavender should be watered deeply but far less often: • In warm seasons: once every 10–14 days • In cool seasons: once every 3–4 weeks

    Visual cue: leaves turn crisp and grayish when too dry, but bounce back after watering.

    6. Provide airflow around the plant

    Crowded or humid spaces trap moisture. Make sure your lavender has: • At least 12 inches of space on all sides • No other plants touching it • Good air movement, especially on a balcony

    7. Optional: Light antifungal treatment

    If you saw root rot, dust the trimmed root base lightly with cinnamon powder. It’s natural, gentle, and won’t harm beneficial soil microbes.

    Pro Tips & Best Practices (From Hands-On Experience)

    • Terracotta pots almost always outperform plastic for lavender. • Lavender hates rich, dark, moisture-retentive potting mixes. • If your plant leans or grows unevenly, rotate the pot weekly. • Avoid mulching with bark—use gravel or nothing at all. • Never place lavender under drip irrigation.

    The biggest beginner mistake: watering “on schedule.” Lavender must be watered by soil dryness, not by habit.

    FAQ

    Why is my lavender turning brown at the base?

    Usually poor drainage or overwatering. The base rots first. Repot into a gritty mix and reduce watering.

    Can I save a lavender plant that’s turning gray and crispy?

    Yes—this usually means underwatering. Water deeply, then allow soil to dry. Move to full sun.

    How long does it take lavender to recover?

    2–8 weeks depending on severity. Stressed lavender often regrows from the base first.

    Can lavender grow indoors?

    Not well. Without 6–8 hours of direct sun, it declines. A strong grow light can help, but outdoor growing is best.

    Should I fertilize a dying lavender plant?

    No. Fertilizer stresses it further. Lavender prefers poor soil.

    My lavender has woody stems—should I cut them back?

    Only cut dead wood. Healthy lavender wood can be pruned lightly, but cutting too low can stop regrowth.

    When NOT to Use This Method

    Avoid reviving lavender if: • Soil stays waterlogged due to heavy clay and cannot be amended • You’re in a tropical, humid climate with daily rainfall (fungus dominates) • Temperatures are below freezing (wait until spring to repot or prune)

    In these cases, replacing the soil or relocating the plant may be safer.

    Alternative Methods or Solutions

    • Hard-pruning in early spring Good for leggy lavender but won’t save a severely rotted plant.

    • Propagating cuttings If the mother plant is mostly dead, take cuttings from healthy tips to regrow a new plant.

    • Root washing + full soil replacement Effective for severe root rot but stressful for the plant.

    Conclusion

    Saving a lavender plant from dying mostly comes down to restoring the conditions it naturally loves: strong sun, very little water, and sharply draining soil. Once you fix the root environment and trim away damage, lavender often surprises gardeners with fresh new shoots—sometimes within weeks.

    Be patient, stay gentle with watering, and remember that lavender is a drought-loving plant. With the steps above, your lavender has an excellent chance of bouncing back and thriving for years.

  • Clever Tips For Growing Pumpkins In Small Spaces

    Clever Tips For Growing Pumpkins In Small Spaces

    Every product is independently reviewed and selected by our editors. If you buy something through our links, we may earn an affiliate commission at no extra cost to you.

    Pumpkins have a reputation for needing a huge garden, but with the right approach, they grow surprisingly well in patios, balconies, side yards, and compact raised beds. I’ve grown pumpkins in tight corners of my small backyard, in 15‑gallon containers on a terrace, and even up a makeshift trellis against a fence. What matters most is choosing the right variety and managing the vines before they decide to take over.

    Below are practical, experience-tested tips that make pumpkin growing in small spaces not just possible, but productive.

    1. Choose Compact or Mini Pumpkin Varieties

    If you only change one thing, make it this. Variety choice determines 90% of your success in small spaces.

    Best space-friendly varieties I’ve grown: • Baby Boo • Jack Be Little • Small Sugar Pie • Baby Bear • Bushkin • Bush-type kabochas

    These produce full-sized flavor in much smaller plants.

    2. Start Training Vines Vertically From Day One

    Pumpkins naturally sprawl, but you can easily encourage them to climb.

    Use what you have: • A fence or railing • A trellis or tomato cage • Bamboo canes tied into a teepee • Strong nylon netting

    If you wait too long, the vines toughen and resist training. Guide them early with soft ties.

    3. Use Containers to Control Spread

    Growing in pots naturally limits root growth, which keeps the plant compact.

    Container guidelines: • 10–15 gallons for mini pumpkins • 20 gallons for pie-sized pumpkins • At least 12–16 inches deep • Good drainage is essential

    My most manageable pumpkins have always been container-grown they’re easier to prune, feed, and direct.

    4. Prune Purposefully to Manage Vine Length

    Pruning is a must in small spaces.

    What works well: • Keep the main vine to a reasonable length (6–10 ft). • Remove side shoots that aren’t producing fruit. • Once 1–2 pumpkins are developing, pinch the tip of the main vine.

    This stops the plant from trying to produce a patch-worth of vines.

    5. Use Slings to Support Fruit on Vertical Vines

    If pumpkins grow vertically, fruit needs support so the vine doesn’t snap.

    DIY sling options I’ve used: • Old T-shirts • Mesh produce bags • Soft cloth tied into a hammock

    It looks odd but works perfectly.

    6. Maximize Sunlight in Small Spaces

    Pumpkins need full sun 6 hours minimum, 8+ is ideal.

    If light is limited: • Place containers at the brightest edge of the balcony or patio. • Use reflective surfaces like light walls or light-colored pots. • Rotate containers weekly for even light exposure.

    Shaded pumpkins stretch excessively and fruit poorly.

    7. Feed Regularly Especially in Containers

    Pumpkins are heavy feeders, and limited soil means limited nutrients.

    What I’ve found effective: • Start with rich potting mix and compost. • Use a slow-release organic fertilizer. • Supplement with liquid seaweed or fish emulsion every 1–2 weeks. • Increase potassium when flowers appear.

    Healthy, well-fed vines stay compact and fruit early.

    8. Hand Pollinate in Tight Urban Gardens

    If pollinators rarely visit your balcony or courtyard, pumpkins may flower without setting fruit.

    Hand pollination method: • Use a small brush or cotton swab. • Transfer pollen from a male flower (thin stem) to a female flower (tiny pumpkin behind petals). • Do this early morning for best results.

    In my patio garden, hand pollination doubled my fruit set.

    9. Mulch to Reduce Water Stress and Vine Rooting

    Mulch helps small-space pumpkins by: • Reducing evaporation • Keeping soil temperatures stable • Preventing vines from rooting in unwanted spots

    Good mulch options: • Shredded leaves • Straw • Wood chips (in containers, a thin layer is best)

    10. Use Creative Vertical Spaces

    Pumpkins grow well when you think vertically especially in tight gardens.

    Ideas that have worked for me: • Training vines along a balcony railing • Growing a container pumpkin at the base of a fence • Letting vines climb a pergola for shade • Using an A-frame trellis in a raised bed

    Pumpkin vines are flexible and surprisingly cooperative when guided early.

    Conclusion

    Growing pumpkins in small spaces is completely achievable if you choose compact varieties, train vines vertically, prune regularly, and give the plant consistent sun and nutrients. With these clever tips for growing pumpkins in small spaces, you can enjoy homegrown pumpkins without needing a big garden just a bit of planning and some gentle vine training.

    If you’d like, I can turn this into a full SEO‑optimized long-form article with headings, troubleshooting, and step-by-step instructions just let me know.

  • Growing pumpkins in containers indoors

    Growing pumpkins in containers indoors

    Every product is independently reviewed and selected by our editors. If you buy something through our links, we may earn an affiliate commission at no extra cost to you.

    Growing pumpkins indoors especially in containers sounds ambitious, but it’s absolutely doable with the right setup. I started experimenting with indoor pumpkin growing a few winters ago when I didn’t have outdoor space, and I quickly learned that pumpkins behave differently indoors: they grow fast, need strong support, and depend entirely on you for pollination and light.

    If your indoor pumpkin seedlings keep getting leggy, if vines tangle around furniture, or if flowers appear but never turn into fruit, you’re not alone. These are the classic challenges of indoor pumpkin growing, and they all have simple solutions.

    This guide gives you a practical, experience-based method to grow healthy, productive pumpkins in containers inside whether you’re using a sunny window, a grow-light setup, or a small indoor garden corner.

    Why Growing Pumpkins in container Indoors Works (When Done Correctly)

    Pumpkins thrive indoors when you re-create the outdoor conditions they need:

    • Consistent warmth (70–80°F)
    • Strong, direct light
    • Deep, rich soil
    • Good airflow
    • Proper pollination
    • Vertical support for the vines

    Indoors, you control the environment, which means:

    • No pests like squash vine borers
    • No powdery mildew from humid outdoor mornings
    • No sudden cold snaps
    • Faster growth with stable temperatures

    The trick is giving pumpkins enough light, space, and root room the three things indoor gardeners often underestimate

    What You’ll Need

    These are the tools and materials I use when growing pumpkins indoors:

    • Large container (15–25 gallons, minimum 12 inches deep)
    • High-intensity grow light (LED full-spectrum preferred)
    • Rich, well-draining potting mix
    • Tomato cage, trellis, or vertical support
    • Slow-release organic fertilizer
    • Small paintbrush or cotton swab (for hand pollination)
    • Self-watering tray or saucer
    • Mulch (wood chips or shredded straw)

    Budget-friendly alternatives:

    • Repurposed storage tubs with drainage holes
    • DIY bamboo trellis
    • South-facing window + supplemental desk lamp

    Eco-friendly considerations:

    • Use peat-free potting soil
    • Choose organic fertilizers and neem oil if pests appear
    • Avoid chemical pesticides indoors (unsafe for people and pets)

    How to Grow Pumpkins in Containers Indoors

    Step 1: Choose the Right Pumpkin Variety

    Not all pumpkins suit indoor cultivation. Choose compact or bush types.

    Best indoor varieties:

    • Baby Boo
    • Jack Be Little
    • Sugar Pie
    • Baby Bear
    • Small Kabocha varieties
    • Bushkin

    Avoid giant varieties indoors they become unmanageable quickly.

    Step 2: Use a Large Container with Perfect Drainage

    Pumpkins need space for roots to anchor and absorb nutrients.

    Minimum container size:

    • 15 gallons for miniature pumpkins
    • 20–25 gallons for pie-sized pumpkins

    Use containers with:

    • Drainage holes
    • A saucer or tray
    • At least 12–16 inches depth

    Tip: I once tried growing a pumpkin in a 5‑gallon bucket it survived, but the fruit stayed small and the plant stressed constantly. More soil equals healthier vines.

    Step 3: Fill with High-Quality Potting Mix

    Avoid garden soil too dense and full of pests.

    Use:

    • Potting mix with perlite
    • A handful of compost
    • A slow-release organic fertilizer mixed in

    Soil should feel light and airy when squeezed, not clumpy.

    Step 4: Provide Strong Indoor Lighting

    Pumpkins are heavy feeders and heavy light users.

    Indoors, they need:

    • 12–16 hours of light per day
    • A grow light positioned 6–10 inches above leaves
    • Even light distribution as vines grow

    Signs your plant needs more light:

    • Long, stretched stems
    • Small leaves
    • Pale foliage
    • Slow vine development

    In my indoor setup, pumpkins only thrived once I moved them under a high-output LED panel.

    Step 5: Train the Vines Vertically

    Indoors, horizontal pumpkin vines will take over your whole room.

    Use:

    • A trellis
    • Tomato cage
    • Vertical garden frame

    Tie vines loosely with:

    • Garden tape
    • Soft twine
    • Fabric strips

    Indoor vines grow softer than outdoor vines they need extra support but gentle handling.

    Step 6: Hand Pollinate the Flowers

    Indoors, you don’t have bees to do the work.

    Here’s how to pollinate:

    • Identify male flowers (thin stems) and female flowers (tiny pumpkin behind petals).
    • Use a cotton swab or small brush.
    • Dab the inside of the male flower.
    • Transfer pollen to the center of the female flower.

    Best done in the morning when flowers first open.

    If female flowers shrivel and fall off, lack of pollination is usually the cause.

    Step 7: Water Consistently but Never Overwater

    Pumpkins like evenly moist not soggy soil.

    Watering guidelines:

    • Water deeply when the top inch feels dry
    • Drain excess water immediately
    • Use a self-watering tray to avoid waterlogging
    • Mulch the soil to reduce evaporation

    Indoors, overwatering is the most common mistake. Pumpkin roots need oxygen just as much as moisture.

    Step 8: Feed Regularly

    Pumpkins in containers burn through nutrients fast.

    Use:

    • Slow-release organic fertilizer (every 4–6 weeks)
    • Liquid seaweed or fish emulsion for foliage (every 2 weeks)
    • Additional potassium when flowers start forming

    If leaves go pale or vines slow down, add nutrients.

    Step 9: Support Developing Fruit

    Indoor fruits need extra support.

    Use:

    • Slings made from fabric or mesh
    • Hammocks attached to the trellis
    • Soft cotton material to cradle the fruit

    This prevents the fruit from snapping off the vine prematurely.

    Pro Tips & Best Practices

    • Use a fan to improve airflow and strengthen stems
    • Rotate the container weekly so vines grow evenly
    • Trim excessive side shoots to keep growth manageable
    • Keep temperature stable pumpkins hate cold drafts
    • Expect more frequent watering during active fruiting

    Common beginner mistakes:

    • Choosing a pumpkin variety too large for indoor growing
    • Using insufficient light
    • Skipping hand pollination
    • Growing in containers that are too small
    • Allowing vines to sprawl without support

    FAQ

    Can pumpkins really grow indoors to full size?

    Yes, as long as you choose a small/bush variety and provide strong lighting plus proper pollination.

    How long does it take to grow pumpkins indoors?

    Miniature pumpkins: 85–100 days Pie-sized pumpkins: 95–120 days

    Why are my pumpkin vines long but no fruit is forming?

    Likely due to insufficient light or missed pollination.

    Can I grow pumpkins indoors without grow lights?

    Only if you have a very bright south-facing window, and even then fruiting may be limited. Grow lights produce much better results.

    Will pumpkins indoors attract pests?

    Less often than outdoors, but spider mites and aphids can appear. Neem oil and good airflow help.

    When NOT to Grow Pumpkins Indoors

    Avoid this project if:

    • You can’t provide strong artificial lighting
    • You don’t have at least 15–20 gallons of soil space
    • You’re trying to grow giant pumpkin varieties
    • Your indoor space is very dry or cold

    Pumpkins need warmth, space, and consistent care.

    Alternative Methods

    Grow on a Heated Balcony or Patio

    Adds more natural light. Works well with partial grow-light supplementation.

    Start Pumpkins Indoors, Finish Outdoors

    Begin inside for early growth, then transplant. Great for cold climates.

    Use Dwarf or Micro Pumpkin Varieties

    Some breeders are developing ultra-compact pumpkins that grow well indoors.

    Conclusion

    Growing pumpkins in containers indoors is absolutely possible when you choose the right variety, give the plant enough light, and hand pollinate the flowers. The primary keyword “growing pumpkins in containers indoors” comes down to three things: proper lighting, large containers, and deliberate pollination.

    With patient training and a little daily attention, you can harvest adorable tabletop-sized pumpkins or flavorful sugar pies right from your indoor garden. Start small, stay consistent, and enjoy the process indoor pumpkin growing is one of the most rewarding small-space gardening projects you can try.

  • How to clear a garden full of weeds fast

    How to clear a garden full of weeds fast

    Every product is independently reviewed and selected by our editors. If you buy something through our links, we may earn an affiliate commission at no extra cost to you.

    When a garden is completely overrun with weeds, most beginners panic and think they need to dig everything out or start again. I’ve been there after one rainy week in midsummer, my entire back bed looked like it belonged to the crabgrass and not my tomatoes. The good news is that you can clear a garden full of weeds fast without harming your soil or creating more weeds later.

    The key is using quick, low‑disturbance techniques I’ve relied on in my own backyard, balcony planters, and raised beds over many seasons. These methods remove weeds efficiently, protect soil structure, and keep them from coming right back.

    Why This Fast Method Works

    A garden gets choked with weeds for two main reasons:

    • Weed seeds germinate extremely fast in moist soil
    • Soil disturbance pulls buried seeds to the surface

    Most “fast” solutions actually make things worse because they churn the soil. The method below works quickly because:

    • It removes weeds at or near the surface
    • It avoids deep turning
    • It smothers stubborn roots instead of fighting them
    • It prevents new weed germination immediately after clearing

    This is the approach I use when I need a messy bed usable again in a single afternoon.

    What You’ll Need

    You don’t need fancy tools. Even small‑space gardeners can use this setup.

    • Stirrup hoe (fastest tool for large areas)
    • Garden gloves
    • A rake
    • Cardboard or a tarp (for dense patches)
    • Mulch (straw, shredded leaves, bark fines, grass clippings)
    • A hand weeder or hori‑hori
    • Compost (optional but helpful after clearing)

    Budget alternatives:

    • Old cardboard from delivery boxes
    • Homemade mulch from dried leaves
    • A simple kitchen knife for root crowns in tight spaces

    Eco‑friendly notes:

    • Avoid chemical herbicides dangerous for pets, kids, and soil biology
    • Skip landscape fabric; it causes long-term soil issues in garden beds

    How to Clear a Garden Full of Weeds Fast

    Use these steps when you need fast results same day or same weekend.

    Step 1: Cut Everything Down (5-15 minutes per bed)

    Instead of pulling weeds right away, cut them at the base. This removes the top growth fast and exposes the soil.

    Tools that work best:

    • Stirrup hoe for large areas
    • Hand pruners or shears for thick stems

    Why this works: Cutting is much faster than pulling, and it starves many weeds without disturbing the soil.

    Step 2: Rake Off Loose Debris (5 minutes)

    Gather the cut weeds and remove them from the bed.

    To stay safe:

    • Avoid composting weeds with seeds
    • Keep invasive roots (bindweed, Bermuda grass) out of compost

    Removing debris clears the surface so weeds can’t re-root.

    Step 3: Tarp or Cardboard the Worst Areas (Instant setup; works over days)

    If you have stubborn patches, don’t waste hours pulling.

    Do this instead:

    • Lay a tarp or cardboard on top
    • Weigh down the edges
    • Leave for 1–2 weeks (or longer if needed)

    This method uses sunlight deprivation to collapse the weed system quickly.

    In my garden, tarping knocks down Bermuda grass better than any tool.

    Step 4: Pull Only the Easy-Rooted Weeds (10–20 minutes)

    With tops removed, soil exposed, and weeds weakened, pulling becomes much easier.

    Focus on:

    • Taproot weeds (dandelions, plantain)
    • Thick-stemmed weeds that regrow from crowns
    • Weeds around plant bases

    Do NOT try to dig up invasive runners. Smother them instead.

    Step 5: Mulch Immediately (The real secret to fast results)

    Once the surface is clear, add:

    • 2–3 inches of straw, leaves, or bark fines
    • 1 inch of compost under the mulch if soil is poor

    Mulch stops new weeds from popping up and speeds your future weeding sessions from 1 hour to 5 minutes.

    Avoid piling mulch against plant stems this causes rot and fungal issues.

    Step 6: Water Only the Plants, Not the Bare Soil

    After clearing and mulching, avoid overhead watering for a few days.

    Why: Watering the whole bed wakes up more weed seeds.

    If possible, switch to:

    • Drip irrigation
    • Soaker hoses
    • Base watering with a can

    This small habit drastically reduces weed return.

    Pro Tips & Best Practices

    Here’s what I’ve learned after clearing many weed-choked beds over the years:

    • Weed before it rains wet soil helps roots slip out
    • Keep a stirrup hoe handy; 3 minutes every few days prevents big jobs
    • Mulching is 80% of weed prevention
    • Don’t till tilling is guaranteed to bring up more weeds
    • Solarize only as a last resort (it can overheat and harm soil life)

    Beginner mistakes to avoid:

    • Pulling weeds when soil is bone-dry (roots snap)
    • Leaving roots of perennial weeds
    • Using weed fabric that becomes a nightmare later
    • Throwing seeded weeds into the compost pile

    FAQ

    How do I clear a weedy garden fast without chemicals?

    Cut everything at the base, rake debris, smother the thick patches with cardboard or a tarp, and mulch deeply. It’s faster, safer, and protects soil structure.

    Can I clear weeds fast in wet soil?

    Lightly damp soil is perfect. Waterlogged soil isn’t roots will break and soil compacts.

    How do I kill weeds quickly without tilling?

    A stirrup hoe removes weeds in minutes without disturbing the soil. Mulch afterward to prevent regrowth.

    Can I plant right after clearing weeds?

    Yes. As long as you didn’t deep-dig or spray chemicals, you can plant immediately.

    What should I do if weeds keep coming back?

    Mulch thicker. Each season I add 1–2 inches to keep the soil covered.

    When NOT to Use Fast-Clearing Methods

    Avoid this approach if:

    • Soil is extremely saturated (risk of compaction)
    • You’re dealing with aggressive runners like Bermuda grass—these need tarping
    • The garden contains delicate seedlings that could be damaged by tools
    • You have ground-nesting pollinators active in early spring

    In those cases, slower, more targeted clearing is safer.

    Alternative Methods for Different Situations

    If “fast” isn’t the main priority, here are other approaches:

    No‑Dig Sheet Mulching

    • Best for building new beds
    • Low effort
    • Great long-term weed suppression
    • Not instant you’ll wait a few weeks

    Solarization

    • Kills weed seeds using heat
    • Works in full sun
    • Slower (4–6 weeks)
    • Can harm beneficial microbes

    Hand Weeding

    • Accurate around delicate plants
    • Slowest method
    • Best for small or container gardens

    Conclusion

    If you’re wondering how to clear a garden full of weeds fast, the key is to remove top growth quickly, smother the stubborn roots, and mulch immediately. This combination gives fast visual improvement and long-lasting results without damaging your soil or spending all weekend digging.

    With consistent light maintenance and a protective mulch layer, you’ll rarely face a weed takeover again. A little prevention goes a long way and your garden will be healthier for it.

    Ready to reclaim your space? Start with the quickest step: cut the weeds down, rake them up, and mulch right away. Your garden will look transformed in just a few hours.

  • How to clear a vegetable garden full of weeds

    How to clear a vegetable garden full of weeds

    Every product is independently reviewed and selected by our editors. If you buy something through our links, we may earn an affiliate commission at no extra cost to you.

    A vegetable garden overrun with weeds can feel impossible to fix. I’ve had seasons where I turned my back for just a week and suddenly the chickweed, crabgrass, and bindweed were running the show. Beginners often think this happens because they “did something wrong,” but really, weeds simply love bare soil, warm temperatures, and regular watering the same things your veggies need.

    Clearing a vegetable garden full of weeds doesn’t have to mean ripping everything out or resorting to harsh chemicals. With the right method, you can reclaim your beds quickly, protect soil structure, and get crops growing again without exhausting yourself.

    This guide is based on the practical methods I’ve tested in my own small backyard, container beds, and terrace garden over the years.

    Why This Method Works

    Vegetable gardens get weedy for a few predictable reasons:

    • Sunlight hits bare soil
    • Topsoil stays moist from irrigation
    • Weed seeds live in the top 1–2 inches of soil
    • Disturbing the soil brings buried seeds up to the surface

    The goal is to remove existing weeds while disturbing the soil as little as possible. When you disturb the soil deeply, buried weed seeds get the light they need and sprout—undoing all your work.

    The method below works because it:

    • Removes weeds at the surface without flipping the soil
    • Protects soil microbes and structure
    • Blocks new weed seeds from germinating
    • Keeps roots of desired plants safe
    • Allows you to replant quickly

    It’s efficient, gentle on the soil, and manageable even if you’re gardening in small spaces.

    What You’ll Need

    Tools and materials vary by garden size, but these are my go‑tos:

    • A hand hoe or stirrup hoe (excellent for shallow weeding)
    • Garden gloves
    • A garden fork (not a shovel less soil disturbance)
    • Mulch (straw, shredded leaves, grass clippings, or bark fines)
    • A tarp or cardboard (for smothering heavy areas)
    • A weeding knife or hori‑hori
    • Compost (optional, for restoring the bed after clearing)

    Budget-friendly options:

    • Old cardboard boxes instead of commercial weed barriers
    • Homemade mulch (dry leaves, grass clippings)
    • A simple hand fork or kitchen knife for tight spaces

    Eco-friendly considerations:

    • Avoid landscape fabric in vegetable beds; it restricts soil life
    • Skip chemical herbicides harmful to pollinators, pets, and soil microbes

    Step-by-Step Instructions for Clearing a Weedy Vegetable Garden

    Step 1: Water Lightly the Day Before

    Lightly moisten the soil the evening before you weed. Wet enough to be pliable, not muddy.

    Why: Slightly damp soil lets roots slide out instead of snapping off.

    Step 2: Start with the Largest Weeds

    Remove the tall, established weeds first so you can see the soil surface.

    How to do this:

    • Grip at the base
    • Rock gently side-to-side
    • Pull slow and steady

    If the stem snaps, use a weeding knife to extract the root crown. (In my garden, this is especially helpful for dandelions and plantain.)

    Step 3: Use a Stirrup Hoe for the Small Stuff

    For carpet-like weeds (chickweed, young grasses), don’t hand-pull them. Use a stirrup hoe or hand hoe to skim the soil surface no deeper than 1 inch.

    This severs stems from roots without bringing buried seeds to the top.

    Step 4: Avoid Deep Digging

    This is the mistake I see most beginners make. Shoveling or rototilling churns up soil, exposing thousands of dormant weed seeds.

    Unless you’re removing root-invaders like bindweed, don’t dig deeper than needed.

    Step 5: Smother Problem Patches

    If you’re dealing with:

    • Bermuda grass
    • Bindweed
    • Creeping buttercup
    • Couch grass

    …hand-pulling isn’t enough. Cover the area with cardboard or a tarp for 3–6 weeks.

    This blocks sunlight, exhausts the roots, and softens the soil for easier removal.

    Step 6: Add a Mulch Layer

    Once the surface is clear, mulch is your #1 defense.

    Use:

    • 3 inches of straw
    • 2 inches of shredded leaves
    • Grass clippings (thin layers only to avoid matting)
    • Compost topped with coarse mulch

    Mulch keeps weed seeds from getting the light they need to sprout.

    Tip: Keep mulch 2 inches away from plant stems to avoid rot.

    Step 7: Restore the Bed Before Planting

    After weeding, the soil may be a bit depleted or compacted.

    Fix this by:

    • Adding a 1–2 inch layer of compost
    • Loosening the top few inches with a fork (not turning the soil)

    Now the bed is ready for planting or replanting.

    Pro Tips & Best Practices

    • Weed weekly for 5 minutes instead of waiting for problems
    • Mulch immediately after clearing
    • Water only the base of your vegetable plants, not the bare soil
    • Use drip irrigation if possible less surface moisture = fewer weeds
    • Leave soil undisturbed as much as possible
    • Watch for seedlings that look “too uniform” often weeds, not volunteers

    Common beginner mistakes to avoid:

    • Rototilling (guarantees more weeds next month)
    • Piling mulch directly on plant stems
    • Using plastic mulch in hot climates (can overheat soil)
    • Trying to pull bindweed roots break and spread

    FAQ

    1. Why do weeds come back so fast after I clear them?

    Usually because the soil was disturbed too deeply or the surface was left bare. Mulching prevents new seeds from germinating.

    2. Can I weed a vegetable garden without killing my plants?

    Yes. Use shallow hoeing around plants and hand-pulling only the weeds very close to stems.

    3. Should I pull weeds when the soil is wet or dry?

    Slightly damp soil is ideal. Muddy soil leads to broken roots; dry soil is too hard.

    4. How often should I weed a vegetable garden?

    Once a week is enough once you’ve mulched. Unmulched beds may need attention every 2–3 days in warm weather.

    5. Can I put pulled weeds into my compost?

    Seed-free weeds are fine. Weeds with seeds or invasive roots should be solarized or burned, not composted.

    6. What’s the fastest way to clear a large weedy garden?

    Mow the weeds low, tarp the area for 2–4 weeks, then remove softened roots and mulch. This prevents exhausting digging.

    When NOT to Use This Method

    This approach may not be ideal if:

    • The area is overrun with invasive perennials like bindweed or Bermuda grass (tarping works better)
    • Soil is extremely wet or clay-heavy (wait until it dries to avoid compaction)
    • You have a no-dig permanent bed system already established (minimize disturbance even more)

    If pets or children use the garden area, avoid synthetic herbicides entirely.

    Alternative Methods

    No-Dig Smothering

    • Layer cardboard + compost + mulch
    • Best for severely neglected beds
    • Low effort but takes 3–6 weeks

    Solarization

    • Clear the weeds
    • Cover soil with clear plastic
    • Let sun heat the soil for 4–6 weeks

    Good for pathogens but not eco-friendly and can harm beneficial organisms.

    Sheet Mulching

    • Lay cardboard
    • Add 4–6 inches of organic matter
    • Plant into it

    Great for new gardens but heavy and labor-intensive.

    Conclusion

    Clearing a vegetable garden full of weeds doesn’t require chemicals, endless digging, or starting from scratch. With shallow weeding, smothering tough patches, and immediately adding mulch, you can reclaim your space quickly and sustainably.