Every product is independently reviewed and selected by our editors. If you buy something through our links, we may earn an affiliate commission at no extra cost to you.
Hanging planters made from plastic bottles are one of the smartest small‑space gardening solutions but only if they’re built with proper drainage, soil structure, and plant selection in mind.
Too many DIY tutorials focus on cutting and decorating while ignoring root depth, watering control, and sunlight direction. The result? Soggy soil, dying herbs, and dripping messes indoors.
This guide shows you exactly how to make hanging planters from plastic bottles that are structurally secure, horticulturally sound, and productive whether you’re growing indoors, on a balcony, or under a patio overhang.
Introduction
Hanging planters behave differently from ground-level containers.
They:
- Dry out faster due to air circulation
- Experience more temperature fluctuation
- Drain more quickly
- Require lighter soil mixes
If you compensate correctly by choosing the right bottle size, adding proper drainage, using aerated potting mix, and selecting shallow-rooted plants hanging plastic bottle planters can produce herbs, lettuce, strawberries, and compact flowers successfully.
This step‑by‑step guide covers construction, soil composition, watering frequency, light direction, USDA zone considerations, and common beginner mistakes.
Quick Summary Box
- Best bottle size: 2‑liter soda bottles
- Soil depth: Minimum 6–8 inches
- Drill 4–6 drainage holes (¼ inch)
- Use lightweight potting mix with perlite
- Choose shallow-rooted plants
- South-facing exposure for fruiting plants
- Water when top 1 inch is dry
- Secure hanging support properly
Why Hanging Bottle Planters Work (and Where They Fail)
Benefits
- Space-saving vertical gardening
- Lightweight containers
- Ideal for balconies and small patios
- Low material cost
Common Failures
- No drainage holes
- Overcrowding plants
- Using heavy garden soil
- Weak hanging support
- Underestimating wind exposure
Proper setup prevents these issues.
Step 1: Choose the Right Plastic Bottle
Best Options
2‑Liter Soda Bottles (Most Versatile)
- Soil depth: 6–8 inches
- Supports herbs, lettuce, strawberries
1‑Gallon Water Jugs
- Soil depth: 8–10 inches
- Suitable for dwarf peppers or larger herbs
Avoid thin, brittle plastic for outdoor use.
UV exposure degrades low-quality bottles within 1–2 seasons.
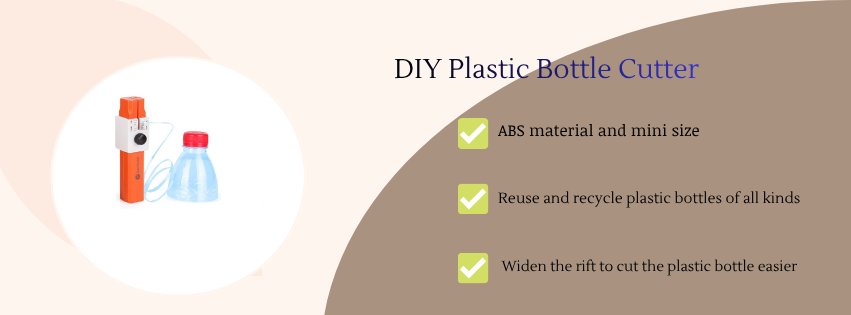
Step 2: Cutting the Bottle (Two Proven Designs)
Design 1: Horizontal Hanging Planter (Most Popular)
- Lay bottle sideways
- Cut a large rectangular opening on one side
- Drill two holes near each end (for rope)
- Drill 4–6 drainage holes in bottom
Why it works:
Provides wide planting space and balanced weight distribution.
Design 2: Vertical Hanging Planter
- Cut side window
- Keep bottle upright
- Drill 4–6 drainage holes at base
- Add two holes near neck for hanging cord
Best for:
- Strawberries
- Trailing herbs
Step 3: Add Proper Drainage (Critical for Hanging Planters)
Hanging planters dry faster but still need drainage.
Drainage Setup
- 4–6 holes, ¼ inch diameter
- Add 1–2 side holes ½ inch above base
- Elevate slightly using washers if indoors
Why it matters:
Without drainage, roots suffocate. With too much drainage and poor soil, soil washes out.
Balance is key.
Step 4: Use the Correct Soil Mix
Never use backyard soil in hanging planters.
Ideal Soil Composition
- 50% coco coir or peat moss
- 30% compost
- 20% perlite
Why this works:
- Perlite reduces weight
- Improves airflow
- Prevents compaction
- Allows excess water to drain freely
Cost impact:
High-quality potting mix costs more upfront but reduces plant failure and pest problems.
Step 5: Secure Hanging Support Properly
This is often overlooked.
Hanging Options
- Nylon rope (weather-resistant)
- Metal chain
- S-hooks and wall brackets
- Balcony rail hooks
Load capacity guideline:
A 2‑liter planter filled with moist soil weighs 5–8 pounds.
Ensure support can handle at least 10 pounds for safety.
Maintenance impact:
Check knots and attachment points monthly.
Step 6: Choose the Right Plants
Hanging containers have limited root depth and faster moisture loss.
Best Plants for Hanging Bottle Planters
Herbs
- Basil
- Parsley
- Thyme
- Oregano
Require 6–8 inches soil depth.
Leafy Greens
- Lettuce
- Arugula
- Spinach
Minimum 4–6 inches soil depth.
Strawberries
- 8 inches soil depth
- Full sun required
USDA Zones 4–11 outdoors.
Compact Flowers
- Petunias
- Alyssum
- Pansies
Shallow root systems.
Avoid:
- Indeterminate tomatoes
- Large root vegetables
- Heavy fruiting plants without strong support
Step 7: Sunlight Planning
South-Facing Exposure
- 6–8 hours direct sun
- Best for strawberries and peppers
East-Facing
- Gentle morning sun
- Ideal for greens and herbs
West-Facing
- Hot afternoon sun
- Increase watering frequency
North-Facing
- Low light
- Use grow lights indoors
If growing indoors, use full-spectrum LED lights (20–40 watts per shelf, 12–14 hours daily).
Watering Strategy for Hanging Planters
Hanging planters dry faster due to airflow.
General watering schedule:
- Indoor: Every 2–3 days
- Outdoor summer: Daily check required
- Strawberries/fruiting plants: Keep consistently moist
Always check soil 1 inch deep before watering.
Overwatering causes more damage than underwatering.
Fertilizing Hanging Bottle Planters
Limited soil volume means limited nutrients.
For leafy plants:
- Balanced liquid fertilizer every 2–3 weeks
For fruiting plants:
- Add slow-release fertilizer at planting
- Supplement every 2 weeks
Cost: $10–$20 per bottle of fertilizer lasts entire season.
Pest Prevention Basics
Hanging planters may attract:
- Aphids
- Spider mites
- Whiteflies
Prevention:
- Ensure airflow
- Avoid overcrowding
- Inspect weekly
- Use neem oil spray if necessary
Healthy plants resist pests better.
Budget vs Premium Hanging Setup
Budget Setup ($40–$70)
- Recycled bottles
- Basic potting mix
- Nylon rope
- Seed packets
Ideal for balconies and kitchens.
Premium Setup ($120–$250)
- UV-resistant decorative paint
- High-quality potting mix
- Slow-release fertilizer
- Wall brackets
- Drip irrigation kit (for multiple planters)
Premium reduces watering labor and improves durability.
Common Beginner Mistakes
- No drainage holes
- Using heavy soil
- Hanging in low-light areas
- Weak rope or insecure mounting
- Overcrowding plants
Correct these and hanging bottle planters become reliable micro-gardens.
FAQ
1. What size bottle is best?
2‑liter bottles are the most versatile.
2. Do hanging bottle planters need drainage holes?
Yes. Always drill 4–6 holes.
3. How much weight can a hanging bottle planter hold?
Typically 5–8 pounds when filled with moist soil.
4. How often should I water?
Check daily outdoors. Indoors every 2–3 days.
5. What’s the easiest plant to start with?
Leaf lettuce or basil.
6. Can I grow strawberries?
Yes, with 8 inches soil depth and full sun.
Final Thoughts
Learning how to make hanging planters from plastic bottles is about more than cutting and tying rope.
The difference between a thriving vertical garden and a failed DIY project comes down to:
- Proper drainage
- Lightweight soil composition
- Correct root depth
- Secure hanging support
- Appropriate sunlight exposure
- Consistent watering
Start with one horizontal 2‑liter herb planter in a bright location. Monitor moisture carefully. Once successful, expand into a full vertical system.
Hanging gardens save space. Recycled materials save money. Proper technique ensures long-term growth.
Build it smart and your hanging bottle planters will produce season after season.