Every product is independently reviewed and selected by our editors. If you buy something through our links, we may earn an affiliate commission at no extra cost to you.
A simple bowl of water can transform your yard into a living sanctuary. Within days, you’ll notice sparrows splashing, finches perching, and butterflies hovering nearby. But a poorly designed bird bath becomes dirty, unsafe, or ignored. The difference is in the details.
If you’re asking, “How do I make a homemade bird bath?” this guide will walk you through the exact materials, depth, placement, drainage, and maintenance practices that actually work whether you have a small balcony, patio, or full backyard.
Many DIY bird bath tutorials look attractive but fail in real-world conditions. Water stagnates. Mosquitoes breed. Birds avoid it because it’s too deep. Or it cracks after one winter.
As a horticulturist who designs small-space outdoor environments, I’ve seen that the success of a bird bath depends less on creativity and more on biology and environmental design. Birds need shallow, stable, clean water positioned in the right microclimate.
In this guide, you’ll learn:
- The ideal depth and dimensions birds actually prefer
- Which materials last through seasons
- How to prevent algae and mosquito problems
- How placement impacts bird traffic
- Budget vs. premium setup options
- Maintenance routines that take less than 5 minutes
Let’s build one properly.
Quick Summary
- Ideal water depth: 1–2 inches (sloping sides preferred)
- Diameter: 12–18 inches minimum
- Placement: Partial shade, near shrubs, 5–10 ft from cover
- Height: 2–3 feet above ground (or ground-level for certain species)
- Water change frequency: Every 1–3 days
- Winter consideration: Use frost-proof materials or bring indoors
- Mosquito prevention: Moving water or frequent refresh
Why Birds Need the Right Bird Bath Design
Before building, understand the biology.
Birds don’t swim in bird baths they stand and flutter. Most backyard birds prefer shallow water where their feet touch bottom. Deep bowls deter smaller species like chickadees and finches.
Proper design matters because:
- Shallow water reduces drowning risk
- Sloped edges allow safe entry and exit
- Clean water prevents disease spread
- Elevated placement reduces predator access
A bird bath is both a wildlife support tool and a landscape feature. When designed correctly, it increases biodiversity in small gardens and even apartment balconies.
Step 1: Choose the Right Base Structure
You don’t need expensive materials. Many effective homemade bird baths are built from everyday items.
Option 1: Large Plant Saucer on a Stand (Most Practical)
Best for: Beginners, patios, balconies Cost: $15–$40 Maintenance: Low
Why It Works
Plant saucers are already shallow and wide exactly what birds prefer. Terracotta or glazed ceramic holds water well and provides grip.
How to Build
- Choose a saucer 12–18 inches wide
- Ensure depth is no more than 2 inches
- Place on:
- An upside-down nursery pot
- A sturdy outdoor stool
- A concrete block wrapped in stone veneer
Secure with outdoor adhesive if in windy areas.
Material Considerations
- Terracotta: Natural look, breathable, but may crack in freeze
- Glazed ceramic: Durable, easier to clean
- Plastic: Lightweight and affordable, but may tip
Avoid metal in hot climates it overheats quickly.
Option 2: Repurposed Bowl or Dish
Best for: Budget builds Cost: Under $10 Maintenance: Moderate
Look for:
- Wide rim
- Textured surface
- UV-resistant material
Avoid glass in freeze-prone USDA Zones 6 and below unless brought indoors in winter.
Option 3: Concrete DIY Bird Bath (Long-Term Solution)
Best for: Permanent backyard installation Cost: $40–$100 Maintenance: Low
Concrete retains stability and withstands weather. Use:
- A large plastic bowl as a mold
- Quick-set concrete mix
- Reinforcement mesh for strength
Seal with a non-toxic, wildlife-safe concrete sealer.
Concrete works especially well in USDA Zones 7–10 where freeze cycles are minimal.
Step 2: Get the Depth Exactly Right
This is where most DIY bird baths fail.
Ideal Water Depth:
- 1 inch at edges
- 2 inches maximum in center
Why shallow works:
- Small songbirds feel secure
- Water warms moderately in morning sun
- Easy cleaning
If your container is too deep, add:
- Smooth river stones
- Flat slate pieces
This creates varied depths and perching areas.
Cost impact: River stones cost $5–$15 per bag and significantly improve usability.
Maintenance impact: Stones need occasional scrubbing to prevent algae buildup.
Step 3: Placement Makes or Breaks Success
Improper placement is the number one reason birds ignore baths.
Ideal Placement Guidelines
1. Partial Shade
Morning sun (east-facing exposure) is ideal.
Why:
- Prevents overheating
- Reduces algae growth
- Keeps water cooler
Avoid full afternoon west-facing sun in hot climates.
2. Near Shrubs (5–10 Feet Away)
Birds need quick escape cover from predators.
Plant pairings that work well:
- Dwarf boxwood
- Native shrubs
- Ornamental grasses
- Hydrangeas (Zones 3–9)
Avoid placing directly under dense trees falling debris increases cleaning.
3. Elevation
Standard height:
- 2–3 feet above ground
Ground-level baths attract:
- Doves
- Robins
But increase predator risk.
Balcony gardeners can place on a stable railing table with secure weight distribution.
Step 4: Water Quality & Mosquito Control
Stagnant water becomes unsafe quickly.
Change Frequency:
- Every 1–2 days in summer
- Every 3 days in mild weather
Preventing Mosquitoes
Mosquitoes need 5–7 days of still water to reproduce.
Solutions:
- Refresh water regularly
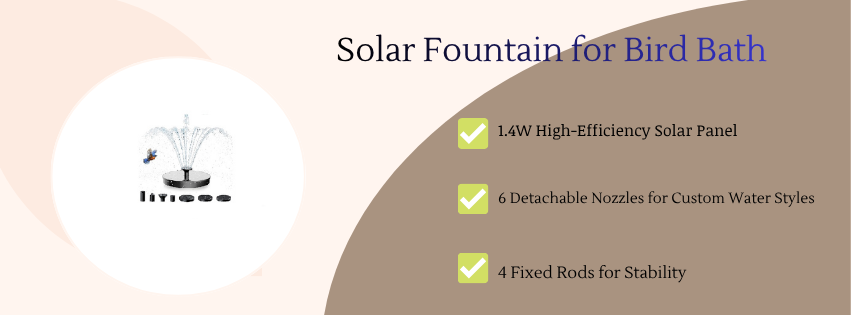
- Add a small solar fountain pump
- Use mosquito dunks (Bti bacteria safe for wildlife)
Solar fountain pumps cost $20–$50 and dramatically increase bird activity.
Why birds prefer moving water:
- Sound attracts them
- Fresher oxygenated water
- Reduces algae buildup
Maintenance: Pumps need weekly debris removal.
Step 5: Cleaning & Disease Prevention
Dirty bird baths spread avian diseases like salmonella.
Weekly Deep Clean Routine
- Dump water
- Scrub with 1:9 vinegar-water solution
- Rinse thoroughly
- Air dry before refilling
Avoid harsh chemical cleaners.
Maintenance time: 5–10 minutes.
Cost: Minimal.
Step 6: Seasonal Considerations (USDA Zone Guide)
Zones 8–10 (Mild Winters)
- Year-round use possible
- Algae more common
- Monitor evaporation
Zones 5–7 (Cold Winters)
- Bring ceramic indoors
- Avoid freeze-thaw cracking
- Consider heated bird bath base
Zones 3–4 (Severe Winters)
- Use heated bird bath units
- Store DIY models indoors
Heated bases cost $50–$100 but provide critical winter hydration.
Enhancing Your Bird Bath Area with Plantings
Strategic planting improves bird traffic.
Soil Considerations
If installing near garden beds:
- Use well-draining loam
- Amend heavy clay with compost (30%)
- Maintain 6–12 inch root clearance around pedestal
Poor drainage leads to muddy splash zones.
Best Companion Plants
Choose shallow-rooted ornamentals near pedestal to avoid structural shifting.
Examples:
- Salvia (Zones 4–10)
- Coneflower (Zones 3–9)
- Lavender (Zones 5–9, needs sandy soil)
- Native grasses
These attract pollinators, increasing ecological value.
Budget vs. Premium Bird Bath Setups
Budget Setup ($20–$40)
- Plastic plant saucer
- Upside-down pot stand
- River stones
- Manual water refill
Pros:
- Affordable
- Easy to replace
- Lightweight
Cons:
- Less durable
- May tip in wind
Mid-Range Setup ($50–$120)
- Glazed ceramic bowl
- Weighted pedestal
- Solar fountain pump
Pros:
- Attractive
- More stable
- Higher bird attraction
Cons:
- Moderate cleaning
Premium Setup ($150+)
- Cast concrete basin
- Sealed pedestal
- Integrated solar recirculating pump
Pros:
- Long lifespan
- Weather-resistant
- Professional look
Cons:
- Heavy
- Permanent installation
Common Beginner Mistakes
- Making the bath too deep
- Placing in full sun
- Not cleaning frequently
- Using slippery materials
- Ignoring winter freeze damage
Avoid these and your bird bath will remain active year-round.
FAQ:
1. What is the best material for a homemade bird bath?
Glazed ceramic and concrete are most durable. Plastic works for budget setups but may degrade under UV exposure.
2. How deep should a homemade bird bath be?
1–2 inches maximum. Use stones to adjust depth if needed.
3. How often should I change the water?
Every 1–2 days in warm weather. At least twice weekly in mild conditions.
4. Where should I place a bird bath in a small yard?
Partial shade, 5–10 feet from shrubs, and elevated 2–3 feet above ground.
5. How do I keep mosquitoes out of my bird bath?
Refresh water frequently or use a solar fountain pump to create movement.
6. Can I use a bowl from my kitchen?
Yes, if it’s wide, shallow, and weather-resistant. Avoid materials that crack in freeze cycles.
7. Do bird baths attract pests?
If cleaned regularly, no. Neglected baths may attract insects or spread disease.
Conclusion
If you’ve been wondering, “How do I make a homemade bird bath?” the answer isn’t complicated but it does require attention to biology, depth, placement, and maintenance.
A properly designed bird bath:
- Supports local bird populations
- Increases biodiversity
- Enhances garden movement and sound
- Requires less than 10 minutes of weekly care
Start simple. A wide plant saucer, stable base, shallow water, and consistent cleaning is enough to attract birds within days.
Over time, you can upgrade with a solar fountain or permanent concrete base. The investment is small, but the ecological return is substantial.
Build it thoughtfully and your garden will come alive.